Difference between revisions of "Add iPad to VALT"
IVSWikiBlue (talk | contribs) |
IVSWikiBlue (talk | contribs) |
||
| Line 11: | Line 11: | ||
</div> | </div> | ||
<br> | <br> | ||
| + | |||
{{img with key | file = VALT Add Device Info.png | list = | {{img with key | file = VALT Add Device Info.png | list = | ||
<li><b>Name:</b> You should give the device a unique name that is easily identifiable.</li> | <li><b>Name:</b> You should give the device a unique name that is easily identifiable.</li> | ||
| Line 18: | Line 19: | ||
}} | }} | ||
| + | <br> | ||
| + | <div class="section"> | ||
| + | Once you click <b>Save</b> you will be able to see the | ||
| + | </div> | ||
| + | <br> | ||
{{img with key | file = VALT BEAM Info 1.png | list = | {{img with key | file = VALT BEAM Info 1.png | list = | ||
Revision as of 11:27, 27 July 2022
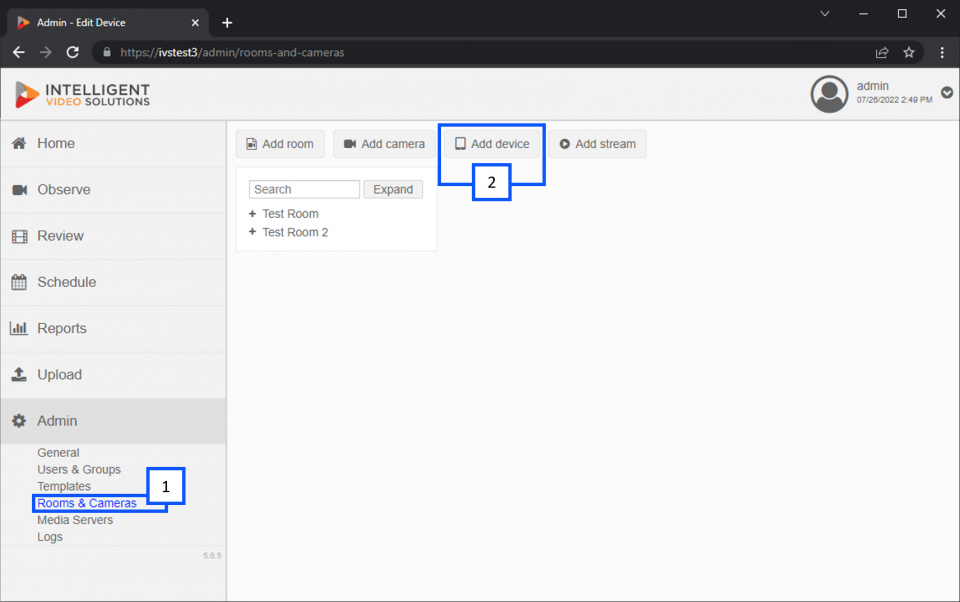
- Go to the Admin section and click Rooms & Cameras
- From there click on Add Device
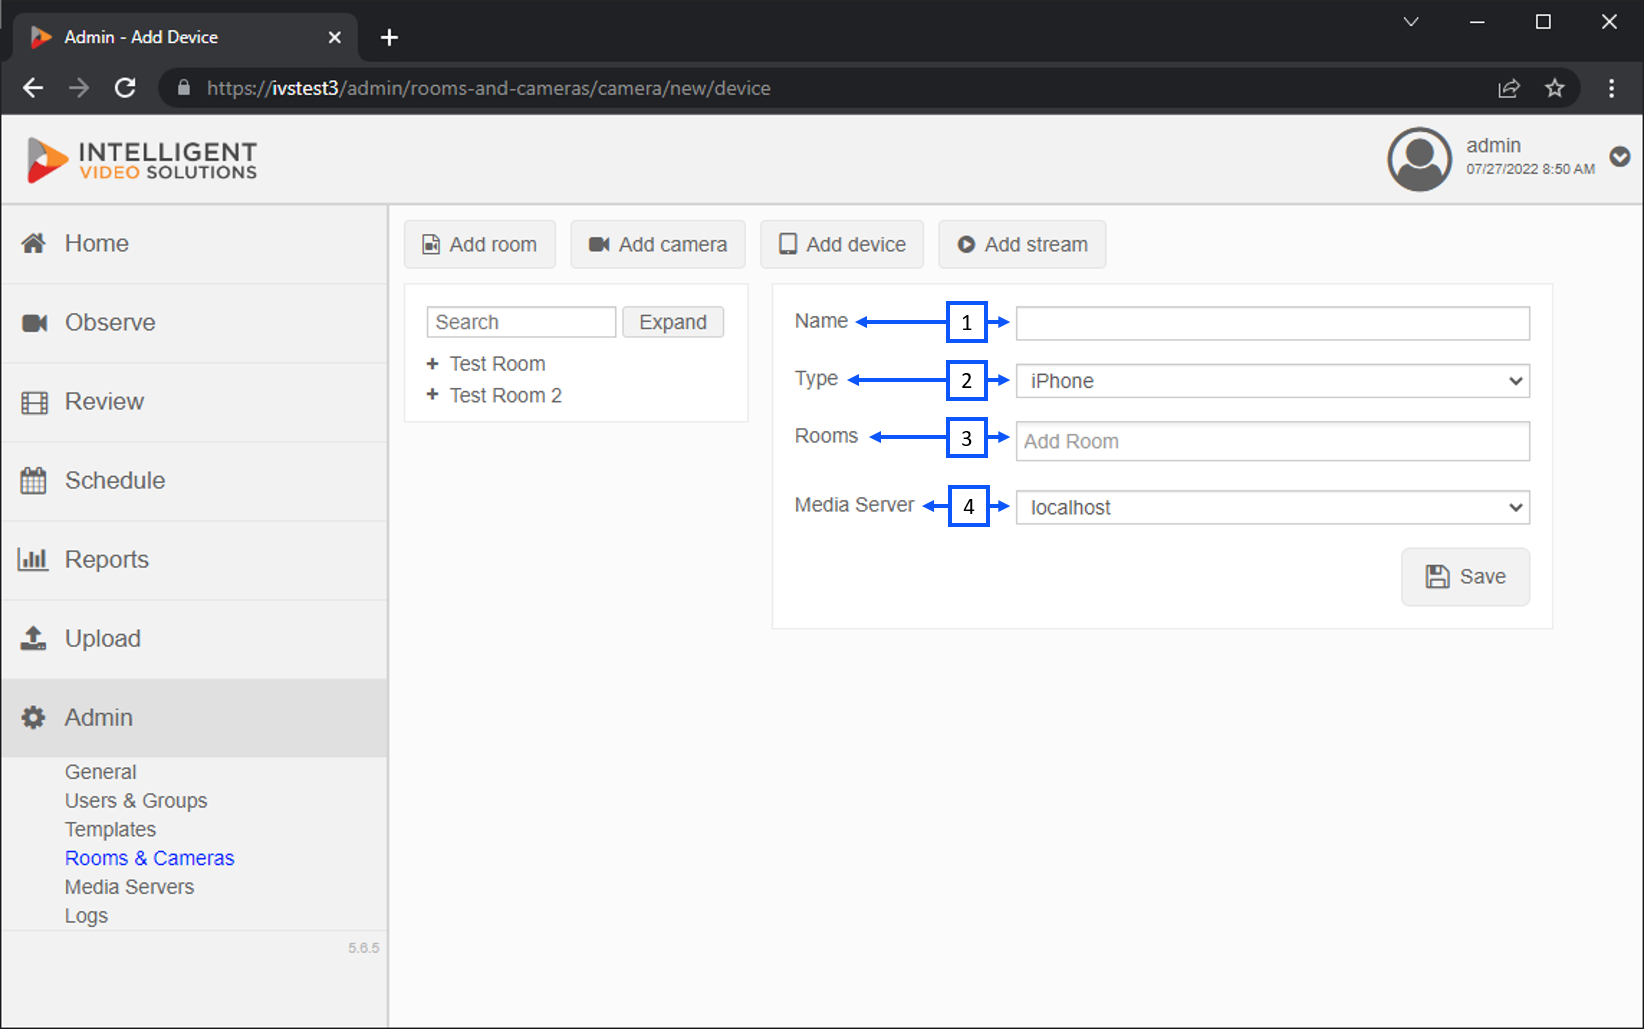
You will then be prompted to fill out the appropriate information for the device you are adding.
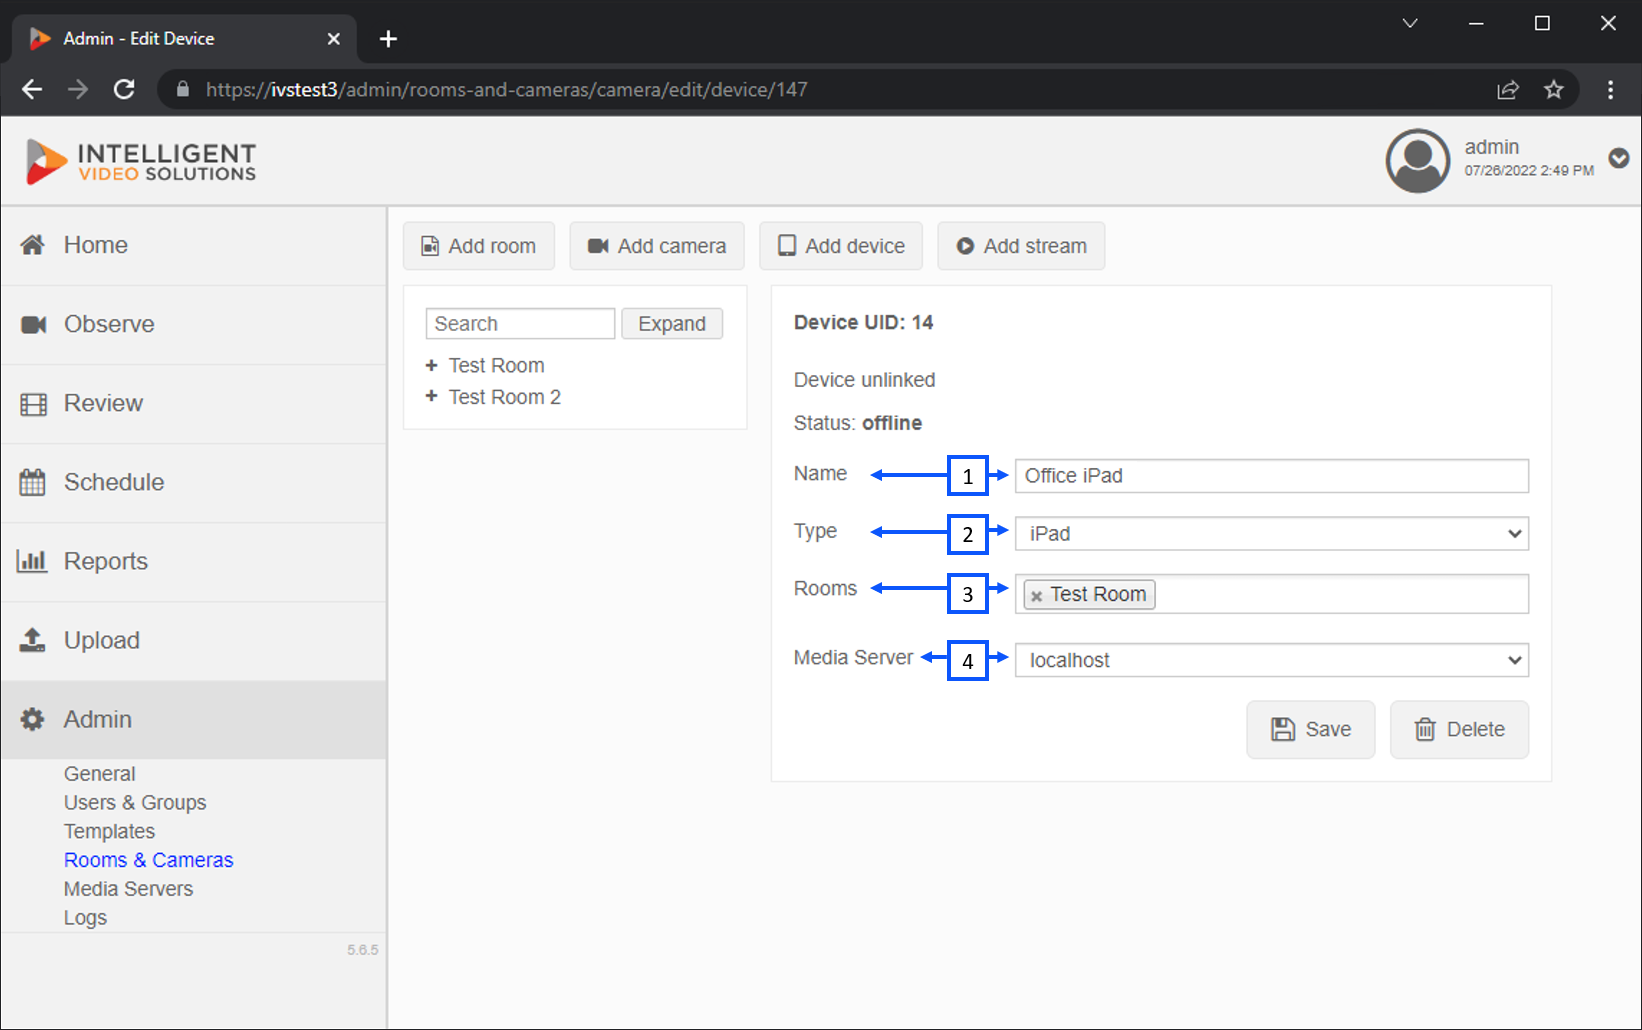
- Name: You should give the device a unique name that is easily identifiable.
- Type: This area allows you to select the type of device you are adding.
- Rooms: This is where you can select the room for the iPad. Most iPads are used in many different rooms. It is recommended to create a separate room for each mobile device.
- Media Server: This area allows you to select the server that will store the recorded video. In many cases, localhost is used.
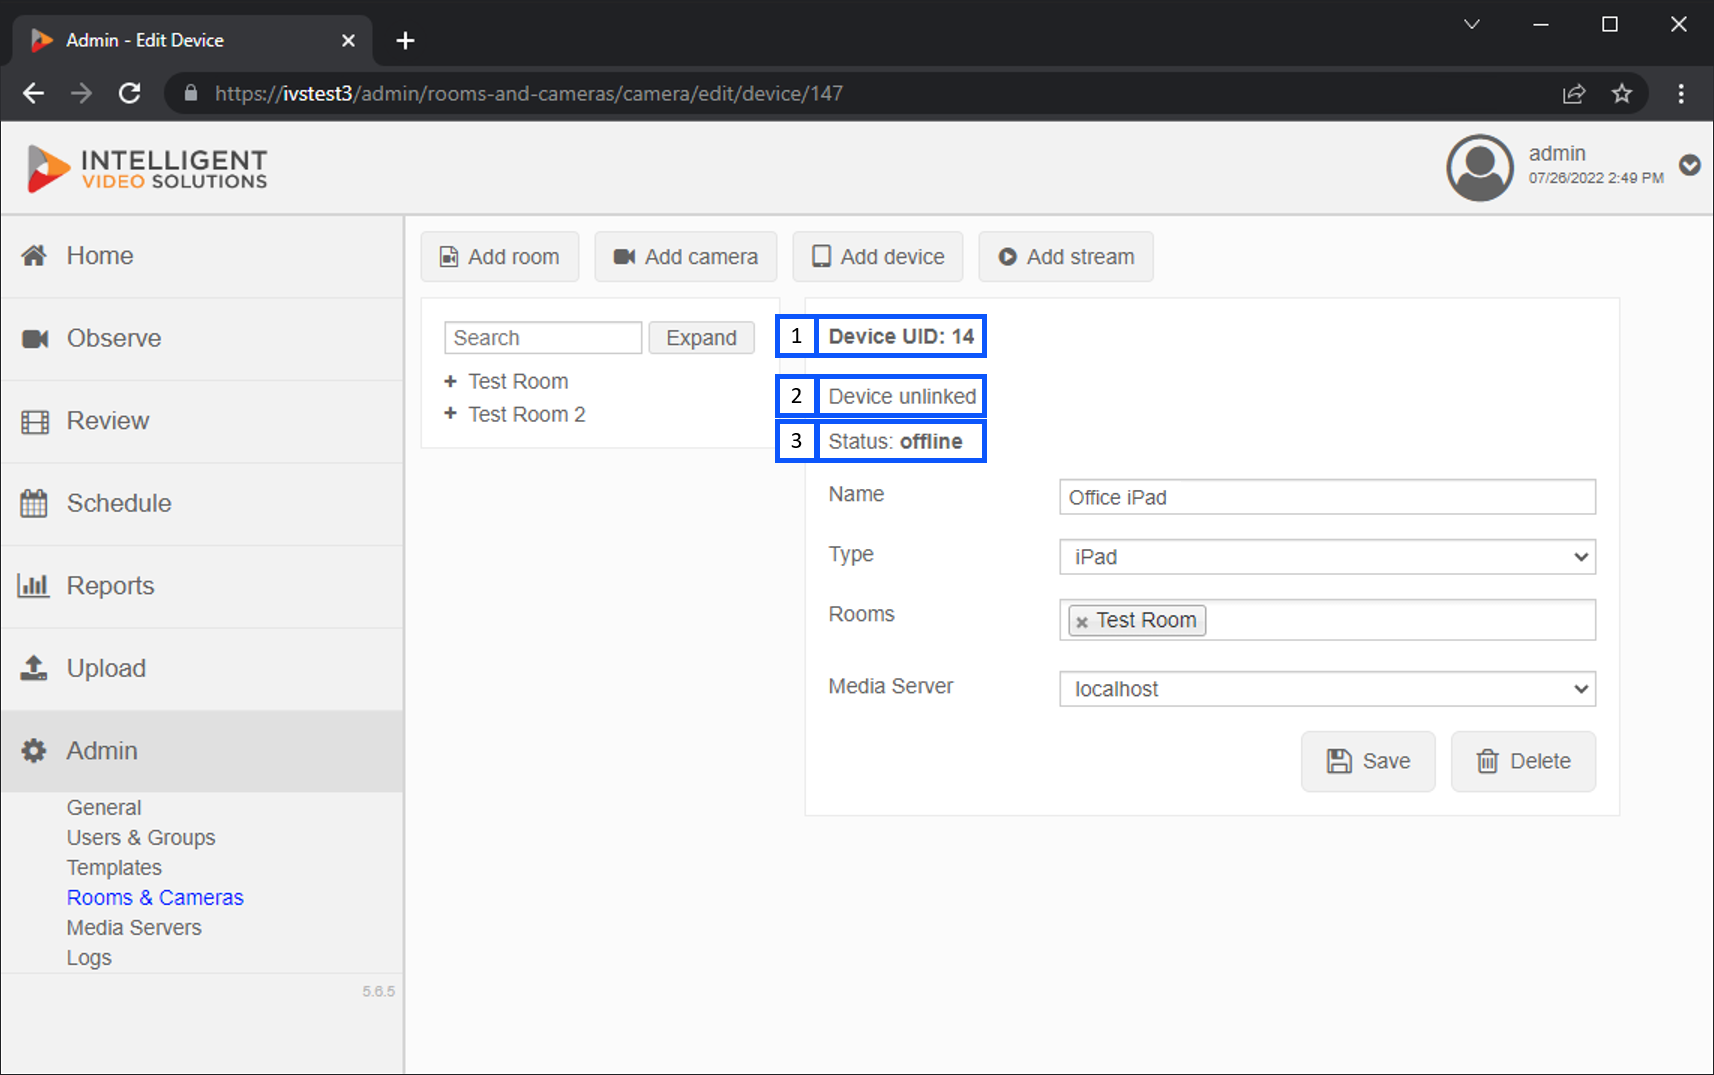
Once you click Save you will be able to see the
- Device UID: This ID is used to sync the device with VALT.
- Link Status: This area shows if the device is linked to VALT.
- Status: This area indicates if the device is currently streaming and connected to VALT.


