Difference between revisions of "Tubular LED Key Switch"
IVSWikiBlue (talk | contribs) |
IVSWikiBlue (talk | contribs) |
||
| Line 13: | Line 13: | ||
==Installation Instructions== | ==Installation Instructions== | ||
| − | # | + | #Determine where you want your Securitron Tubular Key Switch to be placed. Use your stud finder to determine that there aren't any studs behind the wall. |
| − | + | #Using your drywall saw, cut a rectangle in the drywall large enough to fit the mud ring into securely. | |
| + | #Using your glow rod or fish tape, fish your 22/4 cable up and through the wall and ceiling until you reach the location of your camera. | ||
| + | #Strip the jacket off of both ends of the cable revealing the 4 individual strands of cable. Strip those individual cables revealing their solid copper inside. | ||
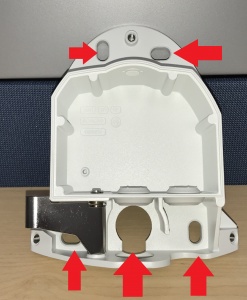
#:[[File:ArrowsOnp5414.JPG|400x300px]] | #:[[File:ArrowsOnp5414.JPG|400x300px]] | ||
Revision as of 12:54, 5 January 2017
Required Parts And Tools
- Securitron KP-1
- Wire Stripper
- Small Flat head screwdriver
- B Connectors

- Stud Finder
- 22/4 Solid Gauge Wire
- Fish Tape or Glow Rod

- DryWall Saw
- Mud Ring
Installation Instructions
- Determine where you want your Securitron Tubular Key Switch to be placed. Use your stud finder to determine that there aren't any studs behind the wall.
- Using your drywall saw, cut a rectangle in the drywall large enough to fit the mud ring into securely.
- Using your glow rod or fish tape, fish your 22/4 cable up and through the wall and ceiling until you reach the location of your camera.
- Strip the jacket off of both ends of the cable revealing the 4 individual strands of cable. Strip those individual cables revealing their solid copper inside.


