Difference between revisions of "Axis T91E61 - Installation"
IVSWikiBlue (talk | contribs) |
IVSWikiBlue (talk | contribs) |
||
| (5 intermediate revisions by the same user not shown) | |||
| Line 1: | Line 1: | ||
{{Article - Manual | content = | {{Article - Manual | content = | ||
{{Aside | content = The camera shown is the [[Axis M5525|Axis M5525-E]], but mounting is the same for the [[Axis M5526-E]].}} | {{Aside | content = The camera shown is the [[Axis M5525|Axis M5525-E]], but mounting is the same for the [[Axis M5526-E]].}} | ||
| + | |||
{{Flexbox | {{Flexbox | ||
| left = | | left = | ||
| − | 1. Locate the | + | 1. Locate the <b>Axis T91E61</b> Wall Mount. |
:''This is the recommended wall mount by IVS. Verify the model of your mount [[AXIS 5525 Wall Mount Types|here]]''. | :''This is the recommended wall mount by IVS. Verify the model of your mount [[AXIS 5525 Wall Mount Types|here]]''. | ||
| right = [[File:T91E61 Wall Mount.png|275px|link=]] | | right = [[File:T91E61 Wall Mount.png|275px|link=]] | ||
| Line 13: | Line 14: | ||
{{Flexbox | {{Flexbox | ||
| left = | | left = | ||
| − | 2. Locate the | + | 2. Locate the <b>Axis T94A01D</b> Pendant Kit. |
| right = | | right = | ||
[[File:T94A01D Pendant Kit.png|200px|link=]] | [[File:T94A01D Pendant Kit.png|200px|link=]] | ||
| Line 163: | Line 164: | ||
{{Top of Page}} | {{Top of Page}} | ||
| − | }} | + | {{hr}} |
| + | |||
| + | {{Aside - Helpful | content = Additional information and documentation can be found here: | ||
| + | :[https://www.axis.com/products/axis-t91e61-wall-mount Axis T91E61] | ||
| + | :[https://www.axis.com/products/axis-t94a01d-pendant-kit Axis T94A01D] | ||
| + | :[https://www.axis.com/dam/public/42/dc/f8/axis-t91e61--installation-guide-en-US-98879.pdf Axis T91E61 Installation] | ||
| + | }} }} | ||
| + | |||
| + | [[Category:Axis T91E61]] | ||
| + | [[Category:Axis T94A01D]] | ||
| + | [[Category:Axis M5525]] | ||
| + | [[Category:Axis M5526]] | ||
Latest revision as of 08:42, 24 April 2026
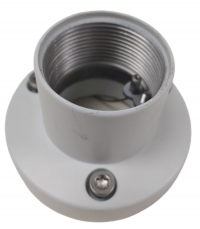
1. Locate the Axis T91E61 Wall Mount.
- This is the recommended wall mount by IVS. Verify the model of your mount here.

2. Locate the Axis T94A01D Pendant Kit.
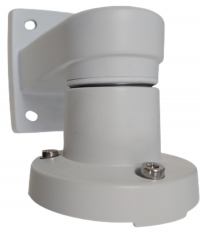
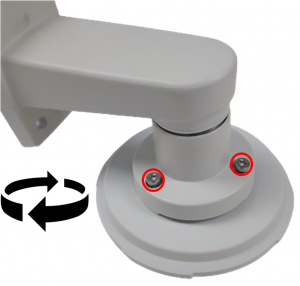
3. Connect the two parts and tighten them together by hand.
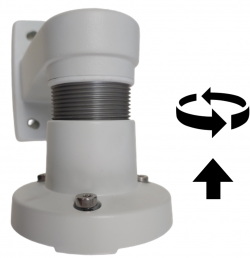
4. Continue tightening, by hand, until you cannot rotate the pendant kit anymore.
5. Using a T20 bit, tighten down the screw located inside the pendant kit.
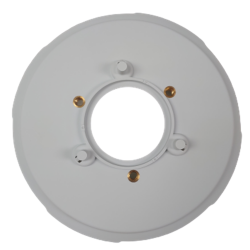
6. Locate the mounting plate.
- This part comes packed with the AXIS M5525.
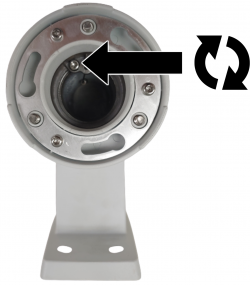
7. Take the camera disk and line up the 3 pegs on the top with the three holes on the pendant kit.
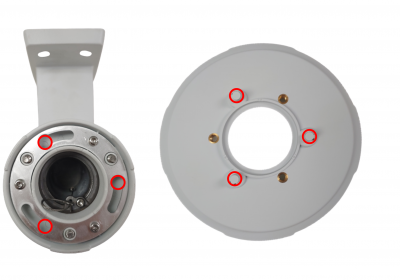
8. Put the pegs in the holes and rotate the disk counter clockwise until the pieces prevent you from turning more.
9. Using a T30 bit, tighten the three screws on top of the pendant kit, securing it to the camera disk.
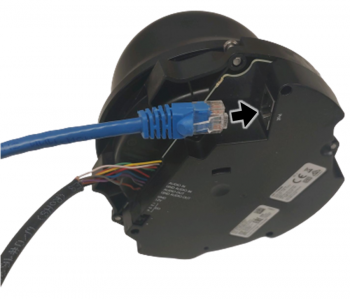
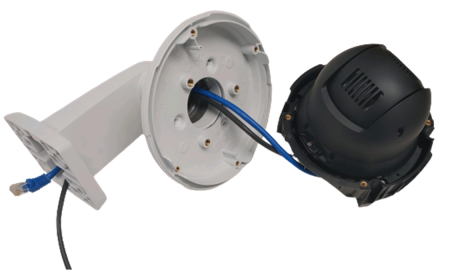
10. Take the M5525 and plug the ethernet cable into its respective jack on the camera. The jack will be listed "PoE".
- Please note that only cameras prepared by IVS will have the pigtail wire connected to the camera. To learn more click here
11. Remove the rubber grommets from the base of the camera.
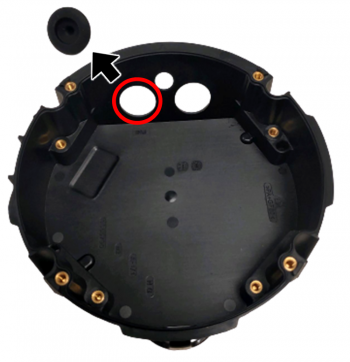
12. Run the cables through the holes where the grommets were.
- Note that each wire should be in its own hole.
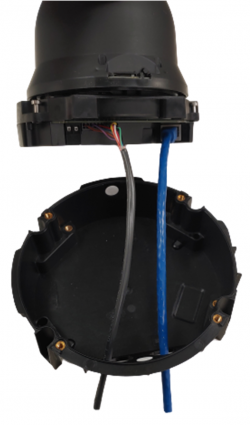
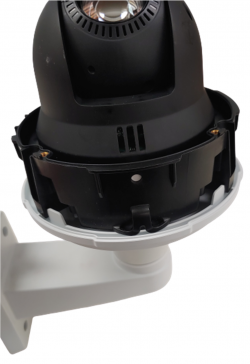
13. Once the camera in the base, locate the four screws attached the camera and tighten them using a T20 bit.
14. Take the assembled wall mount and run the wires (that are attached to the camera) through the wall mount. Match the base of the camera to the bottom of the disc so that the holes for the screws align, allowing the camera to sit comfortably on the mount.
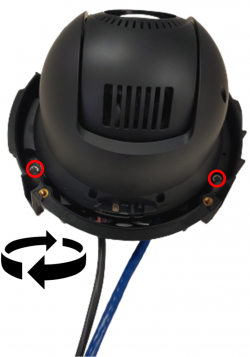
15. The camera will naturally sit on the base when everything is aligned properly.
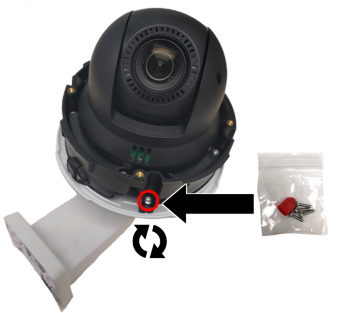
16. Take the screws provided with the camera, located in the small box, and secure the camera to the mount using all 4 screws.
17. Place the dome back on the camera, making sure to align the plastic of the dome to match the plastic on the mount.
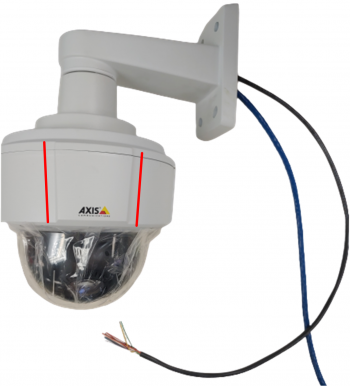
18. Use a T20 to secure the dome to the camera.