Difference between revisions of "Mounting Instructions"
IVSWikiBlue (talk | contribs) (→Installation Instructions) |
IVSWikiBlue (talk | contribs) (→Installation Instructions) |
||
| Line 16: | Line 16: | ||
#*7" vertically between both pairs | #*7" vertically between both pairs | ||
#:[[File:EncoderArmLegnth.JPG|link=https://ipivs.com/wiki/images/3/34/EncoderArmLegnth.JPG]] | #:[[File:EncoderArmLegnth.JPG|link=https://ipivs.com/wiki/images/3/34/EncoderArmLegnth.JPG]] | ||
| + | #Using a measuring tape and level, mark the four mount post locations | ||
| + | #Install the four mount posts | ||
| + | #:[[ | ||
| + | #Carefully remove the existing screws from the housing of the encoder | ||
| + | #:[[ | ||
| + | #Using screws and washers, attach the encoder to the mounting posts | ||
| + | #:[[ | ||
| + | #Connect the Ethernet cable and respective video cable to the proper connection | ||
| + | #:[[ | ||
Revision as of 14:03, 7 May 2020
Required Parts and Tools
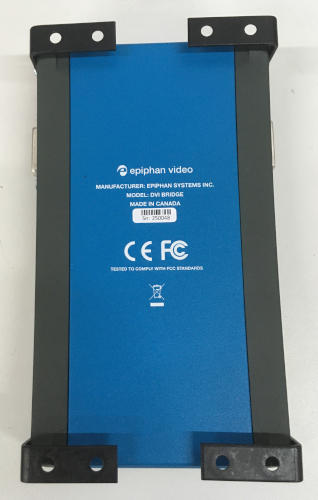
- Epiphan DVI/HDMI Encoder
- (4) 1-1/2" corner mounting brackets (mounting screws included)
- M3x20 Phillips pan machine screws
- SAE #6 flat washers
- Measuring tape
- Level
- Small screwdriver
- Drill and drill bit
Installation Instructions
- Determine the mounting location for the encoder. Generally, it will be mounted under a desk or table near the control work station.
- Ensure that the mounting location allows the video cable and Ethernet cables to reach the encoder unit
- Once the location is determined. Measure out the appropriate distance for mounting the four corner brackets
- 3-3/8" between each pair of brackets
- 7" vertically between both pairs
- Using a measuring tape and level, mark the four mount post locations
- Install the four mount posts
- [[
- Carefully remove the existing screws from the housing of the encoder
- [[
- Using screws and washers, attach the encoder to the mounting posts
- [[
- Connect the Ethernet cable and respective video cable to the proper connection
- [[
