|
|
| (64 intermediate revisions by the same user not shown) |
| Line 1: |
Line 1: |
| − | ==Overview==
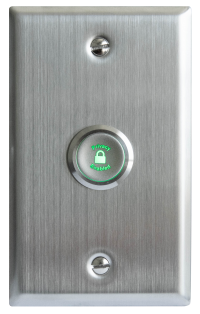
| + | [[Privacy Button 2020-Present|Privacy Button 2020-Present]] |
| − | The privacy switch is a customizable solution for placing the cameras connected to the VALT system in privacy mode. The instructions below will outline how to configure a privacy switch that will stay illuminated while the switch is in the OFF position. Flipping the switch to the ON position will extinguish the light and engage privacy mode. The switch and LED are independent and the behavior can be customized. See the variations section at the bottom of this article for more information.
| |
| | | | |
| − | These instruction are written for use with a camera with 4 IO ports. Port 1 and 2 are reserved for use with the VALT Recording Start/Stop button.
| + | [[File:Privacy Button On.png|200px|link=Privacy Button 2020-Present|Click to Navigate to This Page]] |
| | | | |
| − | ==Compatible Cameras==
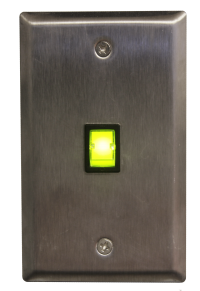
| + | [[Privacy Switch 2013-2019|Privacy Switch 2013-2019]] |
| − | The privacy switch should be usable with any AXIS camera with at least one free input and one free output. The camera must be running firmware version 5.50 or higher.
| |
| | | | |
| − | * Axis P5514
| + | [[File:PrivSwitch.png|200px|link=Privacy Switch 2013-2019|Click to Navigate to This Page]] |
| − | * Axis P5515
| |
| − | * Axis P5414-E
| |
| − | * Axis P5415-E
| |
| − | * Axis F41
| |
| − | * Axis P3364/65*
| |
| − | * Axis P3374/75-V*
| |
| − | * Axis P3235-LVE*
| |
| − | * Axis Q8414-LVS*
| |
| − | * Axis M5525-E
| |
| − | * Axis P5635 MKII
| |
| − | | |
| − | | |
| − | * These cameras can only be used with a single ancillary device (ie: Button or privacy switch). To use these with a camera that does not have 4 I/O ports, you will need to adjust the event rules.
| |
| − | | |
| − | ==Required Parts and Tools==
| |
| − | * VALT Privacy Switch
| |
| − | *:[[File:PrivacySwitch2.jpg|225x300px]]
| |
| − | * Mud Ring or Single Gang Box
| |
| − | * Face Plate
| |
| − | * Wire Cutters/Strippers
| |
| − | * 22/4 solid unshielded plenum
| |
| − | * Jab Saw (used to cut hole)
| |
| − | * Wire fishing poles or tape
| |
| − | | |
| − | {{Privacy Button Diagrams|Privacy Button Diagrams}}
| |
| − | | |
| − | {{Privacy Switch Diagrams|Privacy Switch Diagrams}}
| |
| − | | |
| − | ==Installation Instructions==
| |
| − | # Cut a hole in the wall where the privacy switch will be mounted.
| |
| − | # Insert the mud ring into the hole, and attach it.
| |
| − | # Run 22/4 from the camera to the hole.
| |
| − | # Strip the outer insulation from both ends of the 22/4.
| |
| − | #: [[File:Privacy1.jpg|600x450px|link=]]
| |
| − | # Strip approximately 1/4 inch of insulation off of each wire in the 22/4 on the camera side
| |
| − | #: [[File:Privacy2.jpg|600x450px|link=]]
| |
| − | # Insert the wires into the IO connector on the camera according to the chart below.
| |
| − | #: [[File:Privacy3.jpg|600x450px|link=]]
| |
| − | #: Pin 1: Green
| |
| − | #: Pin 2: Red
| |
| − | #: Pin 5: Yellow
| |
| − | #: Pin 6: Black
| |
| − | #:: ''See the chart at the end of this section for a direct mapping between the switch and I/O connector''
| |
| − | # Strip approximately 1/2 inch of insulation off each wire in the 22/4 on the switch side.
| |
| − | #: [[File:Privacy4.jpg|600x450px|link=]]
| |
| − | # Splice the wires to the switch according to the chart below.
| |
| − | #: [[File:PrivacySwitch3.jpg|600x450px|link=]]
| |
| − | #: [[File:PrivacyButton StartButton.png|600x450px|link=]]
| |
| − | #: Green - Green
| |
| − | #: Yellow - Yellow
| |
| − | #: Red - Red
| |
| − | #: Black - Black
| |
| − | #:: ''Connections should be connected with B connectors''
| |
| − | # Attach the switch to the mud ring.
| |
| − | <br />
| |
| − | '''Wiring Map'''
| |
| − | ::{|class="wikitable" style="text-align:center;border-style:solid;border-width:1px;"
| |
| − | !style="width:100px;" | Privacy Switch
| |
| − | !Lead Color
| |
| − | !Phoenix Connector
| |
| − | |-
| |
| − | |Switch
| |
| − | |Green
| |
| − | |Pin 1
| |
| − | |-
| |
| − | | +
| |
| − | |Red
| |
| − | |Pin 2
| |
| − | |-
| |
| − | |Switch
| |
| − | |Yellow
| |
| − | |Pin 5
| |
| − | |-
| |
| − | | -
| |
| − | |Black
| |
| − | |Pin 6
| |
| − | |}
| |
| − | | |
| − | =Configuration=
| |
| − | Prior to configuring the cameras for use with the privacy switch, make sure that the cameras have already been set up with a valid IP address, and are configured according to [[Camera Settings|VALT Specifications]].
| |
| − | | |
| − | ==Fixed Camera==
| |
| − | | |
| − | ===Load Rules===
| |
| − | # Download the camera rules, using the links below:
| |
| − | #: P3364: https://ivs.box.com/shared/static/b4wbmbyzwi3laz030hb33lidsmz64btp.cfg
| |
| − | #: Fixed: https://ivs.box.com/shared/static/wr8sx4oxruykuhpftj0o8ff80s3y7lap.cfg
| |
| − | # Open '''Access Camera Management'''.
| |
| − | # Click on the '''Add Camera from Address''' icon.
| |
| − | #: [[File:Privacy14.png|link=]]
| |
| − | # Enter the IP address of the camera.
| |
| − | #: [[File:Privacy15.png]]
| |
| − | # Click '''OK'''.
| |
| − | # Enter the username and password for the camera.
| |
| − | #: [[File:Privacy16.png]]
| |
| − | # Click '''OK'''.
| |
| − | # The camera should now appear in the list of devices.
| |
| − | #: [[File:Privacy18.png]]
| |
| − | # Right click on the camera, and select '''Configure Devices'''. Configure from the menu.
| |
| − | #: [[File:Privacy19.png]]
| |
| − | # Click the '''Configuration File''' button.
| |
| − | #: [[File:Privacy20.png]]
| |
| − | # Browse to where configuration file is saved, and select it.
| |
| − | #: [[File:Privacy21.png]]
| |
| − | # Click '''Open'''.
| |
| − | # Click the '''Action Rules''' tab.
| |
| − | #: [[File:Privacy22.png]]
| |
| − | # Click '''Next'''.
| |
| − | #: [[File:Privacy23.png]]
| |
| − | # Click '''Finish'''.
| |
| − | # When the rules have successfully loaded, a message will display at the bottom of the window.
| |
| − | #: [[File:Privacy24.png]]
| |
| − | | |
| − | ===Set Privacy Mask===
| |
| − | This can be done through the API or through the web browser of the camera.
| |
| − | ====Via API====
| |
| − | If the following steps produce an error or fail to create a mask, the mask can be configured via the web interface.
| |
| − | # Open a web browser.
| |
| − | # Copy and paste the following link into the address bar. Replace '''''ipaddress''''' with the ip address of the camera:
| |
| − | #: http://'''''ipaddress'''''/axis-cgi/privacymask.cgi?action=add&name=mask1&width=100&height=100
| |
| − | # Press Enter to submit the address.
| |
| − | # The mask should now be created. This can verified by browsing to the IP address of the camera. The live view should show a black screen.
| |
| − | #: [[File:Privacy8.png|480x260px]]
| |
| − | # Copy and paste the following link into the address bar. Replace '''''ipaddress''''' with the ip address of the camera:
| |
| − | #: http://'''''ipaddress'''''/axis-cgi/param.cgi?action=update&Image.I0.Overlay.MaskWindows.M0.Enabled=no
| |
| − | # This should disable the mask created. This can be verified by browsing to the IP address of the camera. The live view should show a live view from the camera.
| |
| − | #: [[File:Privacy9.png|480x260px]]
| |
| − | | |
| − | ====Via Web Interface====
| |
| − | Perform these steps '''only''' if configuring the mask via API fails.
| |
| − | # Open a web browser.
| |
| − | # Navigate to the IP address of the camera.
| |
| − | # If prompted, enter the username and password for the camera.
| |
| − | # Click on '''Setup''' in the upper right hand corner of the window.
| |
| − | #: [[File:Privacy10.png]]
| |
| − | # Click on '''Video & Audio'''.
| |
| − | #: [[File:Privacy11.png]]
| |
| − | # Click on '''Privacy Masks'''.
| |
| − | #: [[File:Privacy36.png]]
| |
| − | # Click '''Add'''.
| |
| − | # Enter '''Privacy''' in the Mask name field.
| |
| − | # Expand the blue box using a mouse until it covers the entire image.
| |
| − | #: [[File:Privacy37.png]]
| |
| − | # Click '''Save'''.
| |
| − | # Click on the Privacy mask just created.
| |
| − | #: [[File:Privacy38.png]]
| |
| − | # Click '''Enable/Disable'''.
| |
| − | | |
| − | ===Add Recipient===
| |
| − | Some of the rules point to a recipient at an IP address, so the camera must have a recipient set up for itself.
| |
| − | # Click on '''Setup''' in the upper right hand corner of the window.
| |
| − | #: [[File:Privacy10.png]]
| |
| − | # Click on '''Events'''.
| |
| − | # Click on '''Recipients'''.
| |
| − | # Click on '''Add'''.
| |
| − | #: Add '''Self''' in the name field
| |
| − | #: Type '''http://127.0.0.1/axis-cgi/param.cgi''' in the URL field, or the IP address of the camera
| |
| − | #: Type in the login credentials for the camera.
| |
| − | #: Click '''Test'''.
| |
| − | #: Click '''Close'''.
| |
| − | | |
| − | | |
| − | ===Manual Set up of Privacy Rules===
| |
| − | This is how to create the privacy rules if the config file doesn't work properly.
| |
| − | | |
| − | ====I/O Ports====
| |
| − | # Open a web browser.
| |
| − | # Navigate to the IP address of the camera.
| |
| − | # If prompted, enter the username and password for the camera.
| |
| − | # Click on '''Setup''' in the upper right hand corner of the window.
| |
| − | #: [[File:Privacy10.png]]
| |
| − | # Click on '''System Options'''.
| |
| − | #: [[File:Privacy11.png]]
| |
| − | # Click on '''Ports & Devices'''.
| |
| − | #: [[File:Privacy12.png]]
| |
| − | # Change I/O Port 4 to '''Output'''.
| |
| − | #: [[File:Privacy13.png]]
| |
| − | # Click '''Save'''.
| |
| − | | |
| − | ====Privacy Rules====
| |
| − | | |
| − | | |
| − | ==PTZ Camera==
| |
| − | ===Configure Camera===
| |
| − | ====Set Privacy Location====
| |
| − | | |
| − | # Open a web browser.
| |
| − | # Copy and paste the following link into the address bar. Replace '''''ipaddress''''' with the ip address of the camera:
| |
| − | #: http://'''''ipaddress'''''/axis-cgi/com/ptzconfig.cgi?setserverpresetname=Privacy&home=yes
| |
| − | # Press Enter to submit the address.
| |
| − | | |
| − | ====Set Privacy Mask====
| |
| − | | |
| − | # Open a web browser.
| |
| − | # Copy and paste the following link into the address bar. Replace '''''ipaddress''''' with the ip address of the camera.
| |
| − | #: http://'''''ipaddress'''''/axis-cgi/privacymask.cgi?action=add&name=mask1&width=100&height=100
| |
| − | # Press Enter to submit the address.
| |
| − | # The mask should now be created. This can be verified by browsing to the IP address of the camera. The live view should show a black screen.
| |
| − | #: [[File:Privacy8.png|480x260px]]
| |
| − | # Copy and paste the following link into the address bar. Replace '''''ipaddress''''' with the ip address of the camera:
| |
| − | #: http://'''''ipaddress'''''/axis-cgi/param.cgi?action=update&Image.I0.Overlay.MaskWindows.M0.Enabled=no
| |
| − | # This should disable the mask created. This can be verified by browsing to the IP address of the camera. The live view should show a live view from the camera.
| |
| − | #: [[File:Privacy9.png|480x260px]]
| |
| − | | |
| − | ====I/O Ports====
| |
| − | # Open a web browser.
| |
| − | # Navigate to the IP address of the camera.
| |
| − | # If prompted, enter the username and password for the camera.
| |
| − | # Click on '''Setup''' in the upper right hand corner of the window.
| |
| − | #: [[File:Privacy10.png]]
| |
| − | # Click on '''System Options'''.
| |
| − | #: [[File:Privacy11.png]]
| |
| − | # Click on '''Ports & Devices'''.
| |
| − | #: [[File:Privacy12.png]]
| |
| − | # Change I/O Port 4 to '''Output'''.
| |
| − | #: [[File:Privacy13.png]]
| |
| − | # Click '''Save'''.
| |
| − | | |
| − | ===Load Rules===
| |
| − | | |
| − | # Download the camera rules using the links below:
| |
| − | #: PTZ: https://ivs.box.com/shared/static/2yleyfngk6erpoxki06a1u1e84hxlmxd.cfg
| |
| − | # Open '''Access Camera Management'''.
| |
| − | # Click on the '''Add Camera from Address''' icon.
| |
| − | #: [[File:Privacy14.png]]
| |
| − | # Enter the IP address of the camera.
| |
| − | #: [[File:Privacy15.png]]
| |
| − | # Click '''OK'''.
| |
| − | # Enter the username and password for the camera.
| |
| − | #: [[File:Privacy16.png]]
| |
| − | # Click '''OK'''.
| |
| − | # The camera should now appear in the list of devices.
| |
| − | #: [[File:Privacy18.png]]
| |
| − | # Right click on the camera and select '''Configure Devices'''. Configure from the menu.
| |
| − | #: [[File:Privacy19.png]]
| |
| − | # Click the '''Configuration File''' button.
| |
| − | #: [[File:Privacy20.png]]
| |
| − | # Browse to where the configuration file is saved and select it.
| |
| − | #: [[File:Privacy25.png]]
| |
| − | # Click '''Open'''.
| |
| − | # Click the '''Action Rules''' tab.
| |
| − | #: [[File:Privacy26.png]]
| |
| − | # Click '''Next'''.
| |
| − | #: [[File:Privacy27.png]]
| |
| − | # Click '''Finish'''.
| |
| − | # When the rules have successfully loaded, a message will display at the bottom of the window
| |
| − | | |
| − | =Multiple Cameras=
| |
| − | A single privacy switch can be used to trigger privacy mode on multiple cameras. In order to accomplish this, each camera must be configured and then rules must be created in the camera attached to the switch to trigger privacy mode on the other cameras. These rules are similar to the rules used with the primary camera, but vary slightly. Follow the steps below for each additional camera that you wish to include on the privacy switch.
| |
| − | ==Configure Additional Camera==
| |
| − | ===Fixed Camera===
| |
| − | ====Set Privacy Mask====
| |
| − | =====Via API=====
| |
| − | If the following steps produce an error or fail to create a mask, the mask can be configured via the web interface.
| |
| − | # Open a web browser
| |
| − | # Copy and paste the following link into the address bar. Replace '''''ipaddress''''' with the ip address of your camera.
| |
| − | #: http://'''''ipaddress'''''/axis-cgi/privacymask.cgi?action=add&name=mask1&width=100&height=100
| |
| − | # Press enter to submit the address
| |
| − | # The mask should now be created. This can be verified by browsing to the IP address of the camera. The live view should show a black screen.
| |
| − | #: [[File:Privacy8.png|480x260px]]
| |
| − | # Copy and paste the following link into the address bar. Replace '''''ipaddress''''' with the ip address of your camera.
| |
| − | #: http://'''''ipaddress'''''/axis-cgi/param.cgi?action=update&Image.I0.Overlay.MaskWindows.M0.Enabled=no
| |
| − | # This should disable the mask created. This can be verified by browsing to the ip address of the camera. The live view should show a live view from the camera.
| |
| − | #: [[File:Privacy9.png|480x260px]]
| |
| − | | |
| − | =====Via Web Interface=====
| |
| − | Perform these steps '''only''' if configuring the mask via API fails.
| |
| − | # Open a web browser
| |
| − | # Navigate to the IP address of the camera.
| |
| − | # If prompted enter the username and password for the camera.
| |
| − | # Click on Setup in the upper right hand corner of the window.
| |
| − | #: [[File:Privacy10.png]]
| |
| − | # Click on Video & Audio.
| |
| − | #: [[File:Privacy11.png]]
| |
| − | # Click on Privacy Masks
| |
| − | #: [[File:Privacy36.png]]
| |
| − | # Click Add
| |
| − | # Enter '''Privacy''' in the Mask name field.
| |
| − | # Expand the blue box using a mouse until it covers the entire image
| |
| − | #: [[File:Privacy37.png]]
| |
| − | # Click Save
| |
| − | # Click on the Privacy mask just created
| |
| − | #: [[File:Privacy38.png]]
| |
| − | # Click Enable/disable
| |
| − | | |
| − | ===PTZ Camera===
| |
| − | ====Set Privacy Location====
| |
| − | # Open a web browser
| |
| − | # Copy and paste the following link into the address bar. Replace '''''ipaddress''''' with the ip address of the camera.
| |
| − | #: http://'''''ipaddress'''''/axis-cgi/com/ptzconfig.cgi?setserverpresetname=Privacy&home=yes
| |
| − | # Press enter to submit the address
| |
| − | | |
| − | ====Set Privacy Mask====
| |
| − | # Open a web browser
| |
| − | # Copy and paste the following link into the address bar. Replace '''''ipaddress''''' with the ip address of your camera.
| |
| − | #: http://'''''ipaddress'''''/axis-cgi/privacymask.cgi?action=add&name=mask1&width=100&height=100
| |
| − | # Press enter to submit the address
| |
| − | # The mask should now be created. You can verify this by browsing to the IP address of the camera. The live view should show a black screen.
| |
| − | #: [[File:Privacy8.png|480x260px]]
| |
| − | # Copy and paste the following link into the address bar. Replace '''''ipaddress''''' with the ip address of your camera.
| |
| − | #: http://'''''ipaddress'''''/axis-cgi/param.cgi?action=update&Image.I0.Overlay.MaskWindows.M0.Enabled=no
| |
| − | # This should disable the mask you created. You can verify this by browsing to the ip address of the camera. The live view should show a live view from the camera.
| |
| − | #: [[File:Privacy9.png|480x260px]]
| |
| − | == Primary Camera Rules ==
| |
| − | | |
| − | The following steps must be completed on the switch connected to the camera.
| |
| − | | |
| − | # Download the camera rules using the links below.
| |
| − | #: P3364 Primary Camera
| |
| − | #:: Fixed: https://ivs.box.com/shared/static/a4iwjp6vxrdwadiodc3cxxw6z37fzi81.cfg
| |
| − | #:: PTZ: https://ivs.box.com/shared/static/honivu5lijpyry7l57dugqu85qgx9zf6.cfg
| |
| − | #: Other Primary Camera
| |
| − | #:: Fixed: https://ivs.box.com/shared/static/m6v788q972qp0ftwtrpz4e7xzoypjldt.cfg
| |
| − | #:: PTZ: https://ivs.box.com/shared/static/vemi0sszdt2vo3fd8a7d1mqpmlrb5rj4.cfg
| |
| − | # Open the rules in a text editor
| |
| − | # Find and replace all instances of the below IP address with the IP address of the additional camera.
| |
| − | #: Fixed: 192.168.0.64
| |
| − | #: PTZ: 192.168.0.151
| |
| − | # Save your changes.
| |
| − | # Open Access Camera Management
| |
| − | # Click on the '''Add Camera from Address''' icon.
| |
| − | #: [[File:Privacy14.png]]
| |
| − | # Enter the IP address of the camera
| |
| − | #: [[File:Privacy15.png]]
| |
| − | # Click OK
| |
| − | # Enter the username and password for the camera.
| |
| − | #: [[File:Privacy16.png]]
| |
| − | # Click OK
| |
| − | # The camera should now appear in the list of devices.
| |
| − | #: [[File:Privacy18.png]]
| |
| − | # Right click on the camera and select Configure Devices, Configure from the menu.
| |
| − | #: [[File:Privacy19.png]]
| |
| − | # Click the '''Configuration File''' button.
| |
| − | #: [[File:Privacy20.png]]
| |
| − | # Browse to wheres the configuration file is saved and select it.
| |
| − | #: [[File:Privacy28.png]]
| |
| − | # Click Open
| |
| − | # Click the '''Action Rules''' tab
| |
| − | #: [[File:Privacy29.png]]
| |
| − | # Click Next
| |
| − | #: [[File:Privacy30.png]]
| |
| − | # Click Finish
| |
| − | # When the rules have successfully loaded a message will be displayed at the bottom of the window.
| |
| − | #: [[File:Privacy24.png]]
| |
| − | | |
| − | =Variations=
| |
| − | ==LED Lit to Show Privacy Mode Engaged==
| |
| − | This variation can be accomplished by reversing the triggers on the output rules.
| |
| − | # Configure the cameras and load the rules as outlined above.
| |
| − | # Open a web browser
| |
| − | # Navigate to the IP address of the primary camera.
| |
| − | # If prompted enter the username and password for the camera.
| |
| − | # Click on Setup in the upper right hand corner of the window.
| |
| − | #: [[File:Privacy10.png]]
| |
| − | # Click on Events.
| |
| − | #: [[File:Privacy11.png]]
| |
| − | # Click on the Output Active rule
| |
| − | #: [[File:Privacy32.png]]
| |
| − | # Click Modify
| |
| − | #: [[File:Privacy33.png]]
| |
| − | # Under trigger conditions, change Active from No to Yes
| |
| − | # Click OK
| |
| − | # Click on the Output Off Rule
| |
| − | #: [[File:Privacy34.png]]
| |
| − | # Click Modify
| |
| − | #: [[File:Privacy35.png]]
| |
| − | # Under trigger conditions, change Active from Yes to No
| |
| − | # Click OK
| |
| − | | |
| − | ==Privacy Mode Engaged by Flipping Switch Off==
| |
| − | This variation can be accomplished by reversing the triggers on all rules. | |
| − | # Configure the cameras and load the rules as outlined above.
| |
| − | # Open a web browser
| |
| − | # Navigate to the IP address of the primary camera.
| |
| − | # If prompted enter the username and password for the camera.
| |
| − | # Click on Setup in the upper right hand corner of the window.
| |
| − | #: [[File:Privacy10.png]]
| |
| − | # Click on Events.
| |
| − | #: [[File:Privacy11.png]]
| |
| − | # Click on the first rule
| |
| − | #: [[File:Privacy32.png]]
| |
| − | # Click Modify
| |
| − | #: [[File:Privacy33.png]]
| |
| − | # Under trigger conditions reverse the '''Active''' condition.
| |
| − | ## If currently set to Yes, change to No
| |
| − | ## If currently set to No, change to Yes
| |
| − | # Click OK
| |
| − | # Repeat this process for every rule.
| |
| − | | |
| − | ----
| |
| − | =New Structure=
| |
| − | [[New Privacy Button Section|New Privacy Button (under construction)]]
| |
| − | | |
| − | [[File:Privacy Switch - NEW (Front).png|200px|link=New Privacy Button Section]]
| |
| − | | |
| − | [[Old Privacy Switch Section|Old Privacy Switch (under construction)]]
| |
| − | | |
| − | [[File:Privacy Switch - lit (Front).png|200px|link=Old Privacy Switch Section]]
| |