Difference between revisions of "Adding an iOS Device"
IVSWikiBlue (talk | contribs) |
IVSWikiBlue (talk | contribs) |
||
| Line 7: | Line 7: | ||
: 3) Click on Admin -> Rooms -> Add Device. | : 3) Click on Admin -> Rooms -> Add Device. | ||
| − | + | {{img | file = iOS1.PNG}} | |
: 4) Enter the rooms associated with the device. | : 4) Enter the rooms associated with the device. | ||
| Line 19: | Line 19: | ||
: 8) Locate the device in the list of devices and click on it. | : 8) Locate the device in the list of devices and click on it. | ||
| − | + | {{img | file = iOS2.PNG}} | |
: 9) Note the DeviceUID, as it will be needed to install the app on the iPad. | : 9) Note the DeviceUID, as it will be needed to install the app on the iPad. | ||
Revision as of 07:41, 11 May 2022
Important: Prior to adding any iOS devices, make sure that all user groups are configured with a default template for Information and Markers. If these settings are not specified, the iOS device will be unable to upload videos to the server.
- 1) Go to the client interface (using Chrome, Firefox, or other standard web browser).
- 2) Log in to the client (default username: “admin” password: “admin”).
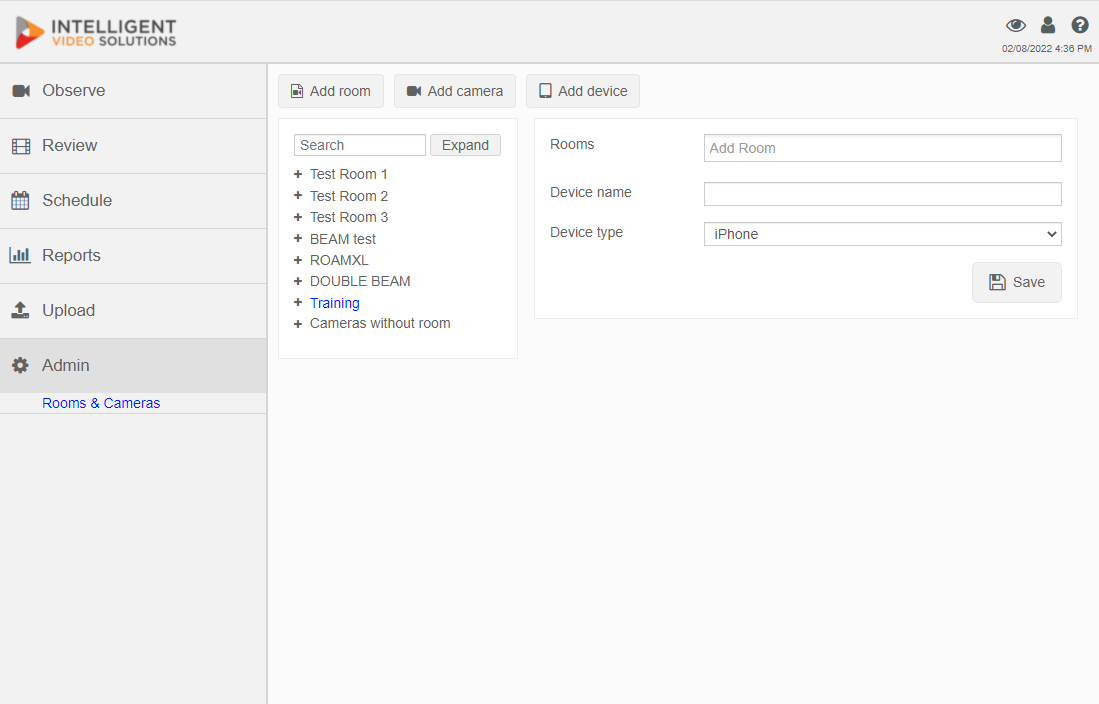
- 3) Click on Admin -> Rooms -> Add Device.
- 4) Enter the rooms associated with the device.
- 5) Enter a name for the device.
- 6) Select the Device type (iPad/iPhone).
- 7) Click Save.
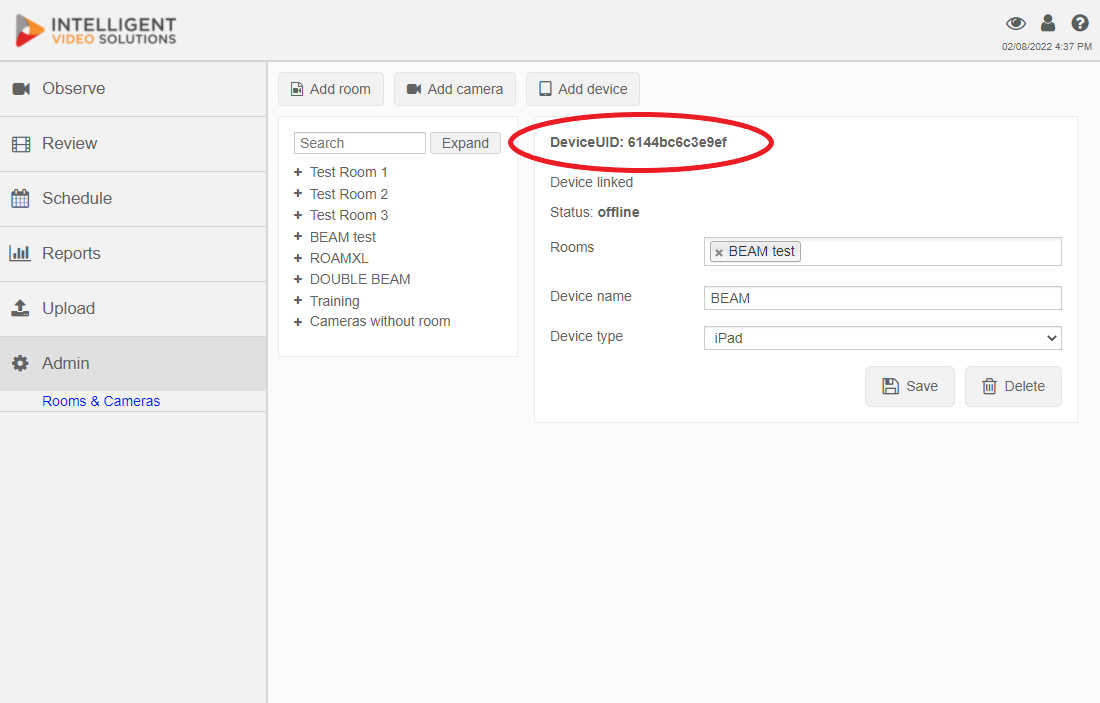
- 8) Locate the device in the list of devices and click on it.
- 9) Note the DeviceUID, as it will be needed to install the app on the iPad.
- For additional information about iOS device configuration click here.
Note: The device status will show as offline, unless the device is placed into streaming mode. The device will also not be accessible for observation unless it is in streaming mode. This option is configured on the device itself. See the IVS Beam Software User Guide for more information.

