Difference between revisions of "Template:VALT Server Migration"
IVSWikiBlue (talk | contribs) (→On the New Server) |
IVSWikiBlue (talk | contribs) |
||
| (14 intermediate revisions by the same user not shown) | |||
| Line 1: | Line 1: | ||
| + | __TOC__ | ||
<div class="floating_card"><b>Note: Change IP's in the below commands to match the IP's of the new and old server</b></div> | <div class="floating_card"><b>Note: Change IP's in the below commands to match the IP's of the new and old server</b></div> | ||
| − | |||
=On the Old Server= | =On the Old Server= | ||
| − | |||
<div class="section"> | <div class="section"> | ||
| Line 12: | Line 11: | ||
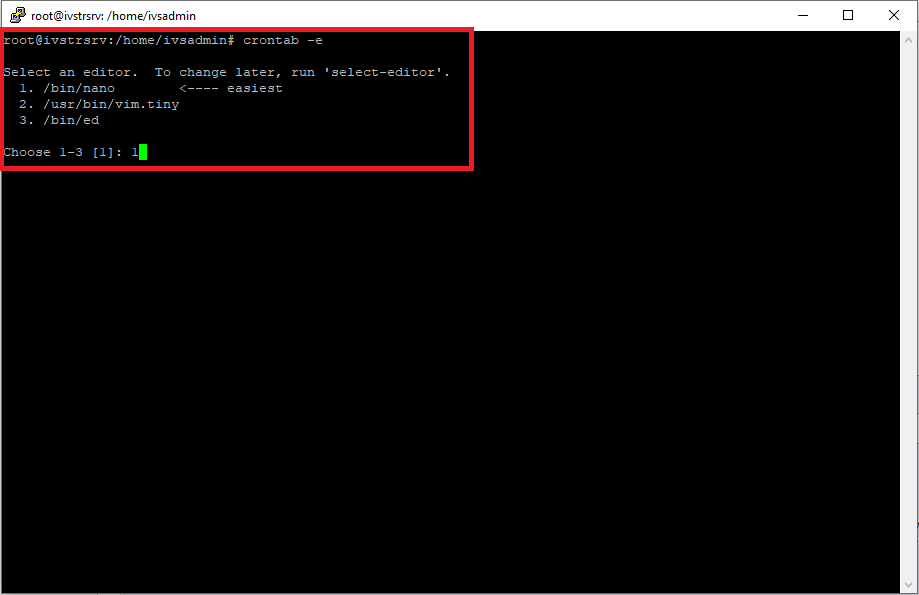
#: <code>crontab -e</code> | #: <code>crontab -e</code> | ||
#: - Press {{Keyboard | key = 1}} to continue | #: - Press {{Keyboard | key = 1}} to continue | ||
| − | </div> | + | </div> |
| + | |||
: {{img | file = Edit_Cronjobs_Command.png}}<br> | : {{img | file = Edit_Cronjobs_Command.png}}<br> | ||
| − | + | ||
<div class="section"> | <div class="section"> | ||
<ol start="3"> | <ol start="3"> | ||
| Line 22: | Line 22: | ||
<li>Press {{Keyboard | key = Y}} to save</li> | <li>Press {{Keyboard | key = Y}} to save</li> | ||
</ol> | </ol> | ||
| − | </div> | + | </div> |
| + | |||
:{{img | file = Disable_Restart_Wowza_Cronjob.png}}<br> | :{{img | file = Disable_Restart_Wowza_Cronjob.png}}<br> | ||
| − | + | ||
<div class="section"> | <div class="section"> | ||
<ol start="6"> | <ol start="6"> | ||
| Line 31: | Line 32: | ||
<li>Type in the following, then press {{Keyboard | key = Enter}}:</li> | <li>Type in the following, then press {{Keyboard | key = Enter}}:</li> | ||
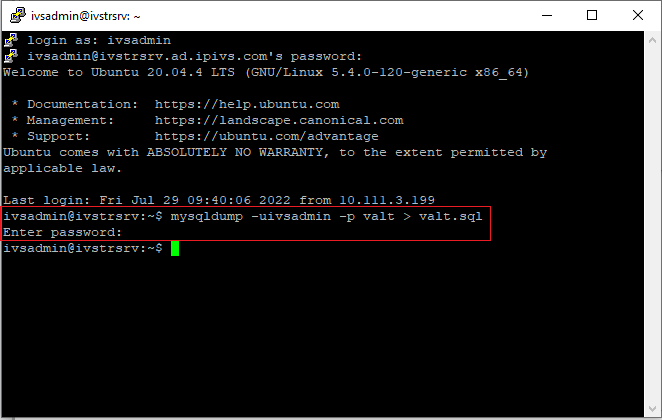
<code>mysqldump -uivsadmin -p valt > valt.sql</code> | <code>mysqldump -uivsadmin -p valt > valt.sql</code> | ||
| − | <li>Enter in the | + | <li>Enter in the MySQL password and press {{Keyboard | key = Enter}}:</li> |
</ol> | </ol> | ||
| − | </div> | + | </div> |
| + | |||
: {{img | file = VALT_Migration_MySQLdump.png}}<br> | : {{img | file = VALT_Migration_MySQLdump.png}}<br> | ||
| − | + | ||
<div class="section"> | <div class="section"> | ||
<ol start="9"> | <ol start="9"> | ||
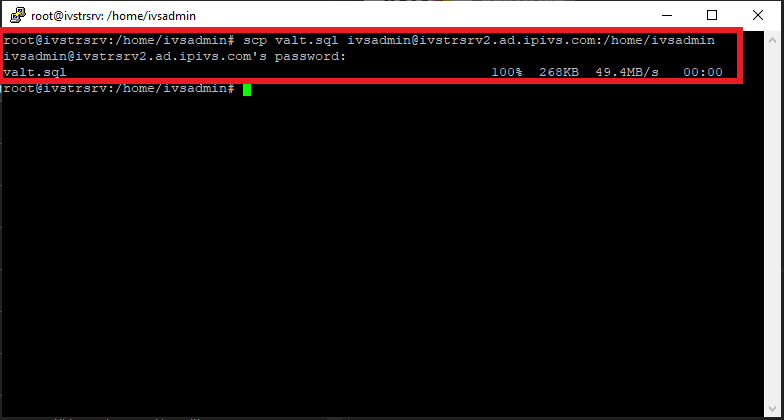
<li>Copy over the database file to the new server</li> | <li>Copy over the database file to the new server</li> | ||
<code>scp valt.sql ivsadmin@'''NewServerIP''':/home/ivsadmin/</code> | <code>scp valt.sql ivsadmin@'''NewServerIP''':/home/ivsadmin/</code> | ||
| − | <li>Enter password for '''ivsadmin'''</li> | + | <li>Enter password for '''ivsadmin''' and press {{Keyboard | key = Enter}}:</li> |
</ol> | </ol> | ||
| − | </div | + | </div> |
: {{img | file = SCP_MySQLdump.png}} | : {{img | file = SCP_MySQLdump.png}} | ||
| Line 51: | Line 53: | ||
#: <code>mysql -uivsadmin -p valt</code> | #: <code>mysql -uivsadmin -p valt</code> | ||
# Enter in the MySQL password and press {{Keyboard | key = Enter}}: | # Enter in the MySQL password and press {{Keyboard | key = Enter}}: | ||
| − | </div | + | </div> |
: {{img | file = MySQL_Login.png}} | : {{img | file = MySQL_Login.png}} | ||
| − | + | ||
<div class="section"> | <div class="section"> | ||
<ol start="3"> | <ol start="3"> | ||
<li>Type in the following and press {{Keyboard | key = Enter}}:</li> | <li>Type in the following and press {{Keyboard | key = Enter}}:</li> | ||
| − | <code>DROP database valt;</code | + | <code>DROP database valt;</code> |
</ol> | </ol> | ||
| − | </div> | + | </div> |
| + | |||
: :{{img | file = Database_DROP.png}} | : :{{img | file = Database_DROP.png}} | ||
| − | + | ||
<div class="section"> | <div class="section"> | ||
<ol start="4"> | <ol start="4"> | ||
<li>Type in the following and press {{Keyboard | key = Enter}}:</li> | <li>Type in the following and press {{Keyboard | key = Enter}}:</li> | ||
| − | <code>CREATE database valt;</code | + | <code>CREATE database valt;</code> |
</ol> | </ol> | ||
| − | </div> | + | </div> |
| + | |||
: :{{img | file = Database_CREATE.png}} | : :{{img | file = Database_CREATE.png}} | ||
| − | + | ||
<div class="section"> | <div class="section"> | ||
<ol start="5"> | <ol start="5"> | ||
<li>Type in the following and press {{Keyboard | key = Enter}}:</li> | <li>Type in the following and press {{Keyboard | key = Enter}}:</li> | ||
| − | <code>exit</code | + | <code>exit</code> |
<li>Type in the following and press {{Keyboard | key = Enter}}:</li> | <li>Type in the following and press {{Keyboard | key = Enter}}:</li> | ||
| − | <code>mysql -uivsadmin -p valt < valt.sql</code | + | <code>mysql -uivsadmin -p valt < valt.sql</code> |
<li>Enter in the MySQL password and press {{Keyboard | key = Enter}}:</li> | <li>Enter in the MySQL password and press {{Keyboard | key = Enter}}:</li> | ||
</ol> | </ol> | ||
| − | </div> | + | </div> |
| + | |||
: {{img | file = Database_IMPORT.png}} | : {{img | file = Database_IMPORT.png}} | ||
| − | + | ||
<div class="section"> | <div class="section"> | ||
<ol start="8"> | <ol start="8"> | ||
<li>Type in the following and press {{Keyboard | key = Enter}}:</li> | <li>Type in the following and press {{Keyboard | key = Enter}}:</li> | ||
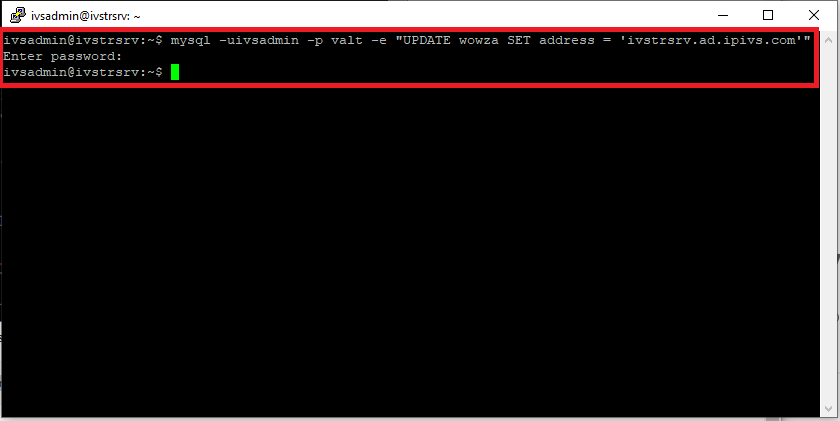
| − | <code>mysql -uivsadmin -p valt -e "UPDATE wowza SET address = '<b>NewServerIP</b>'"</code | + | <code>mysql -uivsadmin -p valt -e "UPDATE wowza SET address = '<b>NewServerIP</b>'"</code> |
<li>Enter in the MySQL password and press {{Keyboard | key = Enter}}:</li> | <li>Enter in the MySQL password and press {{Keyboard | key = Enter}}:</li> | ||
</ol> | </ol> | ||
| − | </div> | + | </div> |
| + | |||
: {{img | file = MySQL_Wowza_Update_Address.png}} | : {{img | file = MySQL_Wowza_Update_Address.png}} | ||
| − | = | + | <div class="section"> |
| − | {{: | + | <ol start="10"> |
| + | {{Aside | content = It can be useful to run the migration in a screen. Use {{Code Block - Mini | text = screen -S video_migration}} to start a named session.}} | ||
| + | <li>Type in the following, then press {{Keyboard | key = Enter}}:</li> | ||
| + | <div class="codeText">sudo rsync -av --progress ivsadmin@<b>OldServerIP</b>:/usr/local/WowzaStreamingEngine/content/valt_recordings/* /usr/local/WowzaStreamingEngine/content/valt_recordings/</div> | ||
| + | <li>When prompted, type <b>yes</b> to continue connecting to the server:</li> | ||
| + | <li>Type in the <b>ivsadmin</b> password and press {{Keyboard | key = Enter}}:</li> | ||
| + | </ol> | ||
| + | </div> | ||
| + | |||
| + | : {{img | file = Rsync_Recordings.png}} | ||
| + | |||
| + | <div class="section"> | ||
| + | <ol start="13"> | ||
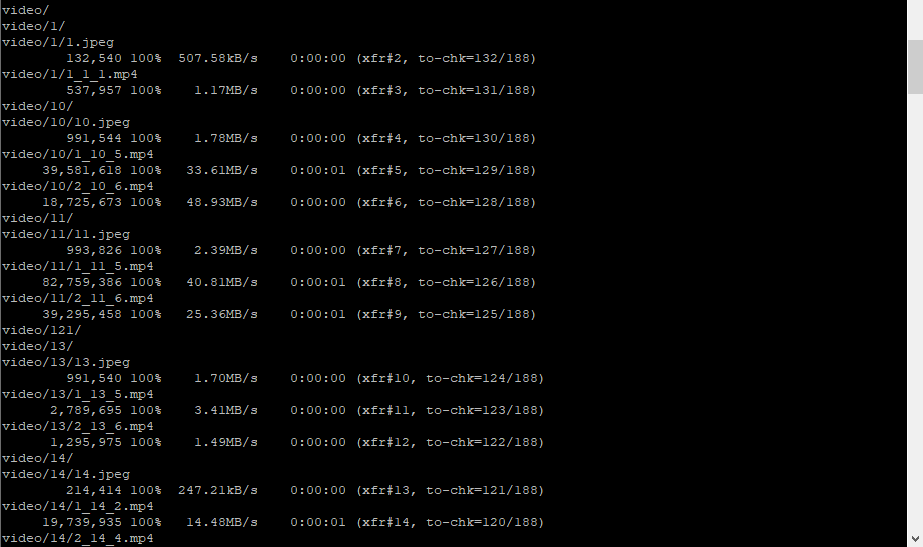
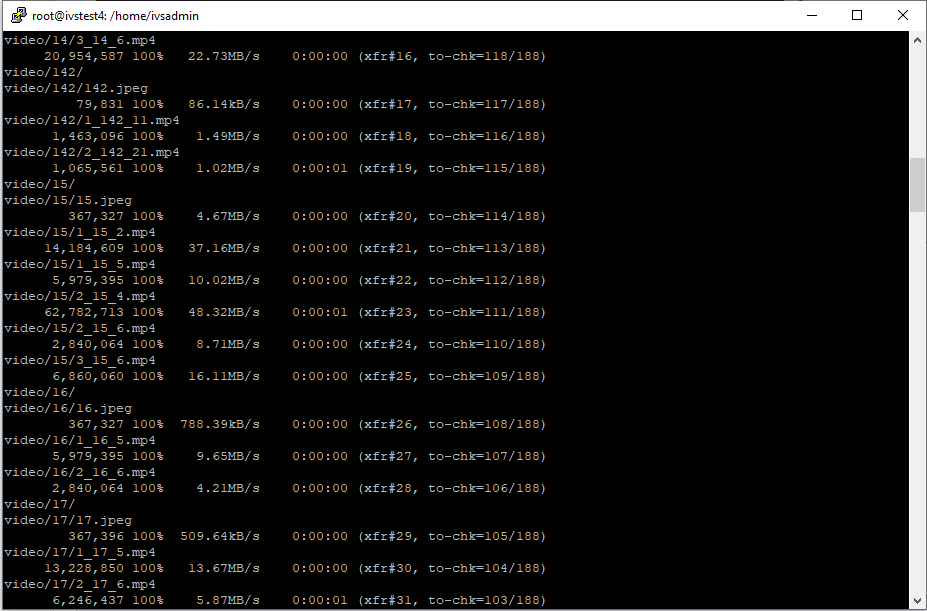
| + | <li>The video files will begin copying over to the new server and will look like this:</li> | ||
| + | </ol> | ||
| + | </div> | ||
| + | |||
| + | : {{img | file = Video_Copy 1.PNG | width = }} | ||
| + | |||
| + | : {{img | file = Video_Copy 2.PNG | width = }} | ||
| + | |||
| + | <div class="floating_card"> | ||
| + | <b>Things to note:</b> | ||
| + | <ul> | ||
| + | <li>Depending on the amount of video files, it may take some time for all of the files to transfer</li> | ||
| + | <li>Assuming the copy is running at a full 1GB link, it will take about 2.8 hours per 1 TB of data</li> | ||
| + | </ul> | ||
| + | </div> | ||
| + | |||
| + | <div class="section"> | ||
| + | <ol start="14"> | ||
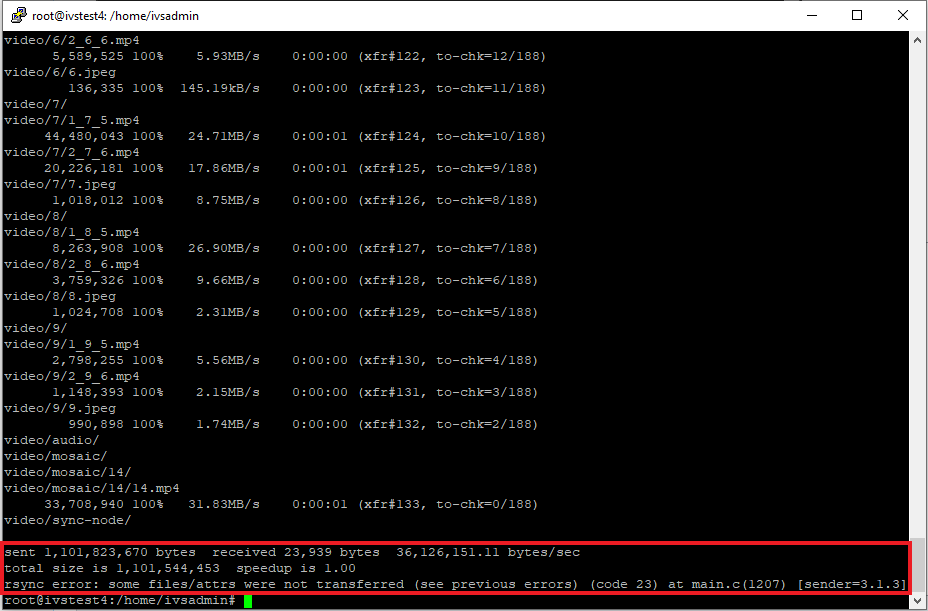
| + | <li>After the video files are done copying over, you will see a confirmation message similar to the one below:</li> | ||
| + | </ol> | ||
| + | </div> | ||
| + | |||
| + | : {{ img | file = Rsync_Confirmation.png}} | ||
| + | |||
| + | <div class="floating_card">After the files have been copied over, navigate to the VALT webpage on the new server and verify that all of the files are there.</div> | ||
Latest revision as of 17:09, 5 March 2025
Contents
Note: Change IP's in the below commands to match the IP's of the new and old server
On the Old Server
- Disable the Apache web service to prevent further recordings:
-
sudo service apache2 stop
-
- Disable the restart Wowza cronjob:
- - Type in the following command:
-
crontab -e - - Press 1 to continue
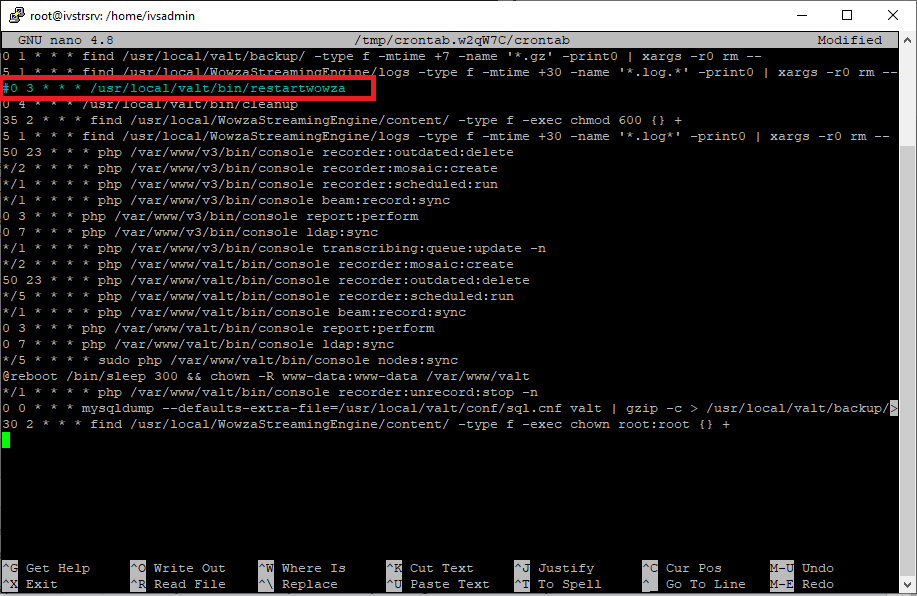
- Comment out the following job:
- Press CTRL + X to exit
- Press Y to save
0 3 * * * /usr/local/valt/bin/restartwowza
- Type in the following, then press Enter:
- Type in the following, then press Enter:
- Enter in the MySQL password and press Enter:
sudo chmod 777 -R /usr/local/WowzaStreamingEngine/content/
mysqldump -uivsadmin -p valt > valt.sql
- Copy over the database file to the new server
- Enter password for ivsadmin and press Enter:
scp valt.sql ivsadmin@NewServerIP:/home/ivsadmin/
On the New Server
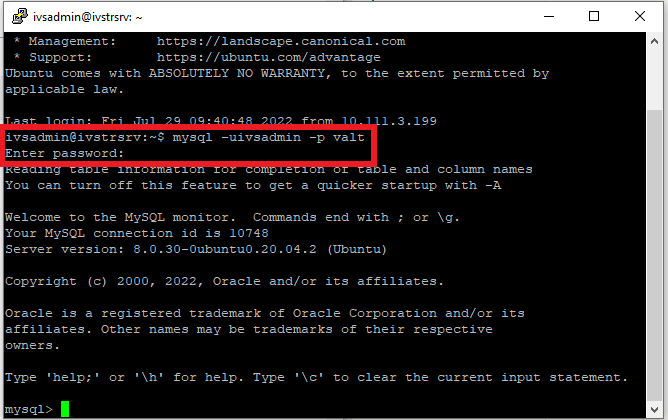
- Type in the following and press Enter:
-
mysql -uivsadmin -p valt
-
- Enter in the MySQL password and press Enter:
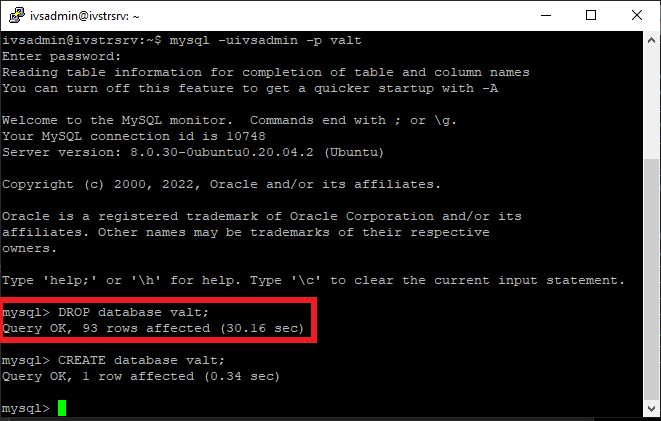
- Type in the following and press Enter:
DROP database valt;
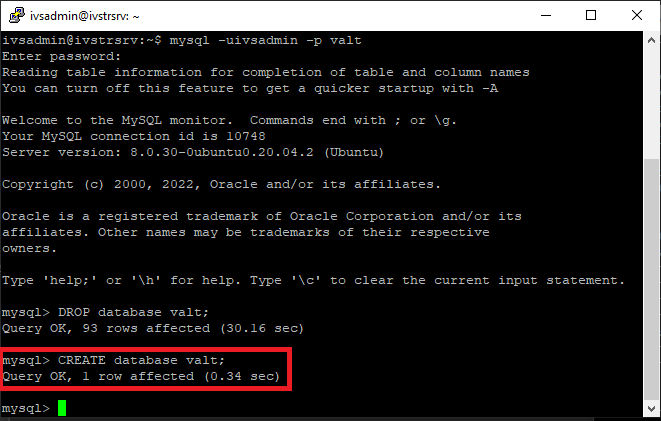
- Type in the following and press Enter:
CREATE database valt;
- Type in the following and press Enter:
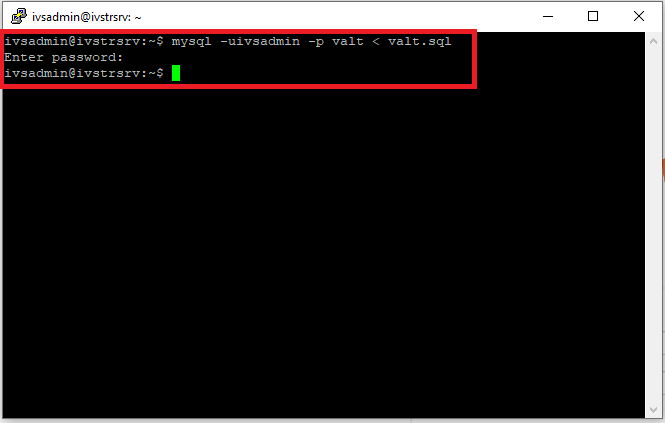
- Type in the following and press Enter:
- Enter in the MySQL password and press Enter:
exit
mysql -uivsadmin -p valt < valt.sql
- Type in the following and press Enter:
- Enter in the MySQL password and press Enter:
mysql -uivsadmin -p valt -e "UPDATE wowza SET address = 'NewServerIP'"
- Type in the following, then press Enter:
- When prompted, type yes to continue connecting to the server:
- Type in the ivsadmin password and press Enter:
✎
It can be useful to run the migration in a screen. Use screen -S video_migration to start a named session.
sudo rsync -av --progress ivsadmin@OldServerIP:/usr/local/WowzaStreamingEngine/content/valt_recordings/* /usr/local/WowzaStreamingEngine/content/valt_recordings/
- The video files will begin copying over to the new server and will look like this:
Things to note:
- Depending on the amount of video files, it may take some time for all of the files to transfer
- Assuming the copy is running at a full 1GB link, it will take about 2.8 hours per 1 TB of data
- After the video files are done copying over, you will see a confirmation message similar to the one below:
After the files have been copied over, navigate to the VALT webpage on the new server and verify that all of the files are there.
