Difference between revisions of "Template:VALT 6 Manual - Observe"
IVSWikiBlue (talk | contribs) |
IVSWikiBlue (talk | contribs) |
||
| (24 intermediate revisions by the same user not shown) | |||
| Line 1: | Line 1: | ||
__TOC__ | __TOC__ | ||
{{Section | width = 100% | title = <h1>Intro</h1> | content = | {{Section | width = 100% | title = <h1>Intro</h1> | content = | ||
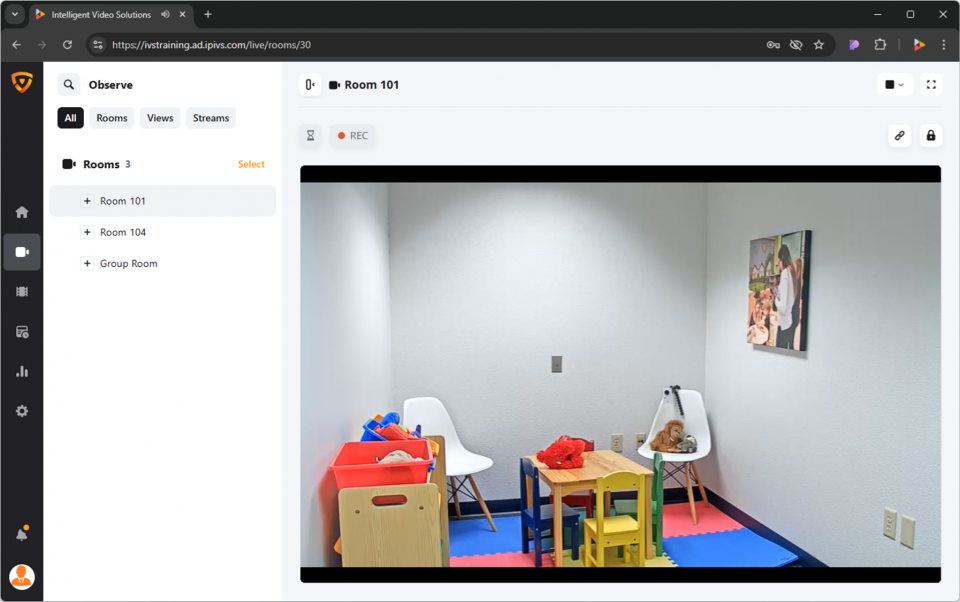
| − | The Observe section is where live observation and recording takes place. On this page you can find the rooms and streams that you have access to. | + | The Observe section is where live observation and recording takes place. On this page you can find the rooms, and streams that you have access to. |
| + | |||
| + | {{hr}} | ||
| + | |||
| + | {{img left | file = VALT 6.3 Manual-Observe 00.png | width = 960px}} | ||
Here you will be able to do the following: | Here you will be able to do the following: | ||
| + | {{Aside - Warning | hue = 50 | content = Not all features may be applicable for your application.}} | ||
*Perform [[#Live Observation|live observation]] | *Perform [[#Live Observation|live observation]] | ||
*[[#Start a Recording|Start]] and [[#Stop a Recording|stop]] recordings | *[[#Start a Recording|Start]] and [[#Stop a Recording|stop]] recordings | ||
| Line 9: | Line 14: | ||
*[[#Talkback|Talkback]] into a room | *[[#Talkback|Talkback]] into a room | ||
| + | {{Top of Page}} | ||
}} | }} | ||
{{Section | width = 100% | title = <h1>Live Observation</h1> | content = | {{Section | width = 100% | title = <h1>Live Observation</h1> | content = | ||
<h2>Search</h2> | <h2>Search</h2> | ||
| + | <ol> | ||
| + | <li>Click the {{img - icon | file = Search.png}} <strong>Search</strong> icon in the top left corner.</li> | ||
| + | <li>Type the name of the room, device, or stream you are looking for.</li> | ||
| + | <li>Look under <b>Rooms</b> for the search results.</li> | ||
| + | </ol> | ||
| + | |||
| + | {{Aside - Helpful | content = See the <b>search</b> feature in action! {{Try it out | link = https://app.storylane.io/share/qhybuoxgfho1}} }} | ||
| + | |||
| + | {{Top of Page}} | ||
| + | {{hr}} | ||
| + | |||
<h2>Filter</h2> | <h2>Filter</h2> | ||
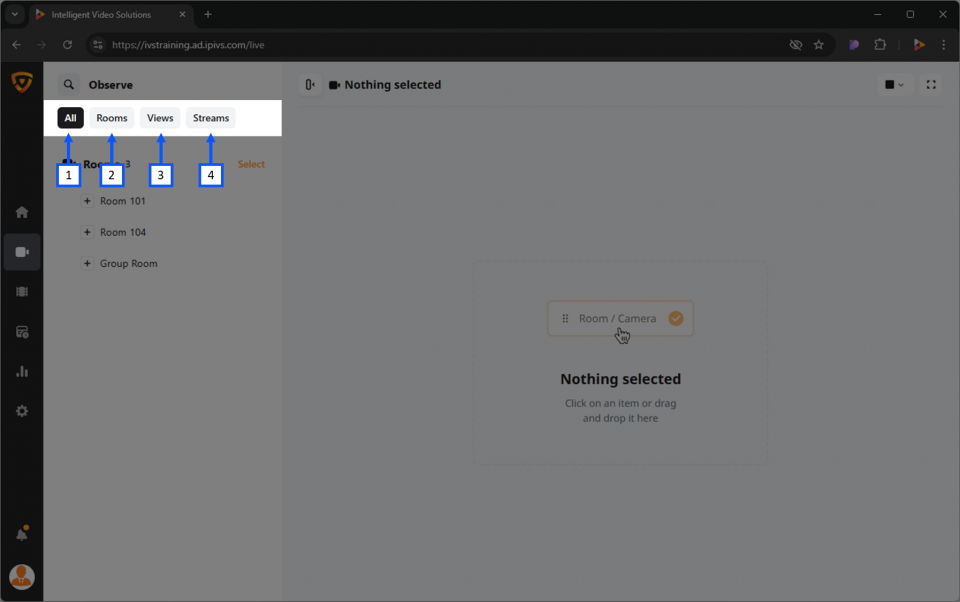
| + | Users can filter their list to show only specific items. | ||
| + | #<b>All</b> <em>(Default)</em><b>:</b> Selecting this will show all available items. | ||
| + | #<b>Rooms:</b> Selecting this will display only the rooms available to the user. | ||
| + | #:<em>Rooms are created by the administrators of the system.</em> | ||
| + | #<b>Views:</b> Selecting this will display any custom views available to the user. | ||
| + | #:<em>Views are saved collections of cameras and streams.</em> | ||
| + | #<b>Streams:</b> Selecting this will display all available streams to the user. | ||
| + | #:<em>BEAM streaming would fit under this category.</em> | ||
| + | |||
| + | {{img left | width = 960px | file = VALT 6.3 Manual-Observe 02.png}} | ||
| + | |||
| + | {{Top of Page}} | ||
| + | {{hr}} | ||
| + | |||
<h2>Select</h2> | <h2>Select</h2> | ||
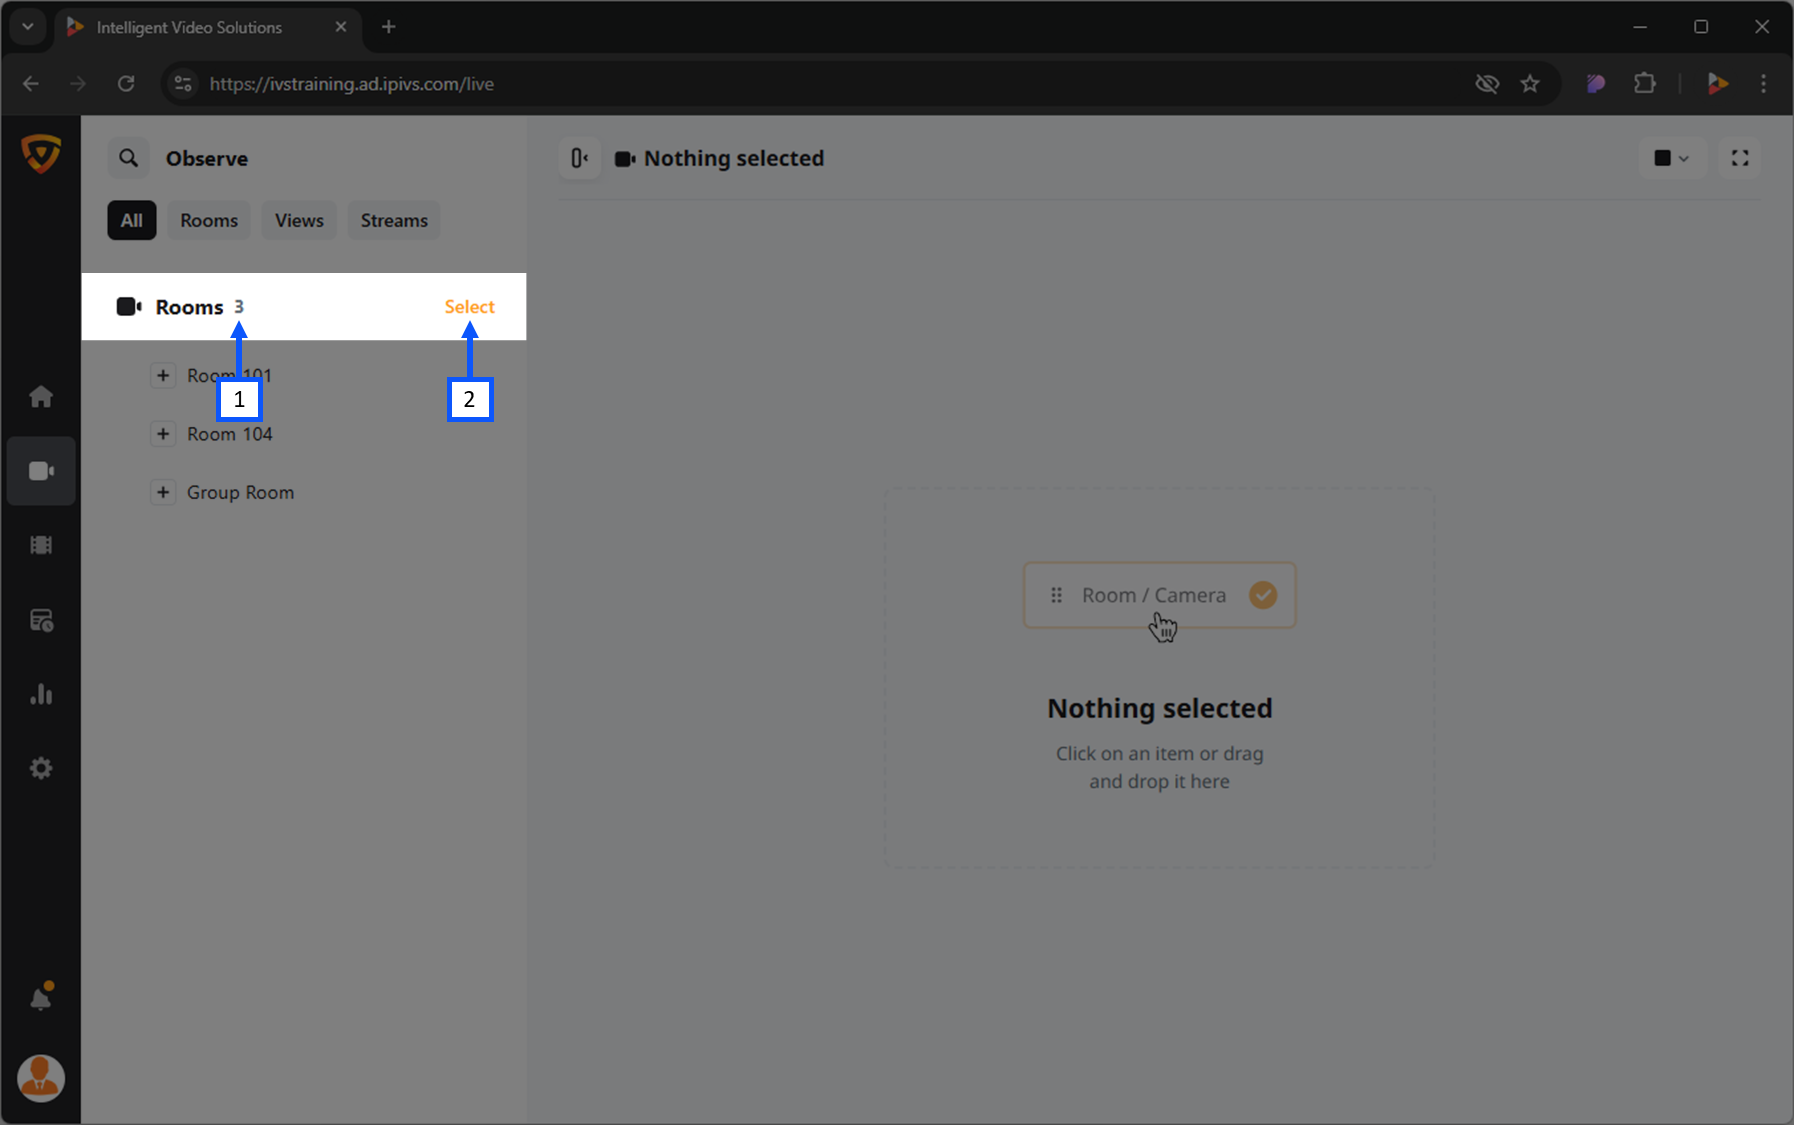
| + | The <b>Select</b> option allows users to <b>[[#Start Multiple Recordings|start multiple recordings]]</b> and <b>[[#Stop Multiple Recordings|stop multiple recordings]]</b> in multiple rooms. | ||
| + | |||
| + | {{img with key | width = 960px | file = VALT 6.3 Manual-Observe 03.png | list = | ||
| + | <li>Number of Rooms</li> | ||
| + | <li><b>Select</b>: Opens the selction tool to check multiple rooms to perform an action.</li> | ||
| + | }} | ||
| + | |||
| + | {{Top of Page}} | ||
| + | {{hr}} | ||
| + | |||
<h2>Open a Room</h2> | <h2>Open a Room</h2> | ||
| + | <ol> | ||
| + | <li>Locate the room from the list.</li> | ||
| + | <li>Click on the name of that room.</li> | ||
| + | </ol> | ||
| + | |||
| + | {{Top of Page}} | ||
| + | {{hr}} | ||
| + | |||
<h2>Open a Stream</h2> | <h2>Open a Stream</h2> | ||
| + | <ol> | ||
| + | <li>Locate a room that contains the desired stream.</li> | ||
| + | <li>Expand the room by clicking the {{Expand Icon}} <b>Expand</b> icon.</li> | ||
| + | <li>Click on the name of the stream.</li> | ||
| + | </ol> | ||
| + | |||
| + | {{Top of Page}} | ||
| + | {{hr}} | ||
| + | |||
<h2>Camera Control</h2> | <h2>Camera Control</h2> | ||
| + | Each video feed will have a variety of options for control. These controls can vary depending on the type of camera/device. | ||
| + | *Pan-Tilt-Zoom (PTZ) camera | ||
| + | *Fixed camera | ||
| + | |||
| + | {{Top of Page}} | ||
| + | {{hr}} | ||
| + | |||
<h3>Digital Zoom</h3> | <h3>Digital Zoom</h3> | ||
| − | <h3>Move Camera</h3> | + | Users can zoom in and out on any video feed using a digital zoom. This zooming is only viewable to the user performing the zoom. This means that it will not impact a recording and will not affect other users live observing the feed. |
| + | |||
| + | A digital zoom will only take the existing pixels and make them larger. This means there is no increase in image quality. | ||
| + | {{Aside - Helpful | content = Want to see <b>Digital Zoom</b> in action! {{Try it out | link = https://app.storylane.io/share/qhybuoxgfho1}} }} | ||
| + | |||
| + | {{Top of Page}} | ||
| + | {{hr}} | ||
| + | |||
| + | <h3>Move Camera (PTZ)</h3> | ||
| + | #Click on the {{img - icon | file = Camera_Control.png | width = 18px}} <strong>PTZ</strong> icon. | ||
| + | #Position the {{img - icon | file = Bullseye.png | width = 18px}} <strong>bullseye</strong> on the desired location. | ||
| + | #*Left click to center view on that point. | ||
| + | #*Mouse scroll wheel is used to zoom in and out. | ||
| + | |||
| + | {{Aside - Helpful | content = Want to see <b>Camera Control (PTZ)</b> in action! {{Try it out | link = https://app.storylane.io/share/qbficrisonph}} }} | ||
| + | |||
| + | {{Top of Page}} | ||
| + | {{hr}} | ||
| + | |||
<h3>Presets</h3> | <h3>Presets</h3> | ||
| + | The preset dropdown enables users to quickly navigate to predefined locations with specific camera zoom levels. | ||
| + | |||
<h4>Create Preset</h4> | <h4>Create Preset</h4> | ||
| + | #Using the {{img - icon | file = Camera_Control.png | width = 18px}} <b>PTZ control</b>, move the camera to the desired location. | ||
| + | #Click the '<b>Select Preset</b>' dropdown and select '<b>Save Current</b>'. | ||
| + | |||
| + | {{hr - 2}} | ||
| + | |||
<h4>Delete Preset</h4> | <h4>Delete Preset</h4> | ||
| + | #Click the '<b>Select Preset</b>' dropdown. | ||
| + | #Hover over the preset to be deleted and click the {{img - icon | file = Delete.png}} <b>Delete</b> icon. | ||
| + | |||
| + | {{Top of Page}} | ||
| + | {{hr}} | ||
| + | |||
<h2>Talkback</h2> | <h2>Talkback</h2> | ||
| + | Clicking the {{img - icon | file = Talkback.png | width = 16px}} <b>Talkback</b> icon allows a user to talk back into a room using the audio output on the camera (assuming this output has been wired to a speaker or audio transmitter). | ||
| + | |||
| + | {{Top of Page}} | ||
| + | {{hr}} | ||
| + | |||
<h2>Sound Control</h2> | <h2>Sound Control</h2> | ||
| + | The {{img - icon | file = Audio.png | width = 18px}} <b>speaker</b> icon mutes / unmutes the audio for that camera. When viewing multiple cameras, the user can control which audio channel they are listening to using this button. | ||
| + | |||
| + | {{Top of Page}} | ||
| + | {{hr}} | ||
| + | |||
<h2>Fullscreen Mode</h2> | <h2>Fullscreen Mode</h2> | ||
<h2>Share Settings</h2> | <h2>Share Settings</h2> | ||
| Line 54: | Line 160: | ||
<h2>Resume a Recording</h2> | <h2>Resume a Recording</h2> | ||
<h2>Stop a Recording</h2> | <h2>Stop a Recording</h2> | ||
| + | <h2>Select</h2> | ||
| + | <h3>Start Multiple Recordings</h3> | ||
| + | <h3>Stop Multiple Recordings</h3> | ||
| + | <h3></h3> | ||
<h2>Sharing Link</h2> | <h2>Sharing Link</h2> | ||
<h2>Comments</h2> | <h2>Comments</h2> | ||
Latest revision as of 18:18, 13 February 2025
Contents
- 1 Intro
- 2 Live Observation
- 3 Recording


