Difference between revisions of "Template:VALT Keypad 3 - Old"
IVSWikiBlue (talk | contribs) (→Through the Web Interface) |
IVSWikiBlue (talk | contribs) m (IVSWikiBlue moved page VALT PIN Code Keypad to Template:VALT Keypad 3 - Old without leaving a redirect) |
||
| (6 intermediate revisions by the same user not shown) | |||
| Line 1: | Line 1: | ||
=Configuration= | =Configuration= | ||
| + | ===Creating the Cable=== | ||
| + | # Cut two 15 foot lengths of 22/8 cable | ||
| + | # Use a 2x20 pin connector, a 2x3 pin connector, and a 1x7 pin connector, crimp and connect as shown below | ||
| + | : [[File:Key 2by20pins.jpg|300px|https://ipivs.com/wiki/images/2/2d/Key_2by20pins.jpg]] | ||
| + | : [[File:Keypad2by3.jpg|300px|https://ipivs.com/wiki/images/0/01/Keypad2by3.jpg]] | ||
| + | : [[File:Key 1by7.jpg|300px|https://ipivs.com/wiki/images/9/90/Key_1by7.jpg]] | ||
===How to Connect=== | ===How to Connect=== | ||
| − | Attach the wiring | + | A GPIO cable will be connected to the processing unit. Connect the cable as shown below. Ensure that the black cable in the 2x20 pin connector aligns with the white cable on the GPIO cable. |
| − | : [[File: | + | Attach the wiring to the physical keypad as shown |
| − | : [[File: | + | : [[File:Key gpioConnected.jpg|300px|https://ipivs.com/wiki/images/b/b3/Key_gpioConnected.jpg]] |
| − | : | + | : [[File:Keypad connected.jpg|300px|https://ipivs.com/wiki/images/3/3d/Keypad_connected.jpg]] |
====DHCP==== | ====DHCP==== | ||
| Line 40: | Line 46: | ||
#Open up a web browser and type in the IP address of the keypad. | #Open up a web browser and type in the IP address of the keypad. | ||
#:''Make sure to add "https://" to the beginning of the IP. | #:''Make sure to add "https://" to the beginning of the IP. | ||
| − | #Log into the keypad using its | + | #Log into the keypad using its credentials. |
| − | + | {| class="wikitable" | |
| − | + | |- | |
| − | + | ! colspan="2" | Default Credentials | |
| + | |- | ||
| + | | '''Username''' | ||
| + | | ivs | ||
| + | |- | ||
| + | | '''Password''' | ||
| + | | admin51 | ||
| + | |} | ||
[[File:Keypad Webpage.png|1300px|link=https://ipivs.com/wiki/images/5/5b/Keypad_Webpage.png]] | [[File:Keypad Webpage.png|1300px|link=https://ipivs.com/wiki/images/5/5b/Keypad_Webpage.png]] | ||
| + | #Log into your VALT server and go to the Observe tab. | ||
| + | #:Use the IP or domain of your VALT server. | ||
| + | #:Open the room you want to connect to the keypad. | ||
| + | #:Look at the URL bar to find the room number. You will use this to connect the keypad to that room. | ||
| + | [[File:VALT Screen Locations.png|1300px|link=https://ipivs.com/wiki/images/8/80/VALT_Screen_Locations.png]] | ||
| + | #Go through the fields and fill out the information specific to your installation. | ||
| + | [[File:Webpage Info.png|1300px|link=https://ipivs.com/wiki/images/f/f2/Webpage_Info.png]] | ||
====Through Putty==== | ====Through Putty==== | ||
Latest revision as of 15:41, 29 March 2024
Contents
Configuration
Creating the Cable
- Cut two 15 foot lengths of 22/8 cable
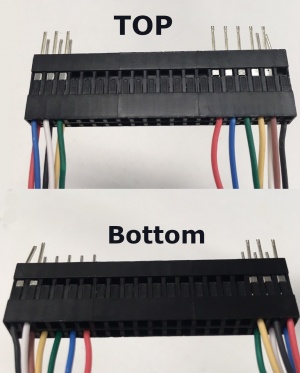
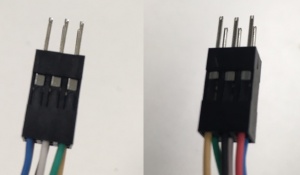
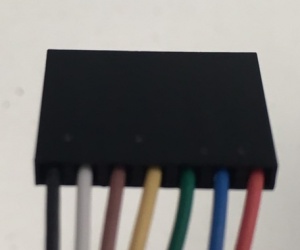
- Use a 2x20 pin connector, a 2x3 pin connector, and a 1x7 pin connector, crimp and connect as shown below
How to Connect
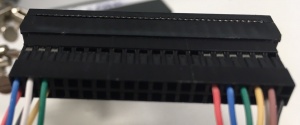
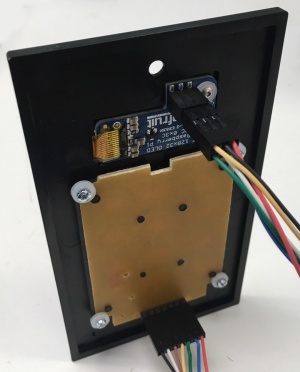
A GPIO cable will be connected to the processing unit. Connect the cable as shown below. Ensure that the black cable in the 2x20 pin connector aligns with the white cable on the GPIO cable. Attach the wiring to the physical keypad as shown
DHCP
The VALT Keypad will automatically pull an IP address from DHCP. The IP address can be obtained by reviewing DHCP leases on the associated DHCP server. The hostname of the device is Keypad.
Static
If no DHCP server is available, the VALT Keypad will default to a static IP address of 192.168.0.92.
Manual
The IP address from the keypad may also be obtained directly by plugging in a keyboard and running the following command from the console:
ifconfig | more
The IP address will be listed under interface eth0.
Manually Setting an IP Address
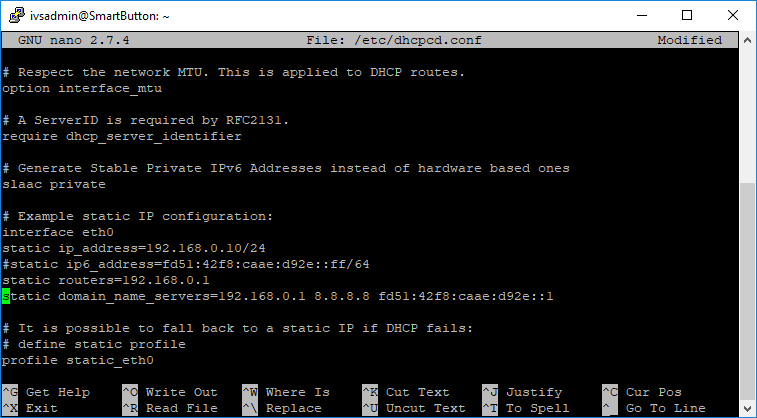
In order to set the IP address manually, connect to the Keypad using the ivsadmin user. The ivsuser account cannot change any settings. If connecting from the console, type the following to change accounts. There will be prompt for the ivsadmin password.su ivsadmin
- Type the following, and press Enter:
sudo nano /etc/dhcpcd.conf
- Scroll down until to the section for interface eth0.
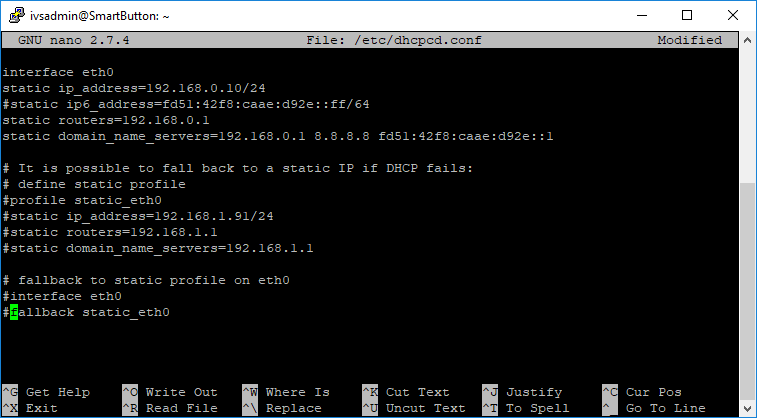
- Remove the # at the start of the lines for static IP, static routers, and static domain_name_servers.
- Update the IP configuration to reflect the correct settings for the environment.
- Comment out the remaining lines in the file by adding a # to the start of the line.
Configuring the Keypad
Through the Web Interface
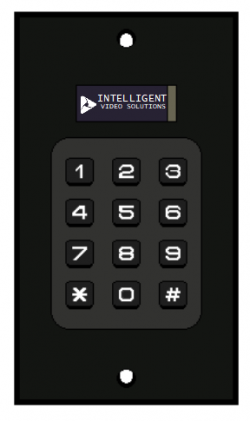
- Make sure the key pad is plugged in and on.
- If it is on you will see the IVS logo displayed on the screen
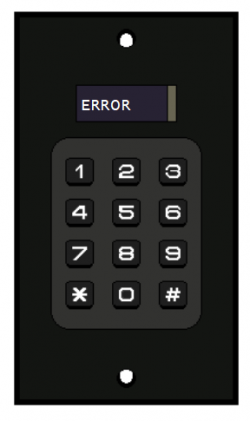
- If you see the error screen, the keypad is not connected to the server. For right now, this is okay.
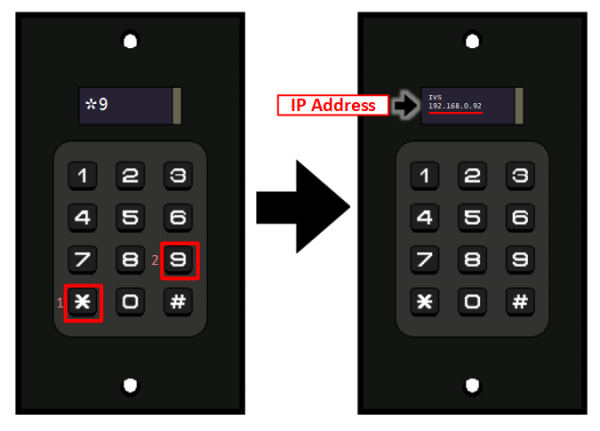
- On the keypad, type *9 to get the IP address of that device.
- The default IP address of the keypad is 192.168.0.92
- Connect your computer to the same network as the keypad.
- Open up a web browser and type in the IP address of the keypad.
- Make sure to add "https://" to the beginning of the IP.
- Log into the keypad using its credentials.
| Default Credentials | |
|---|---|
| Username | ivs |
| Password | admin51 |
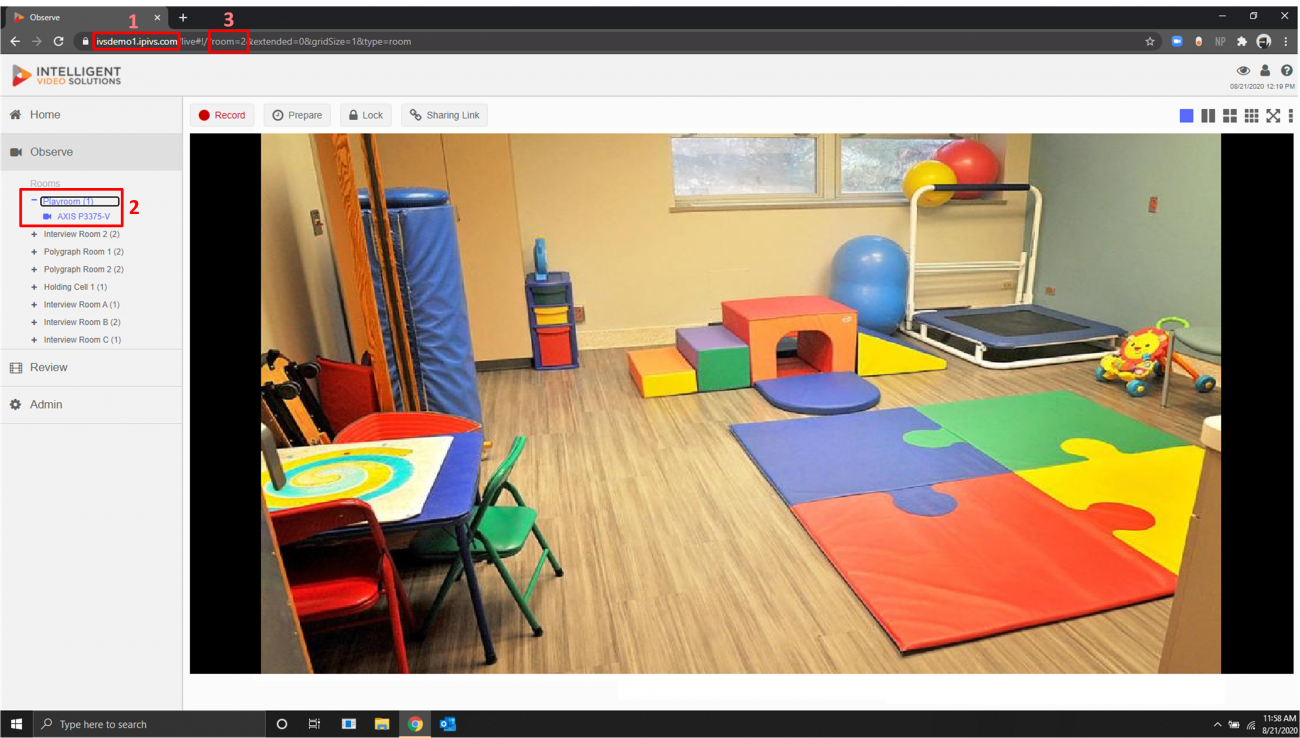
- Log into your VALT server and go to the Observe tab.
- Use the IP or domain of your VALT server.
- Open the room you want to connect to the keypad.
- Look at the URL bar to find the room number. You will use this to connect the keypad to that room.
- Go through the fields and fill out the information specific to your installation.
Through Putty
- Type the following, and press Enter:
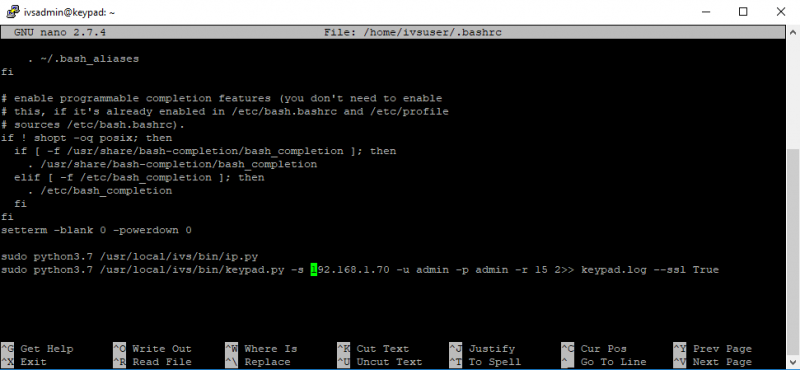
sudo nano /home/ivsuser/.bashrc
- Scroll down to the bottom of the file.
- Modify the last command in the file to match your environment. Make sure to remove the # from the beginning of the line. The settings are listed below.
| -s | Server IP Address or DNS entry |
| -u | VALT Username |
| -p | VALT Password |
| -r | VALT Room Number |
| --ssl | True if the VALT server is using https, otherwise omit this option. |
sudo reboot
The keypad should begin functioning normally.
Star Commands
Typing any of the commands in the table below into the keypad will result in triggering a special function.
| *1 | Share Current Recording With A User |
| *2 | Share Current Recording With A Group |
| *3 | Pause Current Recording |
| *4 | Add a Marker |
| *5 | Not Used Currently |
| *6 | Not Used Currently |
| *7 | Menu |
| *8 | Reboot Keypad |
| *9 | Display IP Address |
| *0 | Reset LED Display |
Disable the Fan
- Connect to the keypad via SSH.
- Type the following, and press Enter:
sudo nano /boot/config.txt
- Scroll down to the bottom of the file and add the following line:
disable_poe_fan=1
- Save the file.
- Reboot the keypad.
