Difference between revisions of "Template:3235 Aim the Camera"
IVSWikiBlue (talk | contribs) (→Aim the Camera) |
IVSWikiBlue (talk | contribs) (→Aim the Camera) |
||
| Line 2: | Line 2: | ||
#In order to aim the camera, it will need to be accessed via the Axis web portal. | #In order to aim the camera, it will need to be accessed via the Axis web portal. | ||
#If the camera is being powered off the network, run Axis IP utility in order to discover the camera. Clicking the IP address will route to the Axis web portal | #If the camera is being powered off the network, run Axis IP utility in order to discover the camera. Clicking the IP address will route to the Axis web portal | ||
| − | #: [[File:IPutility.jpg|link= | + | #: [[File:IPutility.jpg|link=]] |
#If that does not work then use a POE injector to connect to the camera and the default IP. (default Axis IP = 192.168.0.90) | #If that does not work then use a POE injector to connect to the camera and the default IP. (default Axis IP = 192.168.0.90) | ||
#Using a laptop/PC, enter the IP address assigned to the camera into a web browser. | #Using a laptop/PC, enter the IP address assigned to the camera into a web browser. | ||
| − | #:[[File:WebPortalLogIn.jpg|link= | + | #:[[File:WebPortalLogIn.jpg|link=|900px]] |
#Using the IVS admin credentials, log into the camera. | #Using the IVS admin credentials, log into the camera. | ||
#: User: root | #: User: root | ||
#: Password: admin51 | #: Password: admin51 | ||
#Once in the Axis web portal, activate the camera live view. | #Once in the Axis web portal, activate the camera live view. | ||
| − | #: [[File:PreLiveMode.jpg|link= | + | #: [[File:PreLiveMode.jpg|link=|900px]] [[File:Liveview.jpg|link=|900px]] |
#Begin by manually adjusting camera's viewing area using the manual tilt and focus mechanisms on the camera. | #Begin by manually adjusting camera's viewing area using the manual tilt and focus mechanisms on the camera. | ||
| − | #: [[File:3235rotation.jpg|link= | + | #: [[File:3235rotation.jpg|link=]] |
#Using the digital zoom function in the web portal, make any other adjustments needed. | #Using the digital zoom function in the web portal, make any other adjustments needed. | ||
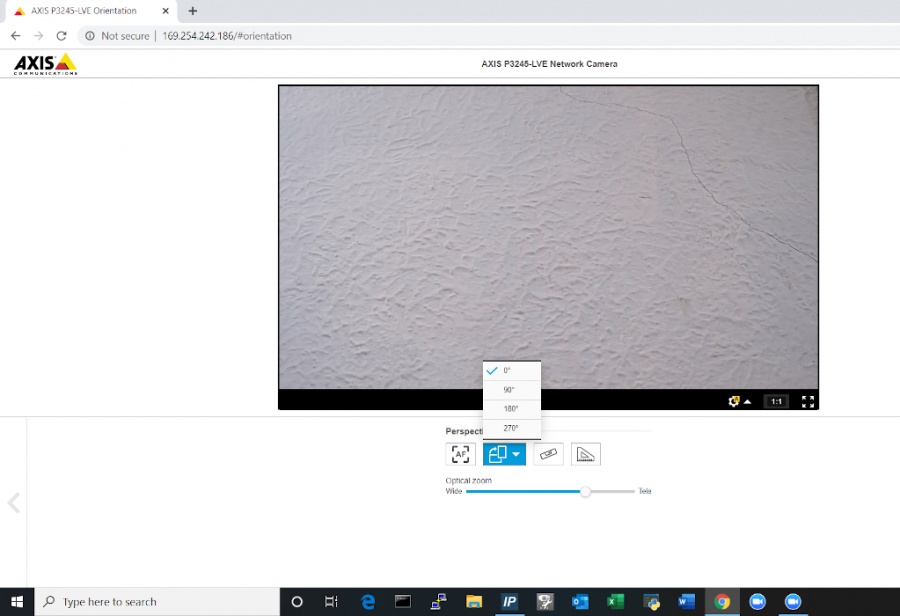
#The image field may also be rotated in the web portal if necessary. | #The image field may also be rotated in the web portal if necessary. | ||
| − | #: [[File:LiveviewRotate.jpg|link= | + | #: [[File:LiveviewRotate.jpg|link=|900px]] |
#Be sure to click the Autofocus button. This will focus the camera and ensure that the autofocus is properly functioning. | #Be sure to click the Autofocus button. This will focus the camera and ensure that the autofocus is properly functioning. | ||
| − | #: [[File:LiveAutoFocus.jpg|link= | + | #: [[File:LiveAutoFocus.jpg|link=|900px]] |
#:''Note:'' This must be done before securing the dome. | #:''Note:'' This must be done before securing the dome. | ||
Latest revision as of 14:53, 10 May 2022
Aim the Camera
- In order to aim the camera, it will need to be accessed via the Axis web portal.
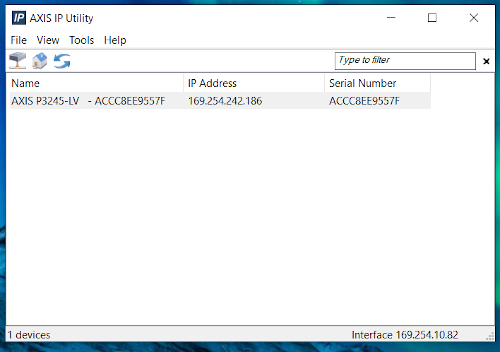
- If the camera is being powered off the network, run Axis IP utility in order to discover the camera. Clicking the IP address will route to the Axis web portal
-
- If that does not work then use a POE injector to connect to the camera and the default IP. (default Axis IP = 192.168.0.90)
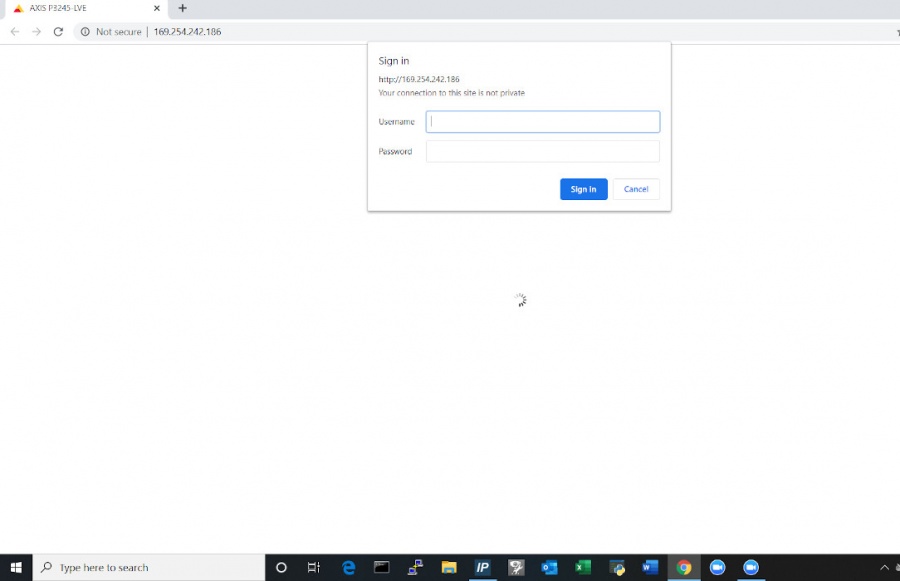
- Using a laptop/PC, enter the IP address assigned to the camera into a web browser.
- Using the IVS admin credentials, log into the camera.
- User: root
- Password: admin51
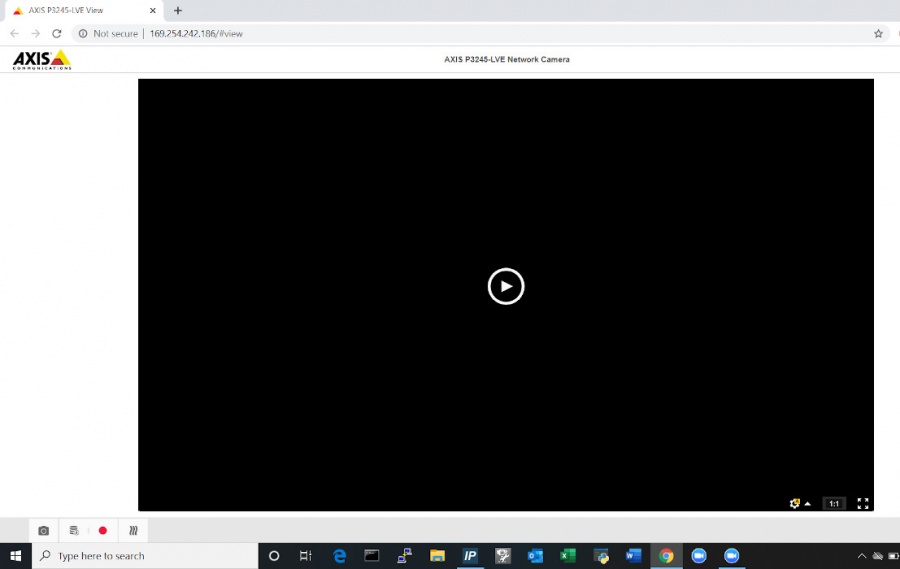
- Once in the Axis web portal, activate the camera live view.
-
- Begin by manually adjusting camera's viewing area using the manual tilt and focus mechanisms on the camera.
-
- Using the digital zoom function in the web portal, make any other adjustments needed.
- The image field may also be rotated in the web portal if necessary.
-
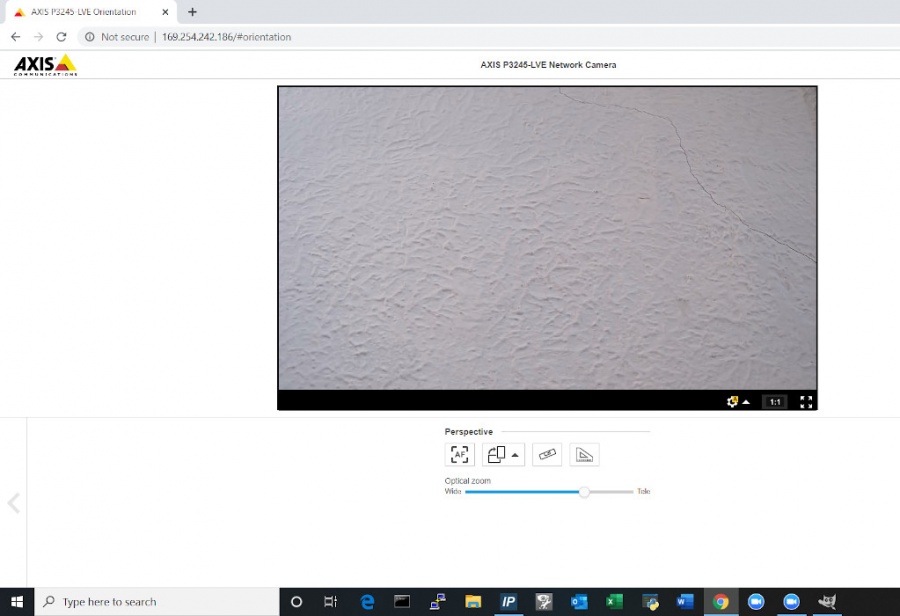
- Be sure to click the Autofocus button. This will focus the camera and ensure that the autofocus is properly functioning.
-
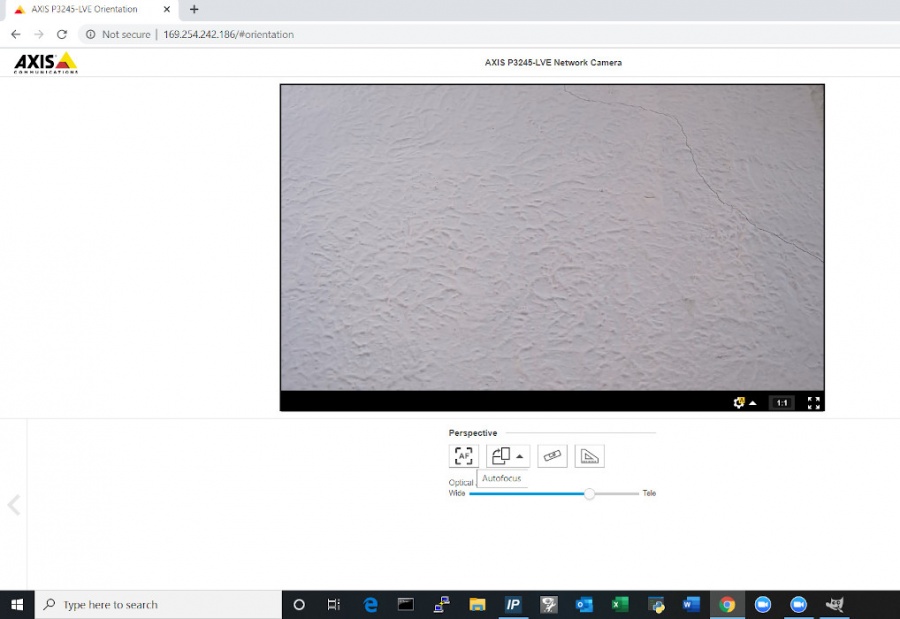
- Note: This must be done before securing the dome.
-
