Difference between revisions of "Transcription"
IVSWikiBlue (talk | contribs) (Created page with "<div class='floating_card'>Prior to setting up transcription you will need an Amazon AWS account, an S3 storage bucket and a Access ID & Secret Key for API access.</div> ==AW...") |
IVSWikiBlue (talk | contribs) |
||
| Line 1: | Line 1: | ||
| − | < | + | {{Article - Manual | content = |
| + | {{Aside | hue = 170 | content = This page uses {{img - tooltip | text = image examples | file = VALT_6.3_Manual-Home_00.png | width = 1000px}} }} | ||
| + | {{Aside - Helpful | content = <strong>Prior to setting up transcription</strong> you will need: | ||
| + | *an Amazon AWS account | ||
| + | *an S3 storage bucket | ||
| + | *and a Access ID & Secret Key <em>(for API access</em>)}} | ||
| − | |||
| − | |||
| − | < | + | <h1>AWS Transcription Setup</h1> |
| − | + | {{Manual lvl 2 | title = Create the AWS Bucket | content = | |
| − | + | <ol> | |
| − | </ | + | <li>Log into AWS with a root level account</li> |
| + | <li>Click on the {{img - tooltip | file = transcribe_1.png | text = S3 | width = 700px}} Storage service</li> | ||
| + | <li>Press the {{img - tooltip | file = transcribe_2.png | text = Create New Bucket | width = 1400px}} button</li> | ||
| + | {{hr - 2}} | ||
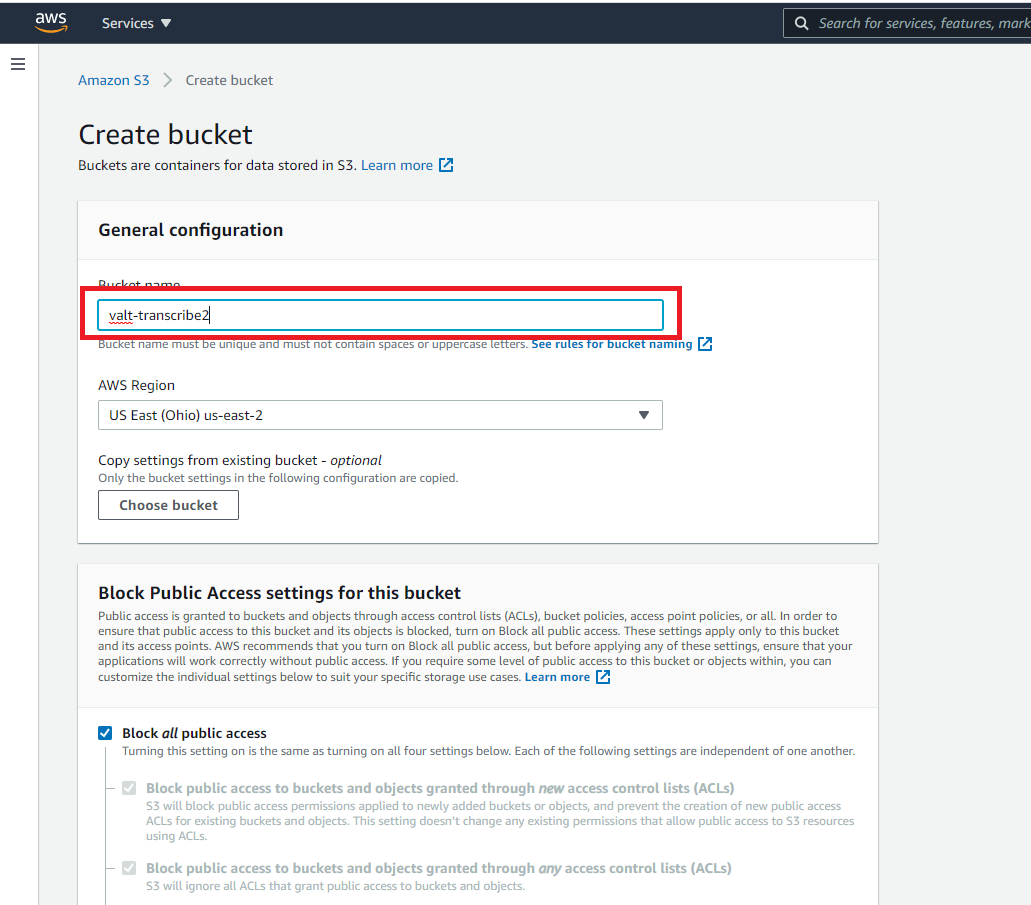
| + | <li>Give the bucket a name</li> | ||
| + | </ol> | ||
| + | {{Section - Expand | title = Image Example | color = #f6c62a | content = <center>{{img - resize | file = transcribe_3.png}}</center> }} | ||
| + | {{hr - 2}} | ||
| + | <ol start="5"> | ||
| + | <li>Click the <b>Save</b> button</li> | ||
| + | </ol> | ||
| + | }} | ||
| − | + | {{hr}} | |
| − | + | {{Manual lvl 2 | title = Gather Credentials & Keys | content = | |
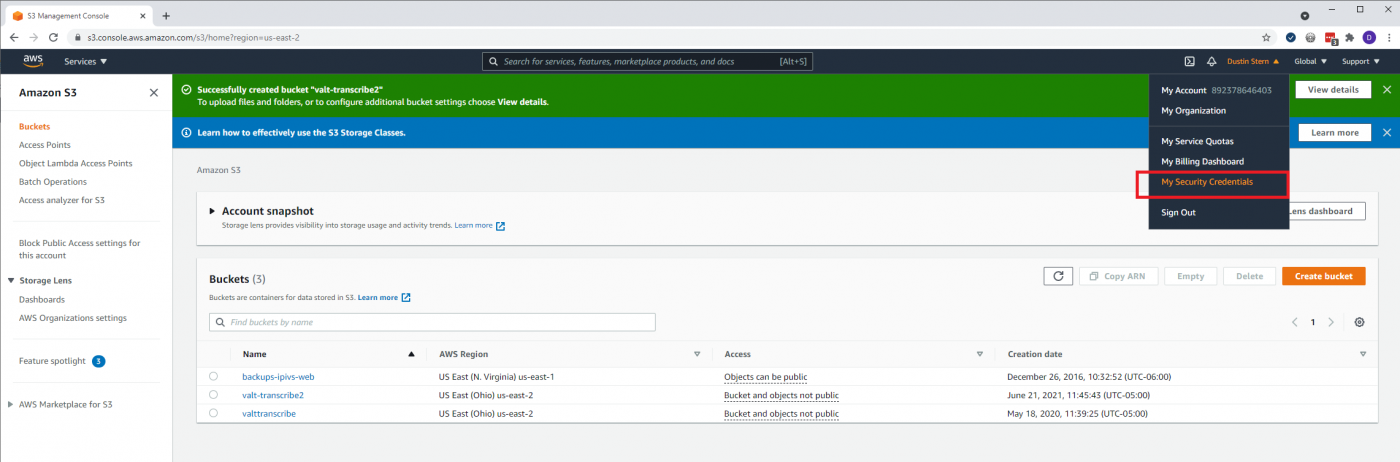
| − | * | + | * Click on the account name then select {{img - tooltip | file = transcribe_4.png | text = My Security Credentials | width = 1400px}} |
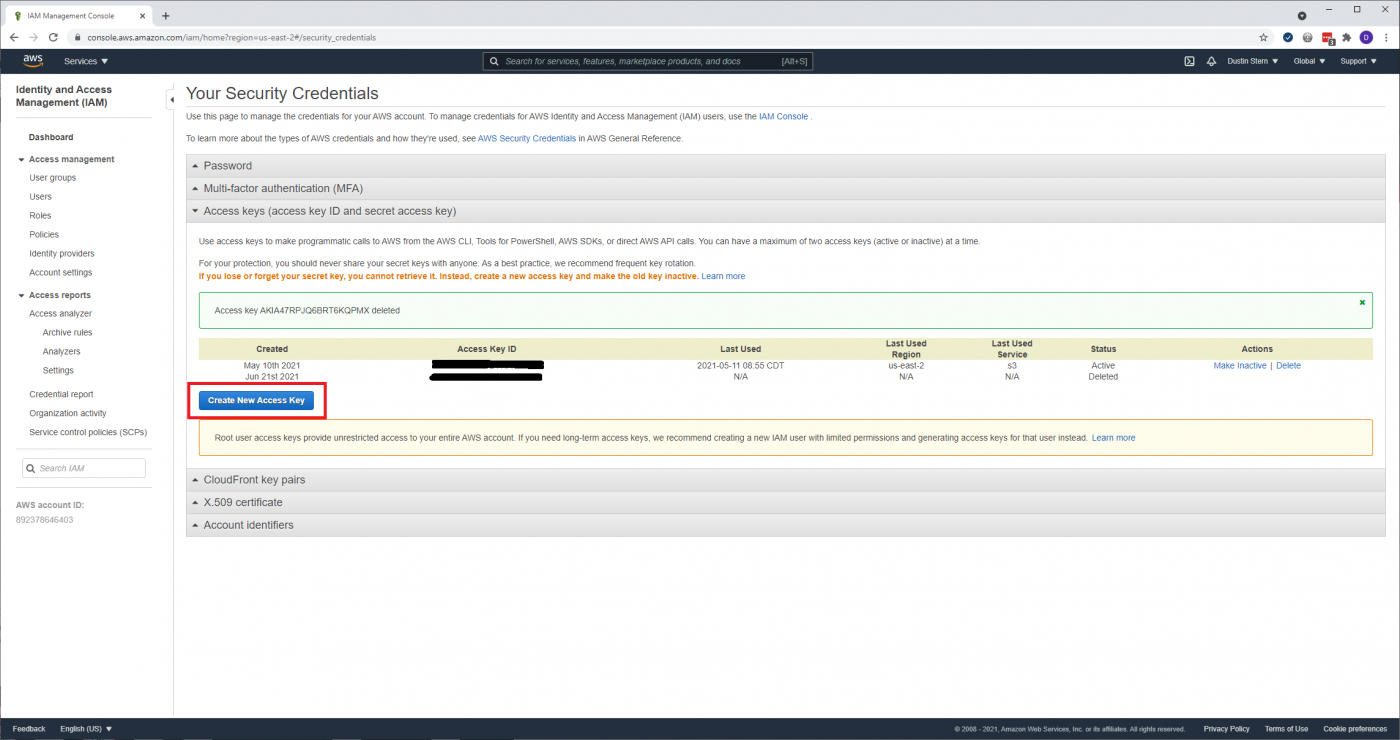
| − | </ | + | * Click on the {{img - tooltip | file = transcribe_5.png | text = Create New Access Key | width = 1400px}} button |
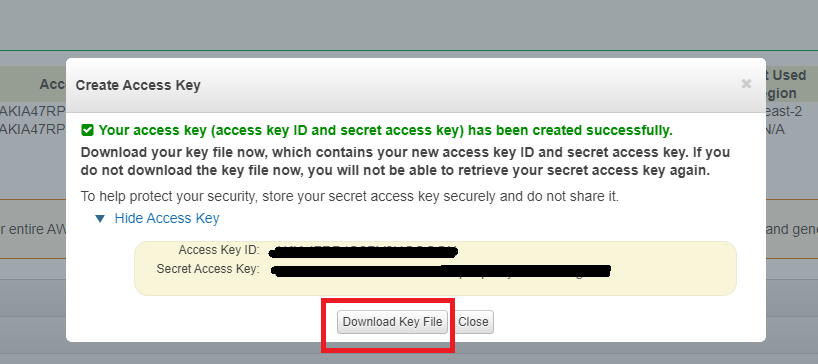
| + | * Download and save the Key file | ||
| + | {{Section - Expand | title = Image Example | color = #f6c62a | content = <center>{{img - resize | file = transcribe_6.png}}</center> }} | ||
| + | {{Aside - Helpful | content = you will need this to configure VALT later}} | ||
| + | }} | ||
| − | |||
| − | + | {{Top of Page}} | |
| − | + | {{hr}} | |
| − | |||
| − | |||
| − | + | <h1>VALT Transcription Setup</h1> | |
| + | {{Manual lvl 2 | title = Add Transcription Server | content = | ||
| + | <!--transcribe_7.png--> | ||
| + | <ol> | ||
| + | <li>Click on the <b>"Admin"</b> section then select <b>"Transcription"</b></li> | ||
| + | <li>Click on <b>"Add Transcription Service"</b></li> | ||
| + | <li>Enter a <b>name</b> <em>(this is just a unique identifier used by VALT)</em></li> | ||
| + | <li>Enter the <b>Access Key ID</b> gathered from AWS</li> | ||
| + | <li>Enter the <b>Secret Key</b> that matches the <b>Access Key</b> from AWS</li> | ||
| + | <li>Select the <b>Region</b> that the AWS bucket is set within</li> | ||
| + | <li>Click <b>Save</b></li> | ||
| + | </ol> | ||
| + | }} | ||
| − | |||
| − | |||
| − | |||
| − | + | {{Top of Page}} | |
| + | {{hr}} | ||
| − | < | + | {{Manual lvl 2 | title = Assign Service to Media Server | content = |
| − | + | <!-- transcribe_8.png --> | |
| − | </ | + | <ol> |
| + | <li>Click on the <b>"Admin"</b> section then select <b>"Media Servers"</b></li> | ||
| + | <li>Click on a <b>media server</b> you want to associate with the newly created transcription service</li> | ||
| + | <li>Click on the <b>"Transcription Service"</b> drop down and select the name of the transcription service</li> | ||
| + | <li>Click <b>Save</b></li> | ||
| + | </ol> | ||
| + | }} | ||
| − | |||
| − | + | {{Top of Page}} | |
| − | + | {{hr}} | |
| − | |||
| − | + | <h1>VALT Permissions</h1> | |
| + | To <b>add</b> and <b>edit</b> transcripts, you will need to be granted the appropriate permissions in VALT. The following videos outline where to enable these permissions and show you how to use them! | ||
| + | |||
| + | {{ hr - 2}} | ||
| + | |||
| + | : [https://valt.wistia.com/medias/sz0m1td9u0 ▶️ Add Transcript] | ||
| + | : [https://valt.wistia.com/medias/2a1tzc59lh ▶️ Edit Transcript] | ||
| − | |||
| − | |||
| − | |||
| − | |||
| − | |||
| − | |||
| − | |||
| − | |||
| − | |||
| − | {{ | + | {{Top of Page}} |
| − | |||
| − | |||
| − | |||
| − | |||
}} | }} | ||
Revision as of 13:48, 8 May 2025
✎
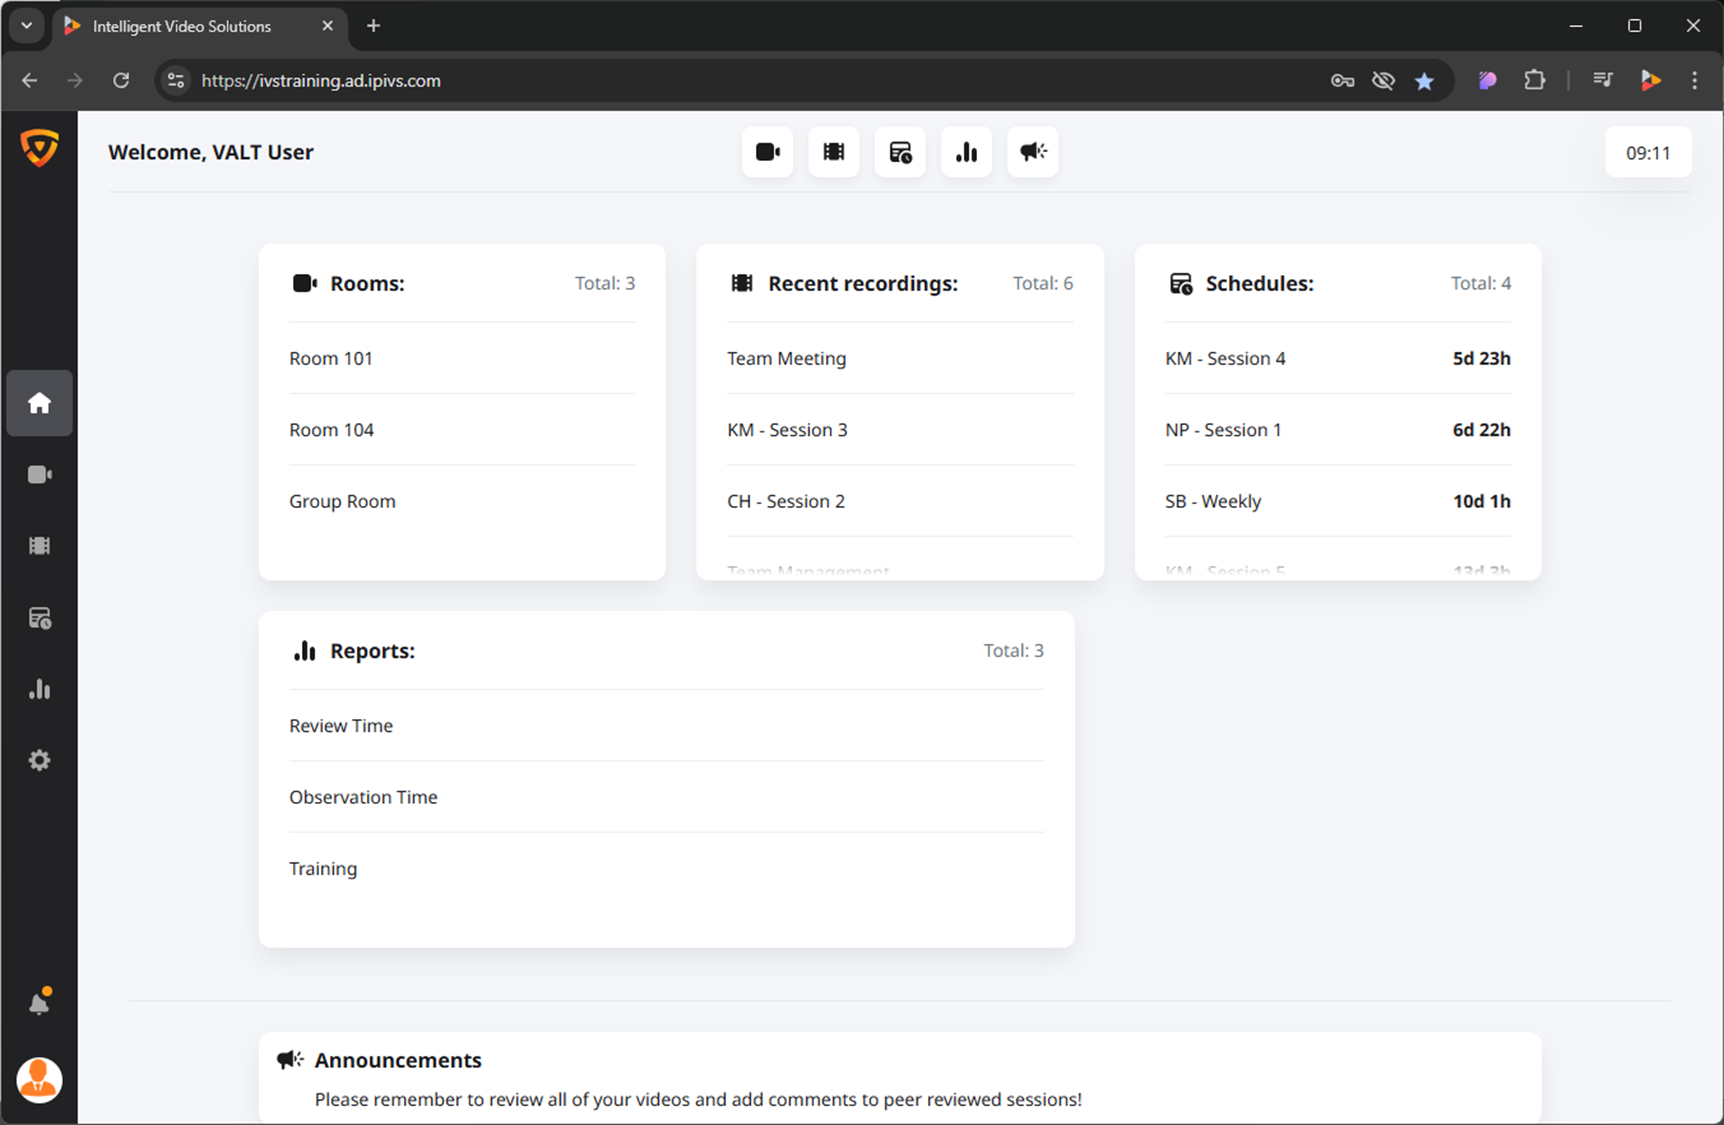
This page uses image examples 🖼️
🖼️
 🖼️
🖼️🕮
Prior to setting up transcription you will need:
- an Amazon AWS account
- an S3 storage bucket
- and a Access ID & Secret Key (for API access)
AWS Transcription Setup
Create the AWS Bucket
- Log into AWS with a root level account
- Click on the S3
 🖼️ Storage service
 - Press the Create New Bucket
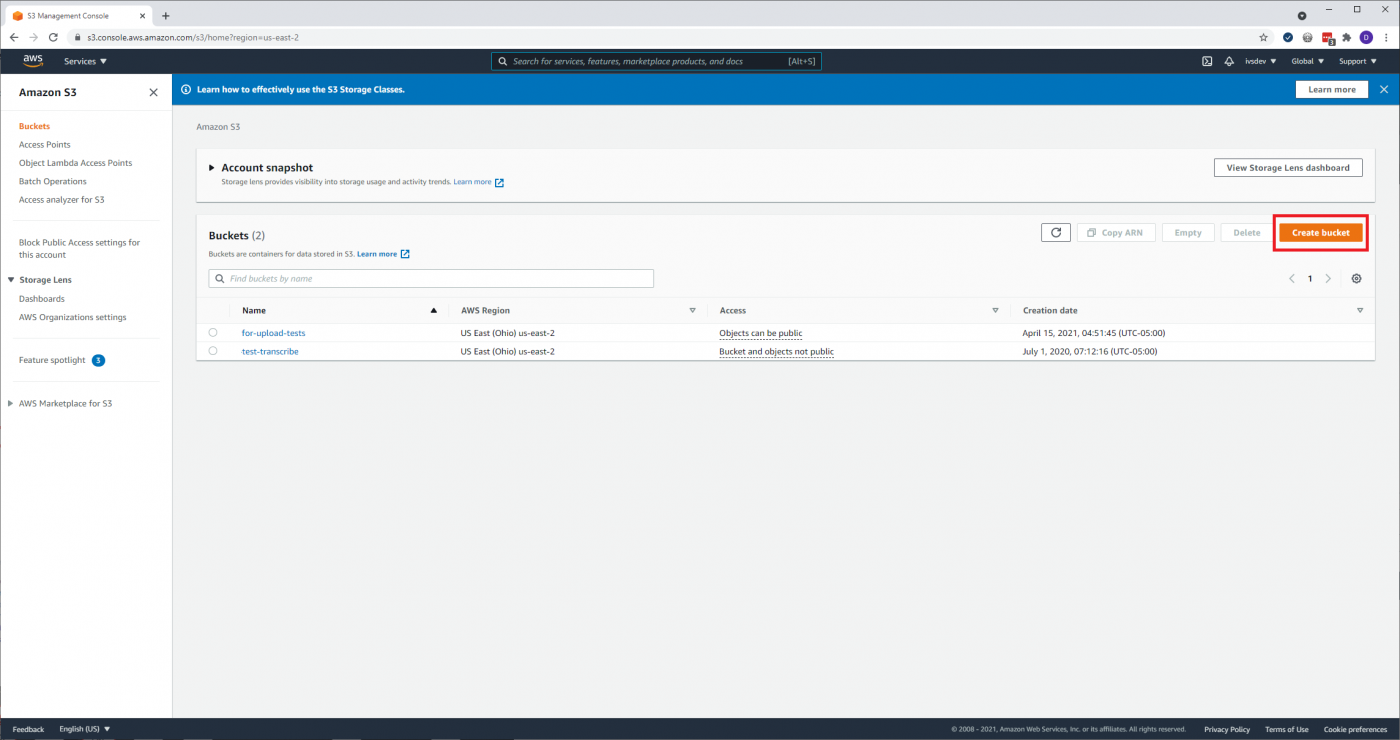 🖼️ button
 - Give the bucket a name
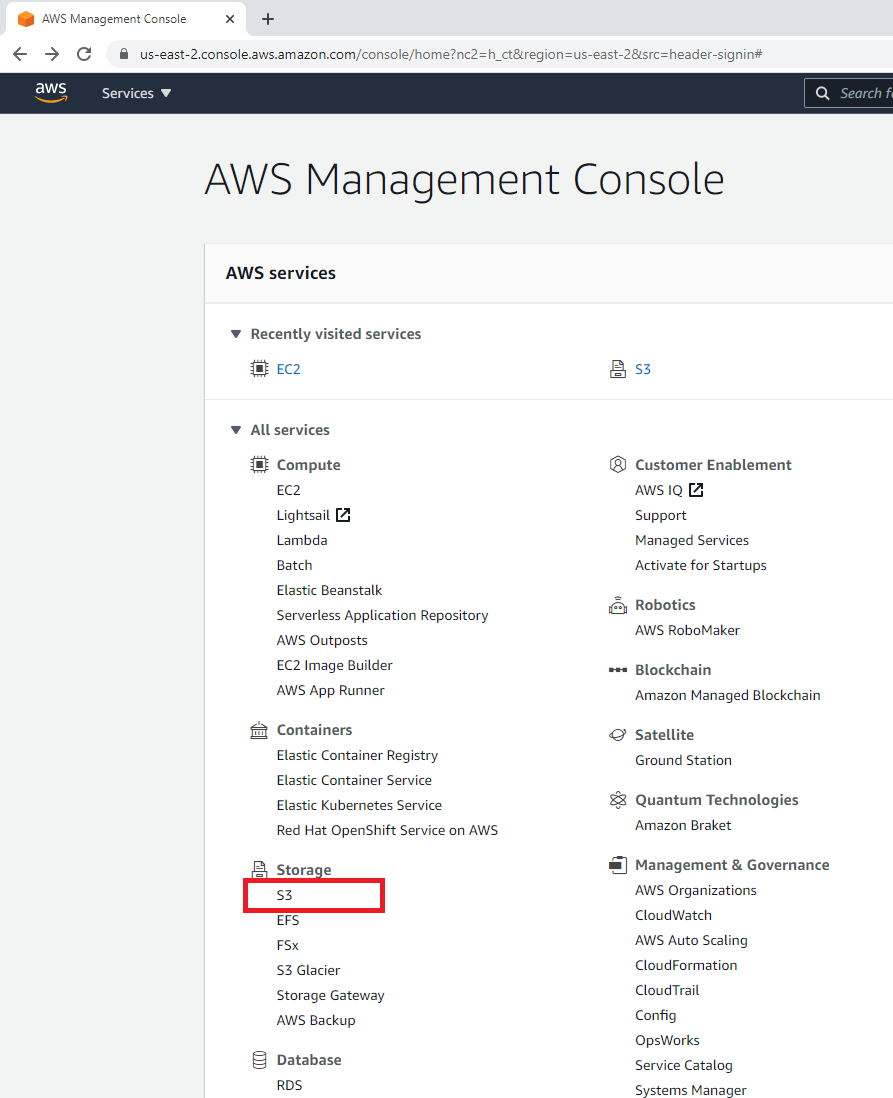

Image Example
- Click the Save button
Gather Credentials & Keys
- Click on the account name then select My Security Credentials
 🖼️
🖼️ - Click on the Create New Access Key
 🖼️ button
 - Download and save the Key file
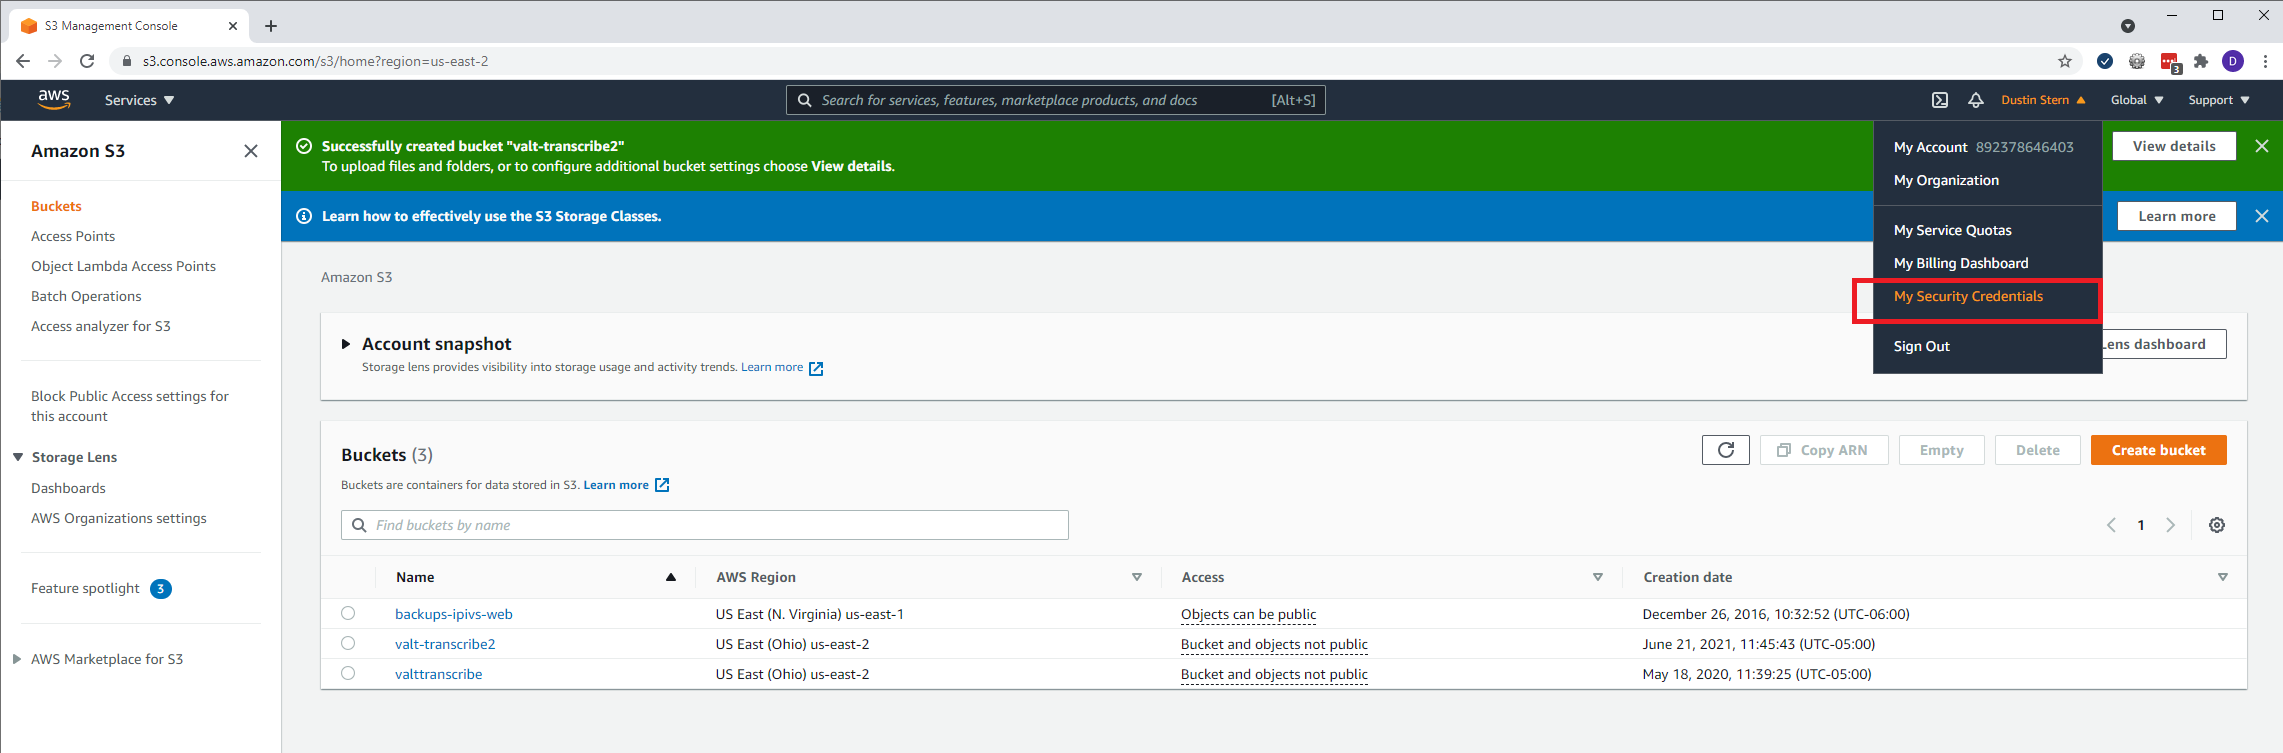

Image Example
🕮
you will need this to configure VALT later
VALT Transcription Setup
Add Transcription Server
- Click on the "Admin" section then select "Transcription"
- Click on "Add Transcription Service"
- Enter a name (this is just a unique identifier used by VALT)
- Enter the Access Key ID gathered from AWS
- Enter the Secret Key that matches the Access Key from AWS
- Select the Region that the AWS bucket is set within
- Click Save
Assign Service to Media Server
- Click on the "Admin" section then select "Media Servers"
- Click on a media server you want to associate with the newly created transcription service
- Click on the "Transcription Service" drop down and select the name of the transcription service
- Click Save
VALT Permissions
To add and edit transcripts, you will need to be granted the appropriate permissions in VALT. The following videos outline where to enable these permissions and show you how to use them!