Difference between revisions of "Camera Settings"
IVSWikiBlue (talk | contribs) |
IVSWikiBlue (talk | contribs) |
||
| Line 32: | Line 32: | ||
Under '''Settings''' --> '''Plain Config''' --> '''Network''' --> you will need to set '''Authentication policy''' to '''Basic''', as shown below. | Under '''Settings''' --> '''Plain Config''' --> '''Network''' --> you will need to set '''Authentication policy''' to '''Basic''', as shown below. | ||
| + | |||
| + | [[File:Basicpolicy.PNG|800px]] | ||
Revision as of 16:11, 4 December 2019
The following camera settings should be enabled prior to adding the camera to the VALT system.
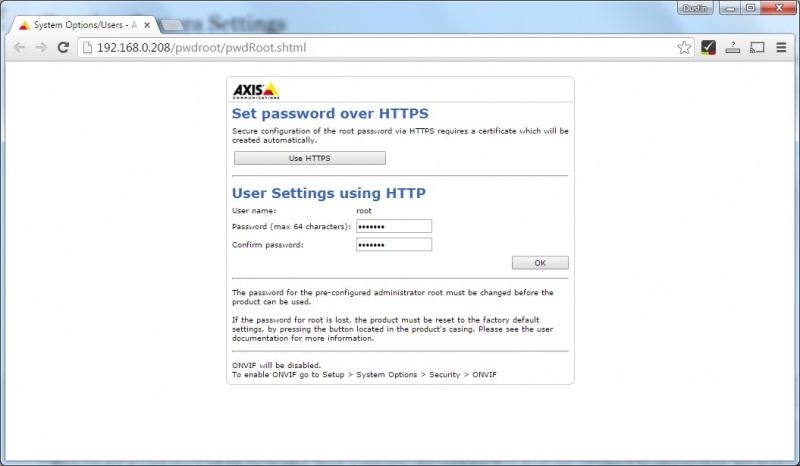
1) Browse to the camera address (you can find the camera address using the Axis IP Utility application), and set the root password.
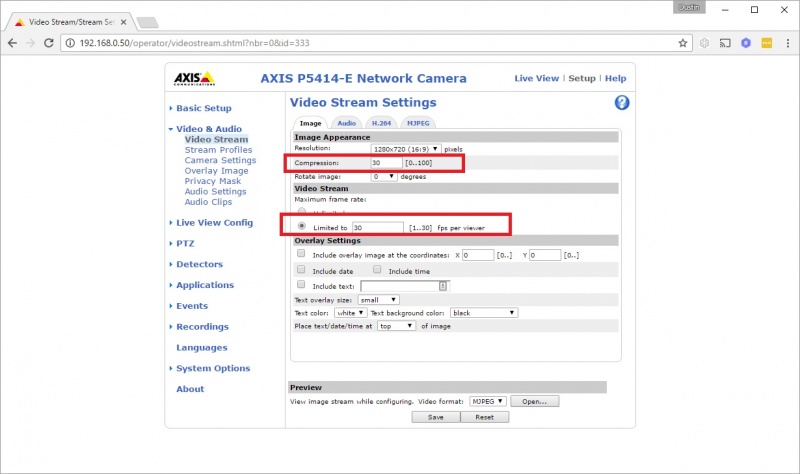
2) Click on the Setup link in the upper left corner, then go to Basic Setup -> Video Stream make sure Compression is set to 30 and Frame Rate is set to 30.
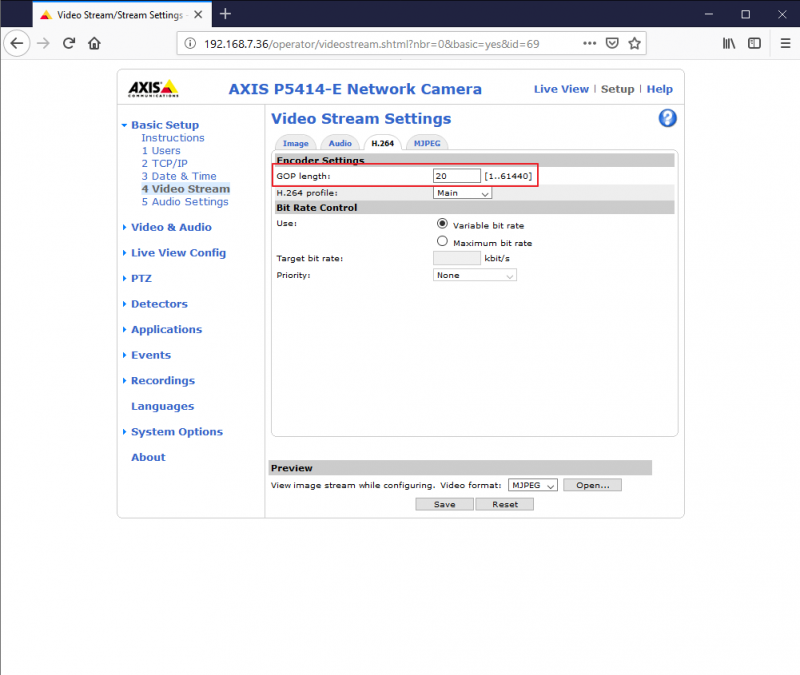
3) Click on the H.264 tab and change the GOP Length to 20.
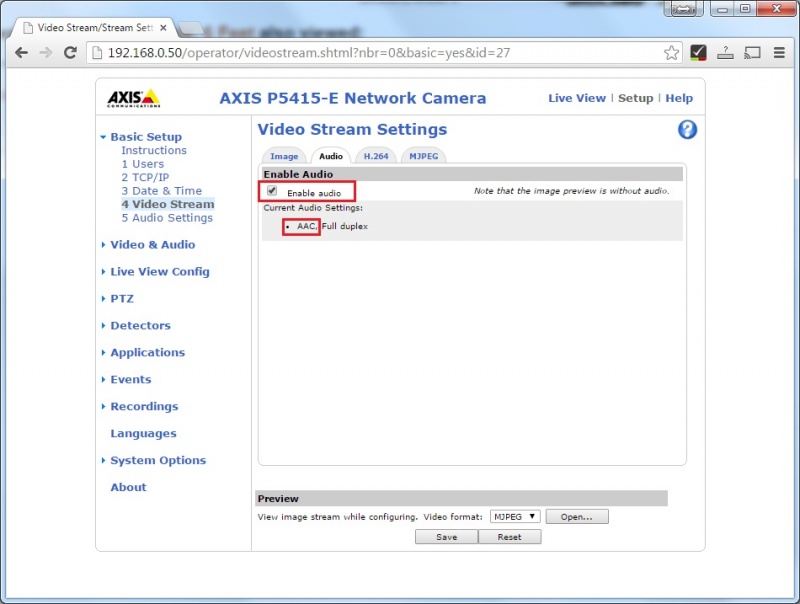
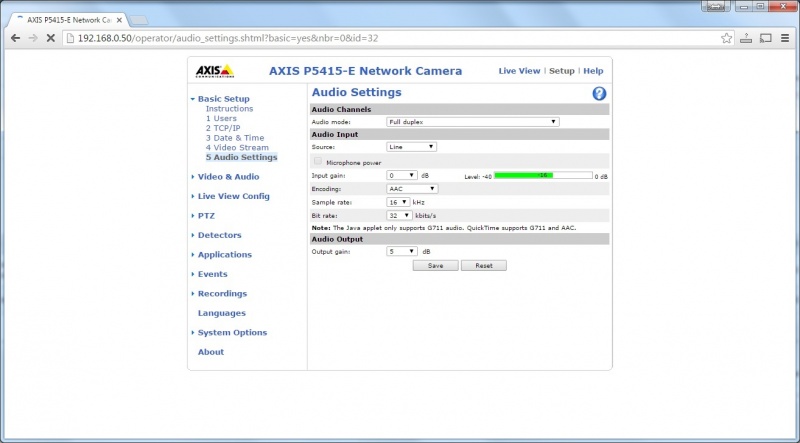
4) Click on the Audio tab. Check the Enable Audio checkbox (ensure the audio format is set to AAC) as shown below then press Save.
5) Click on the Audio Settings section (using Chrome) and ensure a signal is present, using the audio indicator. When no one is speaking audio should be -40 to -30 db, and when someone is speaking, audio should be -20 to -5 db.
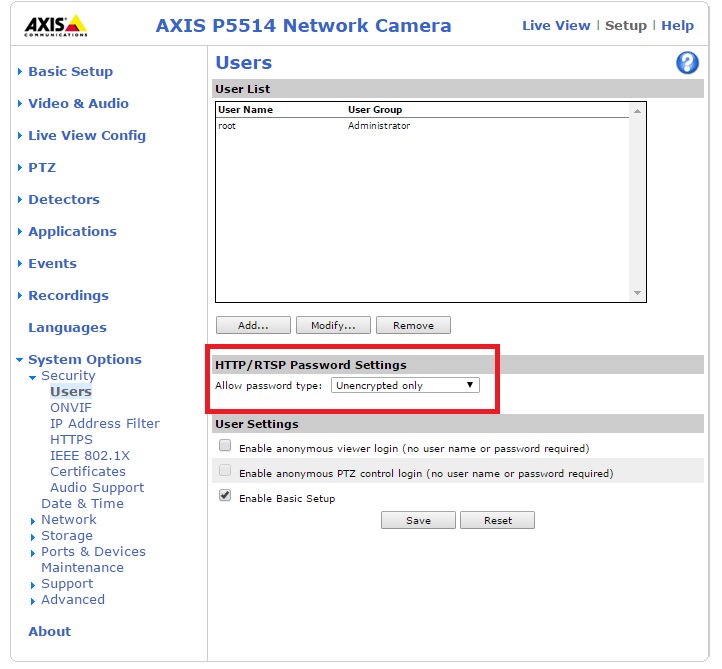
6) For proper I/O and Talkback functionality when using cameras with Axis firmware version 5.70 or greater:
Under Settings --> System Options --> Security --> Users you will need to set Allow Password type to Unencrypted Only, as shown below.
After this change, you will need to restart the camera.
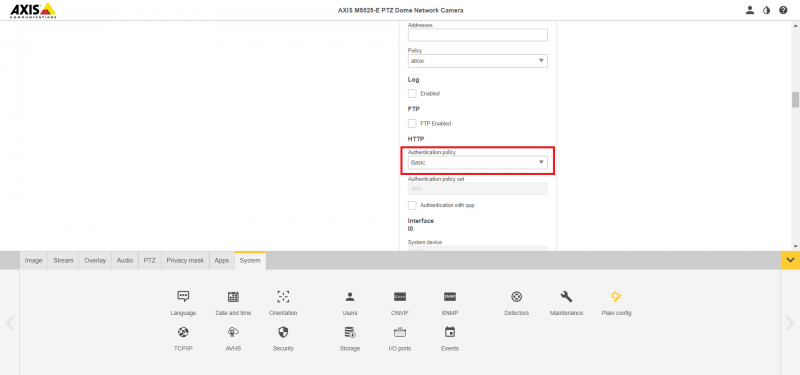
7) For proper I/O and Talkback functionality when using cameras with Axis firmware version 8.0 or greater:
Under Settings --> Plain Config --> Network --> you will need to set Authentication policy to Basic, as shown below.
