Difference between revisions of "Template:VALT Keypad 3 - Old"
IVSWikiBlue (talk | contribs) (→Through the Web Interface) |
IVSWikiBlue (talk | contribs) (→Through the Web Interface) |
||
| Line 30: | Line 30: | ||
====Through the Web Interface==== | ====Through the Web Interface==== | ||
#Make sure the key pad is plugged in and on. | #Make sure the key pad is plugged in and on. | ||
| + | #:''You will see the IVS logo displayed on the screen'' | ||
[[File:Keypad IVS Sceen.png|250px|link=]] | [[File:Keypad IVS Sceen.png|250px|link=]] | ||
<br clear=all> | <br clear=all> | ||
Revision as of 15:18, 20 August 2020
Contents
Configuration
How to Connect
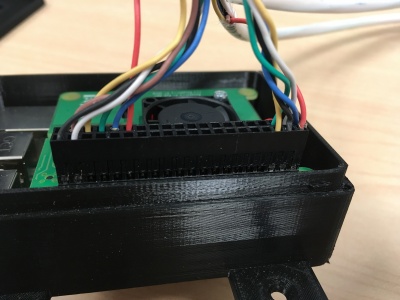
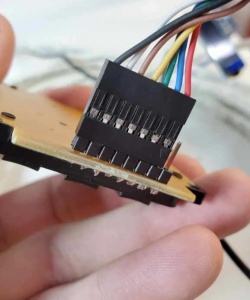
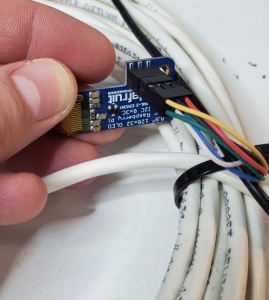
Attach the wiring according to the following diagrams:
DHCP
The VALT Keypad will automatically pull an IP address from DHCP. The IP address can be obtained by reviewing DHCP leases on the associated DHCP server. The hostname of the device is Keypad.
Static
If no DHCP server is available, the VALT Keypad will default to a static IP address of 192.168.0.92.
Manual
The IP address from the keypad may also be obtained directly by plugging in a keyboard and running the following command from the console:
ifconfig | more
The IP address will be listed under interface eth0.
Manually Setting an IP Address
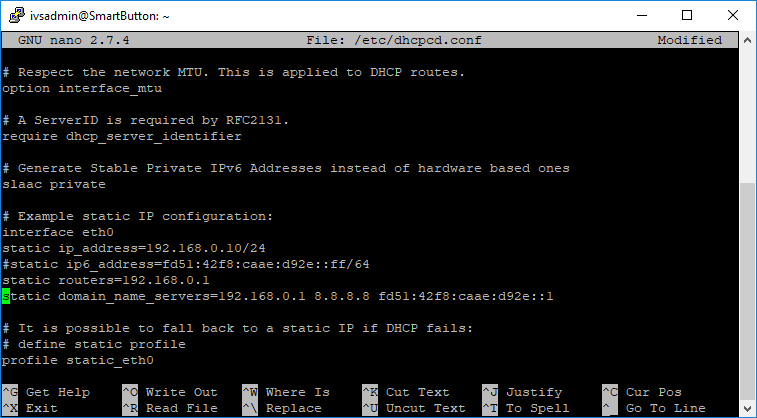
In order to set the IP address manually, connect to the Keypad using the ivsadmin user. The ivsuser account cannot change any settings. If connecting from the console, type the following to change accounts. There will be prompt for the ivsadmin password.su ivsadmin
- Type the following, and press Enter:
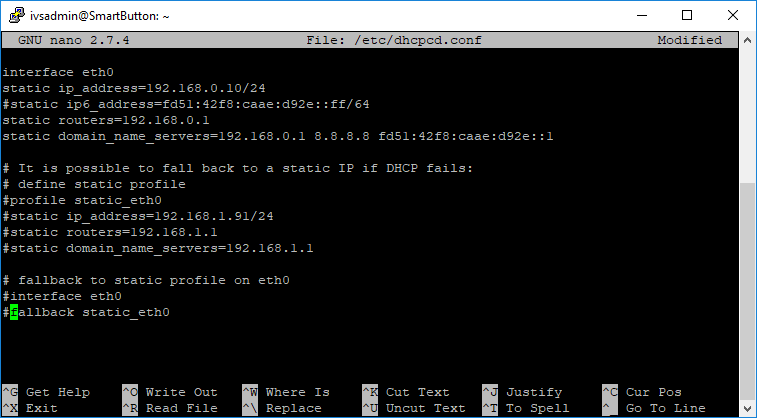
sudo nano /etc/dhcpcd.conf
- Scroll down until to the section for interface eth0.
- Remove the # at the start of the lines for static IP, static routers, and static domain_name_servers.
- Update the IP configuration to reflect the correct settings for the environment.
- Comment out the remaining lines in the file by adding a # to the start of the line.
Configuring the Keypad
Through the Web Interface
- Make sure the key pad is plugged in and on.
- You will see the IVS logo displayed on the screen
- Type the following, and press Enter:
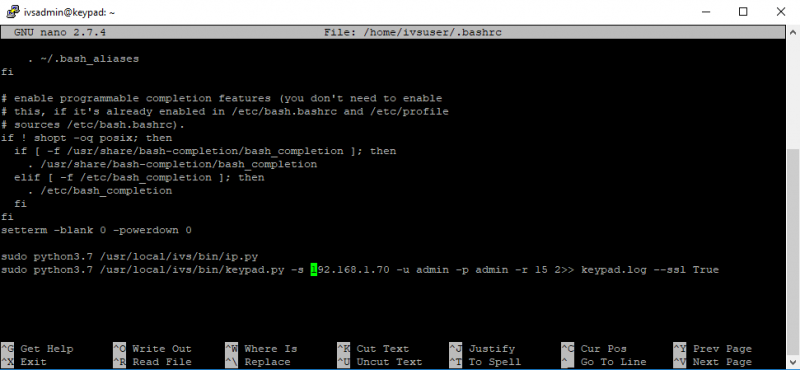
sudo nano /home/ivsuser/.bashrc
- Scroll down to the bottom of the file.
- Modify the last command in the file to match your environment. Make sure to remove the # from the beginning of the line. The settings are listed below.
| -s | Server IP Address or DNS entry |
| -u | VALT Username |
| -p | VALT Password |
| -r | VALT Room Number |
| --ssl | True if the VALT server is using https, otherwise omit this option. |
sudo reboot
The keypad should begin functioning normally.
Star Commands
Typing any of the commands in the table below into the keypad will result in triggering a special function.
| *1 | Share Current Recording With A User |
| *2 | Share Current Recording With A Group |
| *3 | Pause Current Recording |
| *4 | Add a Marker |
| *5 | Not Used Currently |
| *6 | Not Used Currently |
| *7 | Menu |
| *8 | Reboot Keypad |
| *9 | Display IP Address |
| *0 | Reset LED Display |
Disable the Fan
- Connect to the keypad via SSH.
- Type the following, and press Enter:
sudo nano /boot/config.txt
- Scroll down to the bottom of the file and add the following line:
disable_poe_fan=1
- Save the file.
- Reboot the keypad.
