Difference between revisions of "5525 Wall Mount Instructions"
IVSWikiBlue (talk | contribs) |
IVSWikiBlue (talk | contribs) |
||
| Line 18: | Line 18: | ||
#:[[File:Camera disk.png|400px|link=https://ipivs.com/wiki/images/5/56/Camera_disk.png]] | #:[[File:Camera disk.png|400px|link=https://ipivs.com/wiki/images/5/56/Camera_disk.png]] | ||
#Using a T30 bit, tighten the three screws on top of the pendant kit, securing it to the camera disk. | #Using a T30 bit, tighten the three screws on top of the pendant kit, securing it to the camera disk. | ||
| − | #:[[File:Large screws3.png|300px|link=https://ipivs.com/wiki/images/0/ | + | #:[[File:Large screws3.png|300px|link=https://ipivs.com/wiki/images/0/00/Large_screws3.png]] |
# | # | ||
#:[[File:|350px|link=]] | #:[[File:|350px|link=]] | ||
Revision as of 15:07, 17 August 2020
- Locate the AXIS T91E61 Wall Mount.
- This is the recommended wall mount by IVS. Verify the model of your mount here

- Locate the AXIS T94A01D Pendant Kit.
- Connect the two parts and tighten them together by hand.
- Continue tightening, by hand, until you cannot rotate the pendant kit anymore.
- Using a T20 bit, tighten down the screw located inside the pendant kit.
- Locate the mounting plate.
- This part comes packed with the AXIS M5525.
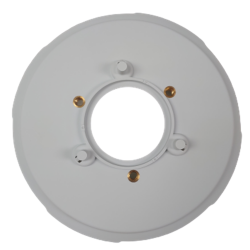
- Take the camera disk and line up the 3 pegs on the top with the three holes on the pendant kit.
- Put the pegs in the holes and rotate the disk counter clockwise until the pieces prevent you from turning more.
- Using a T30 bit, tighten the three screws on top of the pendant kit, securing it to the camera disk.
-
- [[File:|350px|link=]]


