Difference between revisions of "Add iPad to VALT"
IVSWikiBlue (talk | contribs) |
IVSWikiBlue (talk | contribs) |
||
| Line 3: | Line 3: | ||
#From there click on <b>Add Device</b> | #From there click on <b>Add Device</b> | ||
</div> | </div> | ||
| + | <br> | ||
{{img | file = VALT Add Device.png | width = 960px}} | {{img | file = VALT Add Device.png | width = 960px}} | ||
| + | <br> | ||
<div class="section"> | <div class="section"> | ||
| − | You will then be prompted to fill out the appropriate information. | + | You will then be prompted to fill out the appropriate information for the device you are adding. |
</div> | </div> | ||
| + | <br> | ||
{{img with key | file = VALT Add Device Info.png | list = | {{img with key | file = VALT Add Device Info.png | list = | ||
<li><b>Name:</b> You should give the device a unique name that is easily identifiable.</li> | <li><b>Name:</b> You should give the device a unique name that is easily identifiable.</li> | ||
Revision as of 12:09, 27 July 2022
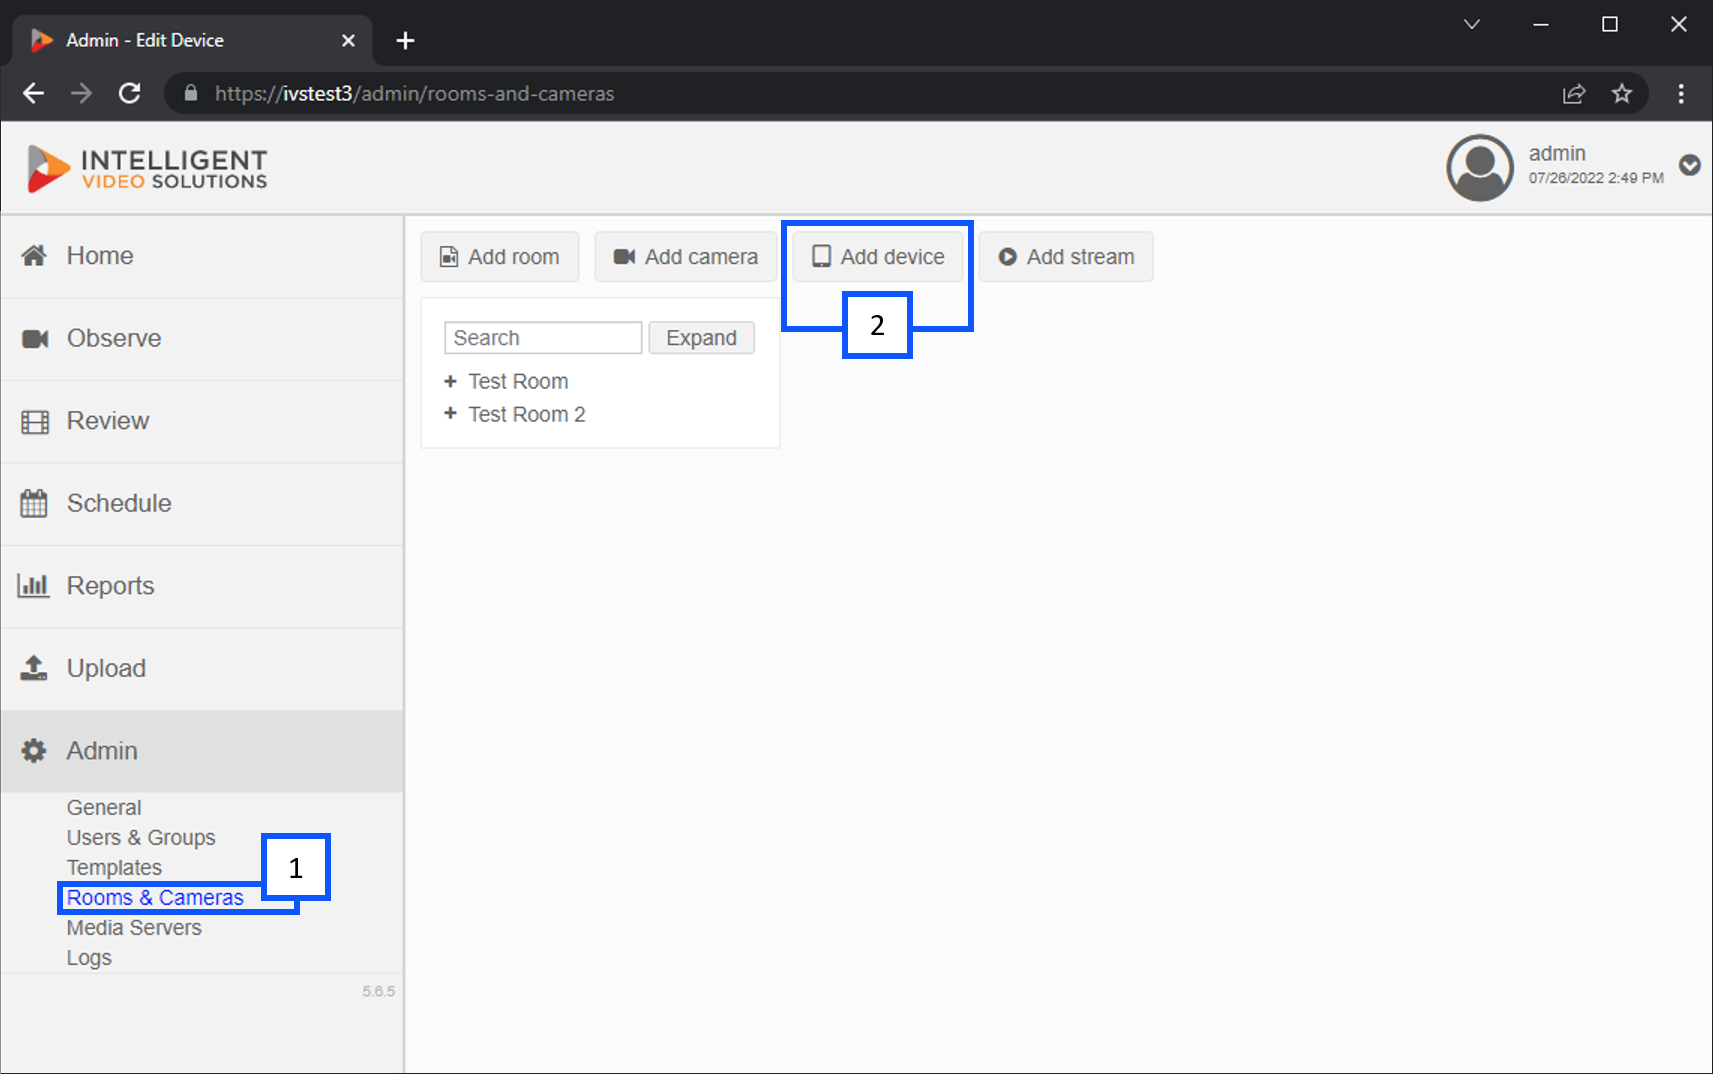
- Go to the Admin section and click Rooms & Cameras
- From there click on Add Device
You will then be prompted to fill out the appropriate information for the device you are adding.
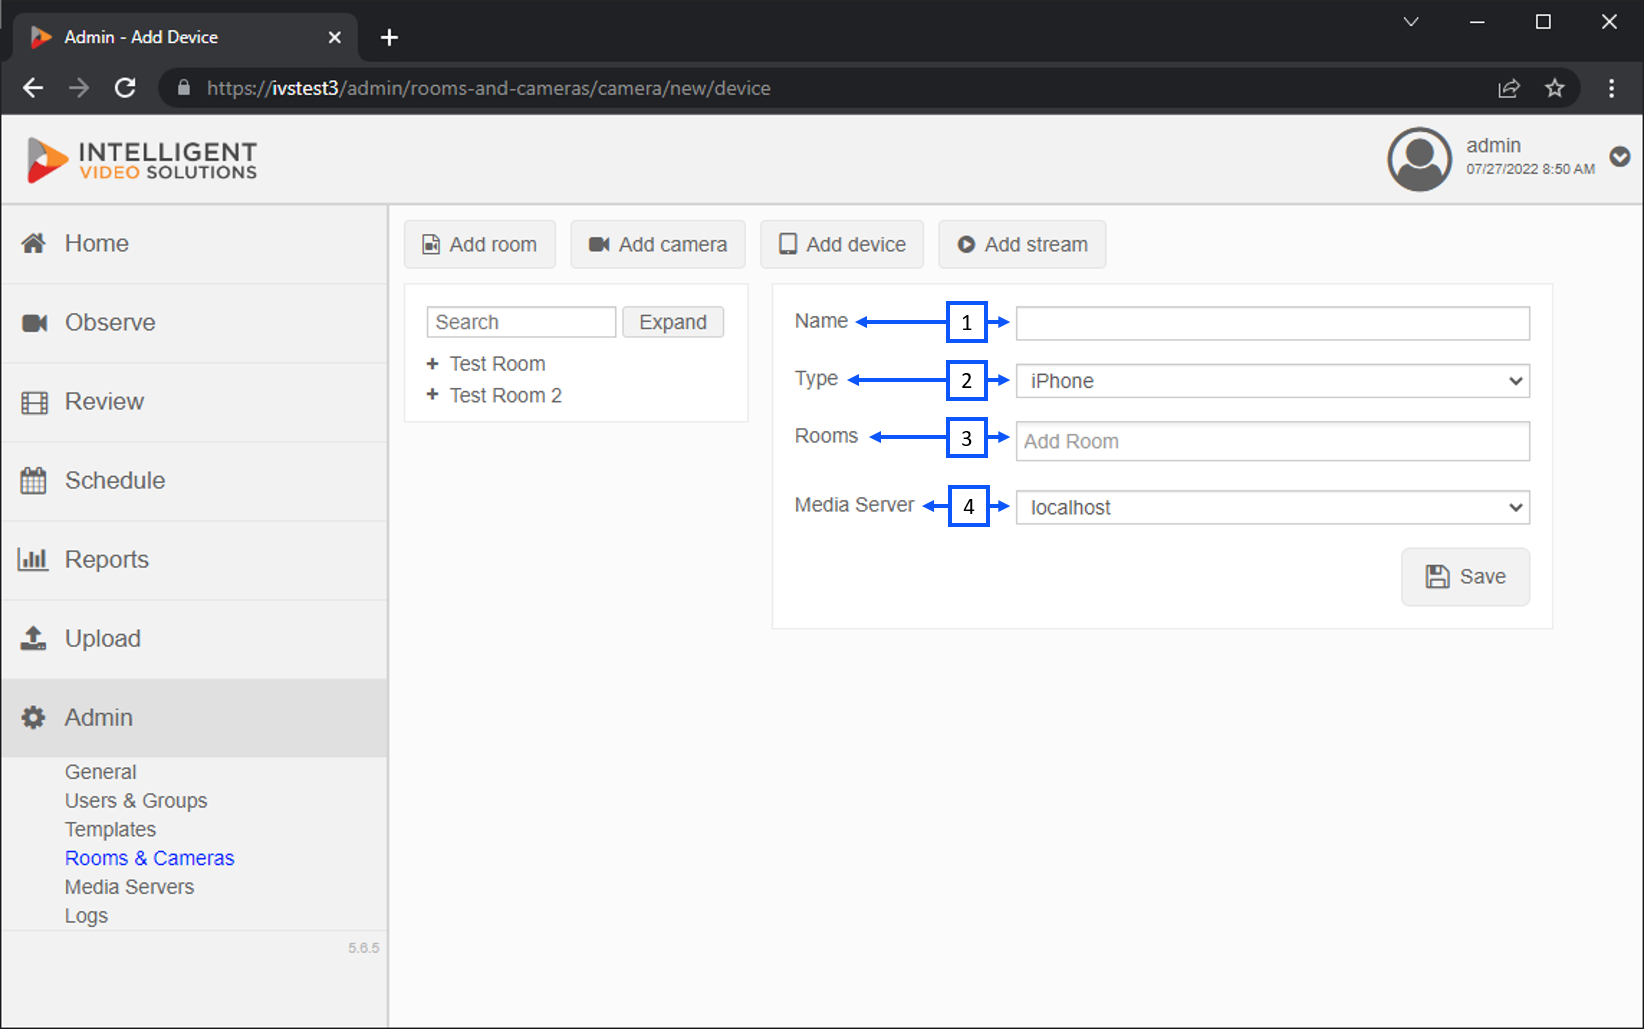
- Name: You should give the device a unique name that is easily identifiable.
- Type: This area allows you to select the type of device you are adding.
- Rooms: This is where you can select the room for the iPad. Most iPads are used in many different rooms. It is recommended to create a separate room for each mobile device.
- Media Server: The area allows you to select the server that will store the recorded video. In many cases, localhost is used.
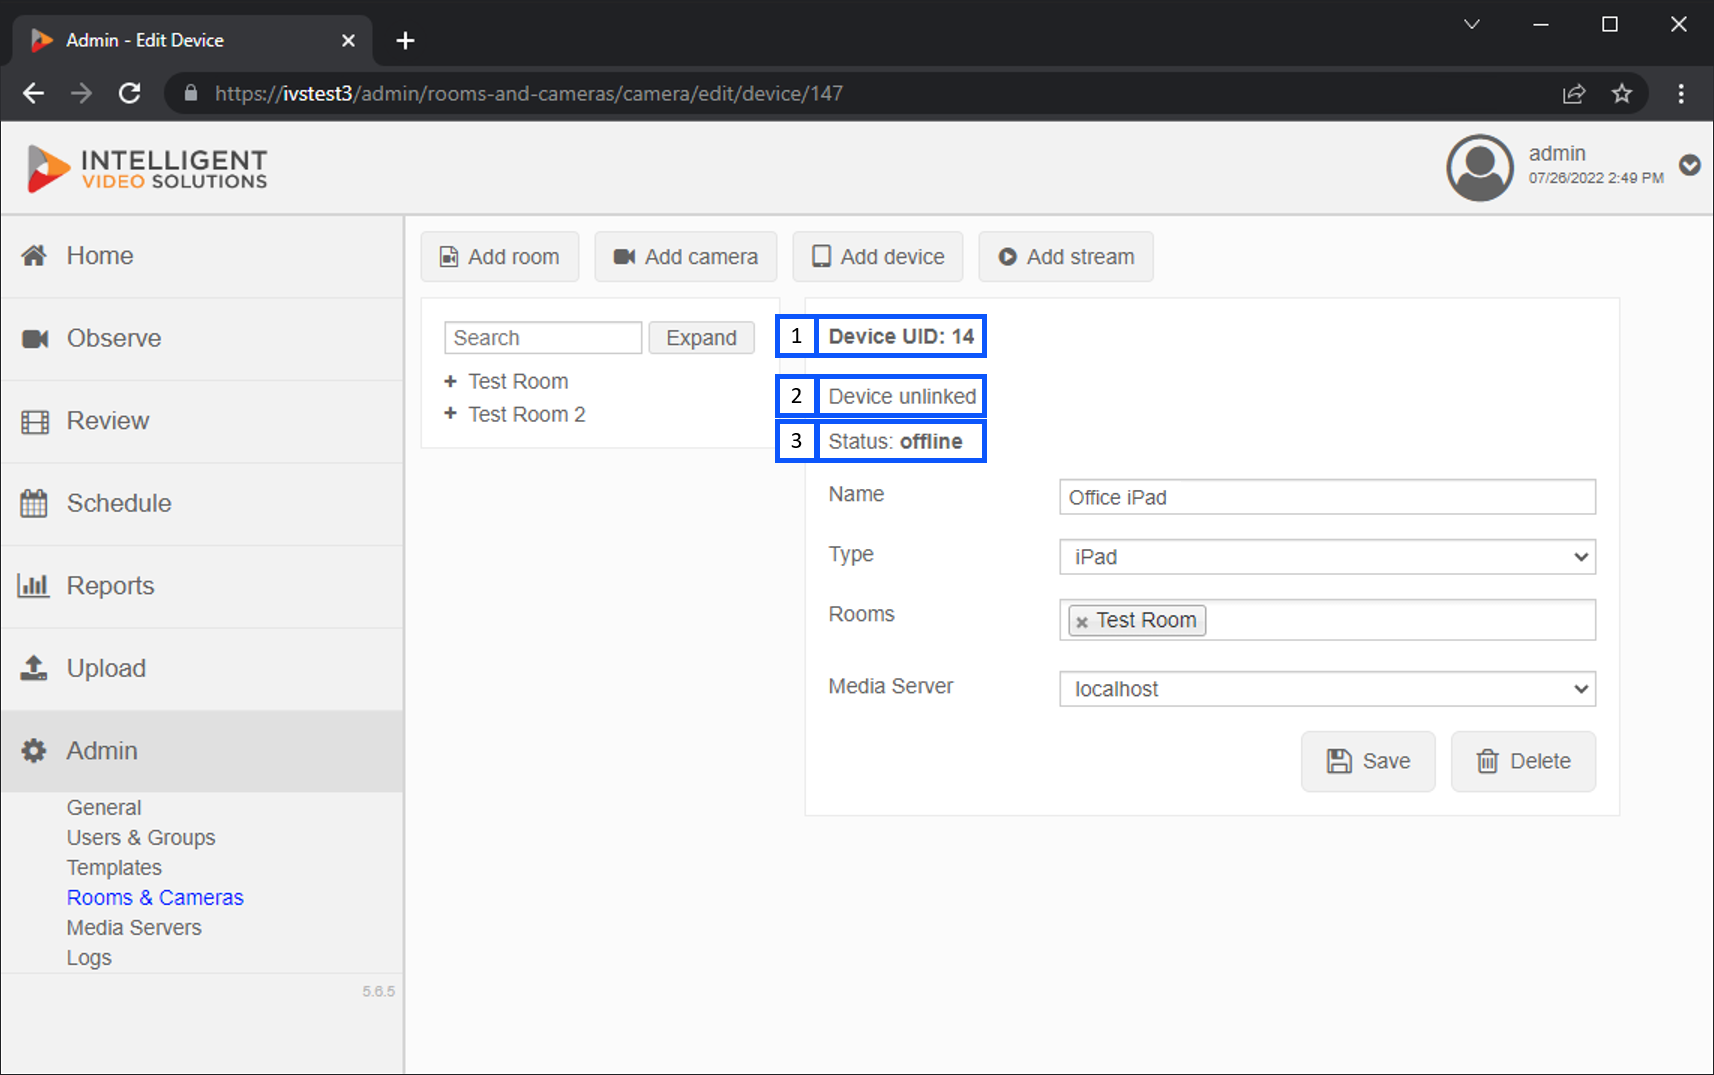
- Device UID:
- Link Status:
- Status:
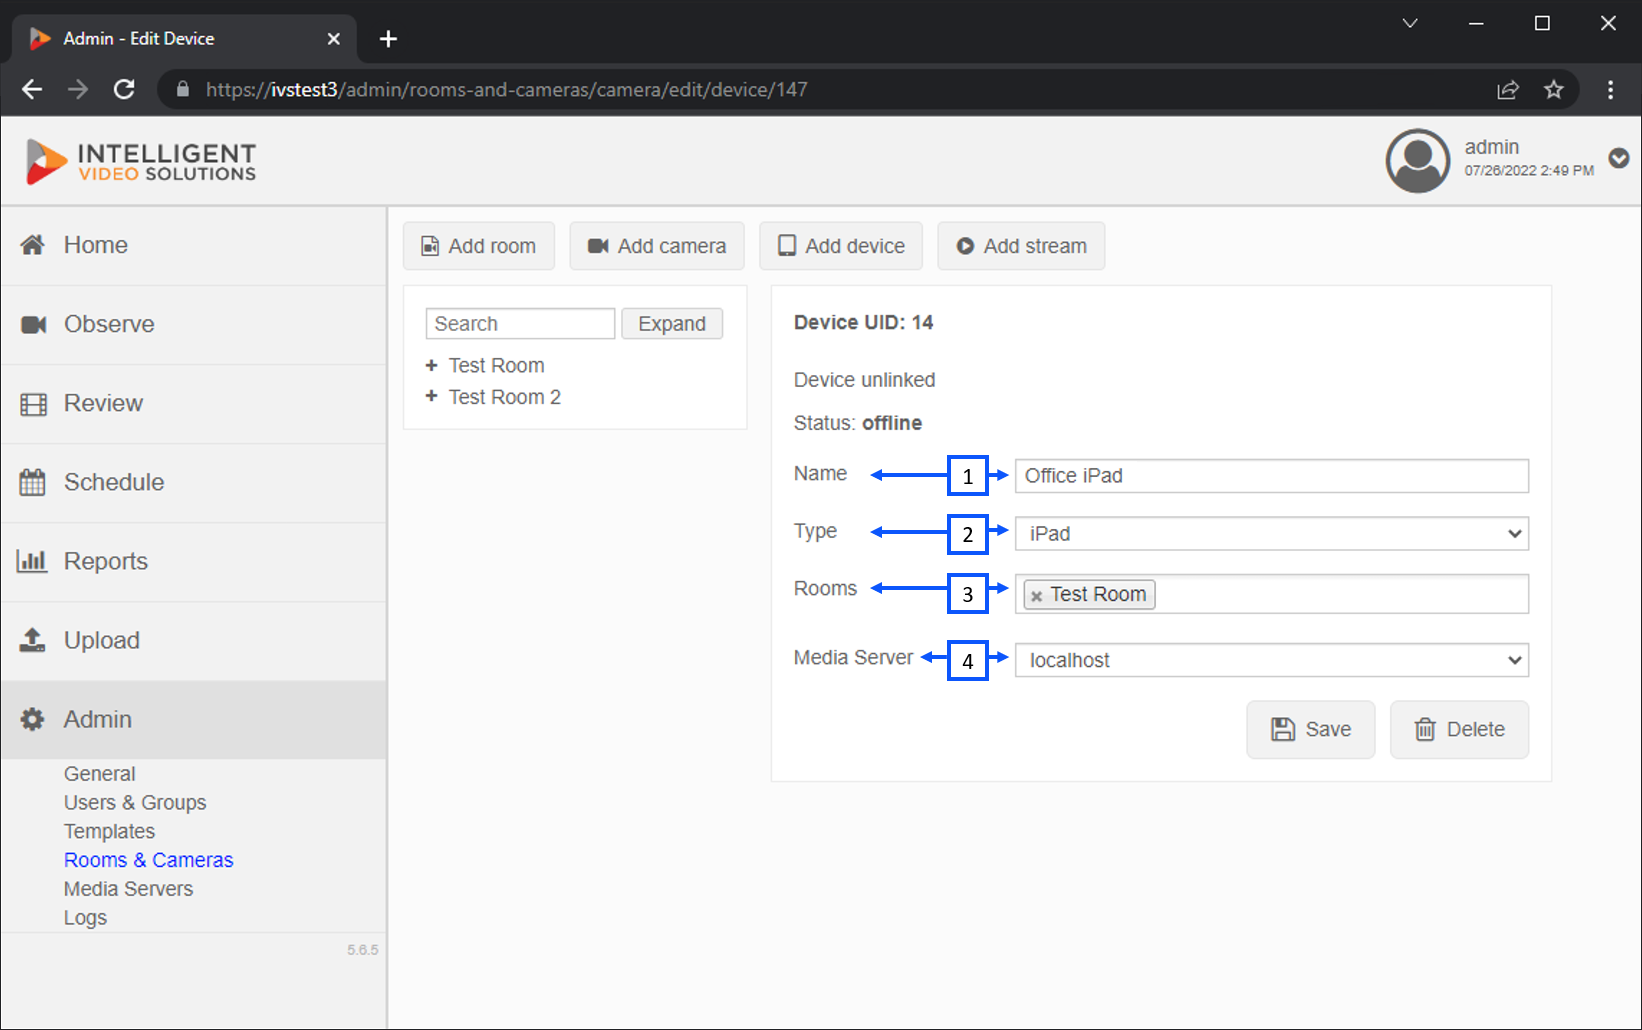
- Name:
- Type:
- Rooms:
- Media Server