Difference between revisions of "Camera Settings 7"
IVSWikiBlue (talk | contribs) |
IVSWikiBlue (talk | contribs) |
||
| (5 intermediate revisions by the same user not shown) | |||
| Line 1: | Line 1: | ||
| + | {{Article | content = | ||
The following camera settings should be enabled prior to adding the camera to the VALT system. | The following camera settings should be enabled prior to adding the camera to the VALT system. | ||
| Line 5: | Line 6: | ||
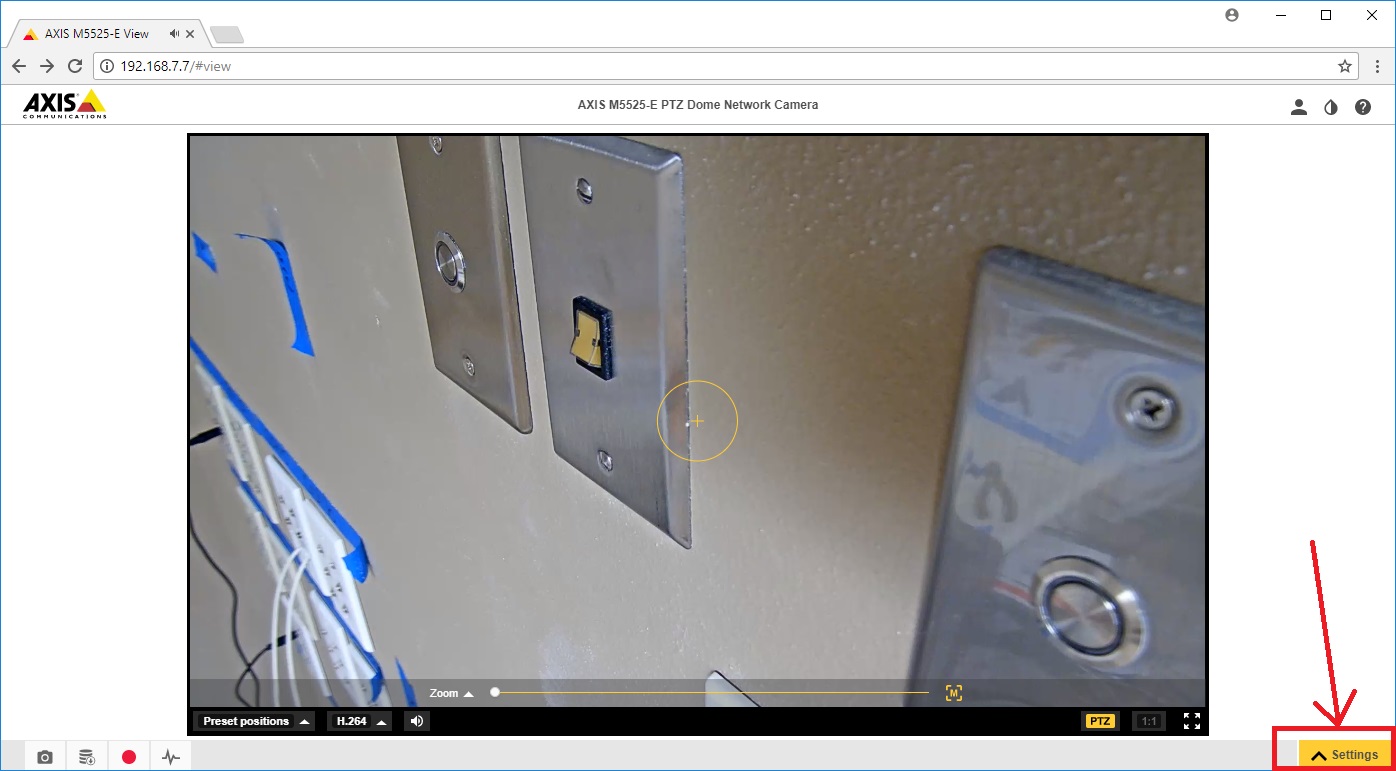
2) Click on the '''Setup''' link in the lower right corner. | 2) Click on the '''Setup''' link in the lower right corner. | ||
| − | {{img | + | {{img - resize |
| file = cam_set1.jpg | | file = cam_set1.jpg | ||
| width = 800px | | width = 800px | ||
| Line 12: | Line 13: | ||
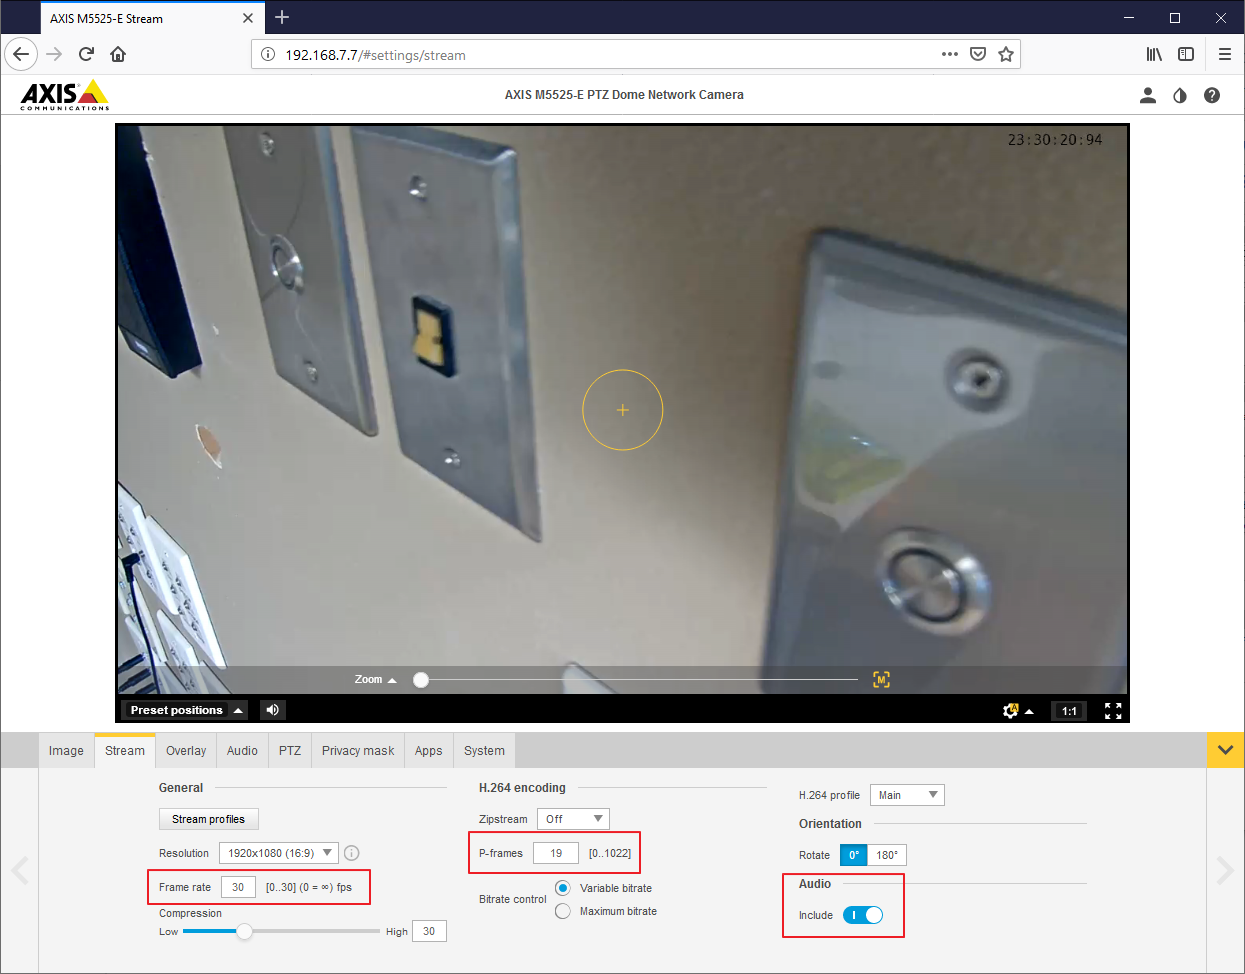
3) Click on the '''Stream''' tab set the '''Frame Rate''' to 30, set the '''P-frames''' to 19, followed by enabling audio using the '''Include''' slider button. | 3) Click on the '''Stream''' tab set the '''Frame Rate''' to 30, set the '''P-frames''' to 19, followed by enabling audio using the '''Include''' slider button. | ||
| − | {{img | + | {{img - resize |
| file = 7PlusFirmwareStreamTabSettings.png | | file = 7PlusFirmwareStreamTabSettings.png | ||
| width = 800px | | width = 800px | ||
| Line 19: | Line 20: | ||
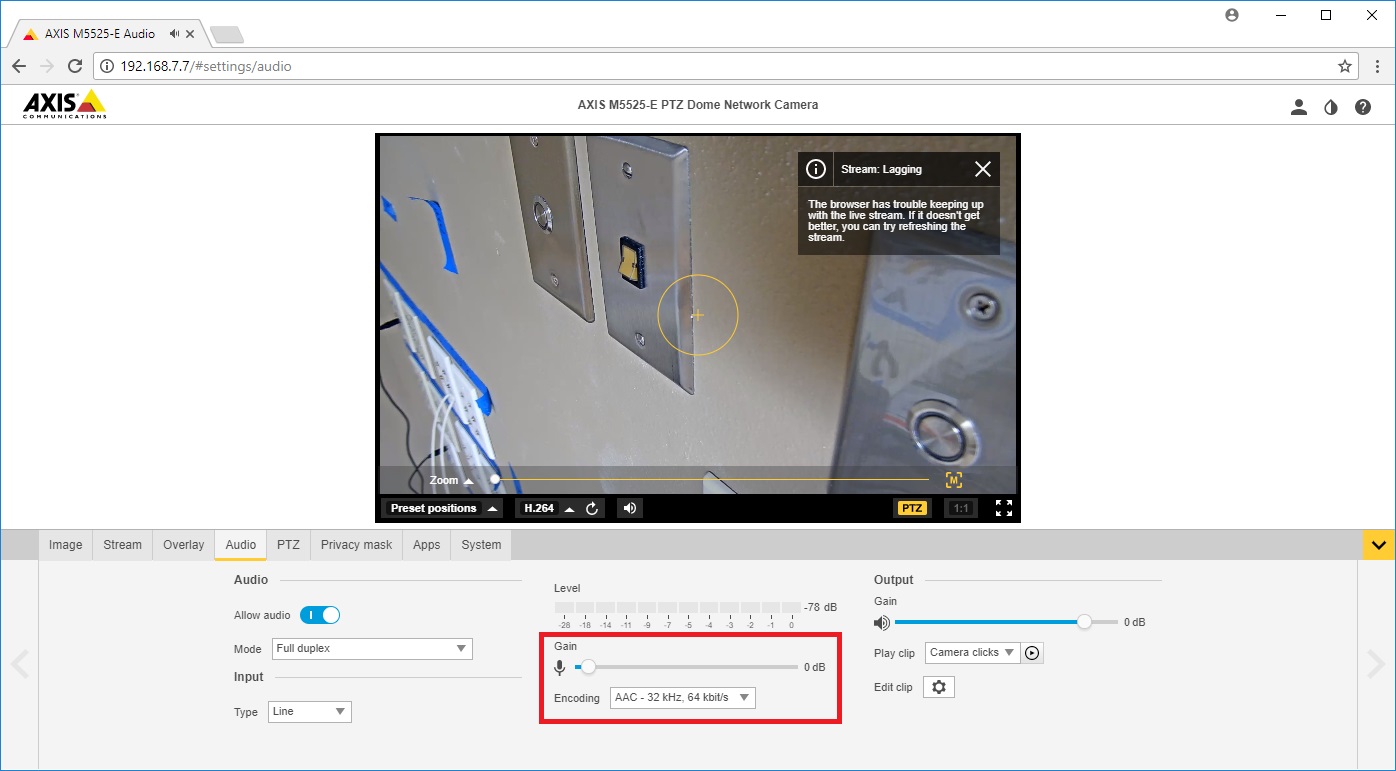
4) Click on the '''Audio''' tab (using Chrome) and ensure a signal is present, using the audio indicator. When no one is speaking audio should be '''-40''' to '''-30 db''', and when someone is speaking, audio should be '''-20''' to '''-5 db'''. | 4) Click on the '''Audio''' tab (using Chrome) and ensure a signal is present, using the audio indicator. When no one is speaking audio should be '''-40''' to '''-30 db''', and when someone is speaking, audio should be '''-20''' to '''-5 db'''. | ||
| − | {{img | + | {{img - resize |
| file = cam_set3.jpg | | file = cam_set3.jpg | ||
| width = 800px | | width = 800px | ||
| Line 26: | Line 27: | ||
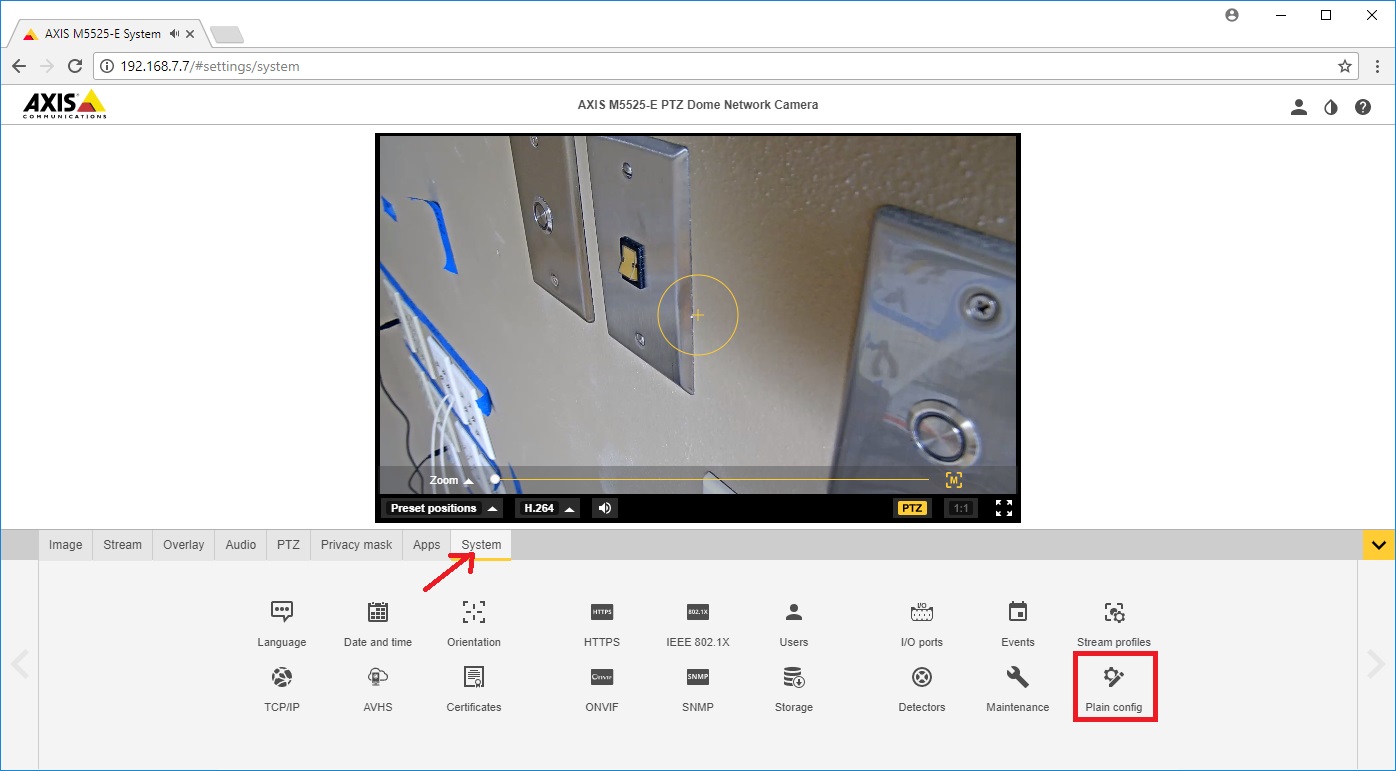
5) Click on the '''System''' tab, then click on '''Plain Config''' button, as shown below. | 5) Click on the '''System''' tab, then click on '''Plain Config''' button, as shown below. | ||
| − | {{img | + | {{img - resize |
| file = cam_set4.jpg | | file = cam_set4.jpg | ||
| width = 800px | | width = 800px | ||
| Line 33: | Line 34: | ||
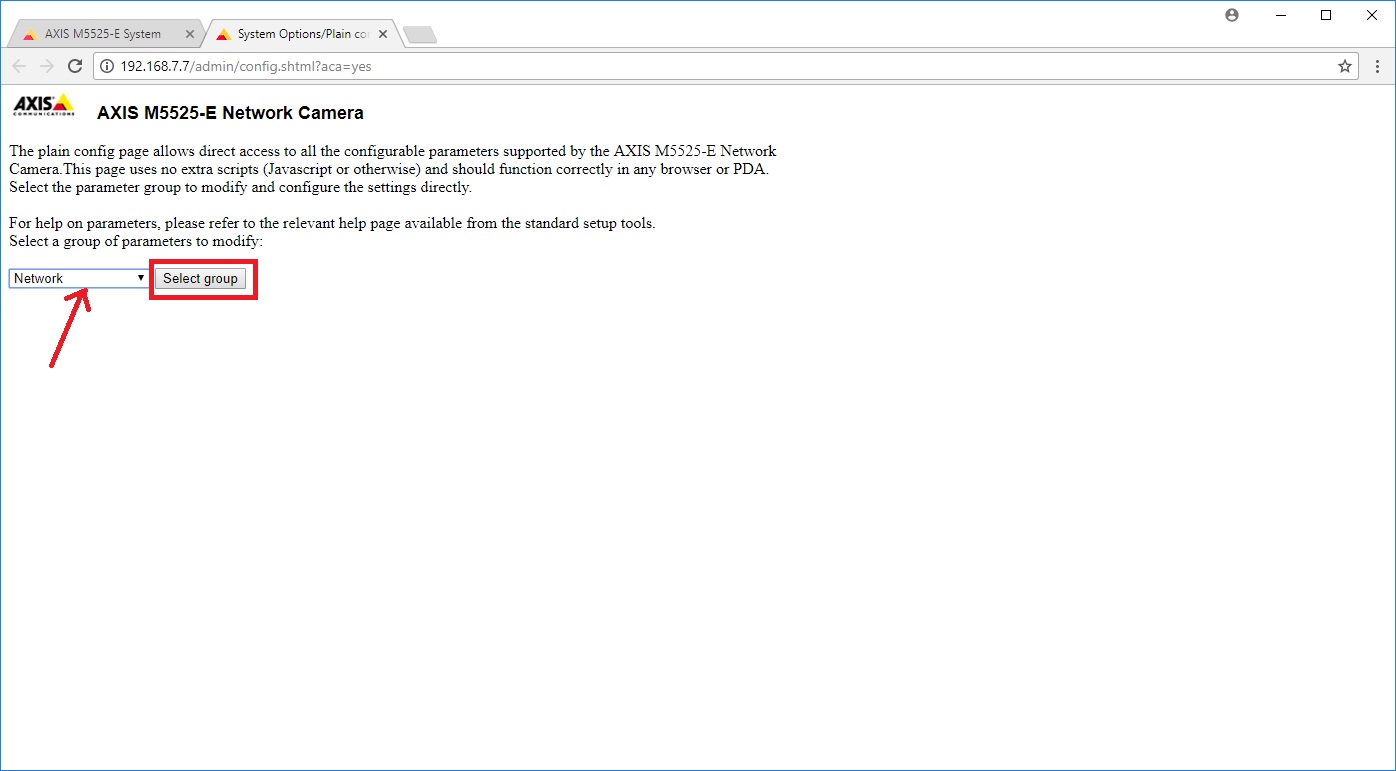
6) Select '''Network''' from the drop-down menu, followed by clicking on '''Select Group'''. | 6) Select '''Network''' from the drop-down menu, followed by clicking on '''Select Group'''. | ||
| − | {{img | + | {{img - resize |
| file = cam_set5.jpg | | file = cam_set5.jpg | ||
| width= 800px | | width= 800px | ||
| Line 40: | Line 41: | ||
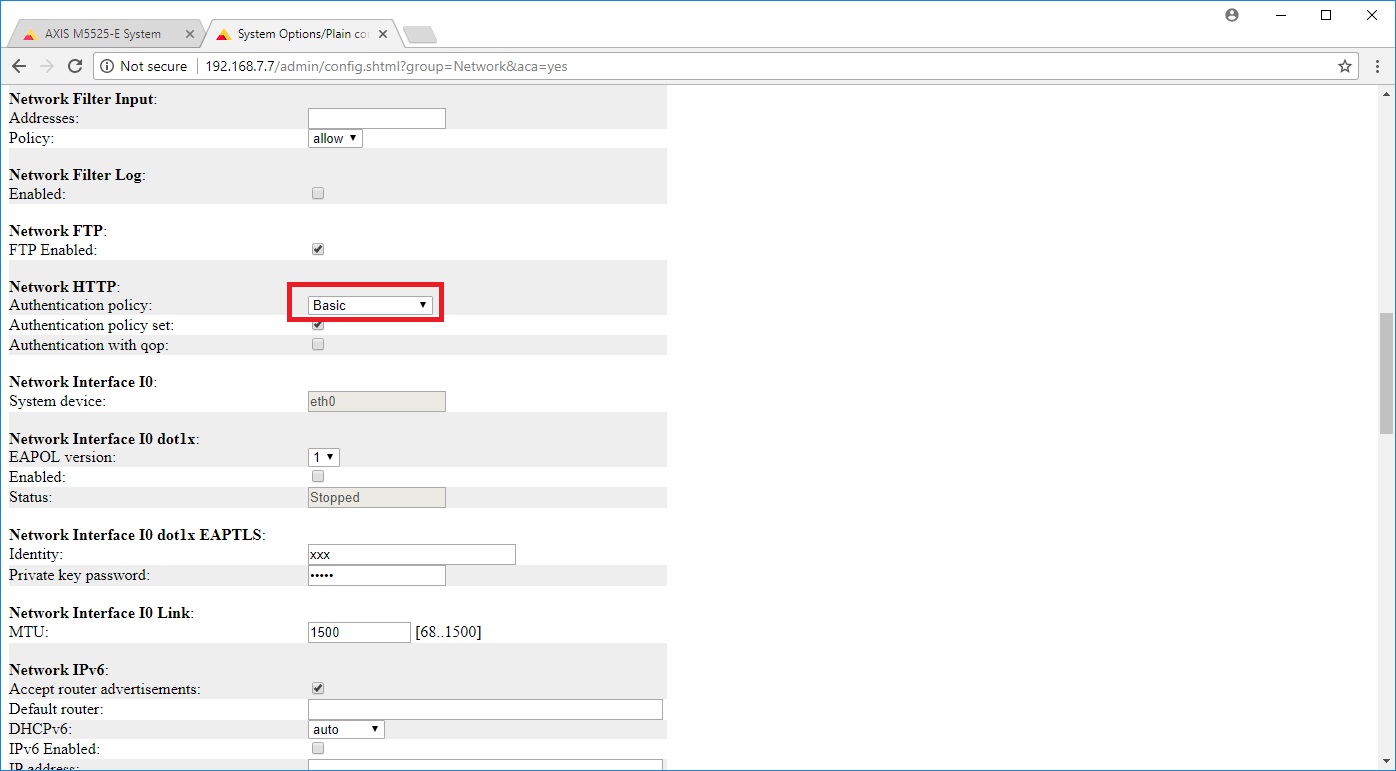
7) Select '''Basic''' from the drop-down menu shown below, then scroll to the bottom and click '''Save'''. | 7) Select '''Basic''' from the drop-down menu shown below, then scroll to the bottom and click '''Save'''. | ||
| − | {{img | + | {{img - resize |
| file = cam_set6.jpg | | file = cam_set6.jpg | ||
| width = 800px | | width = 800px | ||
| + | }} | ||
}} | }} | ||
Latest revision as of 10:30, 10 April 2024
The following camera settings should be enabled prior to adding the camera to the VALT system.
1) Browse to the camera address (you can find the camera address using the Axis IPUtility.exe application), and set the root password.
2) Click on the Setup link in the lower right corner.
3) Click on the Stream tab set the Frame Rate to 30, set the P-frames to 19, followed by enabling audio using the Include slider button.
4) Click on the Audio tab (using Chrome) and ensure a signal is present, using the audio indicator. When no one is speaking audio should be -40 to -30 db, and when someone is speaking, audio should be -20 to -5 db.
5) Click on the System tab, then click on Plain Config button, as shown below.
6) Select Network from the drop-down menu, followed by clicking on Select Group.
7) Select Basic from the drop-down menu shown below, then scroll to the bottom and click Save.