Difference between revisions of "IVS HDMI Encoder/Decoder"
IVSWikiBlue (talk | contribs) (→Firmware Upgrade) |
IVSWikiBlue (talk | contribs) |
||
| (5 intermediate revisions by the same user not shown) | |||
| Line 1: | Line 1: | ||
| + | {{Aside | hue = 50 | icon = {{warning_icon}} | content = This page shows the <b>Encoder</b> setup for the IVS Encoder/Decoder.}} | ||
__TOC__ | __TOC__ | ||
| − | {{Section | title = <h1>Prerequisites</h1> | content = | + | {{Section | title = <h1>Prerequisites</h1> | color = #CCDDDD | content = |
# A windows computer with an ethernet port or a USB-C to ethernet adapter and Google Chrome | # A windows computer with an ethernet port or a USB-C to ethernet adapter and Google Chrome | ||
# One or more IVS HDMI Encoder/Decoder Devices | # One or more IVS HDMI Encoder/Decoder Devices | ||
| Line 7: | Line 8: | ||
}} | }} | ||
| − | {{Section | title = <h1>Powering up the Encoder</h1> | content = | + | {{Section | title = <h1>Powering up the Encoder</h1> | color = #DDDDCC | content = |
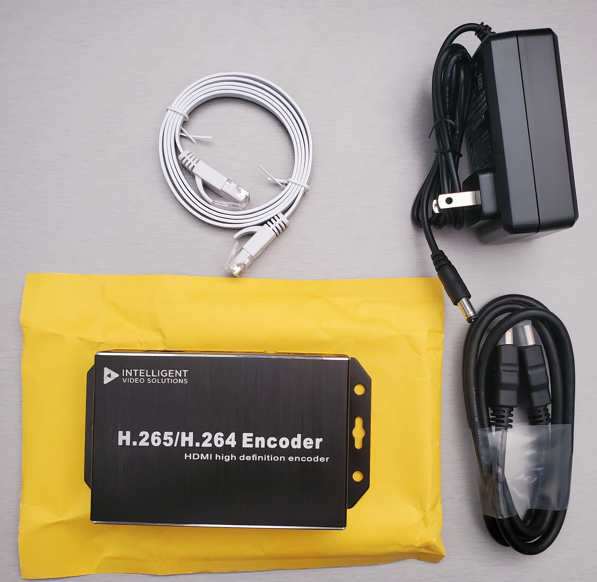
# Unpack the contents of the Encoder Package. | # Unpack the contents of the Encoder Package. | ||
#:{{img | file = Encoder_Contents.PNG | width = 750px}} | #:{{img | file = Encoder_Contents.PNG | width = 750px}} | ||
| Line 18: | Line 19: | ||
}} | }} | ||
| − | {{Section | title = <h1>Connecting to the Encoder</h1> | content = | + | {{Top of Page}} |
| + | |||
| + | {{Section | title = <h1>Connecting to the Encoder</h1> | color = #CCDDDD | content = | ||
# On your computer, open control panel. | # On your computer, open control panel. | ||
# Search for and open Network and Sharing Center. | # Search for and open Network and Sharing Center. | ||
| Line 35: | Line 38: | ||
}} | }} | ||
| − | {{Section | title = <h1>Configuring the Encoder</h1> | content = | + | {{Top of Page}} |
| + | |||
| + | {{Section | title = <h1>Configuring the Encoder</h1> | color = #DDDDCC | content = | ||
# From the encoder Web Interface, select the Settings tab at the top. You will be taken to the settings menu, which is organized into tabs. | # From the encoder Web Interface, select the Settings tab at the top. You will be taken to the settings menu, which is organized into tabs. | ||
| Line 97: | Line 102: | ||
}} | }} | ||
| − | {{Section | title = <h1>Firmware Upgrade</h1> | content = | + | {{Top of Page}} |
| + | |||
| + | {{Section | title = <h1>Firmware Upgrade</h1> | color = #CCDDDD | content = | ||
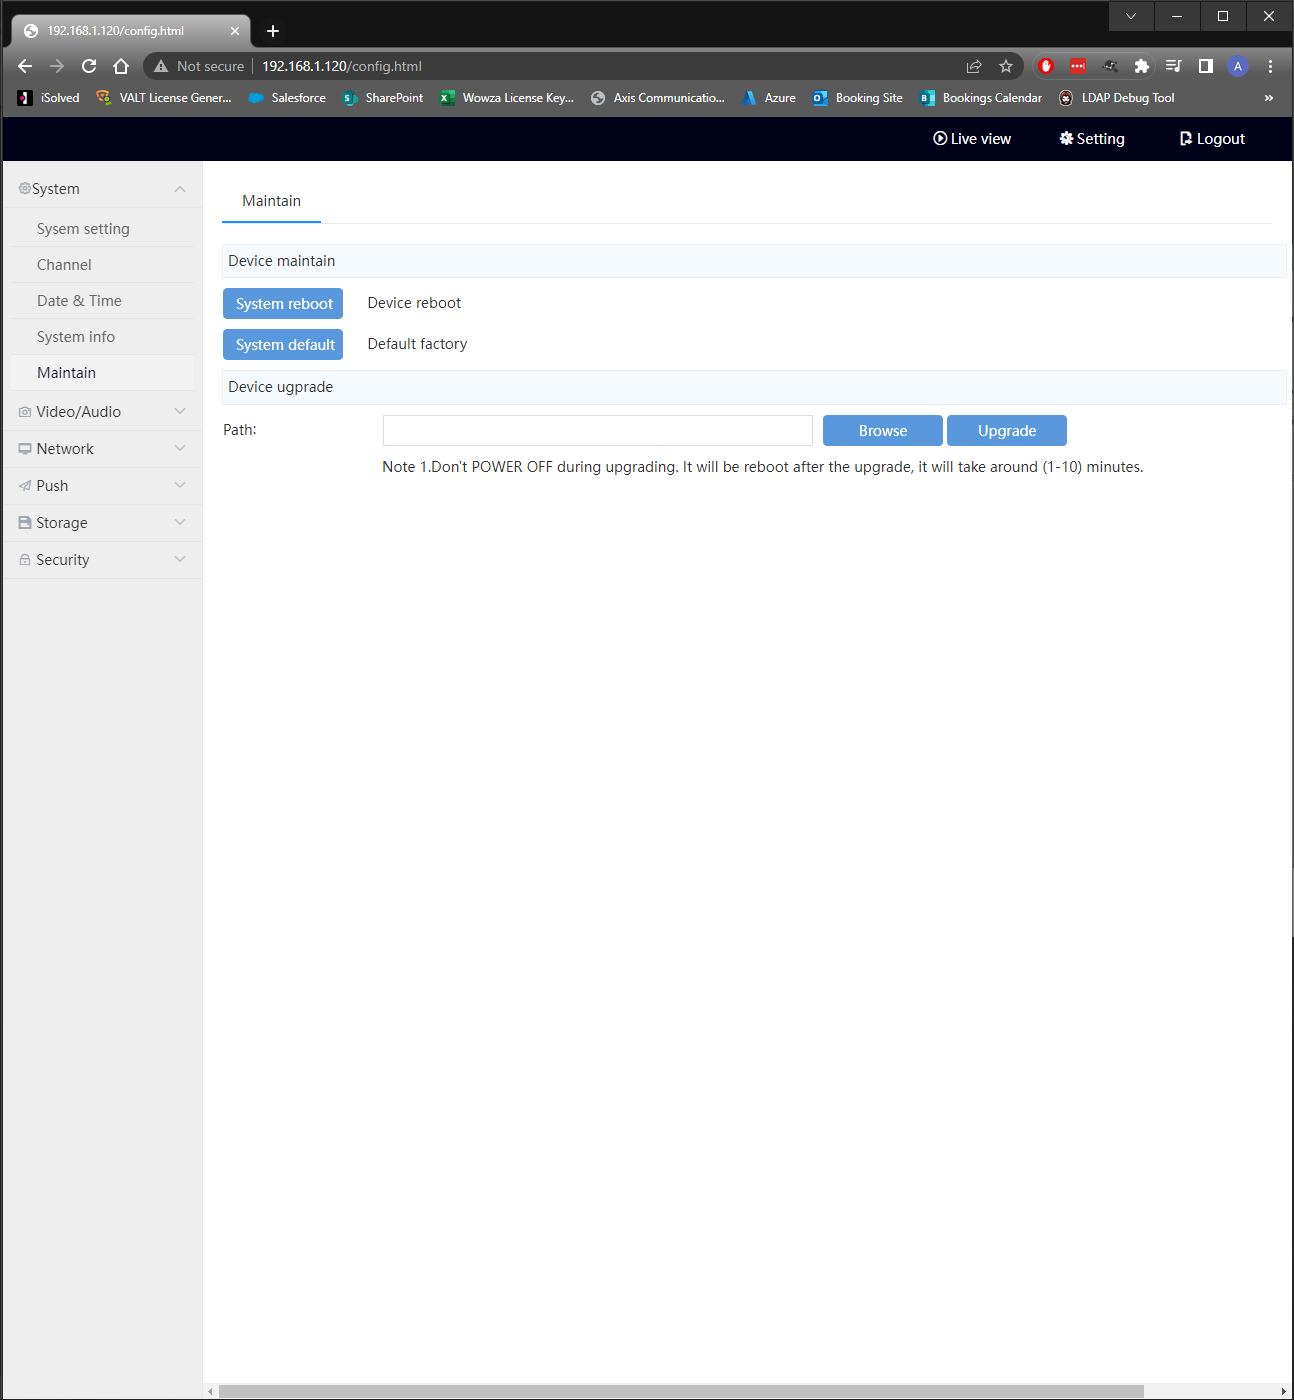
# Select the "System" Tab and then click the "Maintain" menu from the left pane. | # Select the "System" Tab and then click the "Maintain" menu from the left pane. | ||
# You should see the menu pictured below | # You should see the menu pictured below | ||
| Line 106: | Line 113: | ||
}} | }} | ||
| − | =Adding the Encoder in VALT= | + | {{Top of Page}} |
| + | |||
| + | {{Section | title = <h1>Adding the Encoder in VALT</h1> | color = #DDDDCC | content = | ||
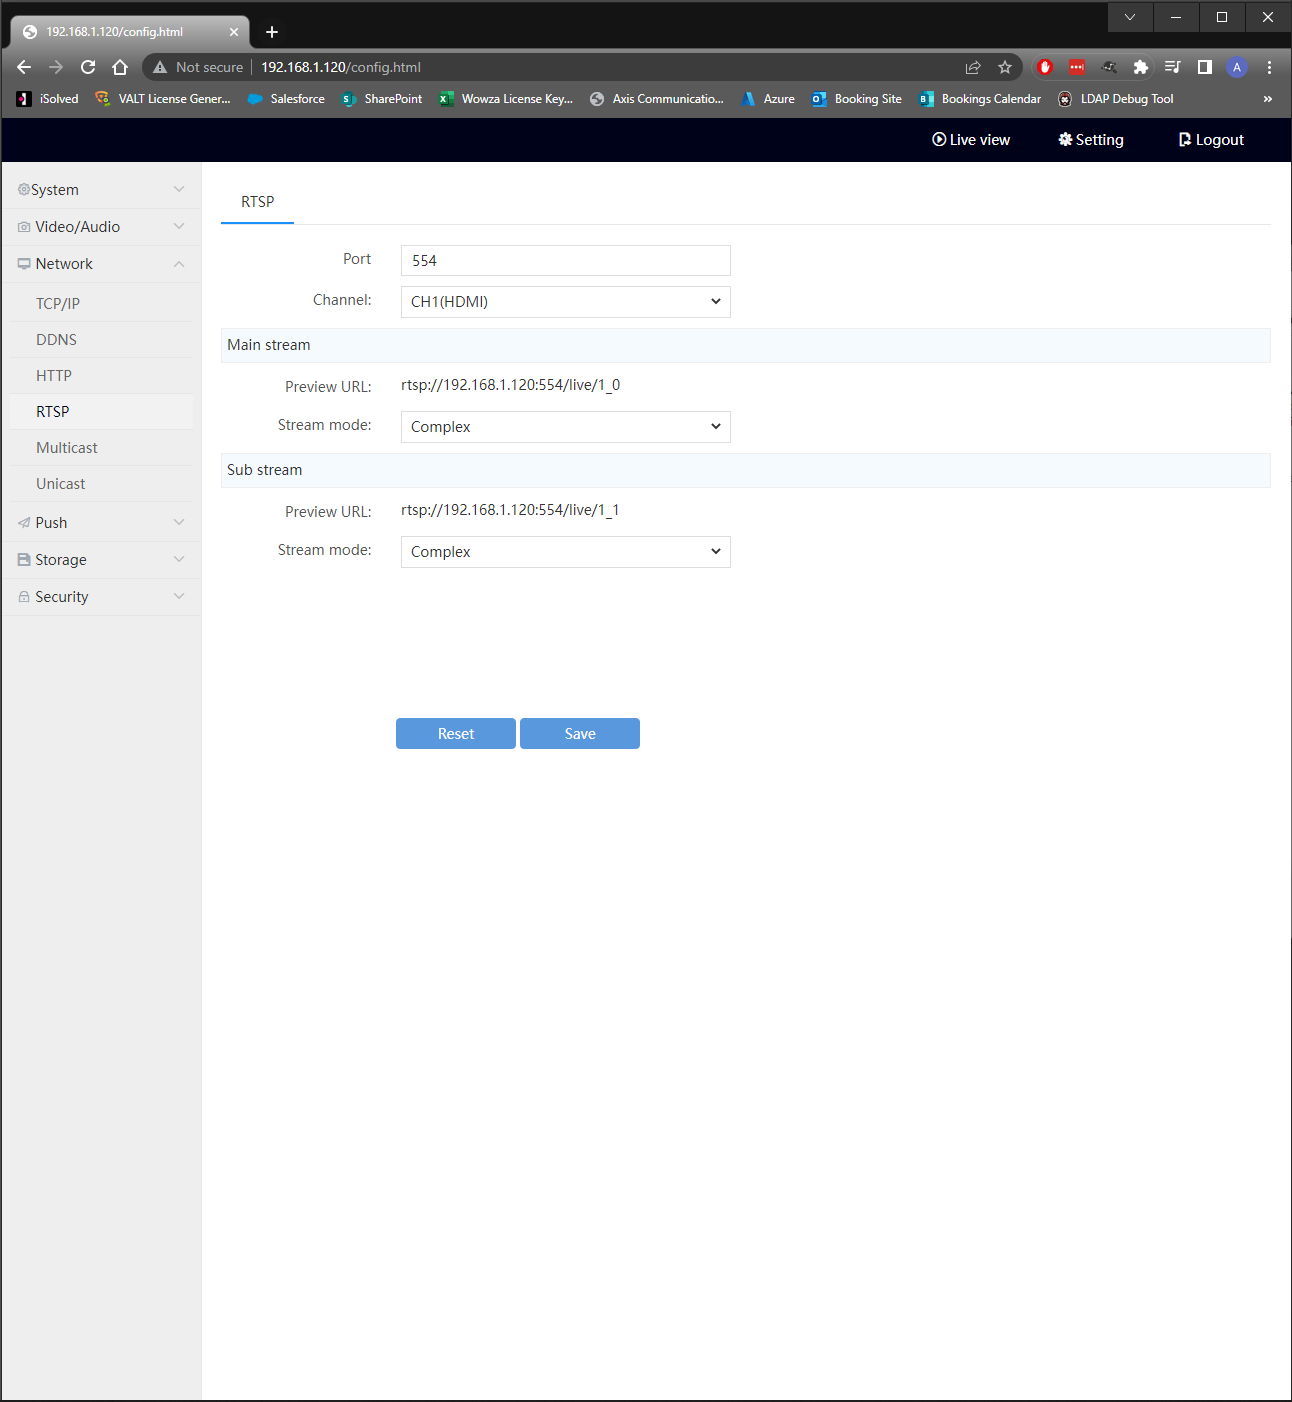
# On the encoder, Select the "Network" Tab and then click the "RTSP" menu from the left pane. | # On the encoder, Select the "Network" Tab and then click the "RTSP" menu from the left pane. | ||
# You should see the menu pictured below | # You should see the menu pictured below | ||
| − | #:{{img | file = RTSP_URL.PNG | width = | + | #:{{img | file = RTSP_URL.PNG | width = 800px}} |
# Find the section labeled "Preview URL" and copy the url that has this format <code>rtsp://<encoder_ip>:554/live/1_0</code> | # Find the section labeled "Preview URL" and copy the url that has this format <code>rtsp://<encoder_ip>:554/live/1_0</code> | ||
# In VALT, navigate to Admin -> Rooms and Cameras | # In VALT, navigate to Admin -> Rooms and Cameras | ||
| Line 118: | Line 127: | ||
# Select a room to assign the encoder to | # Select a room to assign the encoder to | ||
# Click "Save" | # Click "Save" | ||
| + | }} | ||
| + | |||
| + | {{Top of Page}} | ||
Latest revision as of 09:40, 3 October 2023
⚠This page shows the Encoder setup for the IVS Encoder/Decoder.
Contents
Powering up the Encoder
- Unpack the contents of the Encoder Package.
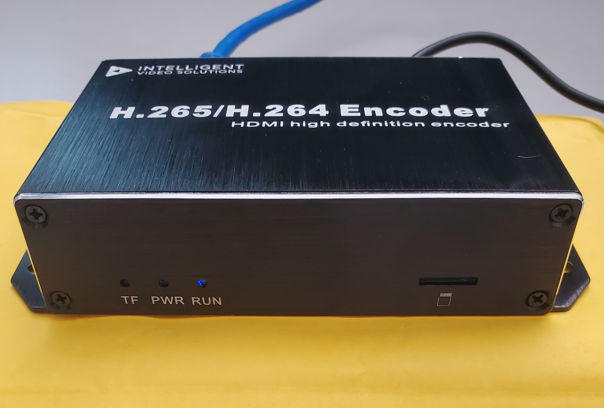
- Find the 12V power supply and the ethernet cable and connect both to the back of the encoder.
- Connect the Power brick of the 12V power supply to a 120V Outlet.
- Connect the other end of the ethernet cable to your computer directly or via a USB-C to ethernet adapter.
- The "Run" LED should light up blue as pictured once the encoder has powered up.
- At this point we are ready to reconfigure the networking on your computer to connect to the encoder
Connecting to the Encoder
- On your computer, open control panel.
- Search for and open Network and Sharing Center.
- Click on the active "Ethernet" Connection on the right.
- Within the Status popup window, click "Properties".
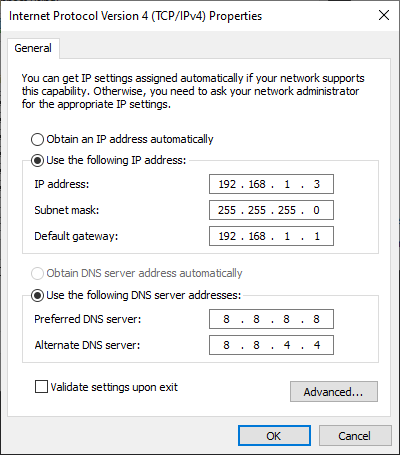
- Within the Properties popup window, double click "Internet Protocol Version 4 (TCP/IPv4)".
- Adjust the properties to match the picture below.
- Remember to come back and change all the settings back to automatic if you want your ethernet to work normally later!
- Click "OK" on this popup and the popup below it to apply the new settings
- Navigate to http://192.168.1.120 in Google Chrome
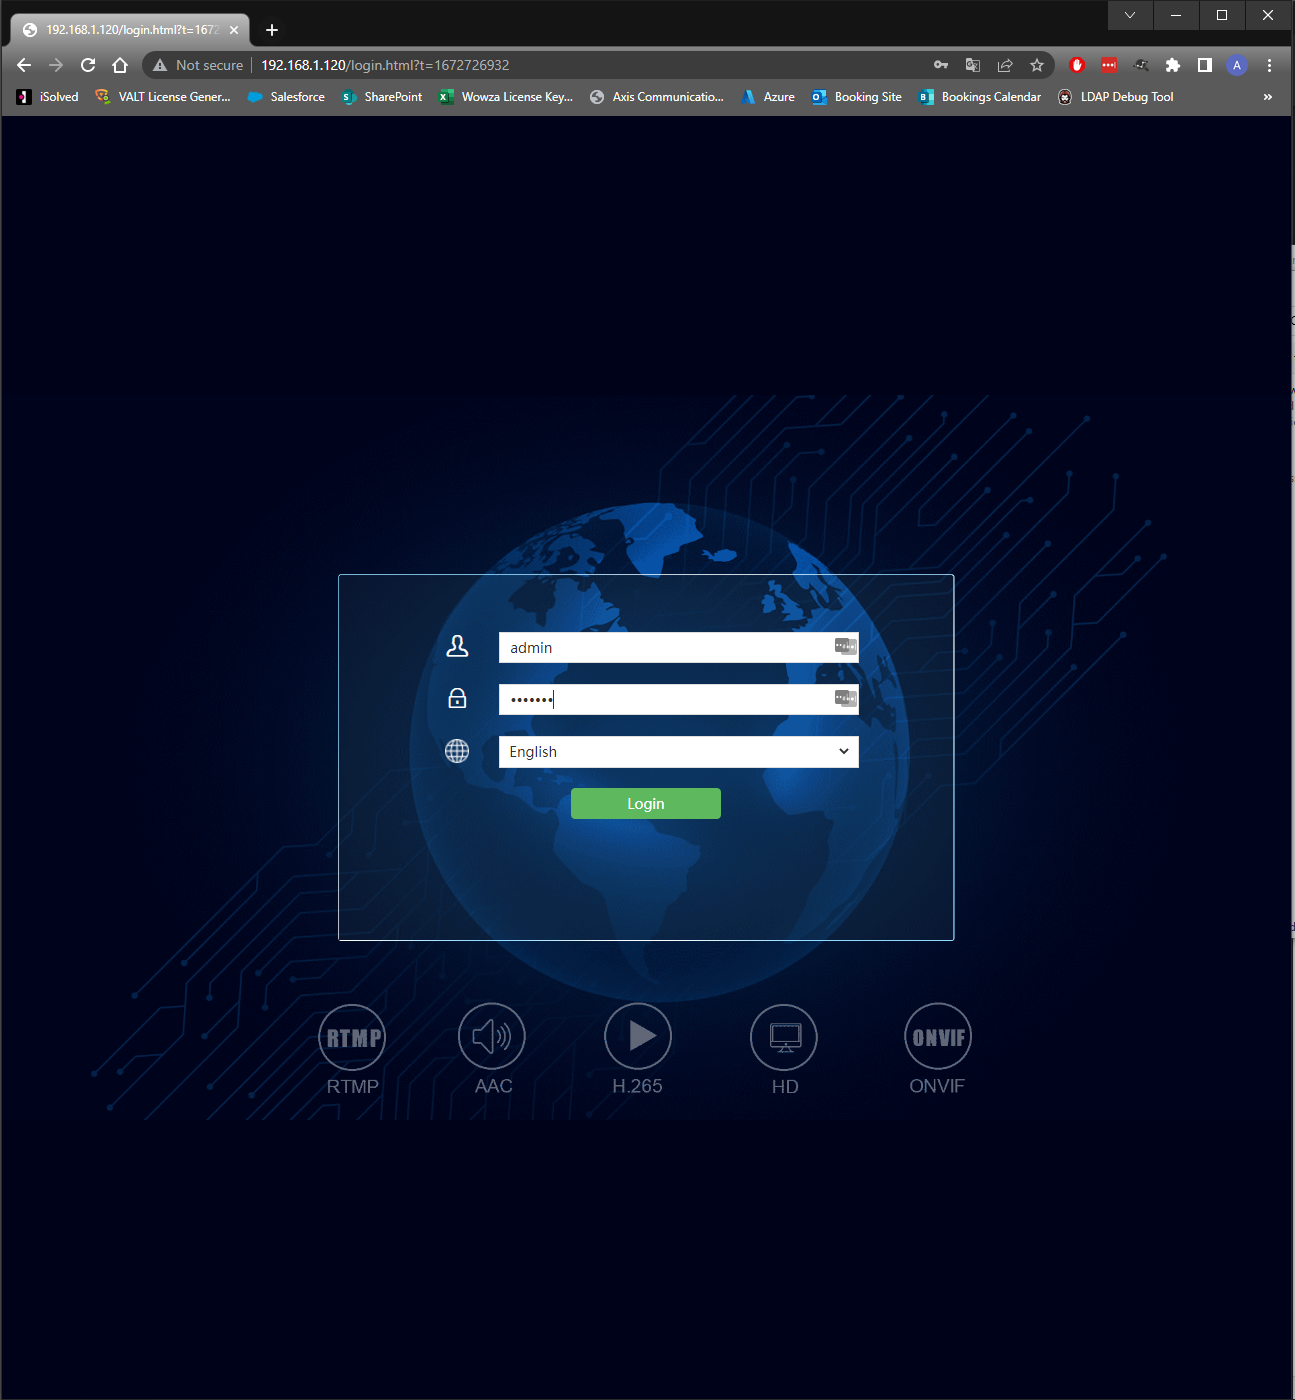
- Provide the default credentials of admin/12345 for the login popup that appears (pictured below)
- If the Encoder Web Interface (pictured below) appears, you are ready to configure the Encoder!
Configuring the Encoder
- From the encoder Web Interface, select the Settings tab at the top. You will be taken to the settings menu, which is organized into tabs.
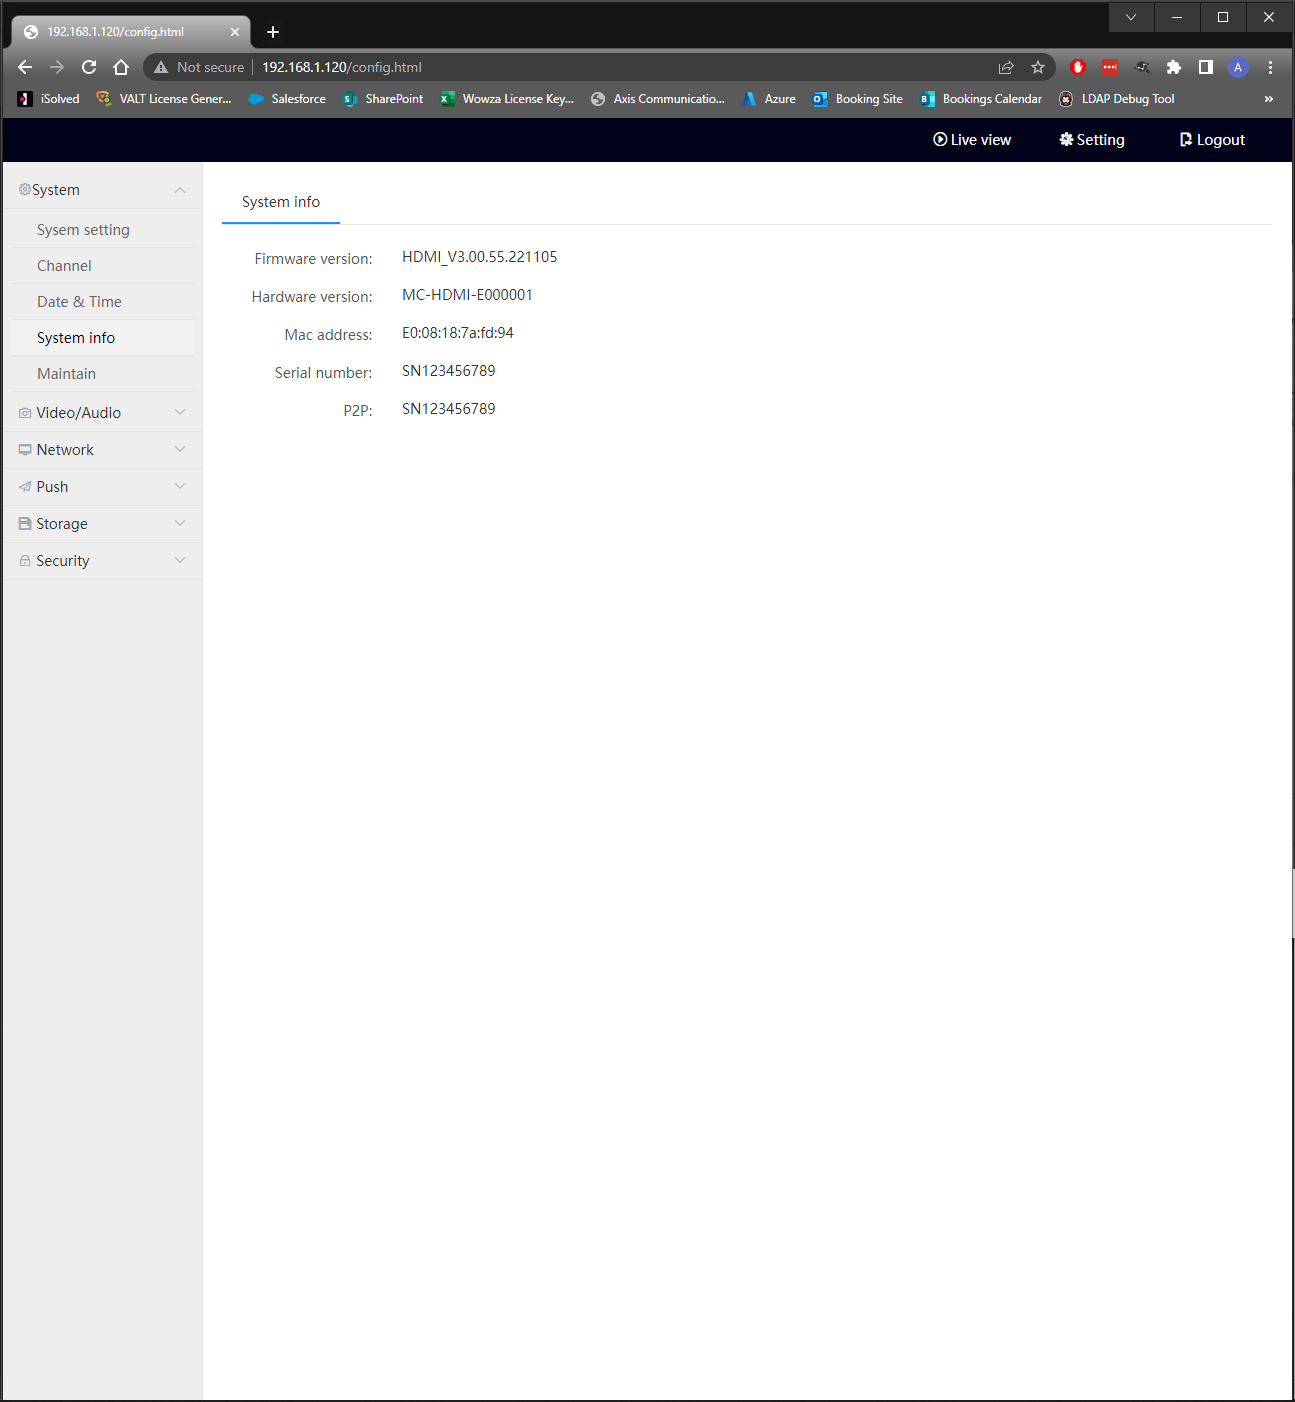
Validate Encoder Firmware and Obtain MAC Address
- Select the "System" tab and then click the "System Info" Menu from the right pane.
- You should be presented with the following information
- If the Firmware version listed is lower than HDMI_V3.00.64.220113, consult the "Firmware Upgrade" portion of this article
- Record the MAC Address listed if needed
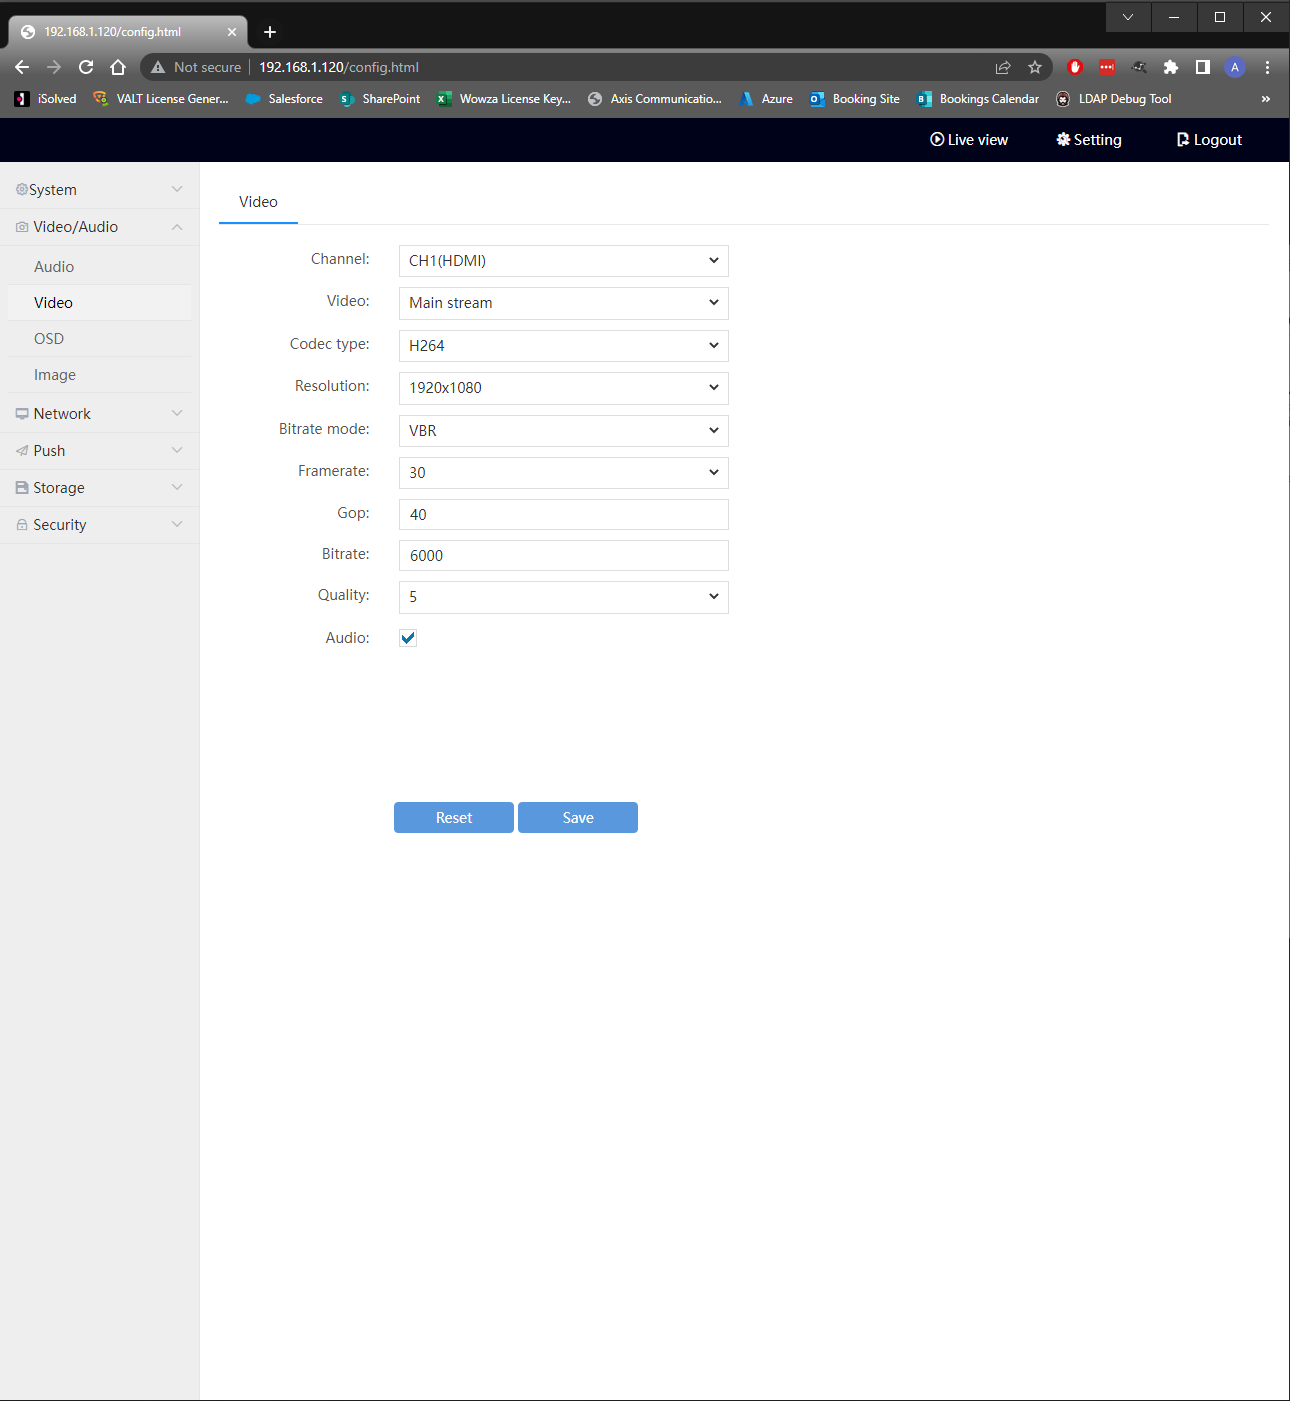
Adjust Encoder Video Settings
- Click on the "Video/Audio" Tab and then select "Video" from the left pane.
- Adjust the options in this Menu to match the configuration in the picture below
- Optionally, you can uncheck the "Audio" box if do not want audio included in the encoder feed.
- Click "Save" to preserve your changes
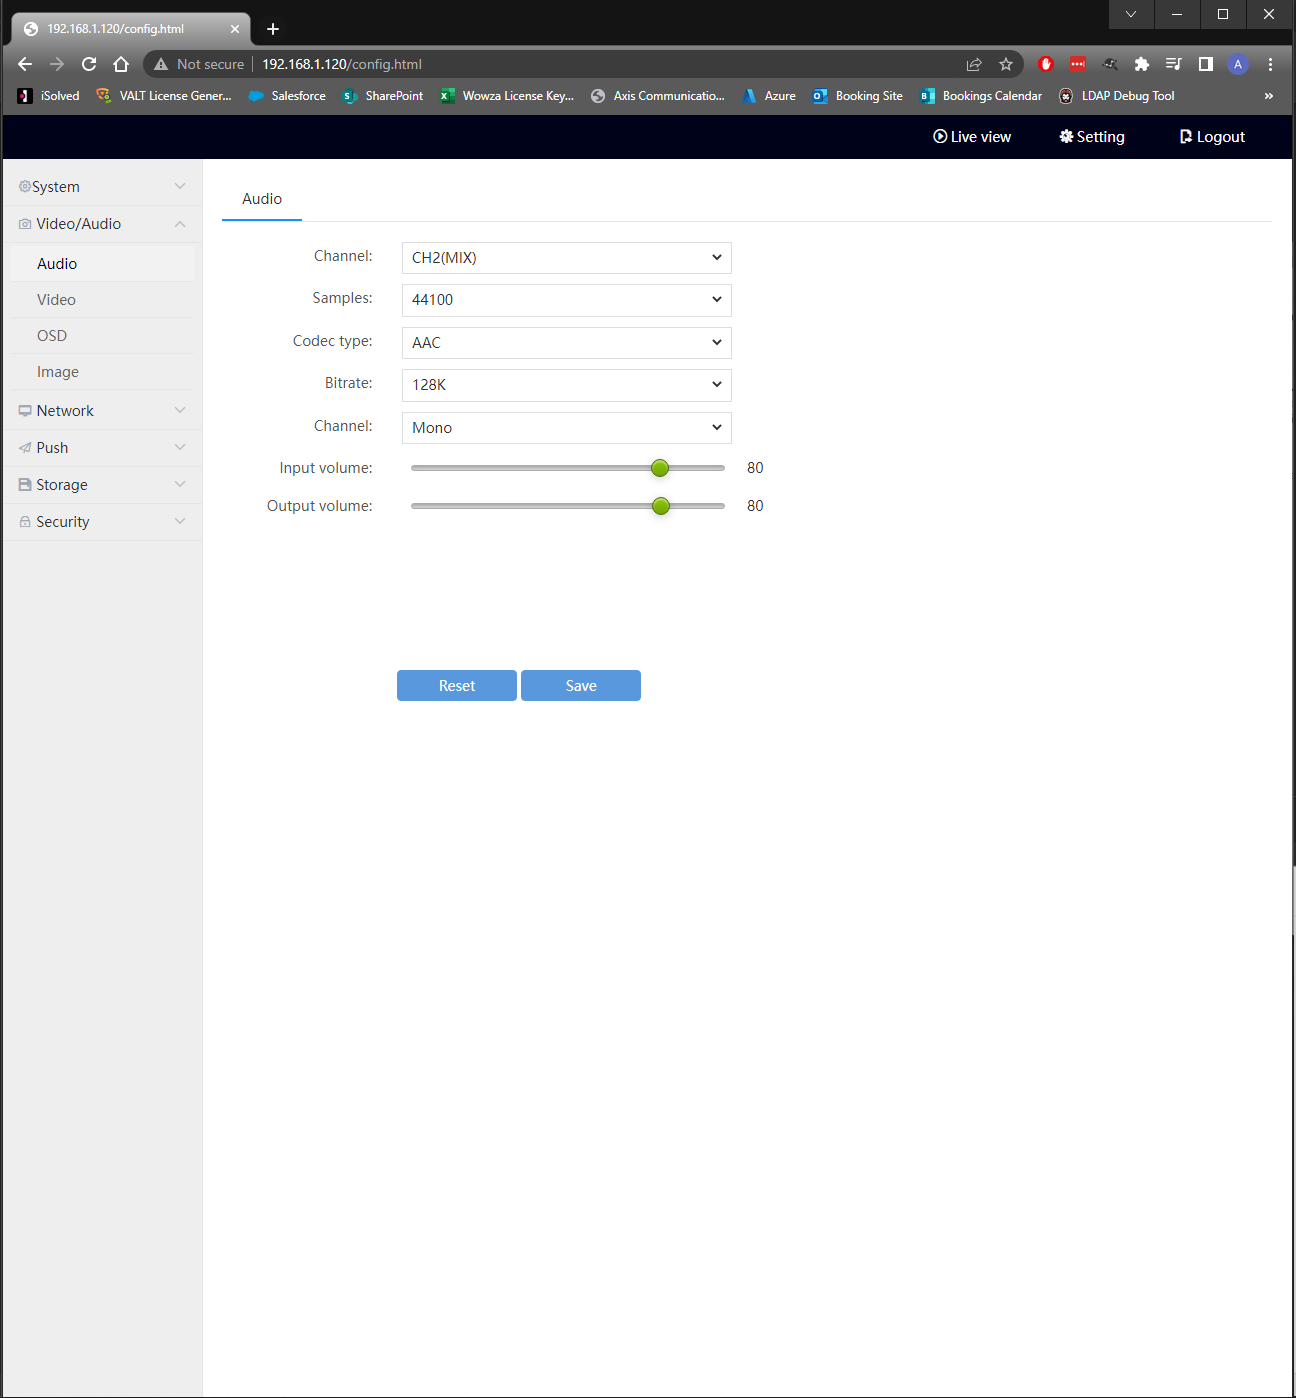
Adjust Encoder Audio Settings
- Select the "Video/Audio" Tab and then click the "Audio" Menu from the right pane.
- You can configure the encoder for HDMI Audio using the audio carried by a native HDMI Signal or for Line In Audio using the 3.5mm audio jack. Instructions for both are below.
HDMI Audio
- Adjust the options in this menu to match the configuration in the picture below
- Click "Save" to preserve your changes
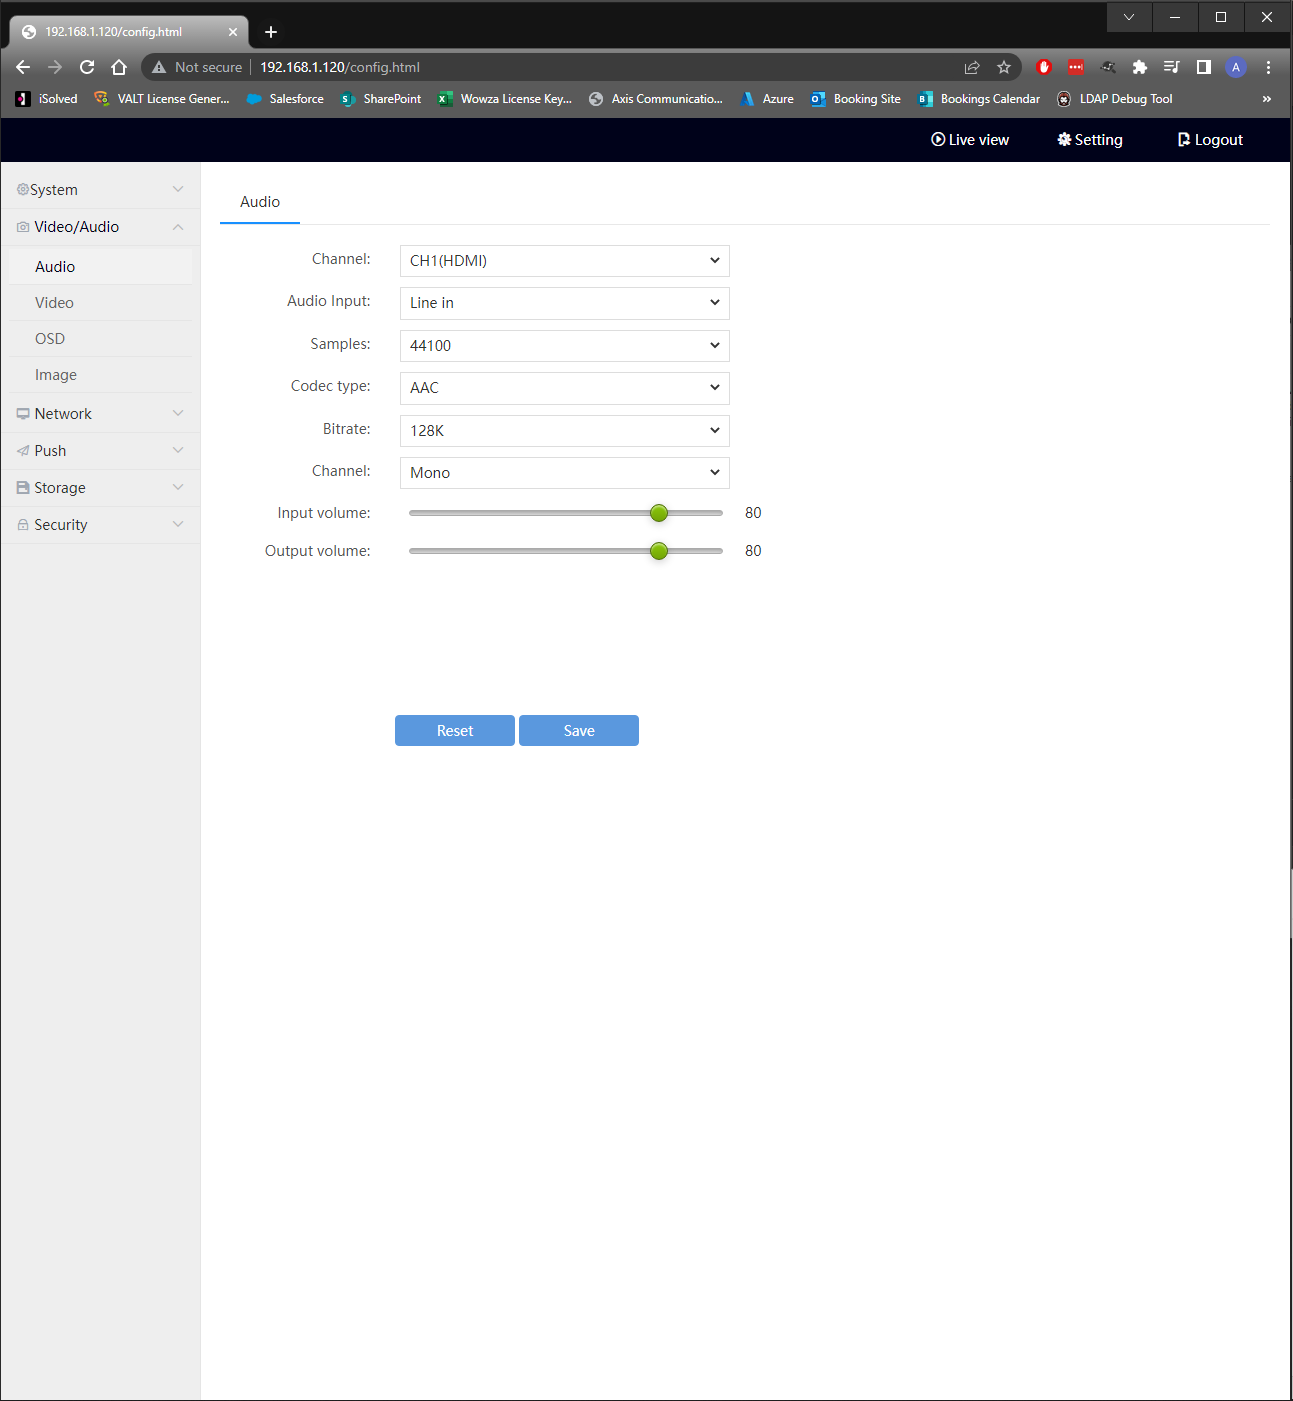
Line In Audio
- Adjust the options in this menu to match the configuration in the picture below
- Click "Save" to preserve your changes
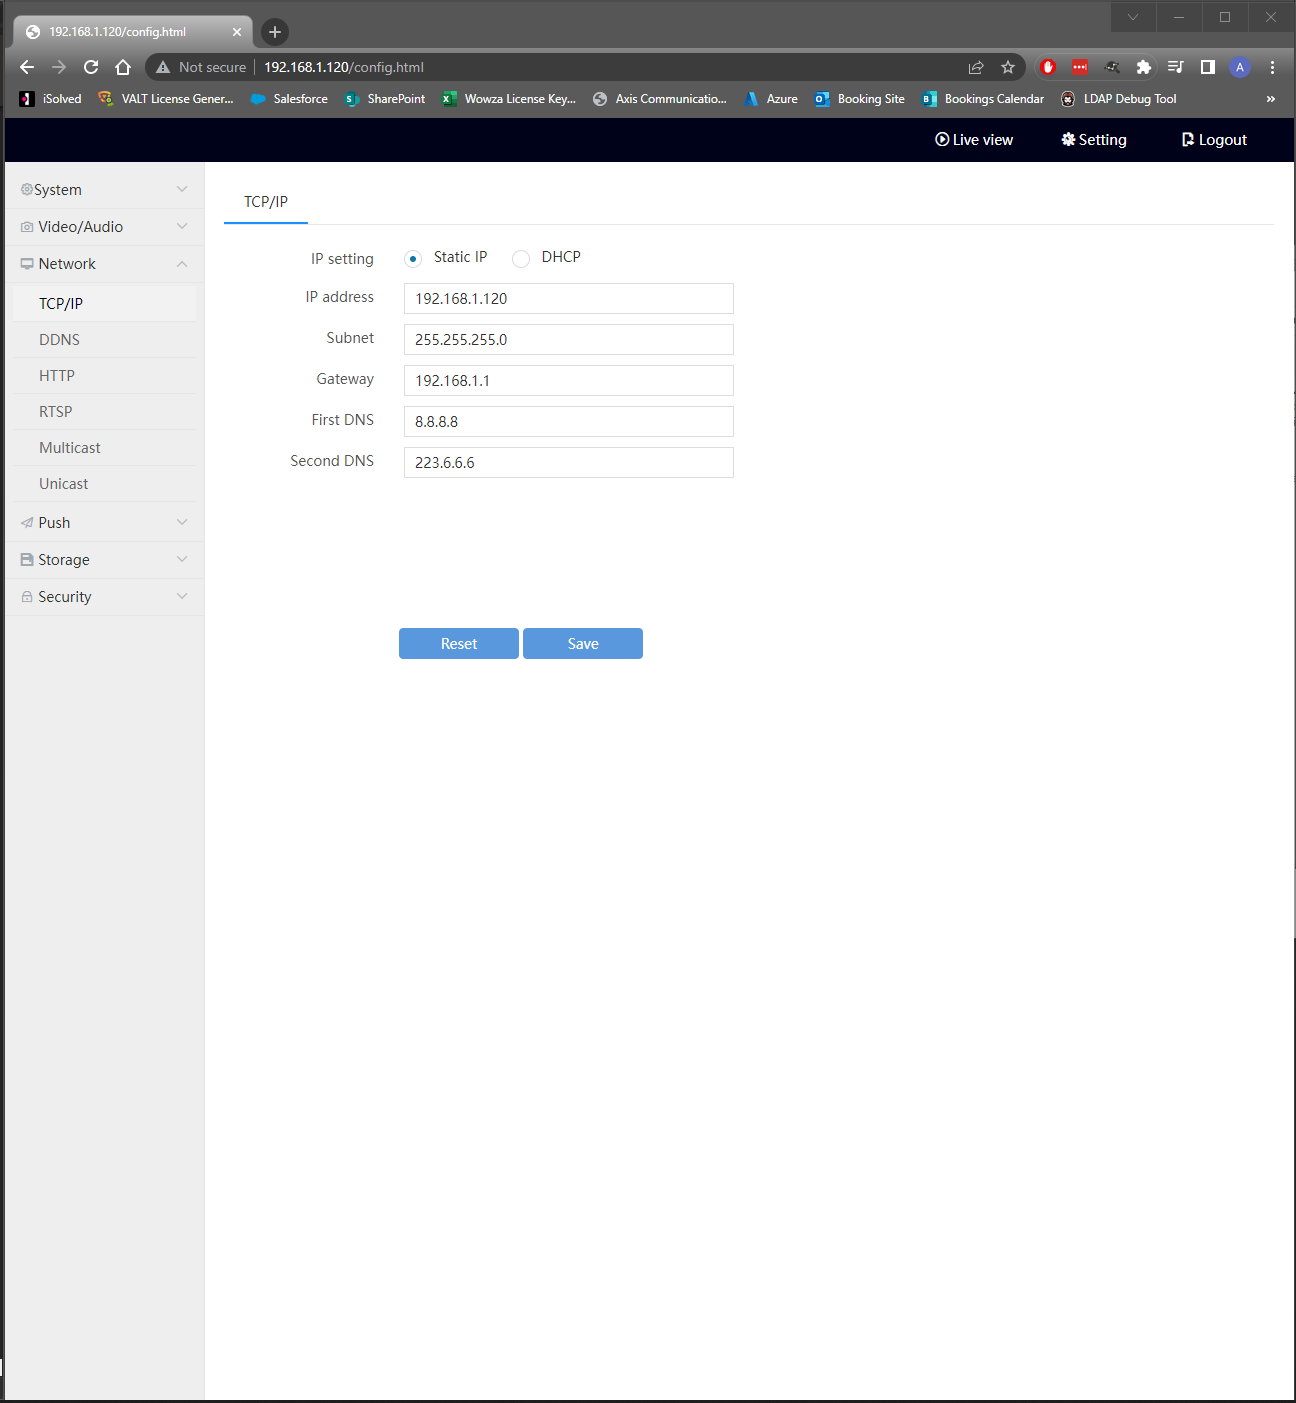
Adjust Encoder Network Settings
⚠NOTE: THAT ADJUSTMENTS TO THE NETWORK SETTINGS WHICH ARE SAVED WILL DISCONNECT YOU FROM THE ENCODER.
- Select the "Network" Tab and then click the "TCP/IP" Menu from the right pane.
- You can configure the encoder for a Static IP or DHCP. Instructions for both are below:
Static IP
- Select the "Static IP" Radio button
- Fill in the IP Address, Subnet Mask, Gateway, and DNS Servers that you want set for the encoder.
- Click "Save" to apply your changes.
DHCP
- Select the DHCP radio button
- Click "Save" to apply your changes.
- Once the encoder is set to DHCP, it does not fall back to a static IP if there is no DHCP server, you must prepare a DHCP lease in order to fix the IP for access to the encoder web interface.
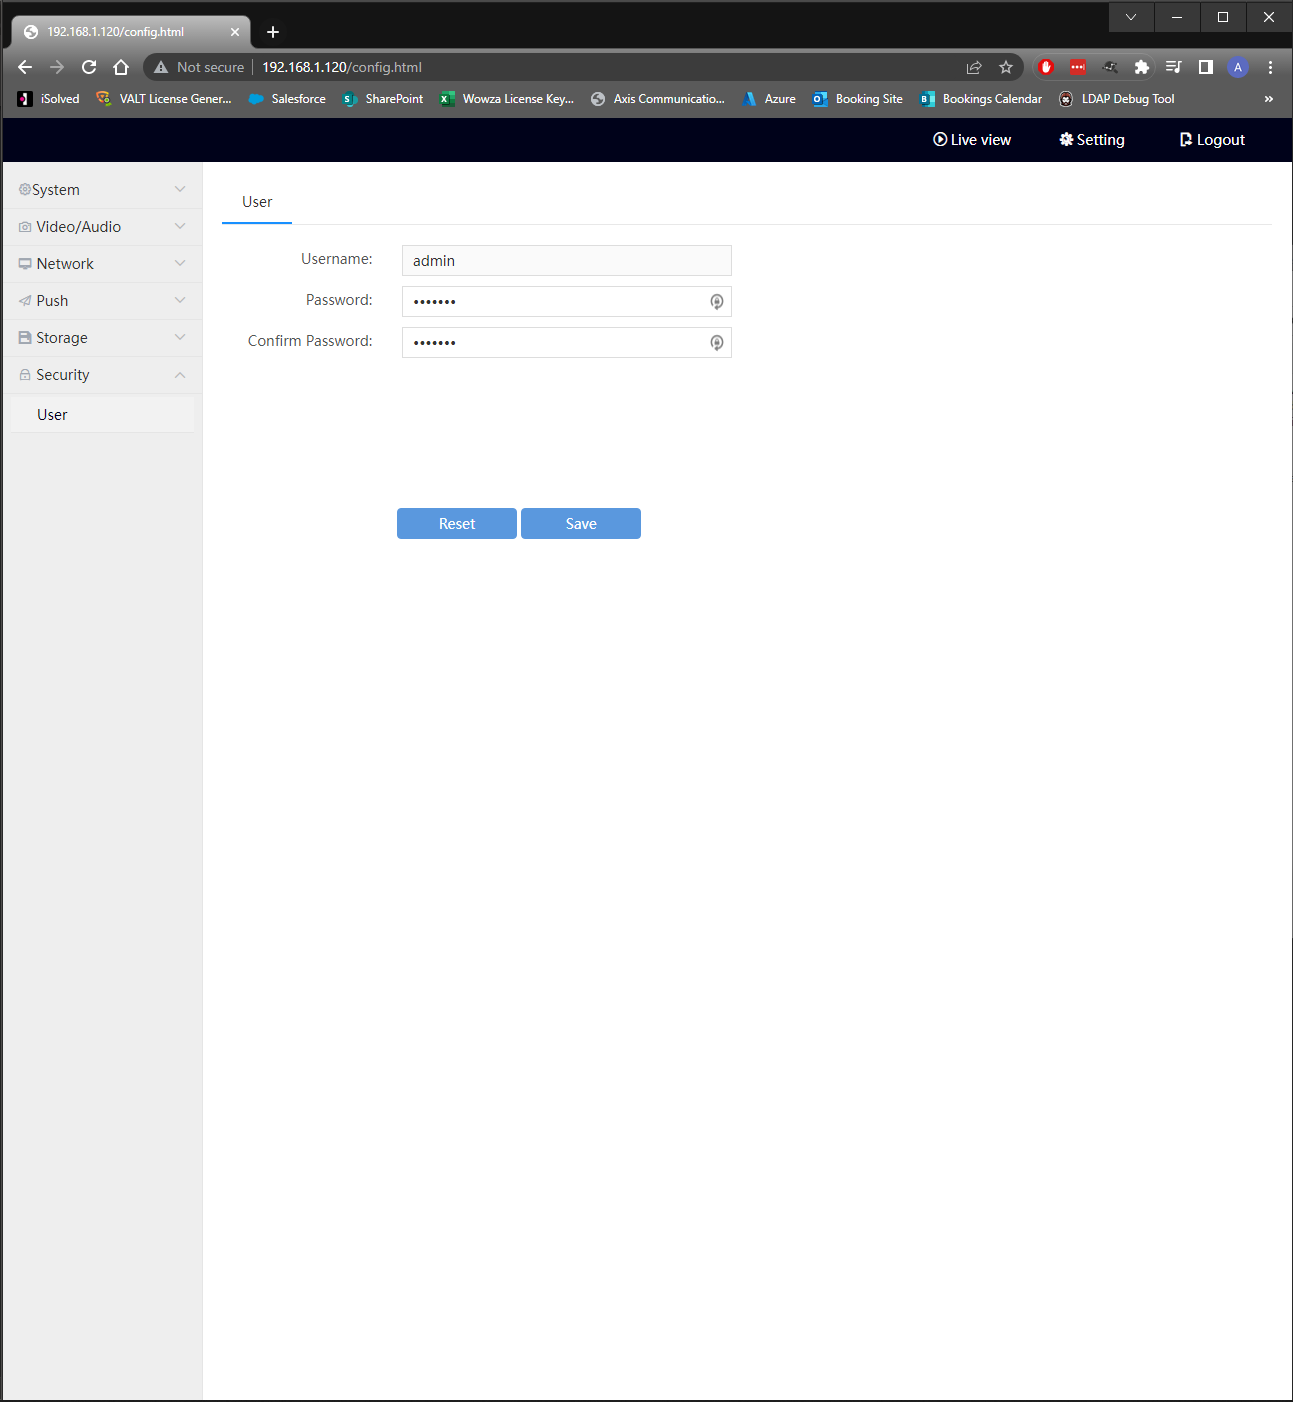
Adjust Encoder Credentials
- Select the "Security" Tab and click on "User"
- Adjust the password to be "admin51" and confirm it.
- Click "Save" to preserve your changes
Firmware Upgrade
- Select the "System" Tab and then click the "Maintain" menu from the left pane.
- You should see the menu pictured below
- Click "Browse" and select the upgraded firmware file, contact IVS Support to be provided with the firmware file if you do not already have it.
- Click "Upgrade" and wait for the process to complete with an "Upgrade Successful" popup.
- Click the "System info" Menu and check that the firmware upgrade has gone through.
Adding the Encoder in VALT
- On the encoder, Select the "Network" Tab and then click the "RTSP" menu from the left pane.
- You should see the menu pictured below
- Find the section labeled "Preview URL" and copy the url that has this format
rtsp://<encoder_ip>:554/live/1_0 - In VALT, navigate to Admin -> Rooms and Cameras
- Click "Add Camera"
- Enter in a name for the camera
- Enter in the Encoder IP
- Enter in the encoder credentials
- Select a room to assign the encoder to
- Click "Save"