Difference between revisions of "Installing Overhead Speaker on Axis Cameras with STM-1"
IVSWikiBlue (talk | contribs) (Created page with "==Required Parts And Tools== * Axis P5414-E 100x100px * Amplified Overhead Speaker (Any speaker will due, however, we recommend the OWI-AMPR2SIC5 and will be...") |
IVSWikiBlue (talk | contribs) (→Installation Instructions) |
||
| Line 17: | Line 17: | ||
#(#)See Pics Below | #(#)See Pics Below | ||
| − | [[File:Phantom Power Jumper.JPG|360x480px]] [[File:Cut Audio Cable.JPG|360x480px]][[File: | + | [[File:Phantom Power Jumper.JPG|360x480px]] [[File:Cut Audio Cable.JPG|360x480px]][[File:|360x480px]][[File:|360x480px]][[File:P5414E Output Wired.jpg|360x480px]] |
#Once audio is plugged in, locate your run 18/2 from the AMP2SIC5 to its designated power outlet. Test the talkback unit is working by activating the talkback function within the Valt Software by having a partner use their computer microphone to communicate with you. | #Once audio is plugged in, locate your run 18/2 from the AMP2SIC5 to its designated power outlet. Test the talkback unit is working by activating the talkback function within the Valt Software by having a partner use their computer microphone to communicate with you. | ||
[[File:Talkback Turn On.jpg|720x960px]] | [[File:Talkback Turn On.jpg|720x960px]] | ||
Revision as of 13:14, 3 October 2017
Required Parts And Tools
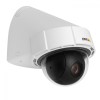
- Axis P5414-E
- Amplified Overhead Speaker (Any speaker will due, however, we recommend the OWI-AMPR2SIC5 and will be the speaker referenced in these instructions)

- 22/2 audio cable

- Fish Tape or Glow Rod

- Electrical Tape
- Wire Stripper


Installation Instructions
- Once your camera is installed, locate the AUDIO OUT on your P5414E.
- Strip the jacket of the 22/2 cable revealing the red, black, and bare wires inside. Cut away the bare wire and plastic surround the cable inside. Strip away a small piece of the red and black jackets revealing the bare copper wire.
- Wire the red to the + and black to the - of the AUDIO OUT of the P5414E phoenix connector.
- In this step, you want to run your 22/2 cable from the camera to your AMP2SIC5, wirings your red wire to the + phoenix connection and black to the - connection of the LINE INPUT of the AMP2SIC5 (See pics).
- Cut a small piece of the 22/2 cable stripping both sides away of either a red or black cable. Wire one end into the - and the other into the ground of the LINE INPUT.
- (#)See Pics Below

 [[File:|360x480px]][[File:|360x480px]]
- Once audio is plugged in, locate your run 18/2 from the AMP2SIC5 to its designated power outlet. Test the talkback unit is working by activating the talkback function within the Valt Software by having a partner use their computer microphone to communicate with you.
