Installing a Hyper-V Valt Virtual Appliance
Contents
Download the Hyper-V Appliance
- Click on the link below to download the Hyper-V virtual appliance.
- Extract ValtHyperV.zip
Load the Template on Hyper-V
- Open Hyper-V Manager
- Right click on your Hyper-V Server and select Import Virtual Machine from the menu.
-
- Click Next
-
- Click Browse
-
- Browse to the folder where you extracted the zip file and click on it.
-
- Click Select Folder
- Click Next
-
- Select the Virtual Machine to import
-
- Click Next
- Select Copy the virtual machine
-
- Click Next
- Review the values for the virtual machine configuration folder, Checkpoint store, and Smart paging folder.
- If changes need to be made, check the box for Store the virtual machine in a different location
- Fill the appropriate values in each of these fieldes
- Click Next
- Review the values for the location to store the virtual hard disks. If changes need to be made, update the value.
-
- Click Next
- Review the final configuration.
-
- If everything is correct, click Finish.


Configure Virtual Hardware
- Right click on the virtual machine in Hyper-V Manager
- Select Settings from the menu
-
- Adjust the memory and CPU of the appliance to support the number of cameras. The table below contains IVS' recommended specs.

Cameras Cores Memory 5 4 8 GB 15 8 16 GB 25 16 32 GB 50 32 64 GB
Click OK once all changes have been made.
You can also adjust the size of the data drive. The default size is 2 TB. If you adjust the size of the virtual drive, you will also need to adjust the size of the partition.
Configure IP Address
You must complete these steps even if you have already specified an IP address for the server or want to use DHCP. This will configure the Valt software with the correct IPs
For more in depth information on network configuration options, see the Valt Command Line Menu page.
- Access the Valt Server Command Line Menu.
- This menu is presented automatically at the Valt server terminal. It can also be accessed via ssh by running the following command from the prompt:
- sudo /usr/local/valt/bin/Menu
-

- Enter Option 1 for Network Configuration
-
- Enter Option 2 for Set IPs
-
- Select your interface from the options listed.
-
- Select Static or DHCP.
- For this example we will select DHCP
-
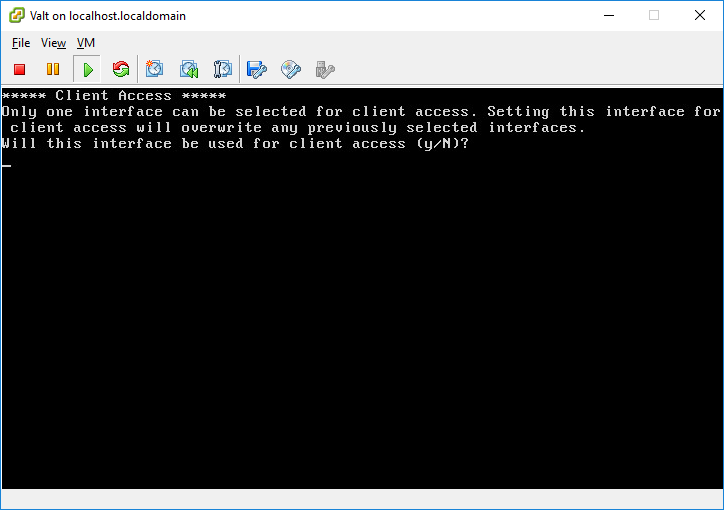
- Type Y when to configure this interface for client access.
-
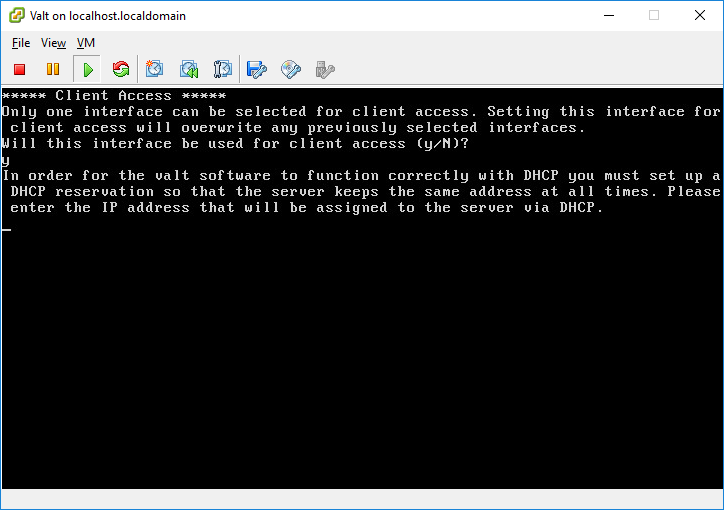
- Enter the IP Address of the interface when prompted.


IP Address changes will not take effect until the server has been rebooted.