Difference between revisions of "NFS Storage"
IVSWikiBlue (talk | contribs) (Created page with "The following instructions will configure the Valt appliance to store videos on a NFS share. '''WARNING: This instructions will remove any previously recorded videos. This sh...") |
IVSWikiBlue (talk | contribs) |
||
| (One intermediate revision by the same user not shown) | |||
| Line 7: | Line 7: | ||
# Connect to the server via SSH or log in to the teminal | # Connect to the server via SSH or log in to the teminal | ||
# Type '''sudo apt-get install nfs-common''' and press enter. | # Type '''sudo apt-get install nfs-common''' and press enter. | ||
| − | # [[File:Storage4.png]] | + | #: [[File:Storage4.png]] |
# When prompted, enter '''Y''' to confirm installation of the package. | # When prompted, enter '''Y''' to confirm installation of the package. | ||
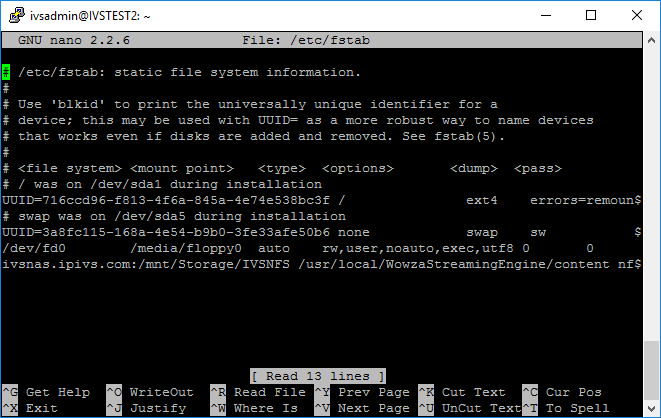
# Type '''sudo nano /etc/fstab''' and press enter. | # Type '''sudo nano /etc/fstab''' and press enter. | ||
#: [[File:Install45.png]] | #: [[File:Install45.png]] | ||
# Delete the line that mounts the local hard drive in /usr/local/WowzaStreamingEngine/content. It will most likely be the last line in fstab | # Delete the line that mounts the local hard drive in /usr/local/WowzaStreamingEngine/content. It will most likely be the last line in fstab | ||
| − | # Add a line for the | + | # Add a line for the NFS share. It should read similar to the following: |
#: ''servername:nfspath'' /usr/local/WowzaStreamingEngine/content nfs auto,nofail,noatime,nolock,intr,tcp,actimeo=1800 0 2 | #: ''servername:nfspath'' /usr/local/WowzaStreamingEngine/content nfs auto,nofail,noatime,nolock,intr,tcp,actimeo=1800 0 2 | ||
#: Replace the italicized text with the appropriate information for your environment. | #: Replace the italicized text with the appropriate information for your environment. | ||
Latest revision as of 17:57, 9 February 2017
The following instructions will configure the Valt appliance to store videos on a NFS share.
WARNING: This instructions will remove any previously recorded videos. This should only be performed with a new Valt installation.
If you need to perform this operation on an existing Valt server, you must copy the contents of /usr/local/WowzaStreamingEngine/content to your NFS share before proceeding.
- Connect to the server via SSH or log in to the teminal
- Type sudo apt-get install nfs-common and press enter.
-
- When prompted, enter Y to confirm installation of the package.
- Type sudo nano /etc/fstab and press enter.
-
- Delete the line that mounts the local hard drive in /usr/local/WowzaStreamingEngine/content. It will most likely be the last line in fstab
- Add a line for the NFS share. It should read similar to the following:
- servername:nfspath /usr/local/WowzaStreamingEngine/content nfs auto,nofail,noatime,nolock,intr,tcp,actimeo=1800 0 2
- Replace the italicized text with the appropriate information for your environment.
- EX: ivsnas.ipivs.com:/var/nfs/vidshare /usr/local/WowzaStreamingEngine/content nfs auto,nofail,noatime,nolock,intr,tcp,actimeo=1800 0 0
-
- Press CTRL-X
- Enter Y to save.
- Do not change the file name and press enter
- Type sudo mount -a and press enter.
-
- Type sudo /usr/local/valt/bin/Storage and press enter
- In some installation the Storage script may be located at /home/ivsadmin/ValtInstall/Storage. If the script is not in either location, please contact IVS technical support for assistance.


The Valt appliance should now be configured to store all videos on an NFS share.