Difference between revisions of "ROAM Bridge"
IVSWikiBlue (talk | contribs) |
IVSWikiBlue (talk | contribs) |
||
| (12 intermediate revisions by the same user not shown) | |||
| Line 1: | Line 1: | ||
__TOC__ | __TOC__ | ||
{{Article | title = ROAM Bridge | content = | {{Article | title = ROAM Bridge | content = | ||
| + | ==General Information== | ||
| + | The <b>ROAM Bridge</b> is used to connect the wireless <b>[[ROAM Carts | ROAM Cart]]</b> to a wireless network. | ||
| + | |||
| + | {{Aside | hue = 50 | icon = {{warning_icon}} | content = The wireless network that this bridge connects to will need to be able to talk to VALT. For more, see our [[Network Requirements]].}} | ||
| + | |||
| + | <hr> | ||
| + | |||
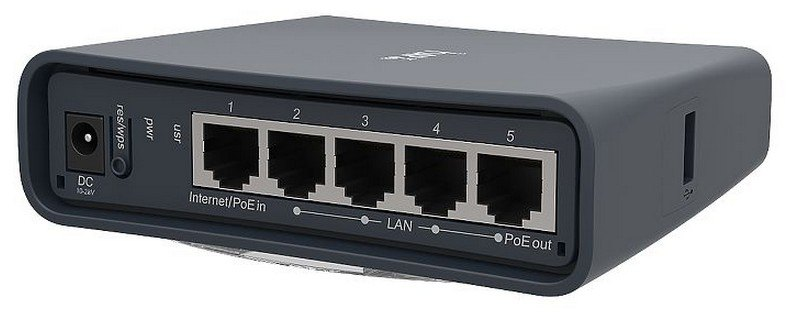
==Physical Device== | ==Physical Device== | ||
| − | {{img | width = 500px | file = ROAM Bridge.png}} | + | <center>{{img - resize | width = 500px | file = ROAM Bridge.png}}</center> |
<hr> | <hr> | ||
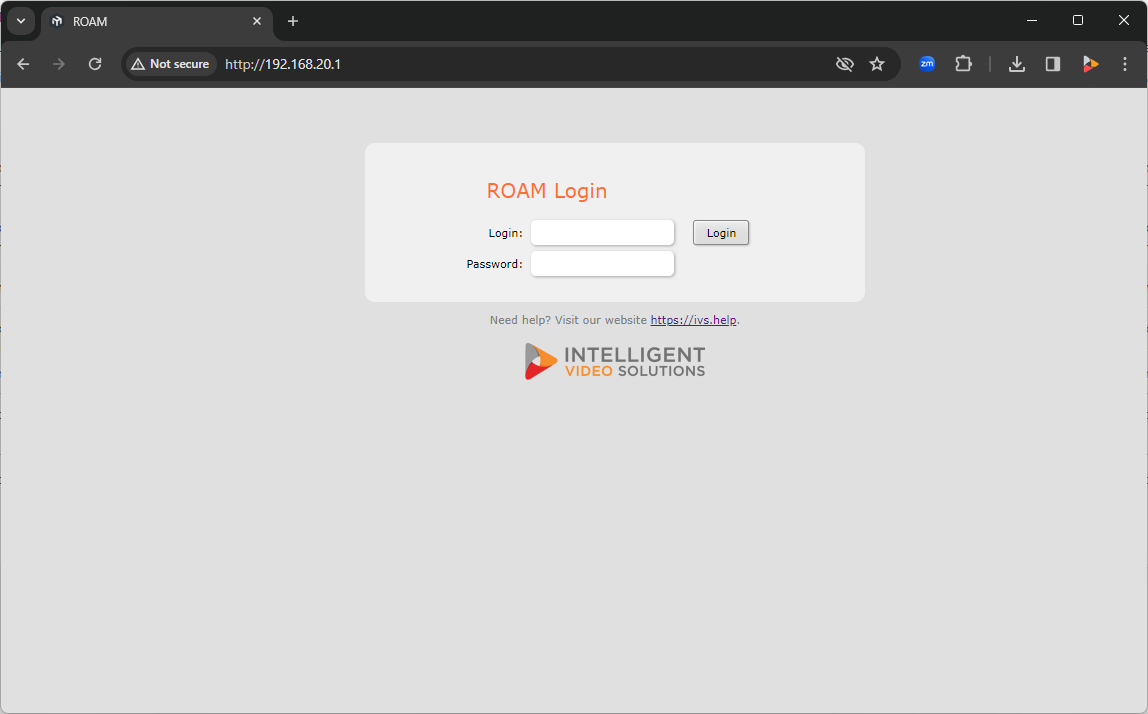
==Accessing the ROAM Bridge== | ==Accessing the ROAM Bridge== | ||
| − | To access the | + | To access the ROAM Bridge, it must be powered and connected to the network. |
| − | {{Aside | content = You can also access the device by connecting a laptop or computer directly to | + | {{Aside | content = You can also access the device by connecting a laptop or computer directly to port 3 or 4.}} |
Once on the network, please navigate to the IP of the bridge, and enter the credentials. | Once on the network, please navigate to the IP of the bridge, and enter the credentials. | ||
| Line 21: | Line 28: | ||
</dl> | </dl> | ||
| − | {{img | + | {{img - resize | file = ROAM Bridge Login Screen.png}} |
| + | {{Top of Page}} | ||
<hr> | <hr> | ||
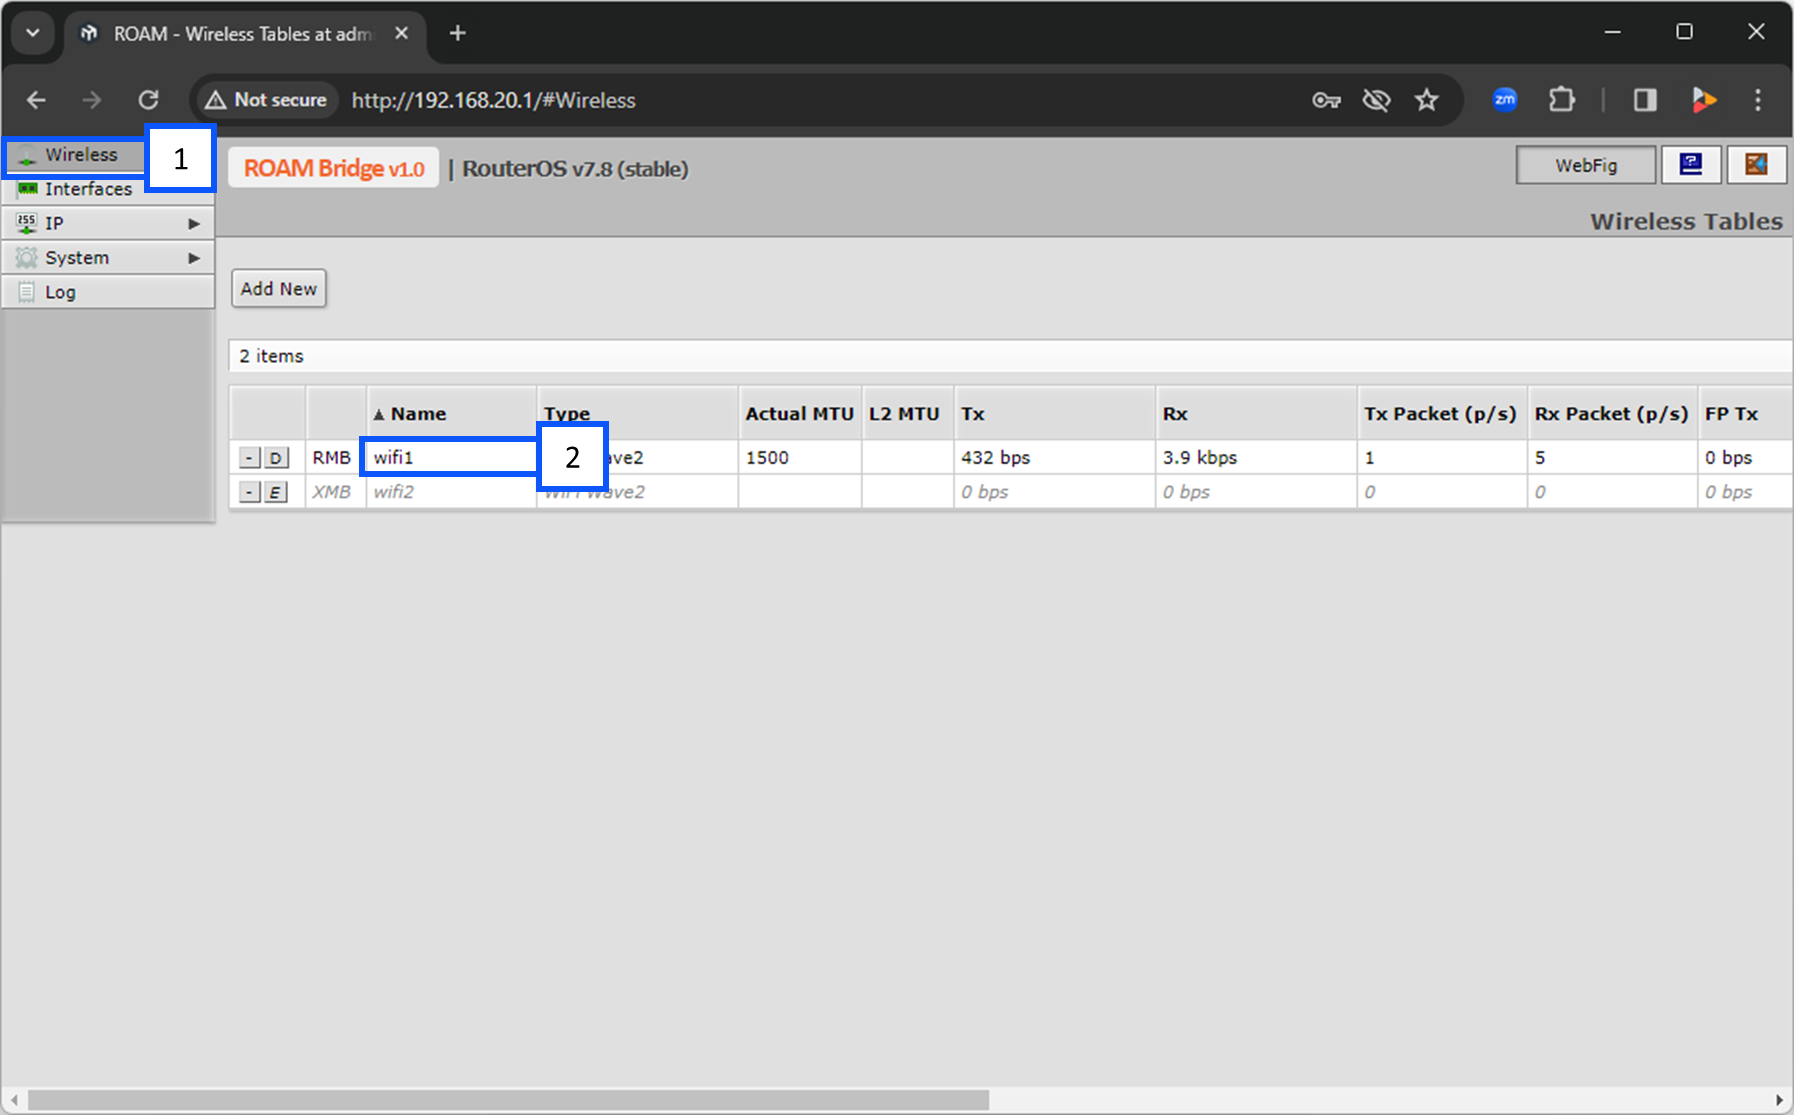
==Configure Wireless== | ==Configure Wireless== | ||
| − | + | {{Aside | hue = 200 | icon = {{book_icon}} | content = To the left of <b>wifi1</b>, you will see a button with [E] or [D]. Make sure this is showing a <b>[D]</b>. This means that is is enabled. The letter D is prompting you to disable wifi1.}} | |
| − | + | # Select <b>Wireless</b>. | |
| − | + | #Click on <b>wifi1</b>. | |
| − | {{Aside | hue = 200 | icon = {{book_icon}} | content = To the left of <b>wifi1</b>, you will see a | + | {{img - resize | file = ROAM Bridge Wireless 01.png}} |
<hr> | <hr> | ||
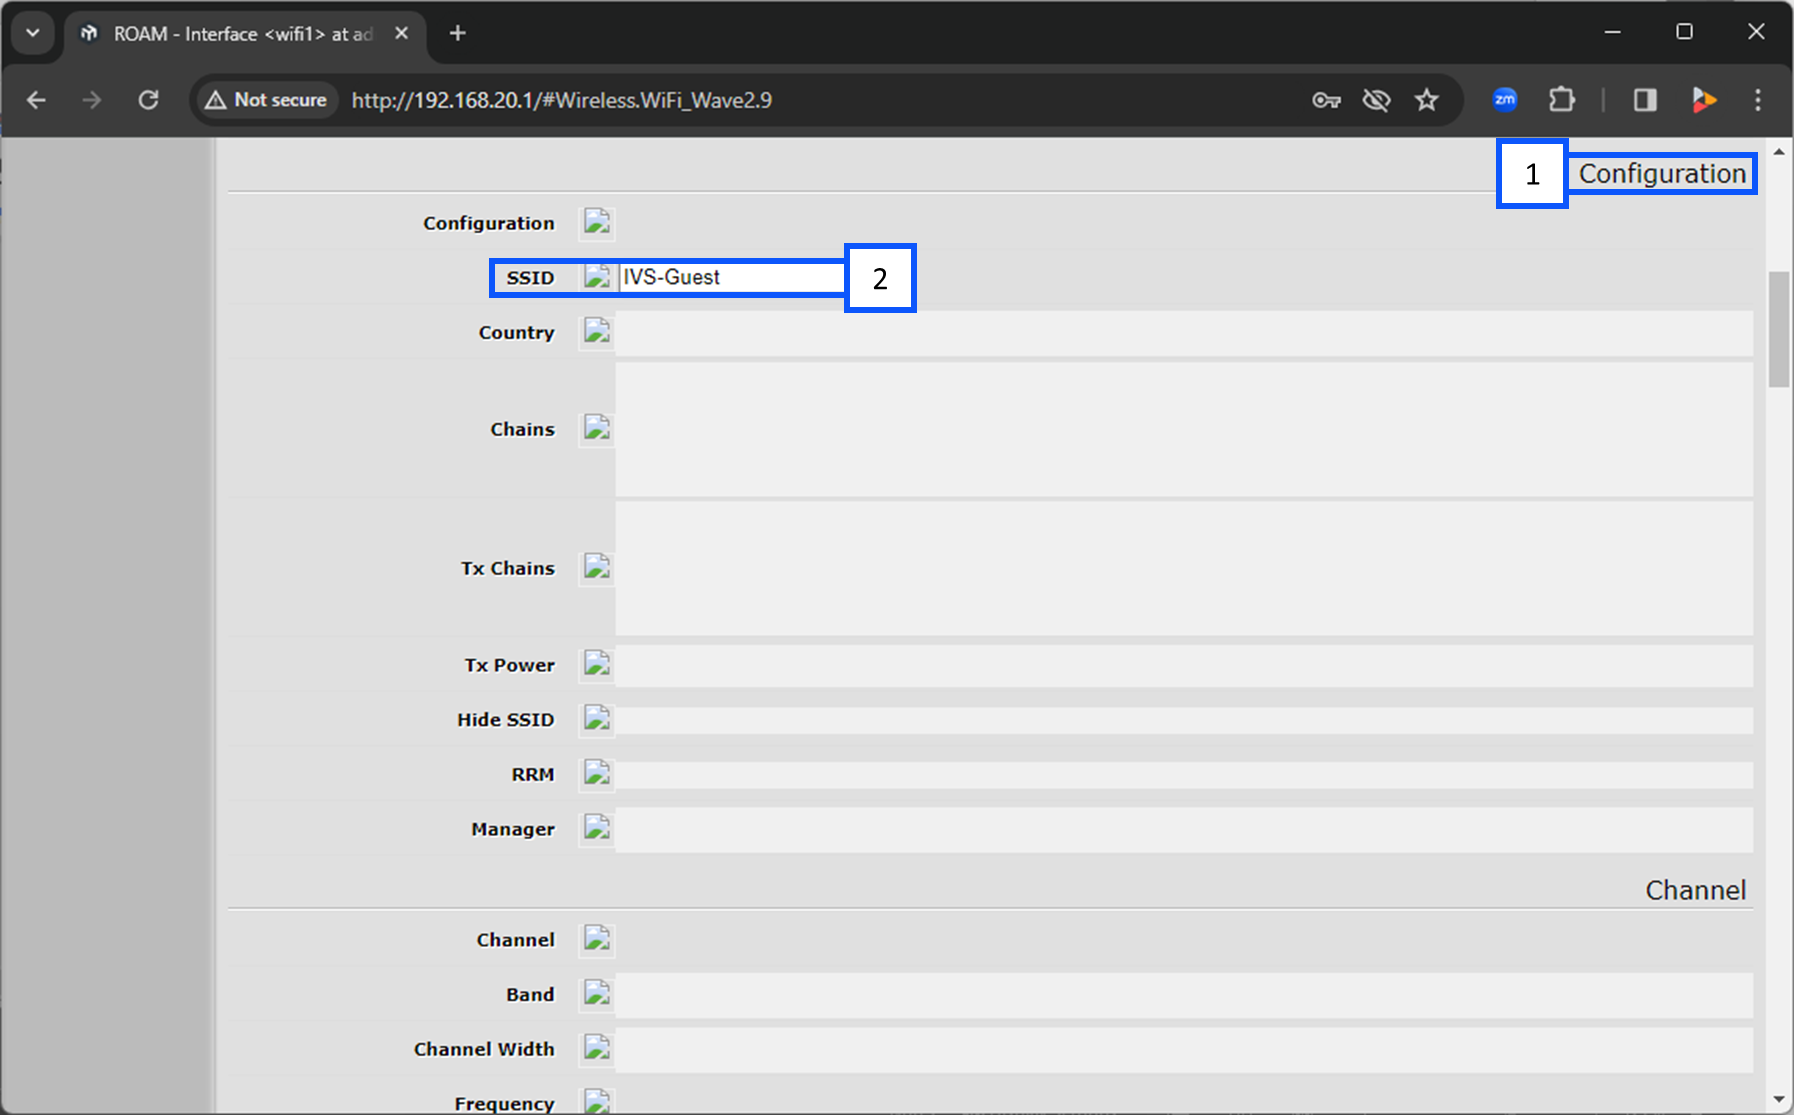
| − | + | #Scroll down to <b>Configuration</b>. | |
| − | {{img | + | #Under <b>SSID</b> select the wireless network you are going to connect to. |
| + | {{img - resize | file = ROAM Bridge Wireless 02.png}} | ||
<hr> | <hr> | ||
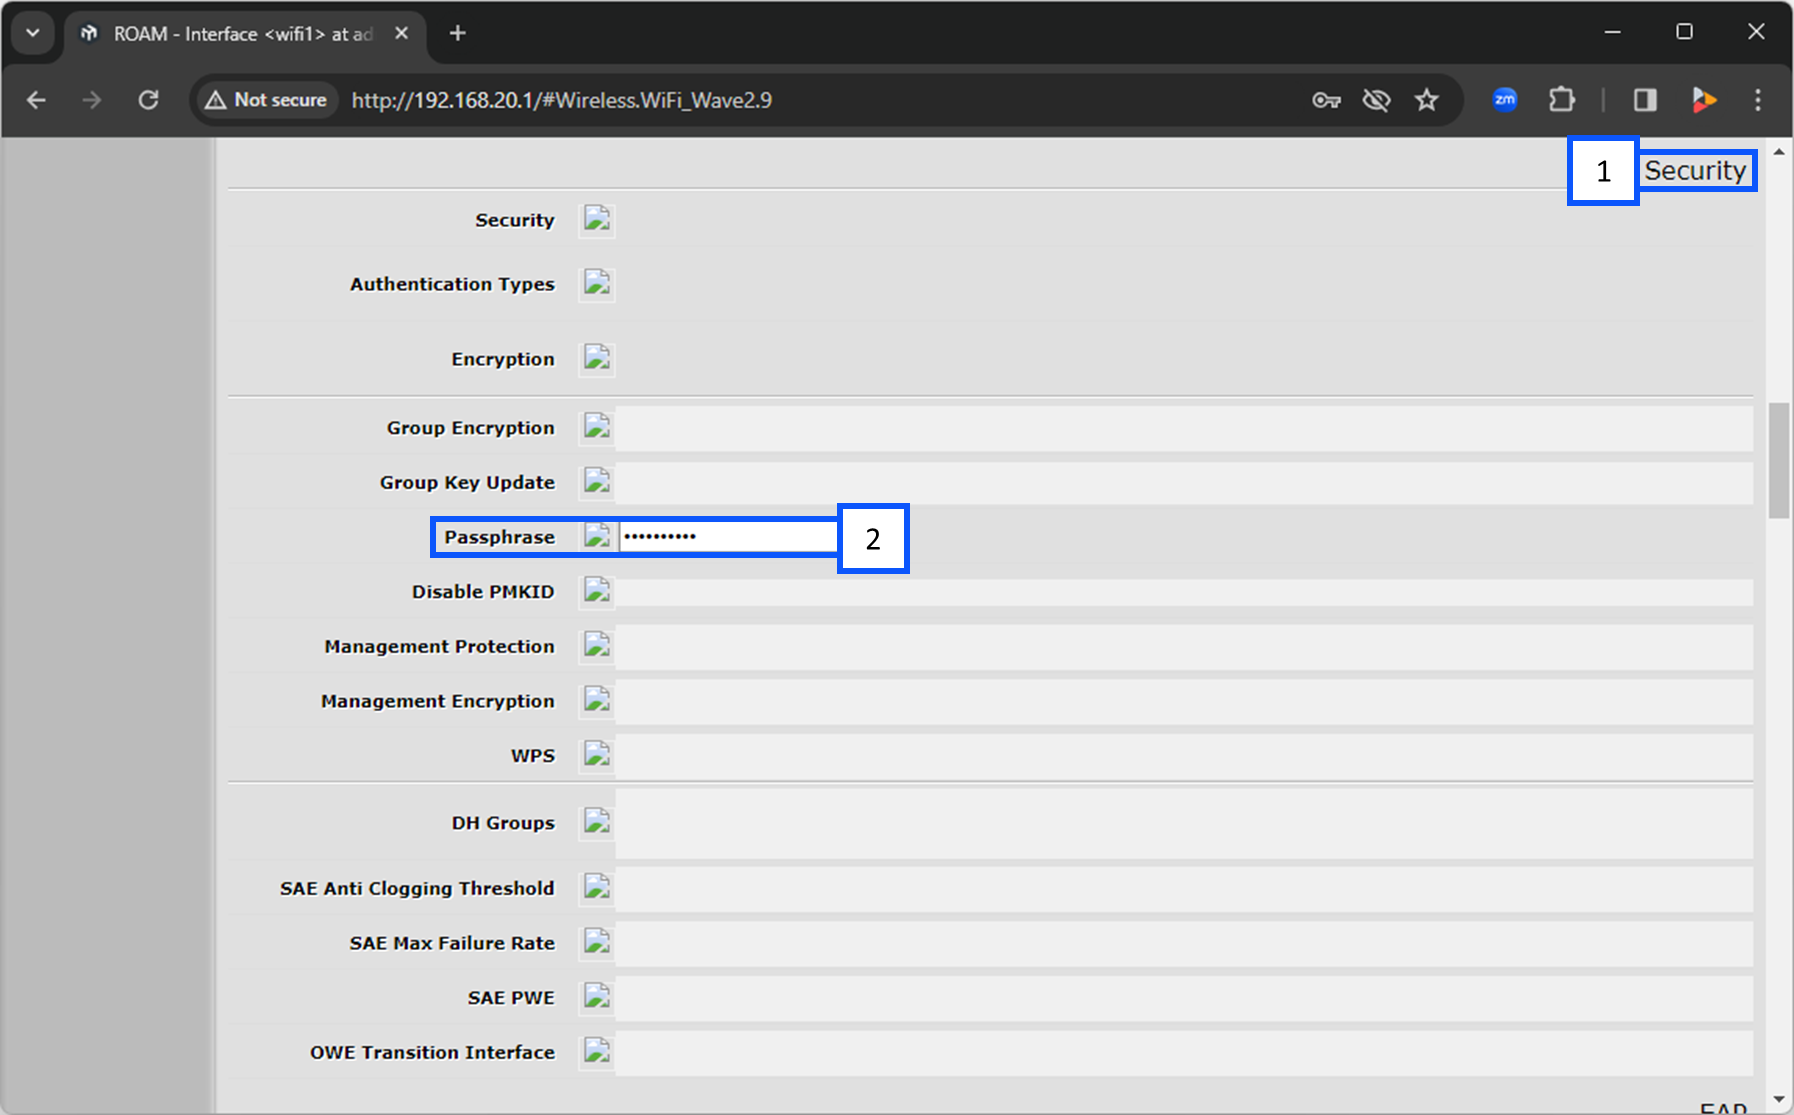
| − | + | #Continue scrolling down to <b>Security</b>. | |
| − | {{img | + | #Under <b>Passphrase</b>, enter in the password for the wireless network you selected above. |
| + | {{img - resize | file = ROAM Bridge Wireless 03.png}} | ||
| + | {{Top of Page}} | ||
<hr> | <hr> | ||
==Locate DHCP Address of the Bridge== | ==Locate DHCP Address of the Bridge== | ||
| − | + | #Navigate to <b>IP</b>. | |
| − | + | #Click on <b>DHCP Client</b>. | |
| − | + | #:From there, you will see the <b>IP Address</b> for wifi1. | |
| − | + | {{Top of Page}} | |
}} | }} | ||
Latest revision as of 13:50, 10 April 2024
Contents
ROAM Bridge
General Information
The ROAM Bridge is used to connect the wireless ROAM Cart to a wireless network.
⚠The wireless network that this bridge connects to will need to be able to talk to VALT. For more, see our Network Requirements.
Physical Device
Accessing the ROAM Bridge
To access the ROAM Bridge, it must be powered and connected to the network.
✎You can also access the device by connecting a laptop or computer directly to port 3 or 4.
Once on the network, please navigate to the IP of the bridge, and enter the credentials.
- User:
- admin
- Password:
- admin51
Configure Wireless
🕮To the left of wifi1, you will see a button with [E] or [D]. Make sure this is showing a [D]. This means that is is enabled. The letter D is prompting you to disable wifi1.
- Select Wireless.
- Click on wifi1.
- Scroll down to Configuration.
- Under SSID select the wireless network you are going to connect to.
- Continue scrolling down to Security.
- Under Passphrase, enter in the password for the wireless network you selected above.
Locate DHCP Address of the Bridge
- Navigate to IP.
- Click on DHCP Client.
- From there, you will see the IP Address for wifi1.