Template:LDAP Server Config
Contents
LDAP Server Config
Connecting to the LDAP Server
- Navigate to the VALT software either through the IP Address or the FQDN using Chrome, Firefox, or other standard web browser
- Log into VALT, web interface, with Admin access.
- Click on Admin -> Users & Groups -> LDAP -> Show Advanced Settings
- Scroll down to Servers
- Enter in your LDAP Server information:

A: Enter the IP Address or FQDN of your Active Directory or other LDAP compatible server in the Server field.
✎Note: I: If you are using LDAPS, enter the IP or FQDN as ldaps://myldapsserver.com
' II: If you are using a Global Catalog Server then it needs to be written as myldapserver.com:3268
III: If you are using a Global Catalog Server with LDAPS, then it needs to be formatted as ldaps://myldapserver.com:3269
B: Enter a Service Account user with read access in the LDAP Bind User field
✎Note: The user must be entered as user@domain.com
C: Enter the Service Account password
Note: Our password requirements do not allow for the use of these reserved characters: ! * ' ( ) ; : @ & = + $ , / ? % # [ ]
D: Enter in the Base DN of the Service Account
Note: Base DN must be entered in the form of DC=ad,DC=ipivs,DC=com
E: Select either Active Directory or Open LDAP
F: >Click Save
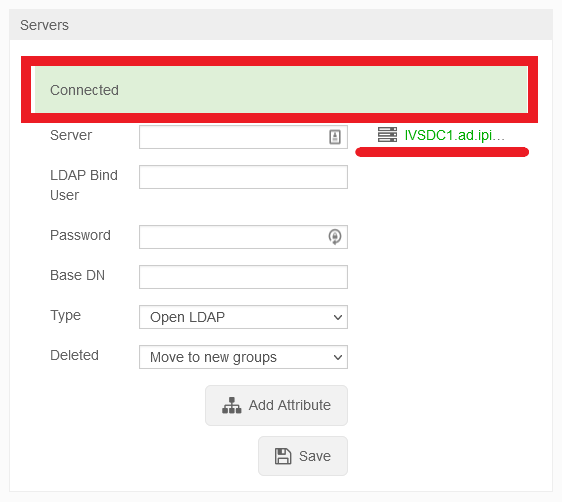
- If the credentials were accepted and a connection was established, you will receive a message stating connected and you will see your LDAP Server in Green:

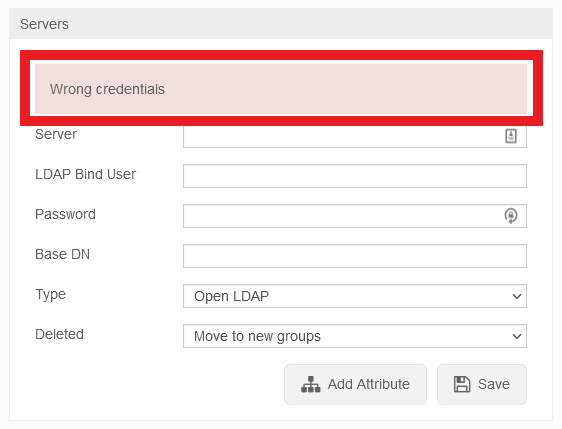
- If the connection fails, you will receive an error message stating Wrong Credentials:

Syncing Security Groups
- To sync users accounts, navigate to Sync Schedules
- Once here, start entering in the following information:
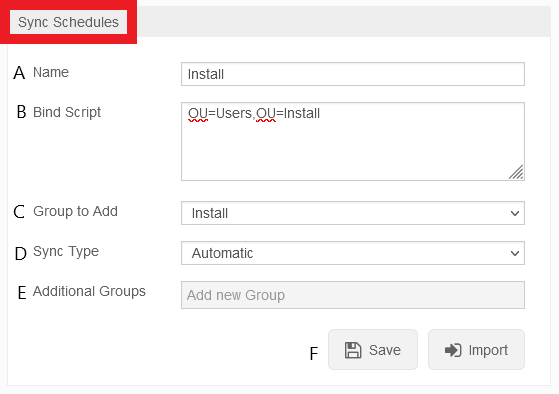
A: Enter in a name for the Security Group
Note: Try to keep these similar to the VALT groups you have createdB: Enter in the DN for the Security Group, omitting the DC components
Example: CN=Service Accounts,OU=Users,OU=InstallC: Select the VALT Group to have the users added to
Note: The VALT groups need to be created before you can link the Security Groups to themD: Choose either Manual or Automatic Sync Type
Note: Automatic syncs users every day at 7AM server time whereas Manual requires an Admin account to manually sync the usersE: Select any Additional Groups you would like the users added to F: Click Save - Test that the user import worked:
- A. Click on the Group
- B. Click Import
- If the import was successful, and there are users assigned to Security Groups, you will see this message:
- If the import was successful, and there are users assigned to Security Groups, you will see this message:
- If the import failed, and there are users assigned to Security Groups, you will see this message:
- If the import failed, and there are users assigned to Security Groups, you will see this message:
Note: If the import failed, and you have users assigned to a group, most likely either your Bind Script in the Sync Schedule block or the Base DN/LDAP Bind User in the Server block are entered incorrectlyImporting an Individual User
- Navigate to the User Import section:
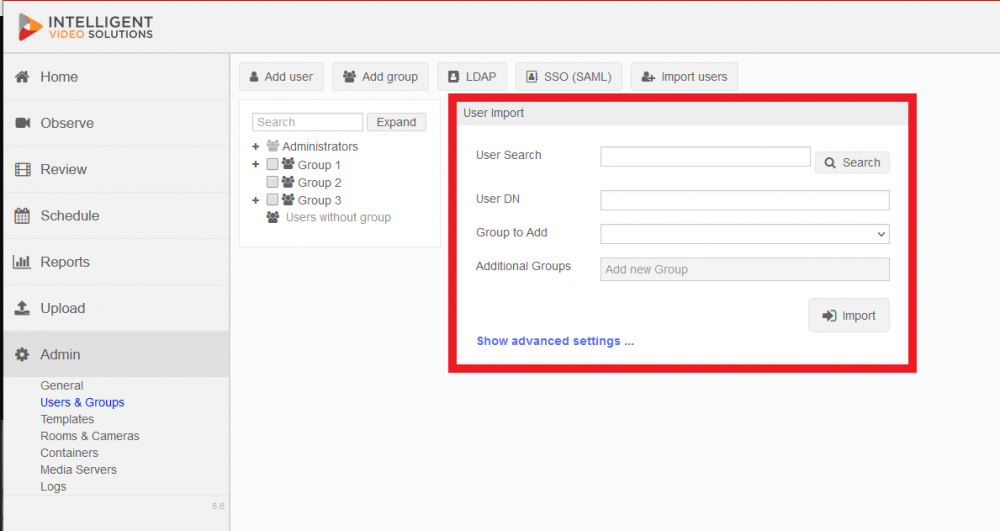
- Enter in the information:
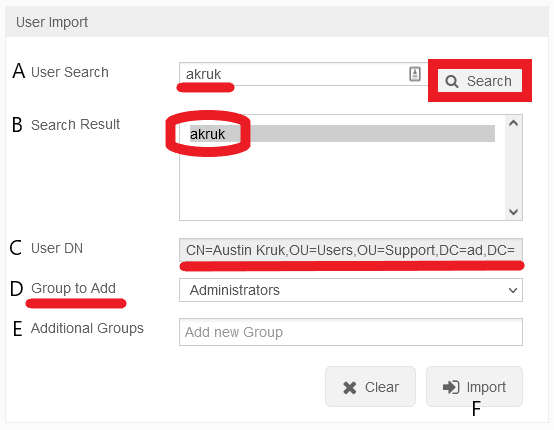
A: Enter in the name of a user and click Search B: A list of all users that populate with your search entry will appear C: The full DN of the user you select will appear here D: Select the Group you want to add the user to E: Select any Additional Groups you would like the user added to F: Click Import
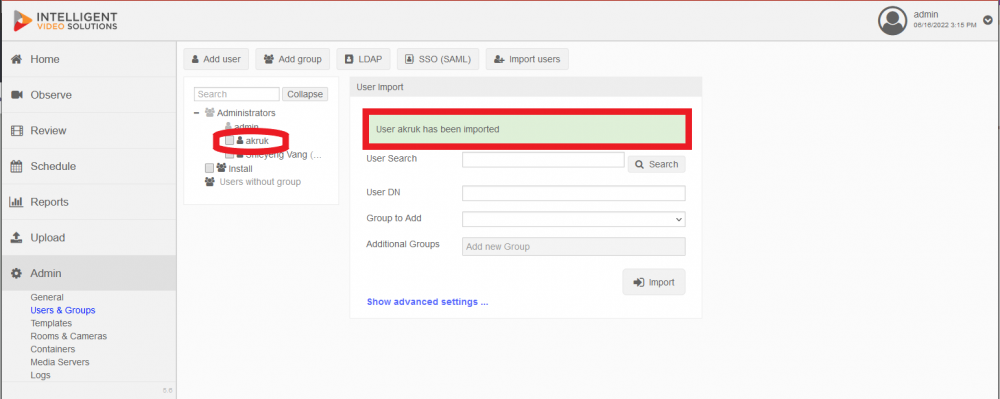
- You will see a confirmation message displayed that the user has been imported and you can verify the user got assigned to the group:
</div></div>


