Card Reader
Contents
Wiring and Diagram
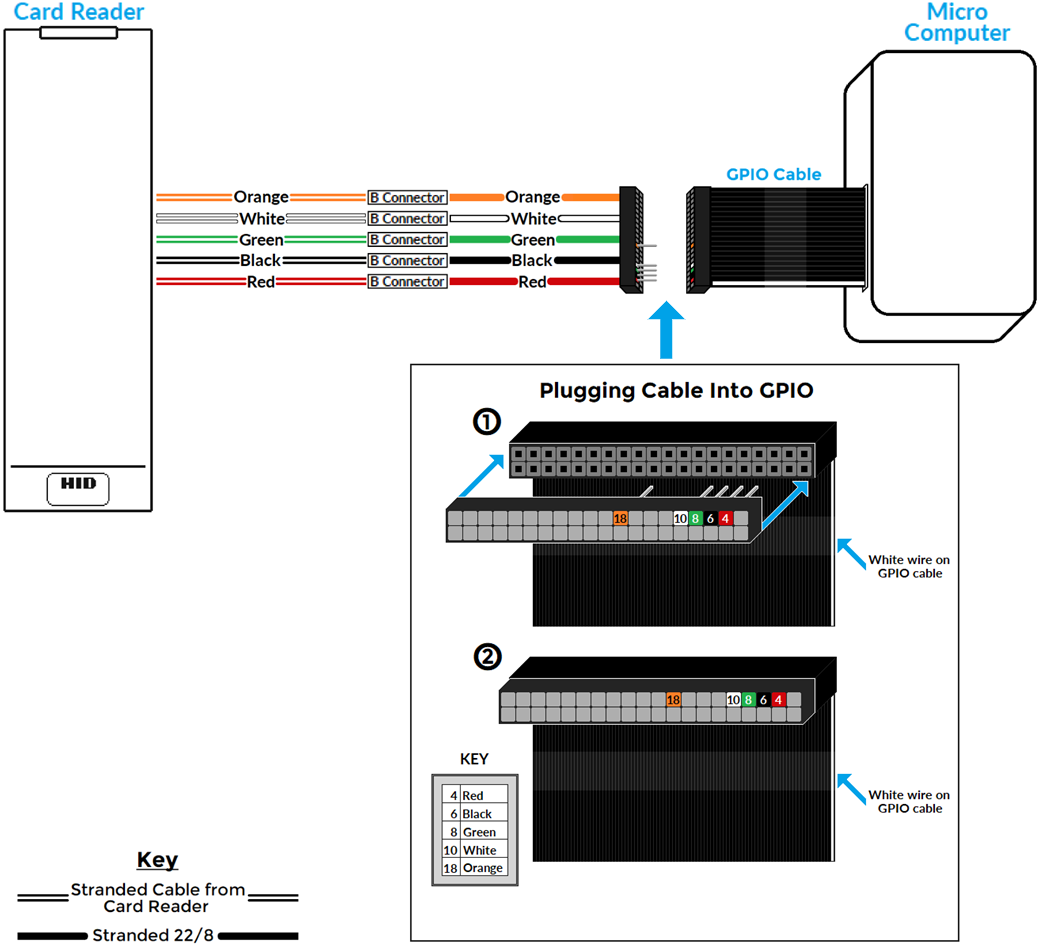
Using 22/8 cable and a 2x20 pin connector, crimp the wires and connect as shown below Using B connectors, splice the HID RP15 connections with the corresponding colors.
| HID RP15 | Microcomputer |
|---|---|
| Red | Pin 4 |
| Black | Pin 6 |
| Green | Pin 8 |
| White | Pin 10 |
| Orange | Pin 18 |

Finding the IP Address
Since the card reader is headless, there is no way to display the IP address. There are two options for discovering the IP address for the device.
- Check the DHCP server logs to see what IP address was assigned to the device. The default name is cardreader.
- Connect a monitor and keyboard to the microcomputer. You can then check the ip address by doing the following:
- Press alt-F2 on the keyboard.
- Enter the username ivsadmin.
- Enter the default password.
- Type the following command and press enter.
ifconfig
- The ip address for eth0 should be displayed on the screen.
Manually Set an IP Address
If ip address cannot be obtained from DHCP and cannot access the web interface, the ip address maybe manually configured on the device. From the console:
- Type the following command and press enter.
sudo rm /etc/dhcpcd.conf
- Type the following command and press enter.
sudo nano /etc/dhcpcd.conf
- Copy and paste the following into the file.
hostname
clientid
persistent
interface eth0
static ip_address=192.168.1.45/24
static routers=192.168.1.1
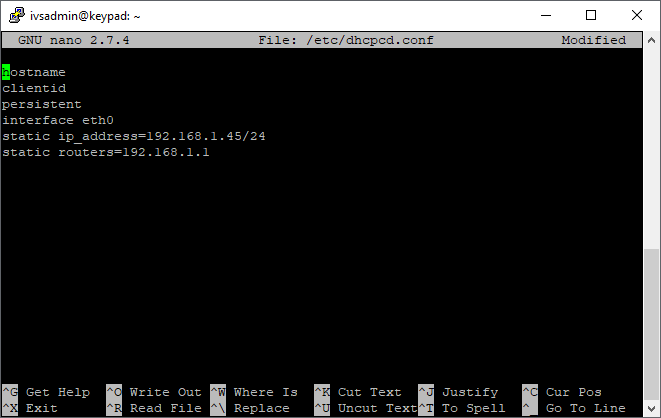
- Change the ip address, subnet mask, and gateway to the appropriate values.
- Note: The subnet mask must be in CIDR notation.
- Press Ctrl-X
- Enter Y to save
- Do not change the file name and press enter.
- Reboot the microcomputer for the network changes to take affect.
- Note: Changing the IP address in this way completely bypasses the web interface. If the web interface is accessed later on, the configuration will not be reflected there and changes made to the network configuration in the web interface will overwrite this configuration.
Configuring the Card Reader
Web Interface
Once know the IP address for the card reader microcomputer is known, the web interface can be accessed by typing https://ipaddress in any web browser. Make sure to replace ipaddress with the actual ip address for the card reader microcomputer.
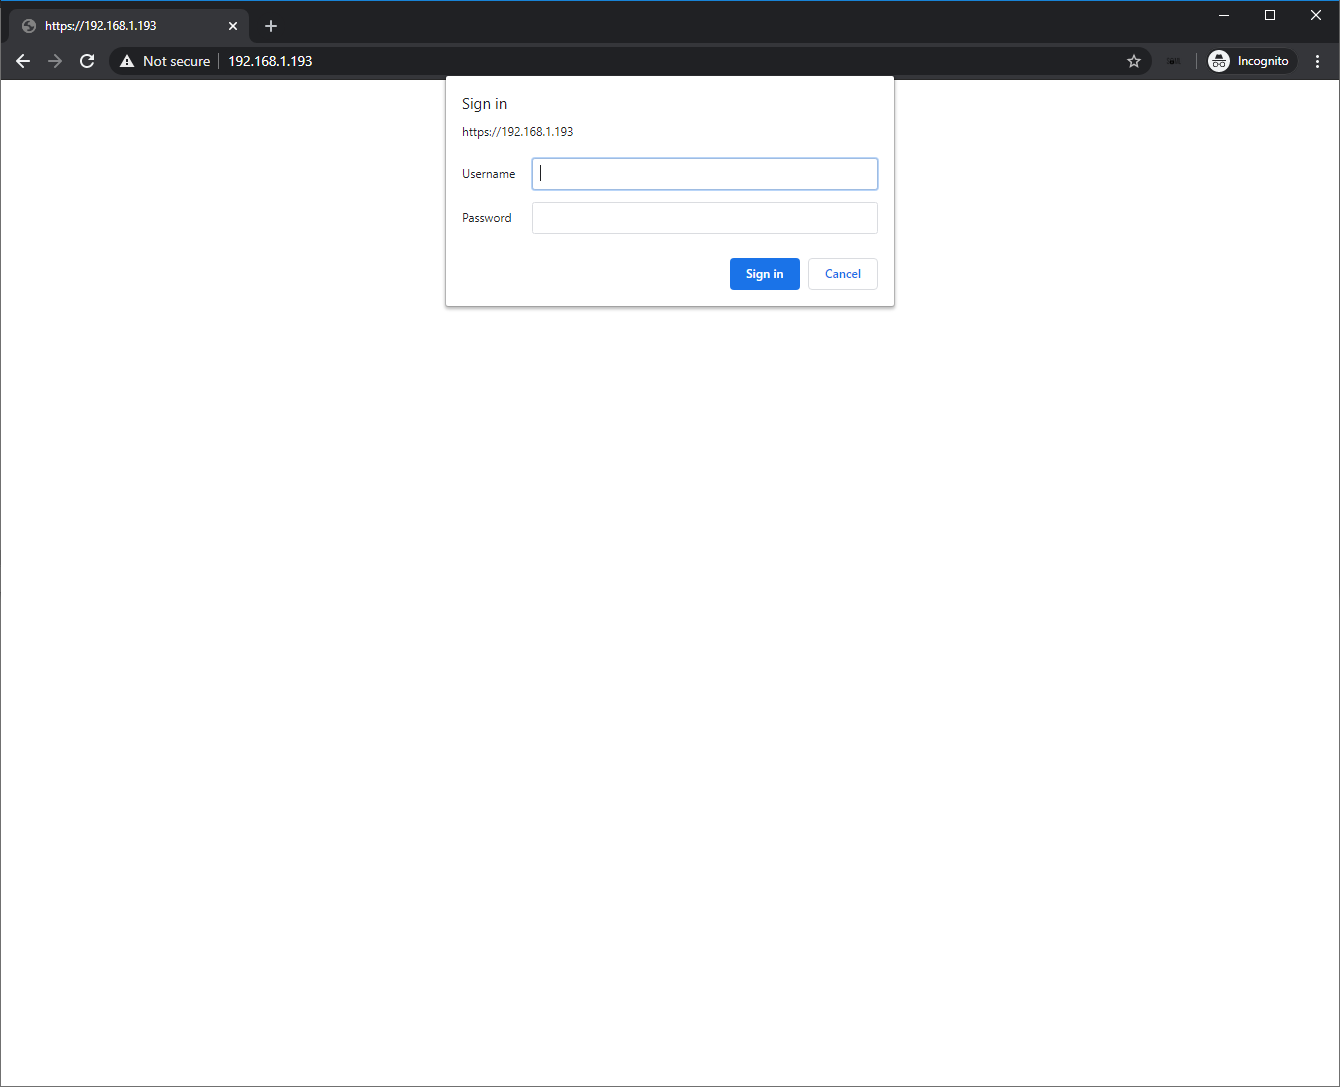
When prompted enter the username and password for the card reader.
- Defaults
- Username: ivs
- Password: admin51
The configuration page will now be displayed.
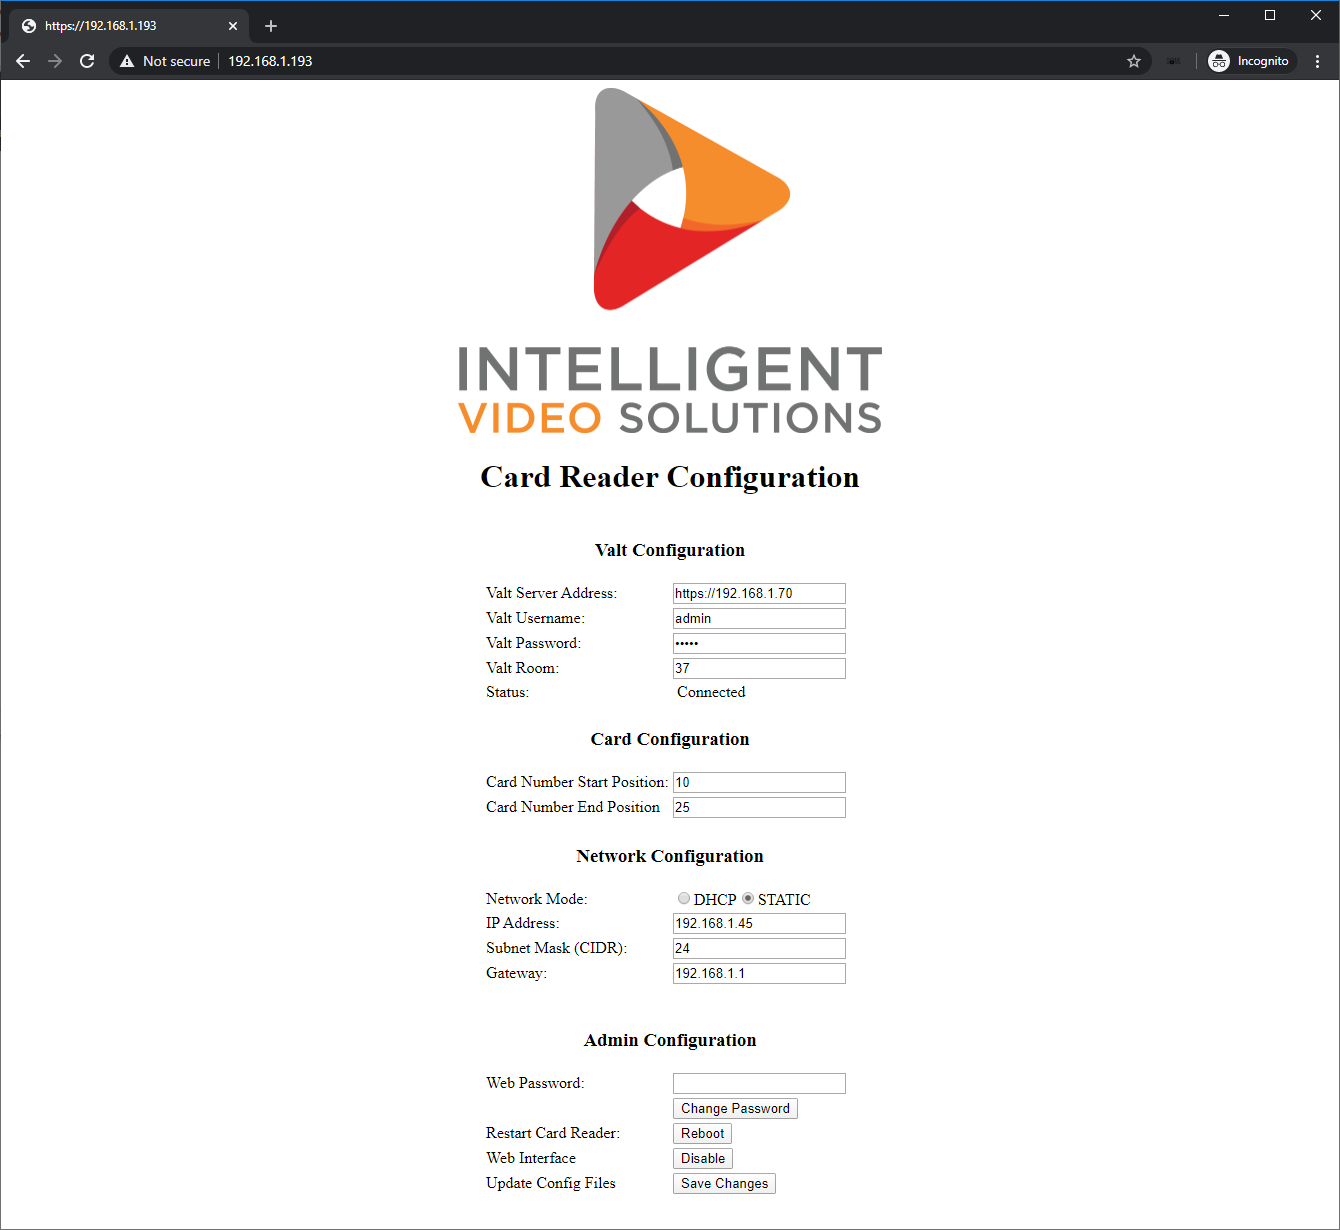
VALT Configuration
| Setting | Value |
|---|---|
| VALT Server Address | This is the full URL for the VALT server. If https:// is not specified http:// is assumed. |
| VALT Username | Username utilized to access VALT, this user should be a member of the administrator's group. |
| VALT Password | VALT password for the specified user. |
| VALT Room | Room number for the room in VALT that the card reader will control. This number can be found by pulling up the room in VALT and looking at the URL. |
| Status | Displays whether or not the card reader is able to connect to the VALT server using the URL and credentials specified. This will also display an error if the room number does not exist. |
Card Configuration
| Setting | Value |
|---|---|
| Card Number Start Position | The position in the RFID card number where the actual card number starts. |
| Card Number End Position | The position in the RFID card number where the actual card number ends. |
Network Configuration
| Setting | Value |
|---|---|
| Mode | Network configuration mode. (DHCP or STATIC) |
| IP Address | Specifies the IP address for the card reader. |
| Subnet Mask | Specified the subnet mask for the card reader. It must be specified in CIDR notation. |
| Gateway | Specifies the gateway for the card reader. |
Note: Network changes made in the web interface will take effect after the next reboot of the card reader.
Admin Configuration
| Setting | Function |
|---|---|
| Web Password | The password user to log into the web interface. |
| Change Password | Changes the web interface password to the value specified on the line above. |
| Restart Card Reader | Reboots the card reader. This is required after changing the network configuration/ |
| Web Interface | Disables the web interface. WARNING: If disabled the only way to access the card reader will be through the command line interface. |
| Update Config Files | Saves Valt, Card, and Network configuration. Success or Failure messages will be displayed below each section. |
Command Line
- Connect to the card reader via SSH
- Type the following command and press enter.
sudo nano /usr/local/ivs/config/cardreader.cfg
-
- Modify the settings for your environment (see table below for settings definitions).
- Press Ctrl-X
- Enter Y to save
- Do not change the file name and press enter.
- Reboot the microcomputer for the network changes to take affect.
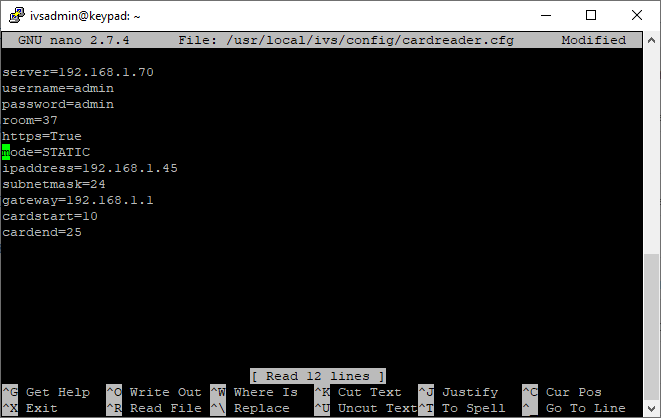
| Setting | Value |
|---|---|
| server | IP address or host name for the VALT server. |
| username | Username utilized to access VALT, this user should be a member of the administrator's group. |
| password | VALT password for the specified user. |
| room | Room number for the room in VALT that the card reader will control. This number can be found by pulling up the room in VALT and looking at the URL. |
| https | Specifies if https is enabled on the VALT appliance. Should be set to True or False. |
| mode | Network configuration mode. Should be set to DHCP or STATIC |
| ipaddress | Specifies the IP address for the microcomputer. |
| subnetmask | Specifies the subnet mask for the microcomputer. It must be specified in CIDR notation. |
| gateway | Specifies the gateway for the microcomputer. |
| cardstart | The position in the RFID card number where the actual card number starts. |
| cardend | The position in the RFID card number where the actual card number ends. |
Note: The network settings specified in this file are used by the web interface only. Changing these settings will not change the actual network settings for the microcomputer.