ISCSI Storage
The following instructions will configure the Valt appliance to store videos on an iSCSI SAN. Prior to performing these steps it is recommend that you configure the Valt appliance with a dedicated NIC for iscsi traffic.
WARNING: This instructions will remove any previously recorded videos. This should only be performed with a new Valt installation.
If you need to perform this operation on an existing Valt server, you must copy the contents of /usr/local/WowzaStreamingEngine/content to your iSCI LUN before proceeding.
- Connect to the server via SSH or log in to the teminal
- Type sudo apt install open-iscsi and press enter.
-
- Type sudo nano /etc/iscsi/iscsid.conf and press enter.
-
- Locate the line node.startup = manual and change it to node.startup = automatic
- Press CTRL-X
- Enter Y to save.
- Do not change the file name and press enter.
- Type sudo mkdir /mnt/iscsi and press enter.
- Type sudo service WowzaStreamingEngine stop and press enter.
- Type sudo umount /usr/local/WowzaStreamingEngine/content and press enter.
- Type sudo rm -r /usr/local/WowzaStreamingEngine/content and press enter.
- Type sudo ln -s /mnt/iscsi /usr/local/WowzaStreamingEngine/content and press enter.
- Type sudo iscsiadm -m discovery -t st -p ipaddressofsan and press enter.
- Replace the italicized text with the ip address for your iSCSI SAN.
-
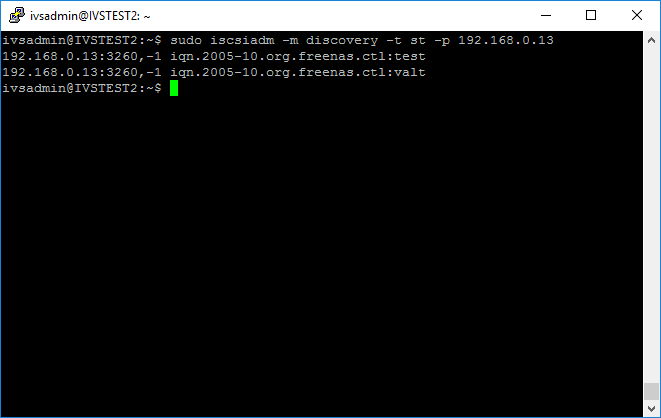
- When you run this command, all available targets will be listed. By default a connection will be established for each available target. You can prevent a target from connecting by running the following command:
- sudo iscsiadm -m node -T iqn.2005-10.org.freenas.ctl:test -o delete
- Replace the italicized text with the iqn for the target you don't want to connect to.
- Type sudo iscsiadm -m node --login and press enter.
- Type sudo lshw -C disk and press enter.
- You should now see a list of the available disks on the machine. Locate the iSCSI disk you just connected. In this case it is /dev/sdb
- Type sudo parted /dev/sdb and press enter.
- Replace /dev/sdb with the appropriate disk identified in step 2.
- You will now be taken to a GNU Parted prompt
- Type mklabel gpt and press enter.
- Type mkpart pri 1 -1 and press enter.
- Type quit and press enter.
- Type sudo mkfs -t ext4 /dev/sdb1 and press enter.
- Replace /dev/sdb1 with the appropriate disk identified in step 2.
- Type sudo blkid and press enter.
- This will display the UUIDs for each partition. Note the UUID for the partition you just formatted.
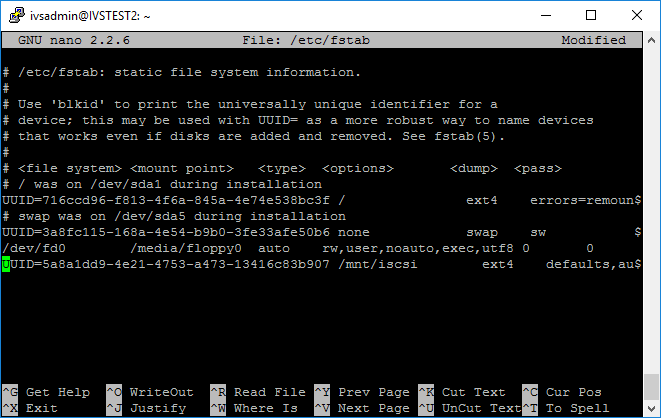
- Type sudo nano /etc/fstab and press enter.
-
- Delete the line that mounts the local hard drive in /usr/local/WowzaStreamingEngine/content. It will most likely be the last line in fstab
- Add a line for the iSCSI disk. It should read similar to the following:
- UUID=5a8a1dd9-4e21-4753-a473-13416c83b907 /mnt/iscsi ext4 defaults,auto,_netdev 0 0
- Replace the italicized text with the appropriate information for your environment.
-
- Press CTRL-X
- Enter Y to save.
- Do not change the file name and press enter
- Type sudo mount -a and press enter.
-
- Type sudo /usr/local/valt/bin/Storage and press enter
- In some installation the Storage script may be located at /home/ivsadmin/ValtInstall/Storage. If the script is not in either location, please contact IVS technical support for assistance.
- Type sudo service WowzaStreamingEngine start and press enter.


The Valt appliance should now be configured to store all videos on an iSCSI SAN.