Simple Configuration
=Description/Objective=
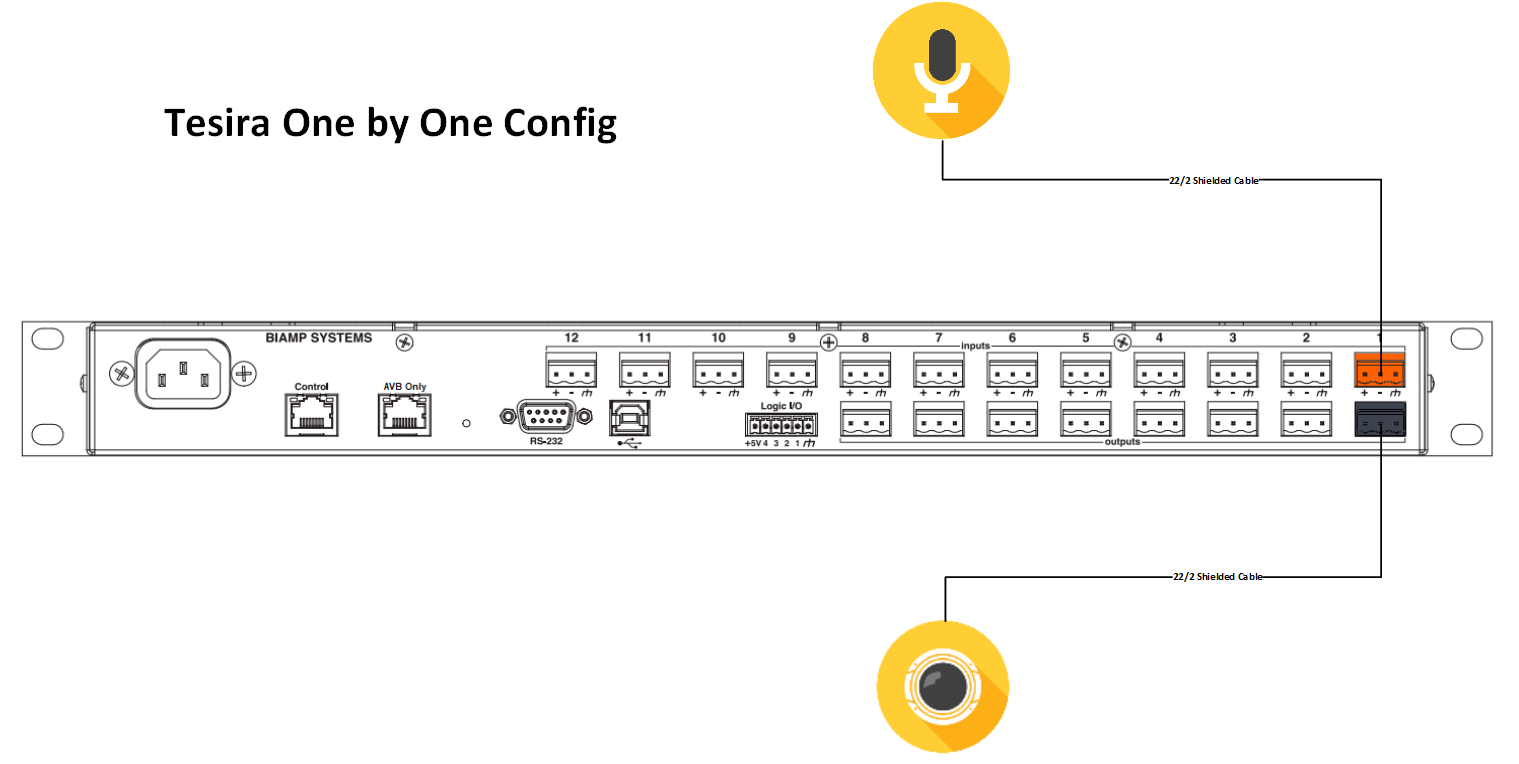
In this example, we will be connecting one microphone to one camera and using the Tesira Forte DSP to reduce the amount of white noise.
Physical Wiring/Line Diagram
To keep things simple, use input 1 and output 1. When terminating the cables, the mic will go into Orange Input 1 and the audio line to the camera will go into Black Output 1.
Tesira Software
Connections
- If the physical connections are complete, open the Tesira software and start building a configuration.
- In this configuration use the following blocks:
- TesiraFORTE CI block
- Peak Meter x 3
- Matrix Mixer with at least 1 input and 1 output, with one additional output for AEC monitoring
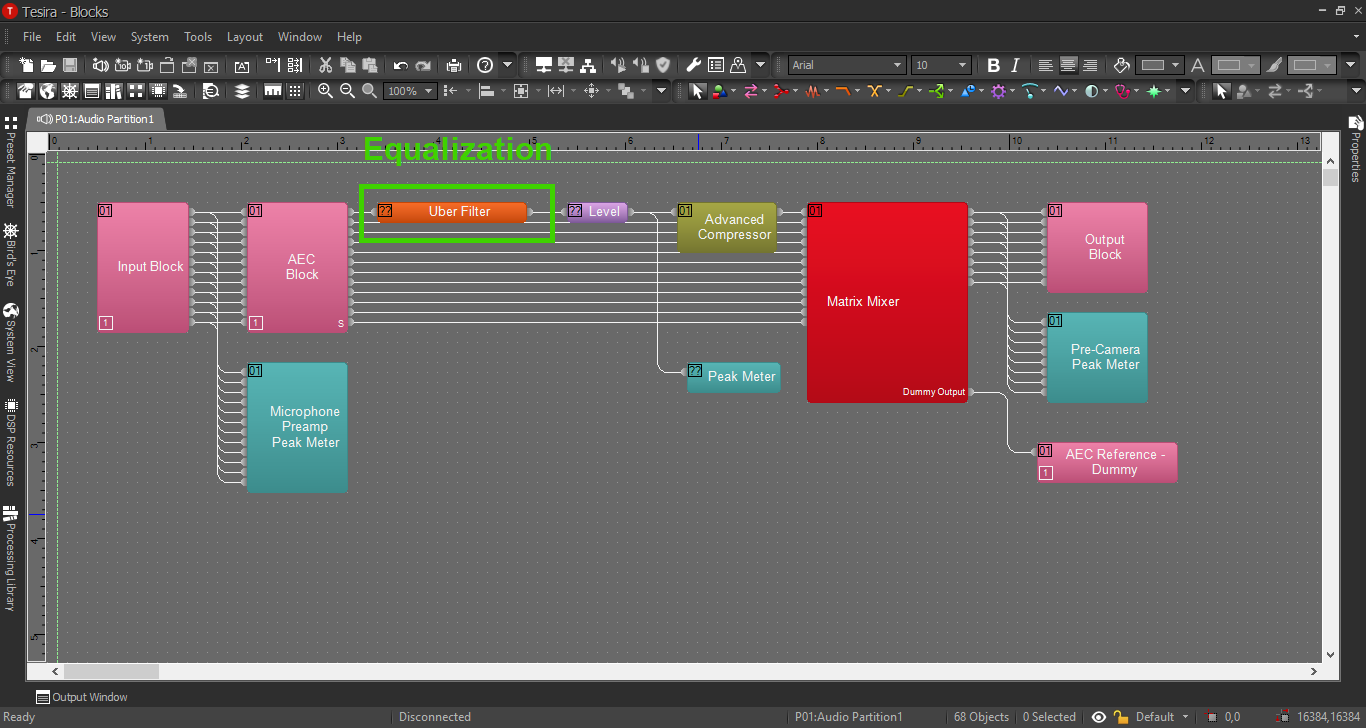
- Uber Filter with as many as 6 filters
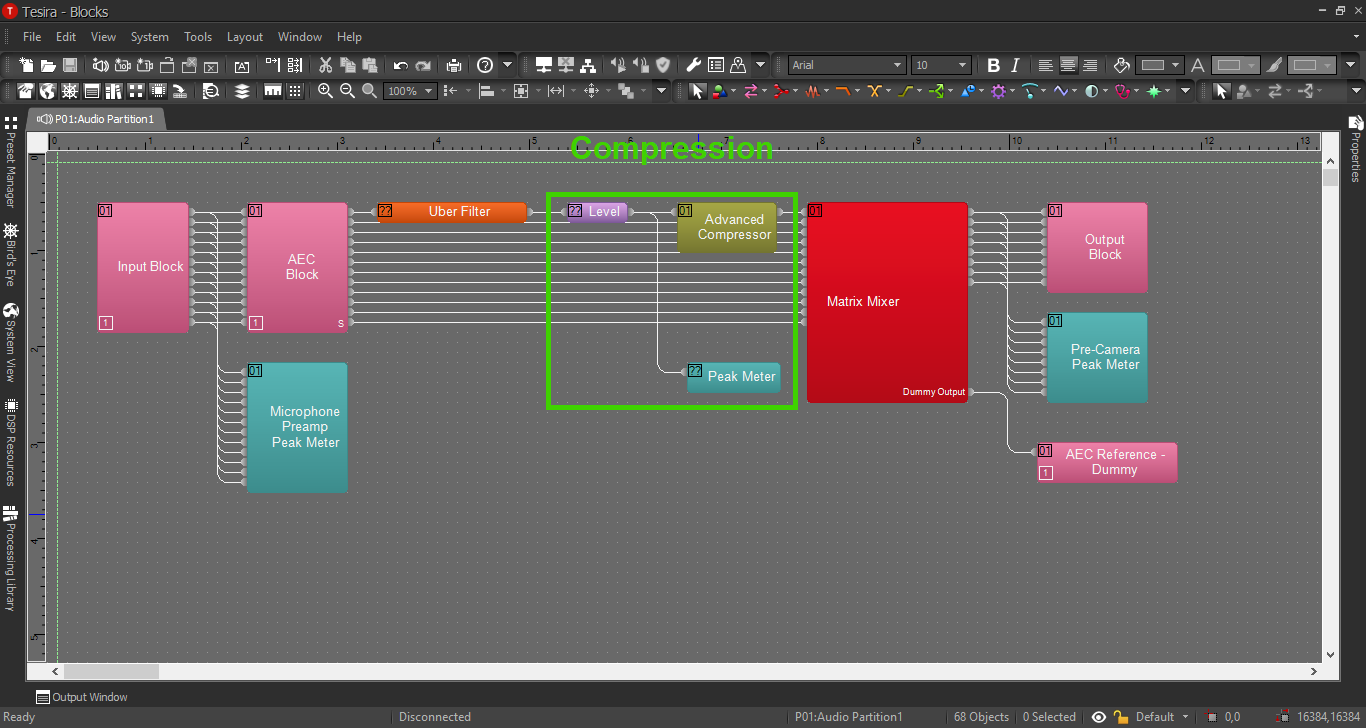
- Compressor with "ganged mode" and "advanced curve"
- Level block
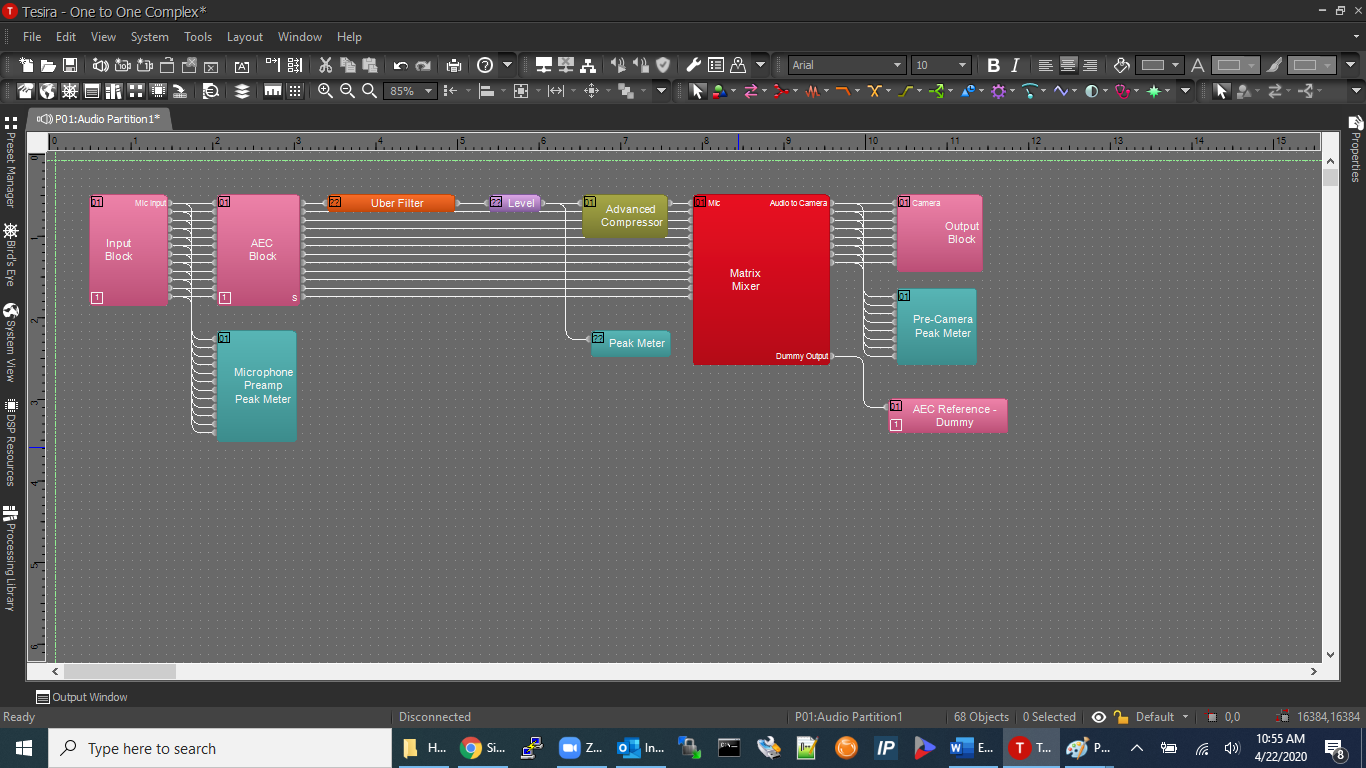
- Connect the blocks as follows:
- The Tesira Input block will already be connected to the AEC block, so connect the first peak meter to the Input block also. This will help ensure proper levels are set on the preamp. More on that in a minute.
- Connect the AEC block to the Uber Filter, then the Filter to the Level Block.
- Connect the Level Block to the Compressor and the second Peak Meter.
- Connect the Compressor to the Matrix Mixer.
- Connect output 1 from the mixer to port 1 on the Tesira Output block AND to the third peak meter. This will ensure the right audio levels are sent to the camera.
- Connect the extra output from the Matrix Mixer to the AEC reference. The Automatic Echo Cancellation feature will not be used in this example.
- Note: The AEC reference block cannot be deleted from the configuration. It also will not compile the configuration if any blocks are not connected (including the AEC reference block.) Do not send any audio to this channel.
When this is complete, the file should look something like this:
Processing Blocks in Tesira
This section will provide further thought process behind each processing block, and how to adjust settings.
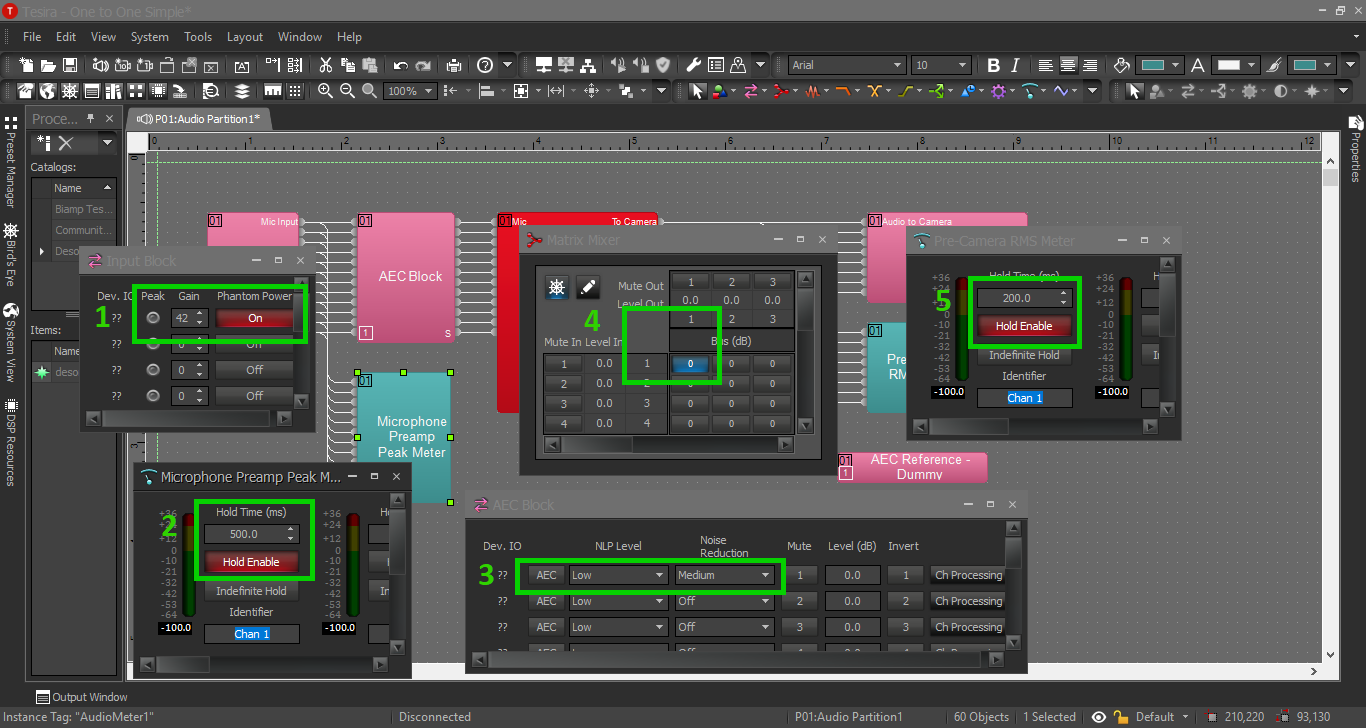
- Input Preamp: STM-1’s will not be used to power the mics – the Forte will provide phantom power. Enable it here for each mic. The gain control on the input block is our preamp. For MX202’s the preamp will usually end up being between 42-48 dB. The purpose of a preamp is to boost the audio signal without added noise, so this setting is important. The goal is for the level of normal speech to show up at or around 0 dB on the peak meter.
- First Peak Meter: This will help set the input gain to the proper level. As a default though, it will give us an instantaneous reading, which is much too fast for the human eye. Select a time between 250-500 milliseconds and enable the Hold button. When testing our input gain, aim to be peaking around 0dB, “kissing” the yellow. Loud noises such as a door slamming should peak way in the yellow, but not clip the input (not surpass the red section of the meter.)
- AEC Block: This block does all the processing for noise reduction in the Forte. If using AEC in our solution, activate the AEC button here. This block also includes general noise reduction capabilities (the Noise Reduction setting). Medium is usually the best option for a room mic.
- Matrix mixer: This is how to control where to send the audio signal of the mic(s). On the left the mixer shows the inputs, and on the top it displays the outputs. In this example, since there is only one mic and sending it to one camera, simply enable the matrix box corresponding to input 1 and output 1.
- Second Peak Meter: Press Enable Hold again on the peak meter at the end of our chain. If no other processing was done, the levels of the peak meters should match. When using more complex solutions, this will help verify the levels and verify that the mixer is configured properly.
- Something to note about the Tesira audio is this: There is an 18 dB difference between the Tesira output block and the Axis camera. It will likely be necessary to raise the output level of the Tesira between 12-18 dB to achieve optimal levels in the Axis camera(s).
EQ and Compression