Template:VALT Keypad - Old
Contents
Configuration
Creating the Cable
- Cut two 15 foot lengths of 22/8 cable
- Use a 2x20 pin connector, a 2x3 pin connector, and a 1x7 pin connector, crimp and connect as shown below
2x20
Use male pin connectors.

2x3
Use male pin connectors.
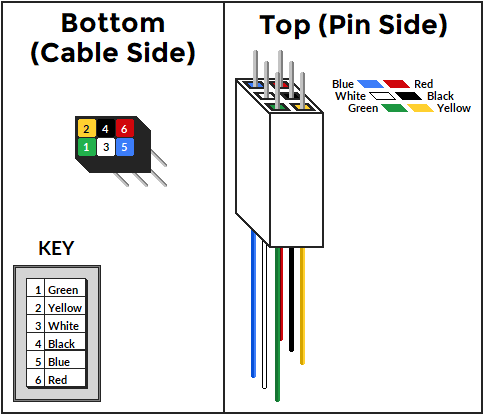
1x7
Use female pin connectors.

How to Connect
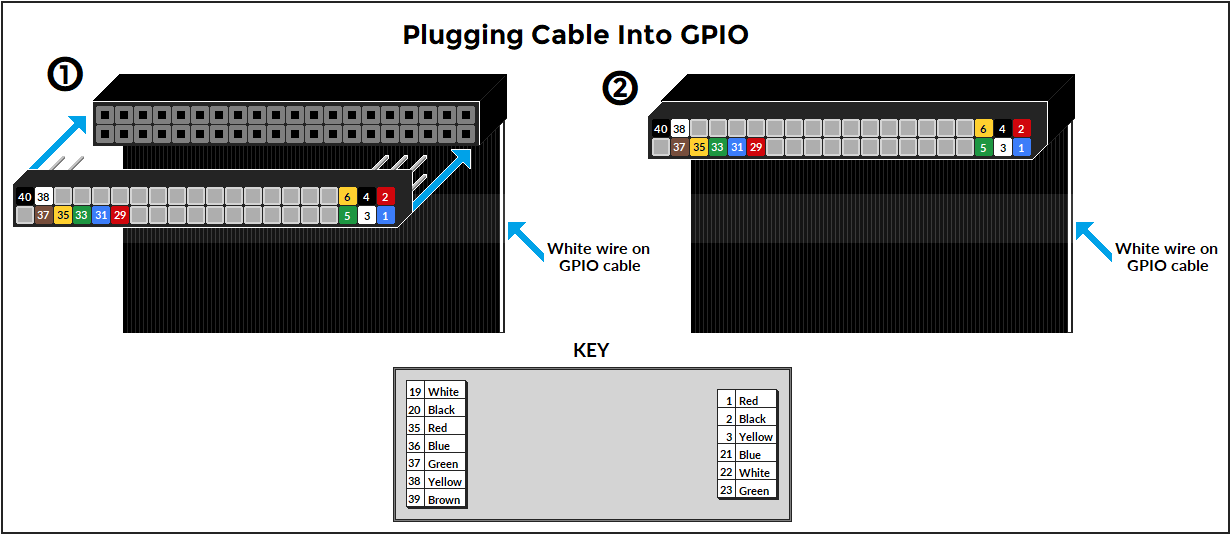
A GPIO cable will be connected to the processing unit. Connect the cable as shown below. Ensure that the black cable in the 2x20 pin connector aligns with the white cable on the GPIO cable. Attach the wiring to the physical keypad as shown
Plugging the cables into the keypad:
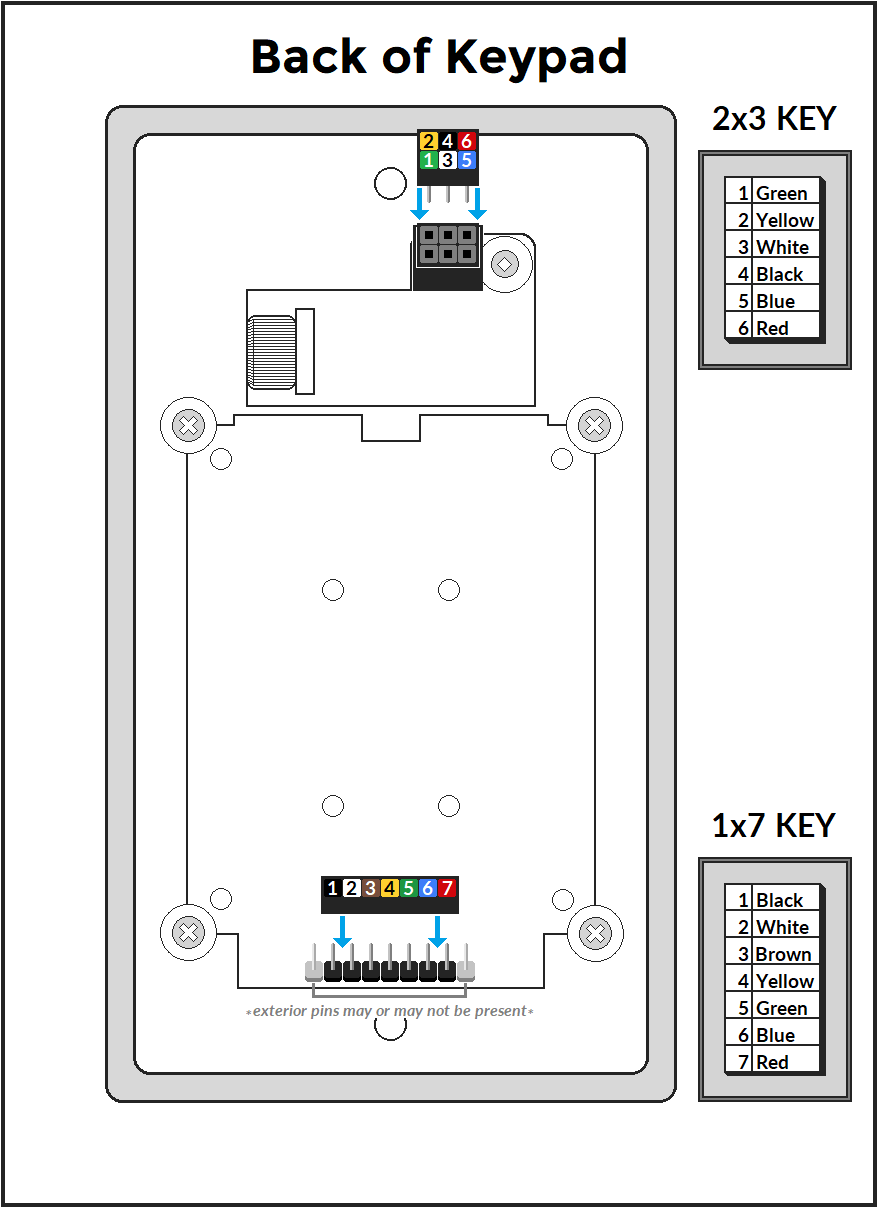
If done correctly your keypad should look like this.

IP Address
DHCP
The VALT Keypad will automatically pull an IP address from DHCP. The IP address can be obtained by reviewing DHCP leases on the associated DHCP server. The hostname of the device is Keypad.
Static
If no DHCP server is available, the VALT Keypad will default to a static IP address of 192.168.0.92.
From the Keypad
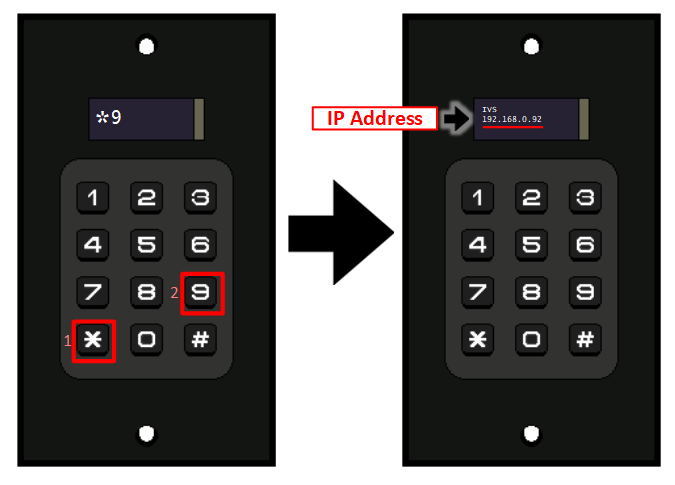
On the keypad, type *9 to get the IP address of that device.
Manual
The IP address from the keypad may also be obtained directly by plugging in a keyboard and running the following command from the console:
ifconfig | more
The IP address will be listed under interface eth0.
Configuring the Keypad
Via the Web Interface
- Make sure the key pad is plugged in and on.
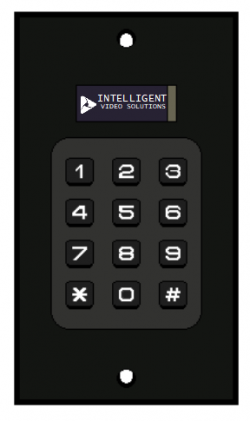
- If it is on you will see the IVS logo displayed on the screen
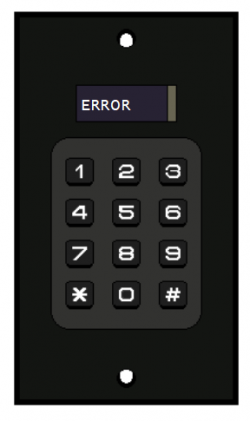
- If you see the error screen, the keypad is not connected to the server. For right now, this is okay.
-
-
- Connect your computer to the same network as the keypad.
- Open up a web browser and type in the IP address of the keypad.
- Make sure to add "https://" to the beginning of the IP.
- Log into the keypad using its credentials.

| Default Credentials | |
|---|---|
| Username | ivs |
| Password | admin51 |

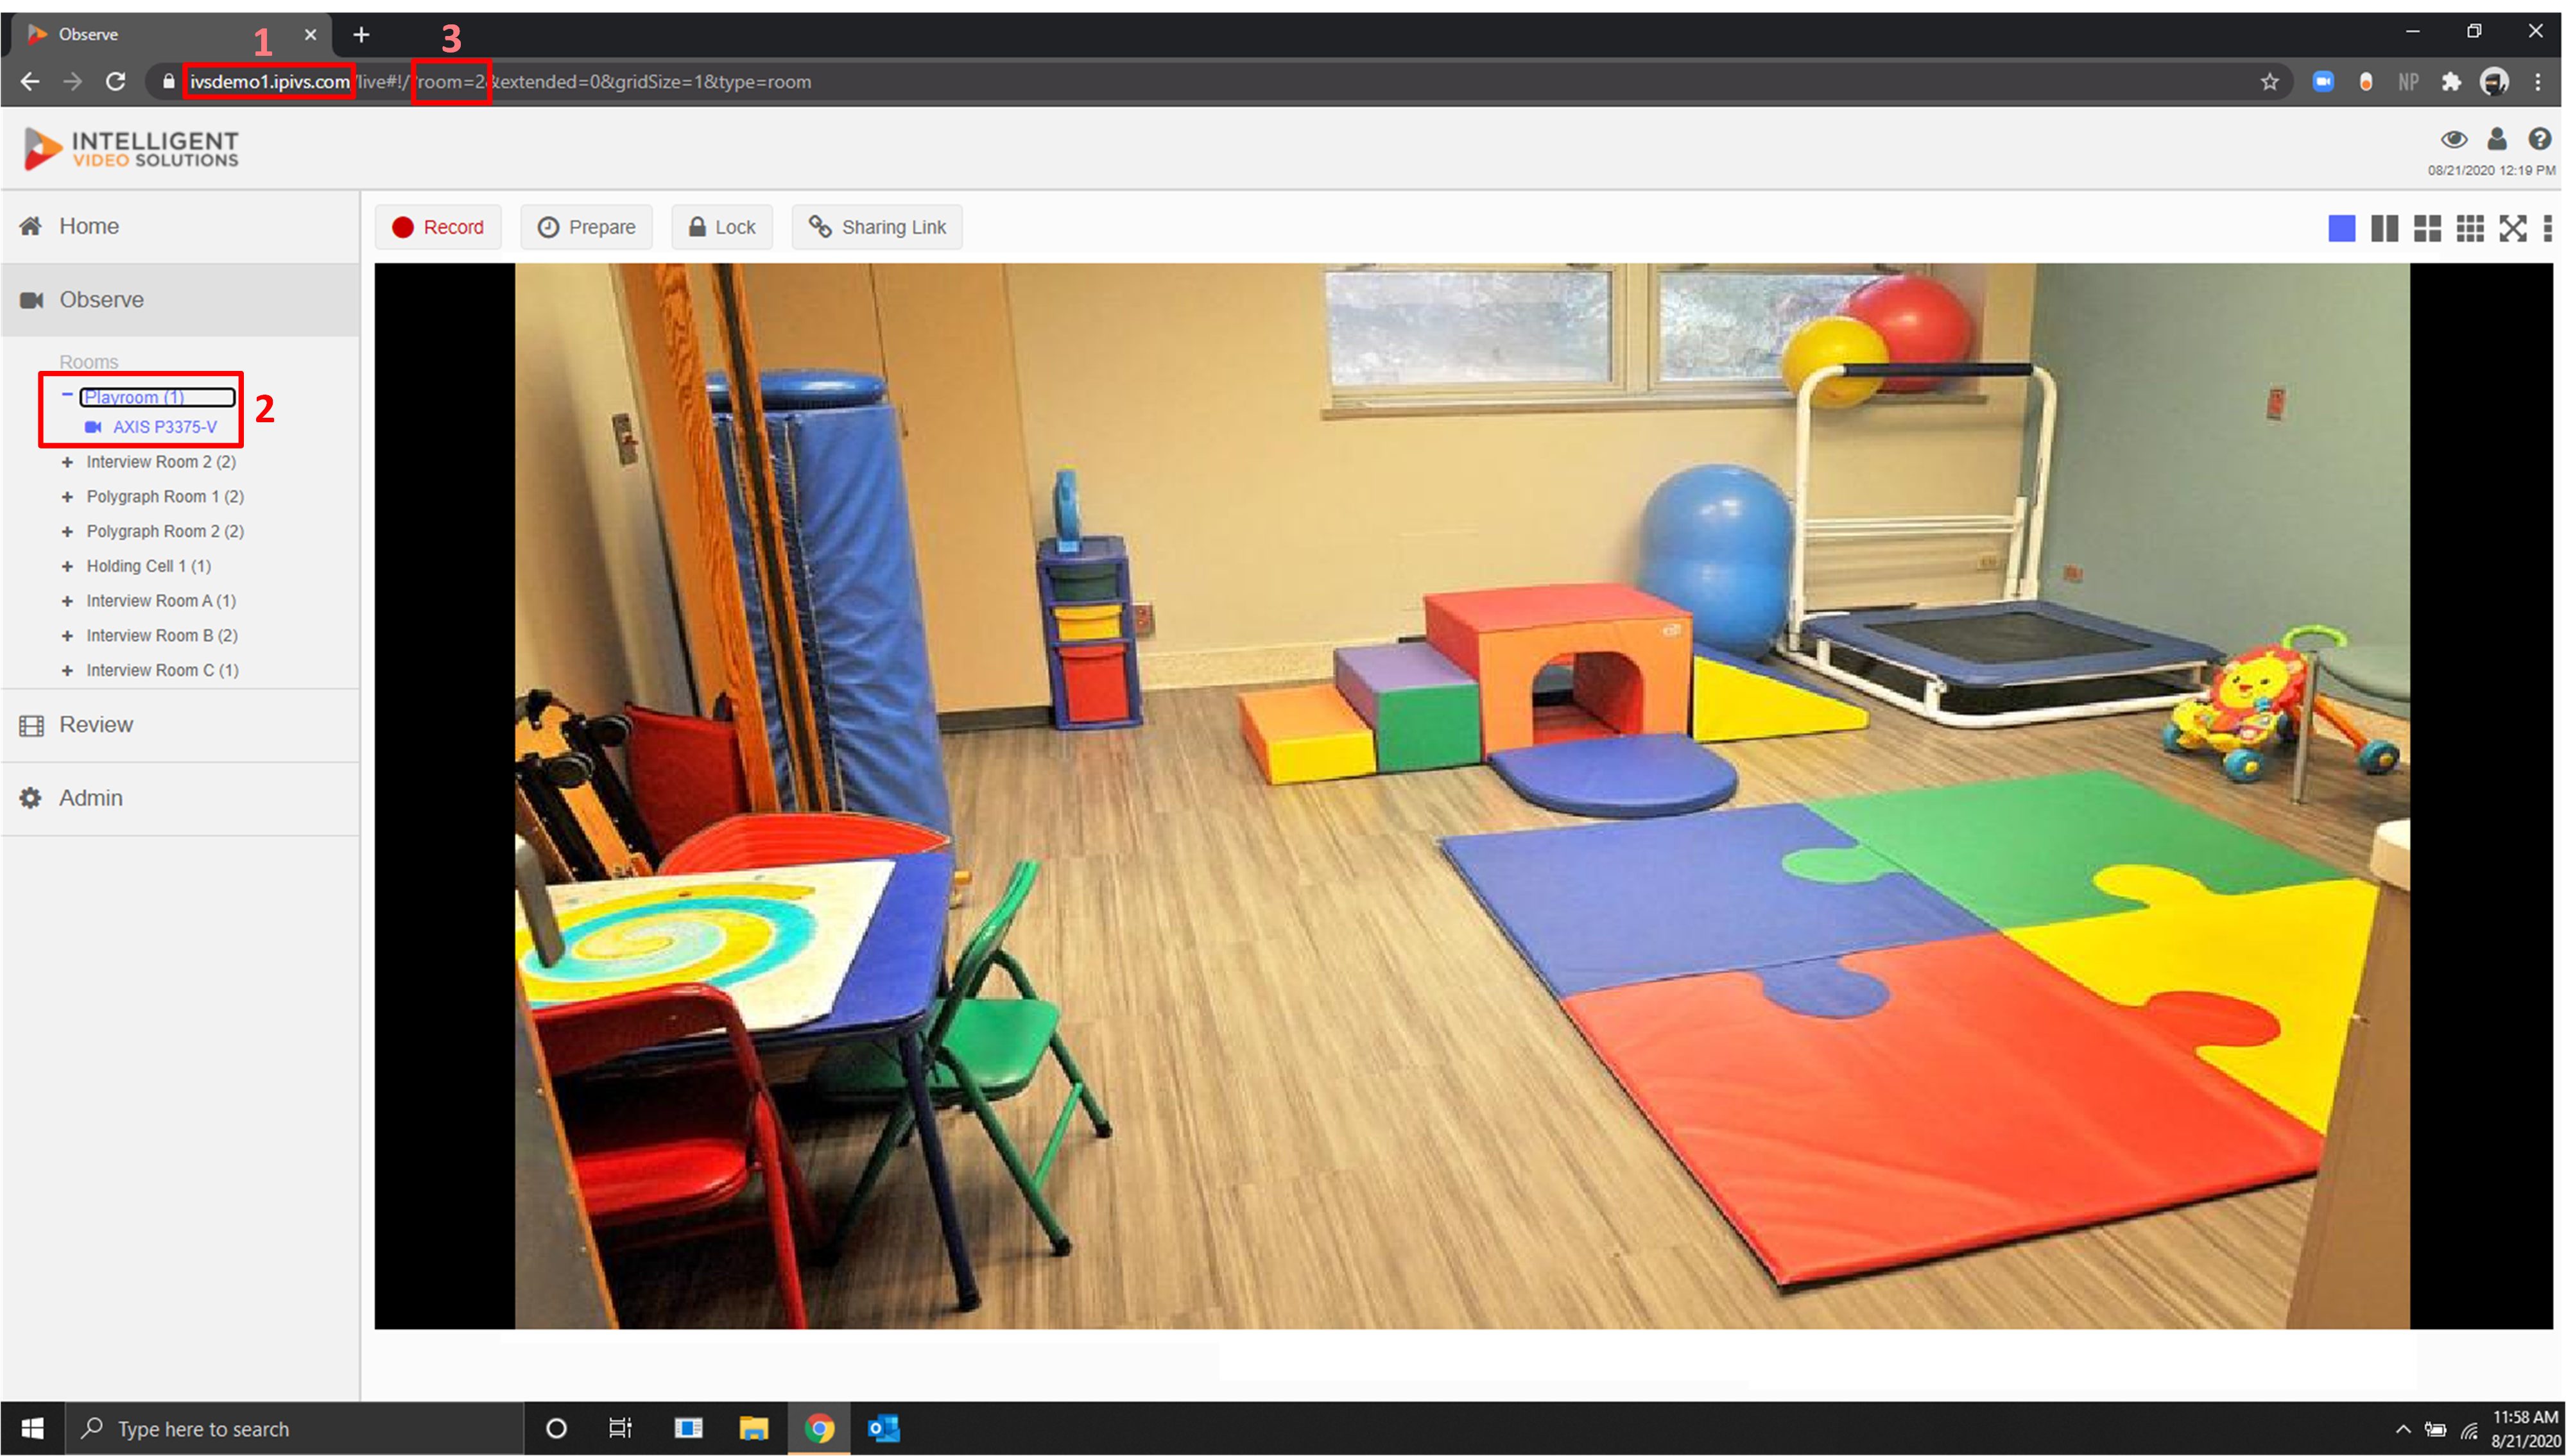
- Log into your VALT server and go to the Observe tab.
- Use the IP or domain of your VALT server.
- Open the room you want to connect to the keypad.
- Look at the URL bar to find the room number. You will use this to connect the keypad to that room.
- Go through the fields and fill out the information specific to your installation.

Valt Configuration
| VALT Server Address | This field should be populated with the server address for the VALT server. If the server is using https, you must include https:// in the server address. |
| VALT Username | This field the user name the keypad will use to authenticate to VALT. It must be a local account on the VALT server and the user must have permissions to access the room and start recordings as other users. It is recommended you create a service account with admin permissions. |
| VALT Password | This field is the password for the specified user. |
| VALT Room | This field is the room number the keypad will be linked to. After establishing a connection to the VALT server this field will be populated with the actual room names. |
| Status | This field shows the current status of the keypad's connection to the VALT server. |
| Retry Connection | Attempts to reconnect to the VALT server. This will not save any configuration changes made. |
| Recording Name | This field specifies the default name for recordings started with the keypad. The recording name may be changed later from the VALT web interface. |
| Marker Name | This field specifies the default name for markers created with the keypad. |
PIN Configuration
This field specified the number of characters in the PIN code. All user PINs must be the same length.
Current Network Configuration
This section displays the current network configuration for the keypad.
Network Boot Configuration
This section allows for configuration of the wired and wireless network interfaces on the keypad.
Admin Configuration
| Keypad Passcode | This field specified the pin code that must be entered on the keypad to access the keypad menu. This menu can be used to set the IP address of the keypad. |
| Web Password | This field specified the password used to log into the keypad web interface. |
| Change Password | Clicking this button will update the password used to log into the web interface. |
| Restart Service | Clicking this button will restart the keypad service. |
| Restart Keypad | Clicking this button will reboot the keypad. |
| Web Interface | Clicking this button will disable the keypad web interface. |
| Update Config Files | Clicking this button will save all changes. |
Star Commands
Typing any of the commands in the table below into the keypad will result in triggering a special function.
| *1 | Share Current Recording With A User |
| *2 | Share Current Recording With A Group |
| *3 | Pause Current Recording |
| *4 | Add a Marker |
| *5 | Lock/Unlock Room |
| *6 | Not Used Currently |
| *7 | Menu |
| *8 | Reboot Keypad |
| *9 | Display IP Address |
| *0 | Reset LED Display |
Start a Recording
Recordings are started by typing in a users pin code. This will also assign the video to that user.
*To add a pin code to a user, first go the user in the Admin section and select the user you want to assign a number to.

*Click on "Advanced Options" to open to the Card Number field.
- Assign the user a pin.
- Save the page.
- Now the user can type that pin into a keypad to start a recording.
Factory Default
On the keypad type *62476. The keypad will restore all settings to default and reboot.