VALT 6 Observe
Contents
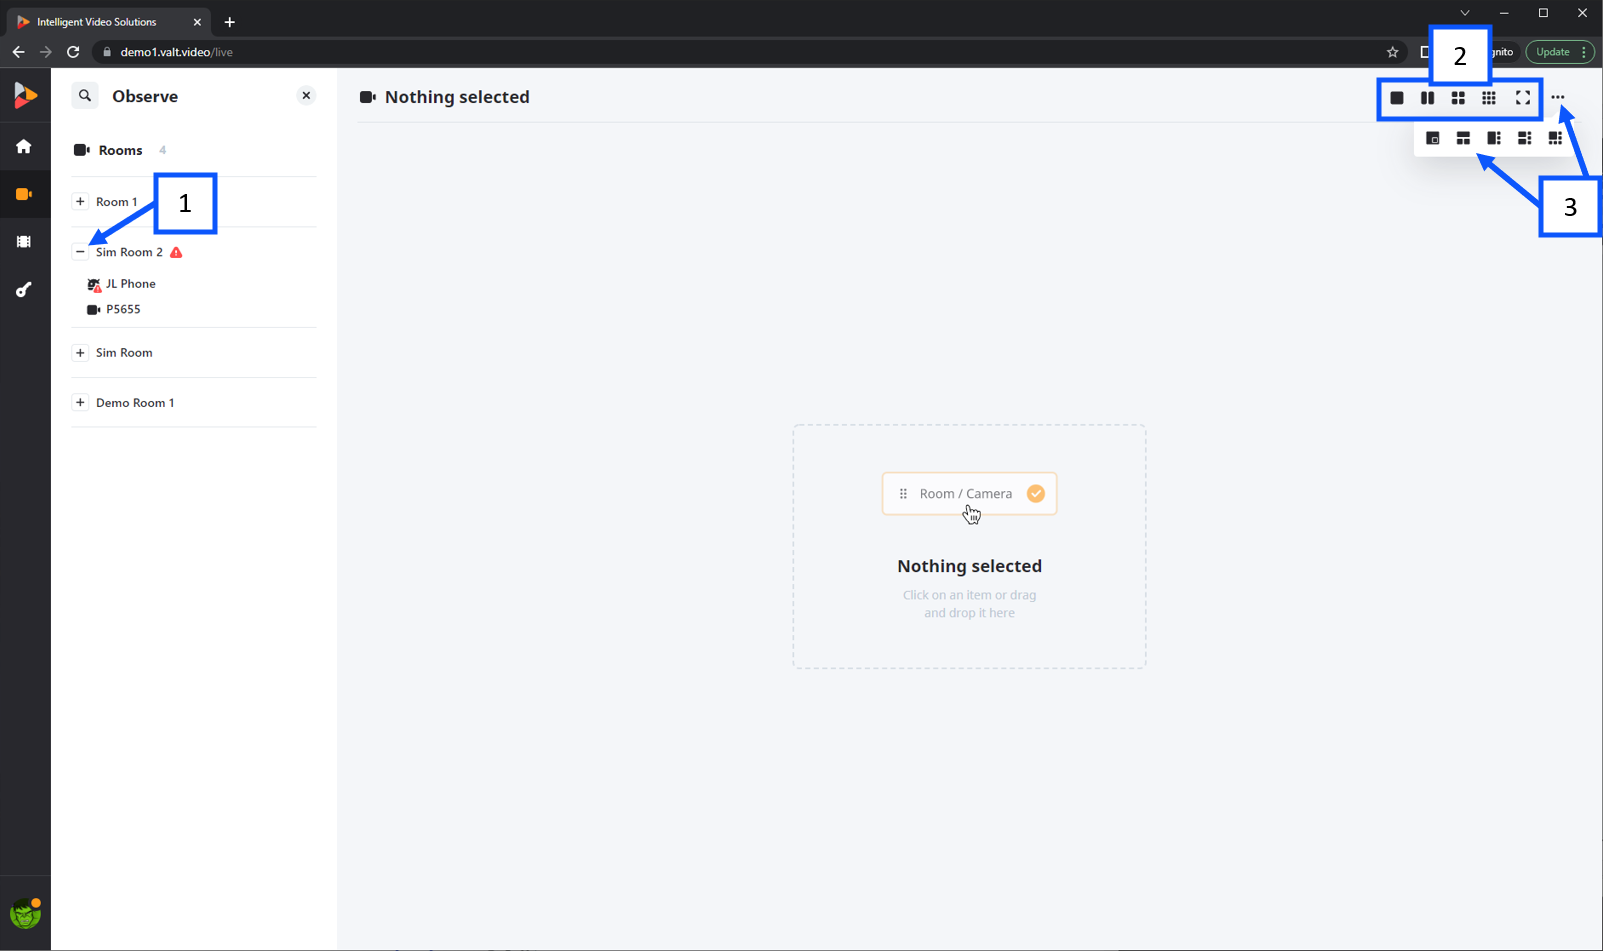
The observe section is used to view live video and audio, prepare or start recordings and stop, pause or manage active recordings.
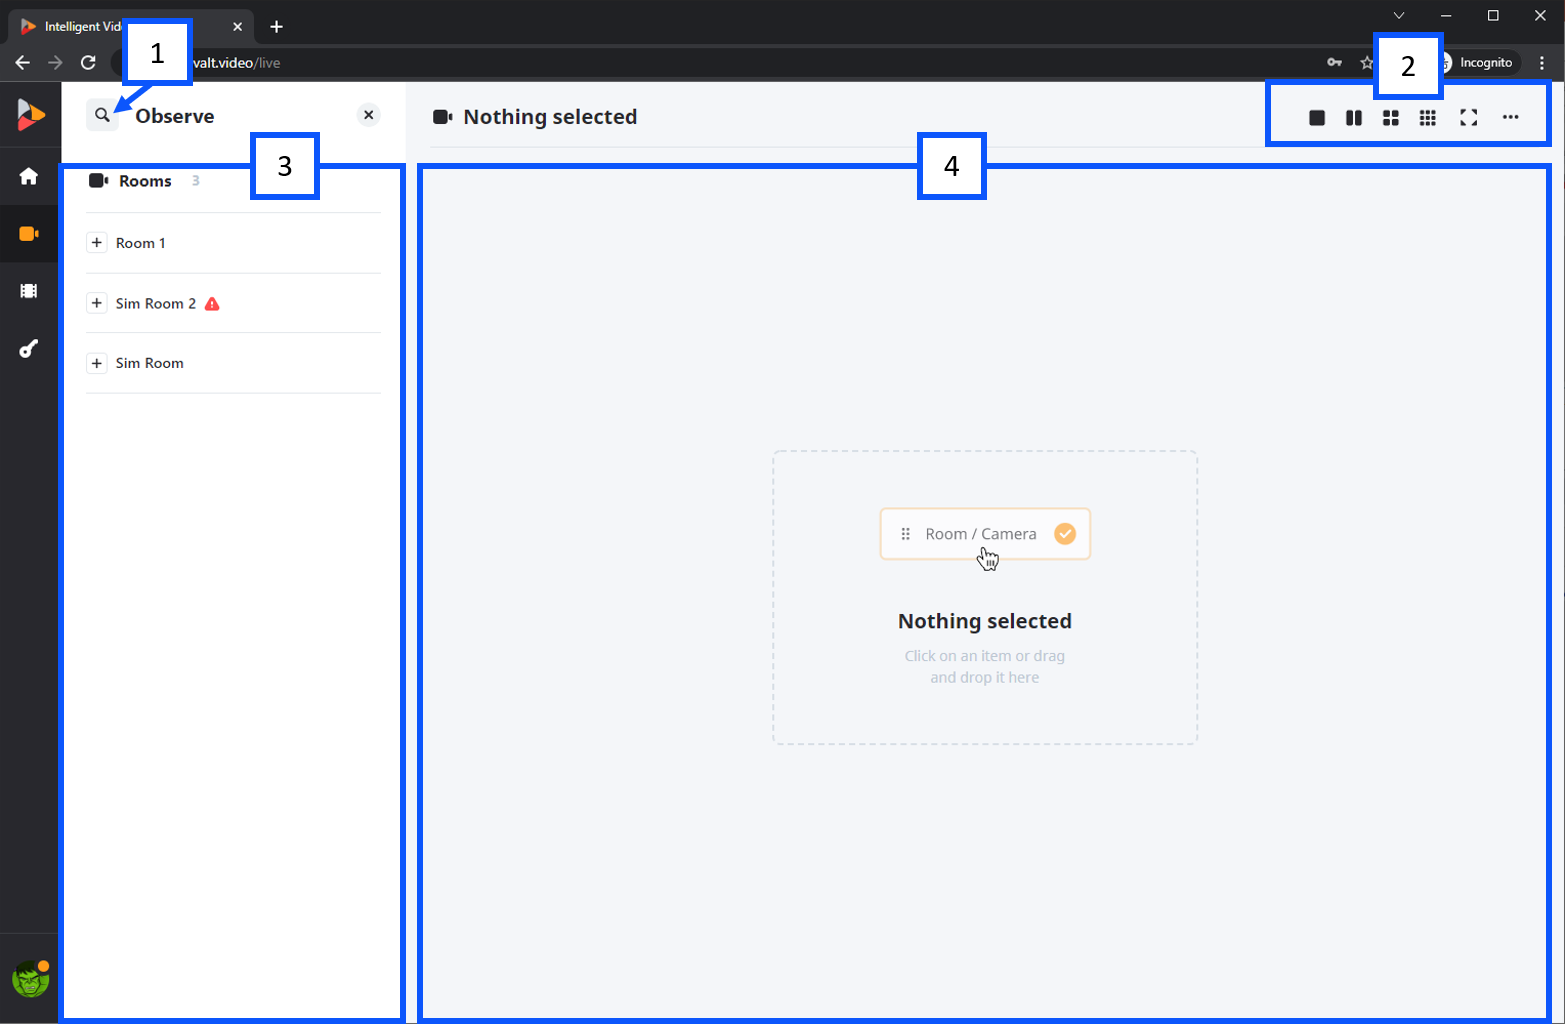
- Clicking the search button will open up a search dialog box that allows a user to search for a cameras or rooms.
- Select or change a matrix view using the buttons shown above.
- Selecting a room or camera from this section will pull up the corresponding audio and video.
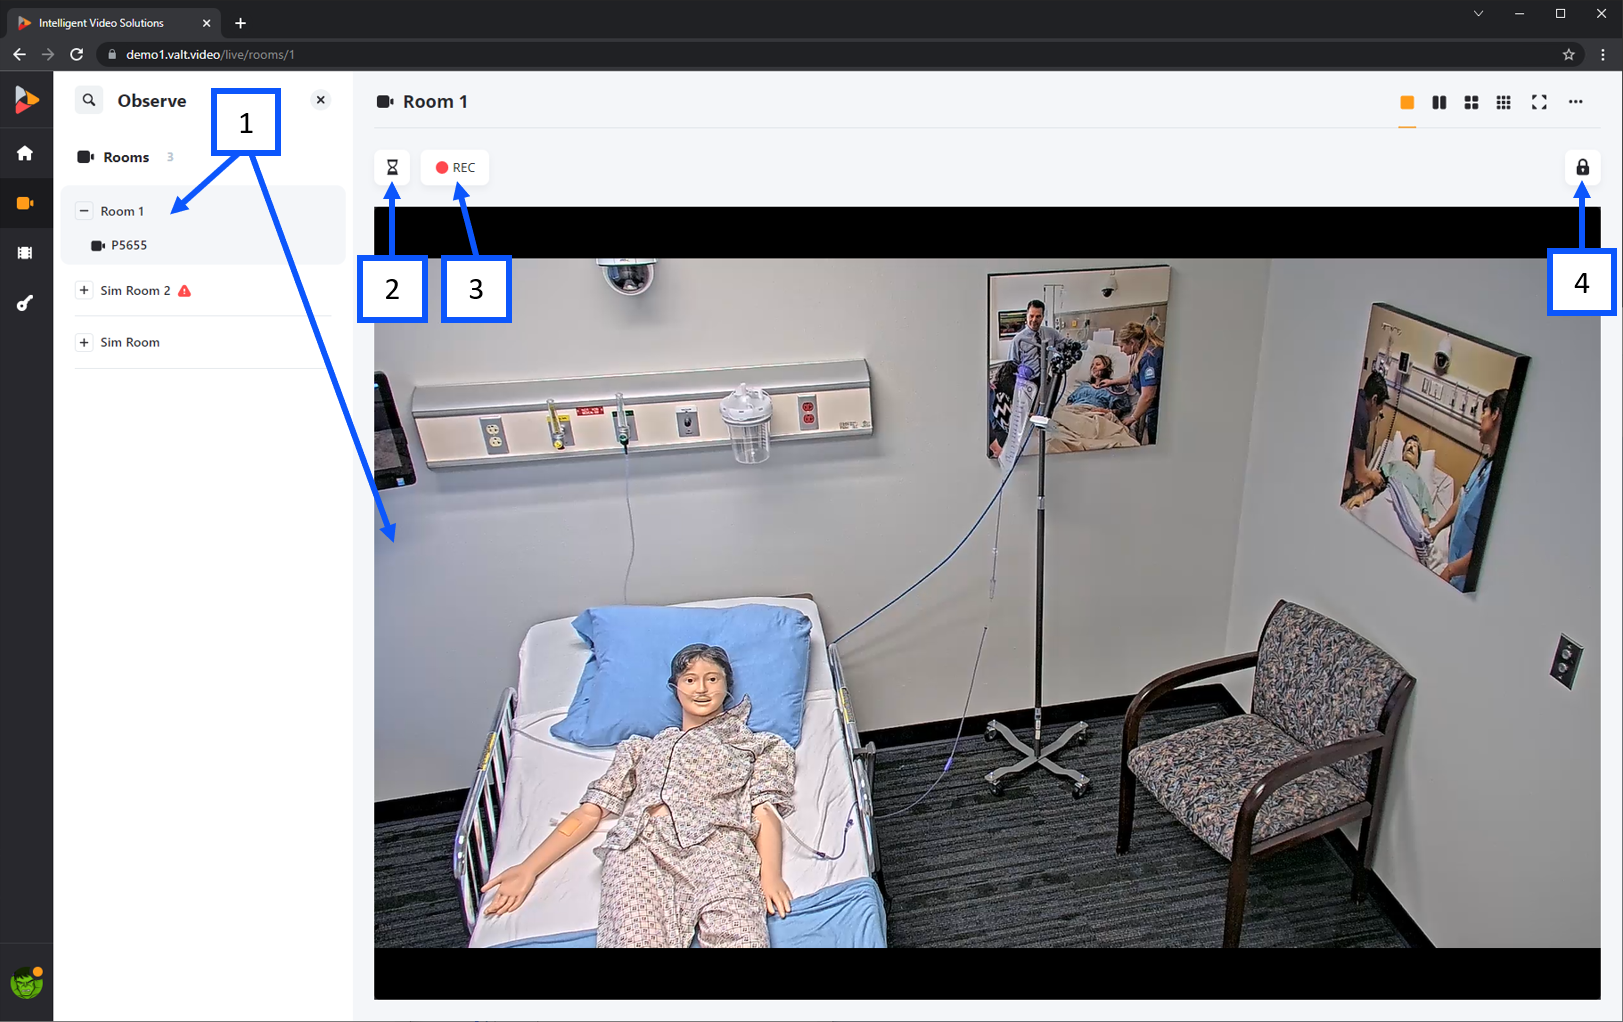
- Selecting a “Room” will pull up the corresponding audio / video as shown above.
- Prepare: Thhis button is used to fill out information about the recording ahead of time so the recording can be initiated with a single click.
- Record: This button is used to initiate a recording in the shown “Room”. Pressing this will bring up a information template.
- Lock: This button is used to prevent recording / viewing a room until the room is unlocked by an authorized user.
⤺ Back to the Main Manual Page
Device Toolbar
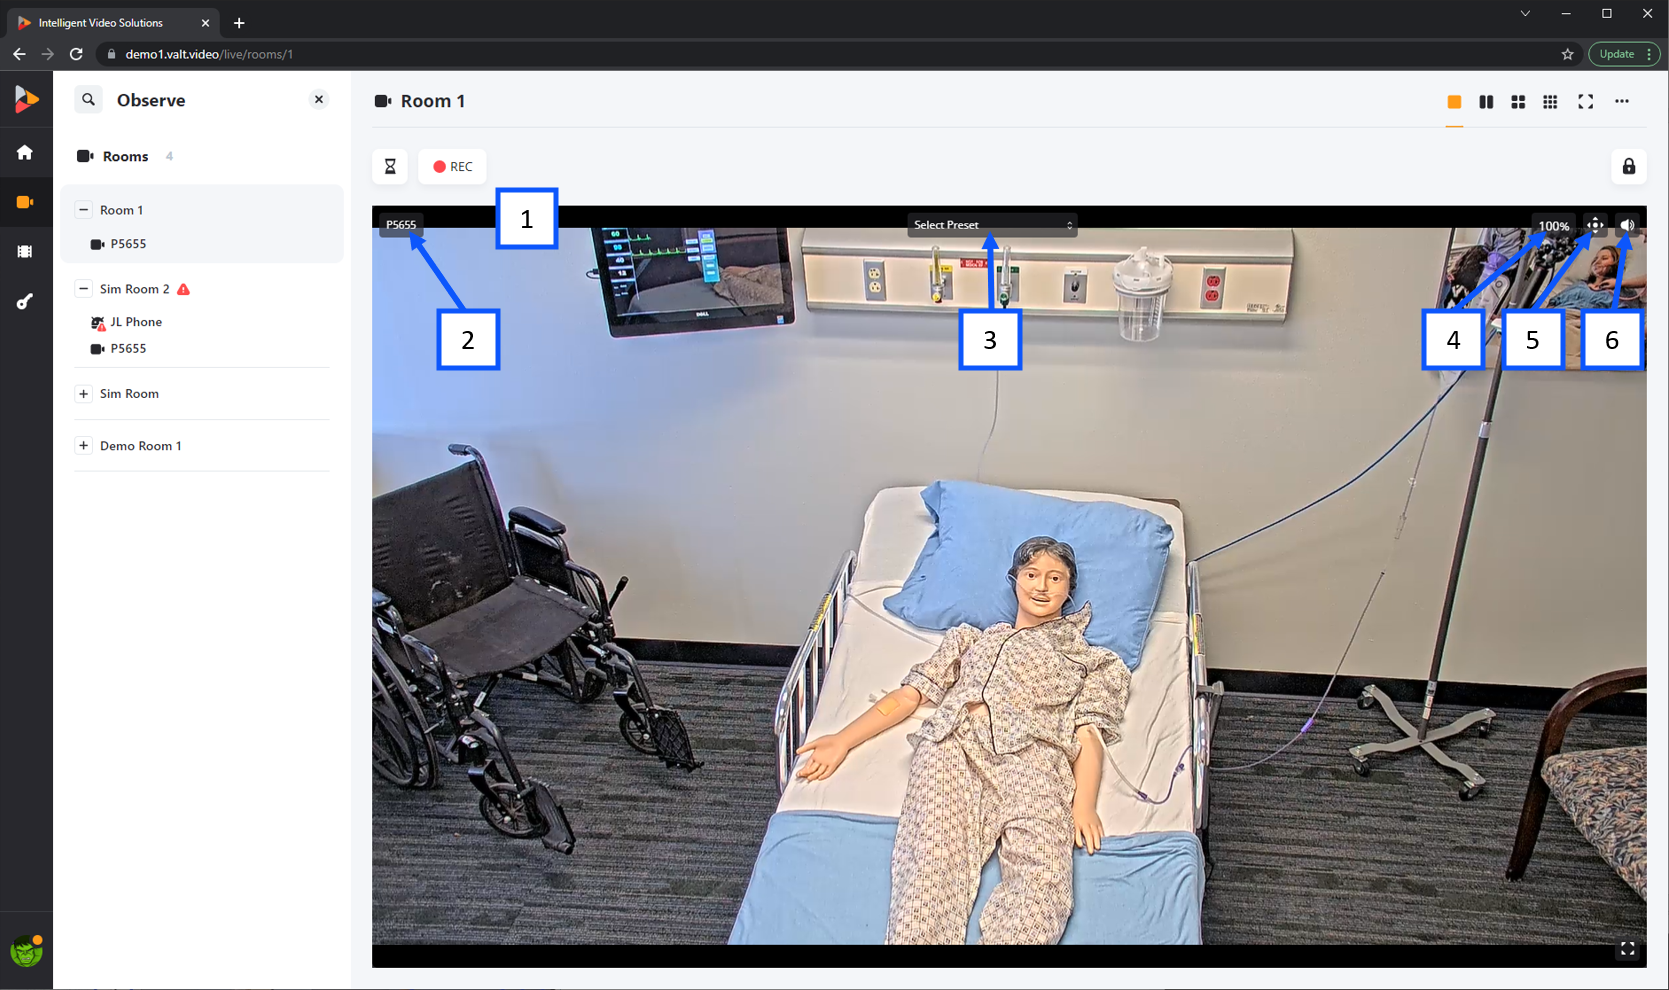
- Clicking on a camera image will bring up the device toolbar.
- This shows the device name.
- If the device is a PTZ camera and the user has PTZ control rights the preset menu will be shown. This allows a user to add / delete / and use presets to control the camera.
- The digital zoom shows how zoomed into the image the user is, hovering over the button will pull up a slider that can be used to zoom in / out.
- PTZ control button enables optical Pan Tilt and Zoom control.
- Audio control button can be used to enable or mute the audio.
⤺ Back to the Main Manual Page
PTZ Control
PTZ control is used to control the pan tilt and zoom of a camera through the VALT software.
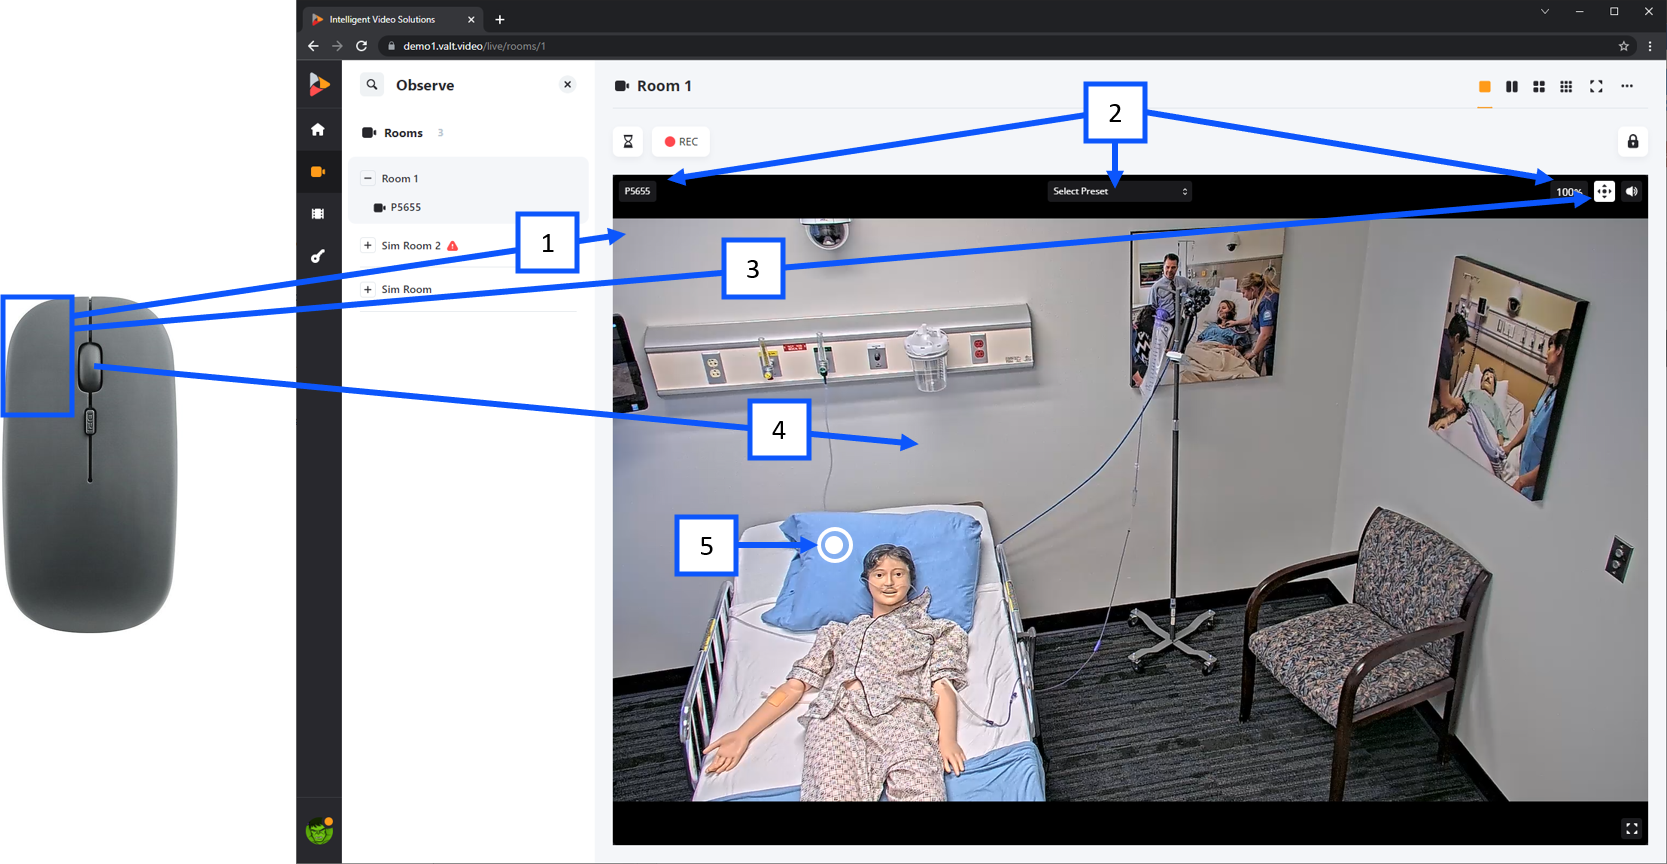
- Clicking anywhere on the camera image will pull up the camera menu (2).
- Camera Menu
- Clicking on the PTZ icon will change the icon from black to red (signalling that PTZ is enabled) the mouse will change to a target as shown above (5).
- The scroll wheel can be used to zoom in / out optically when the PTZ icon is enabled or digitally when it is not.
- PTZ Target: left clicking will recenter the camera on whatever the target is pointing at./li>
⤺ Back to the Main Manual Page
Matrix
Matrix layouts allow a user to view one or more video sources in the desired layout. The matrix layout can be set for each “Room” but a user can also manipulate matrix layouts by selecting a layout and dragging and dropping cameras into the empty cells within the layout.
- Rooms can be expanded by clicking the + to the left of the room.
- Users can select a matrix layout.
- Clicking the three dots will reveal additional matrix options as shown above.
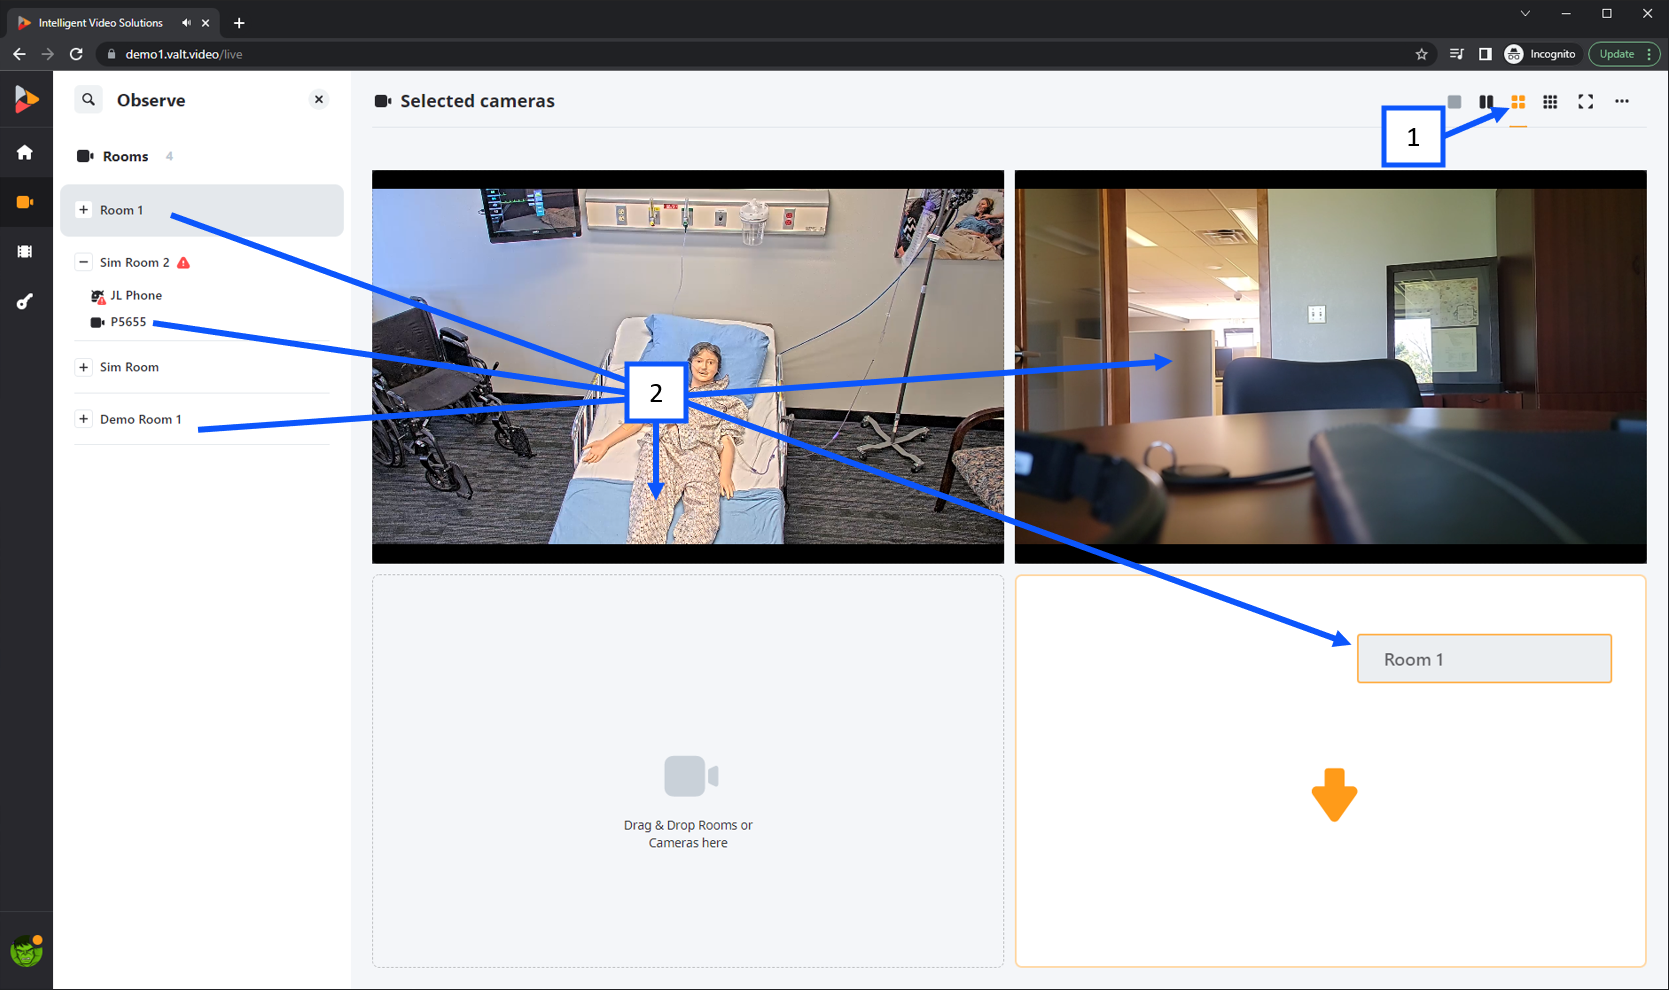
- To use the matrix first select a layout view, once selected the layout will display orange.
- Rooms or individual devices under a room can be dragged and dropped into matrix cells.
⤺ Back to the Main Manual Page
Recording
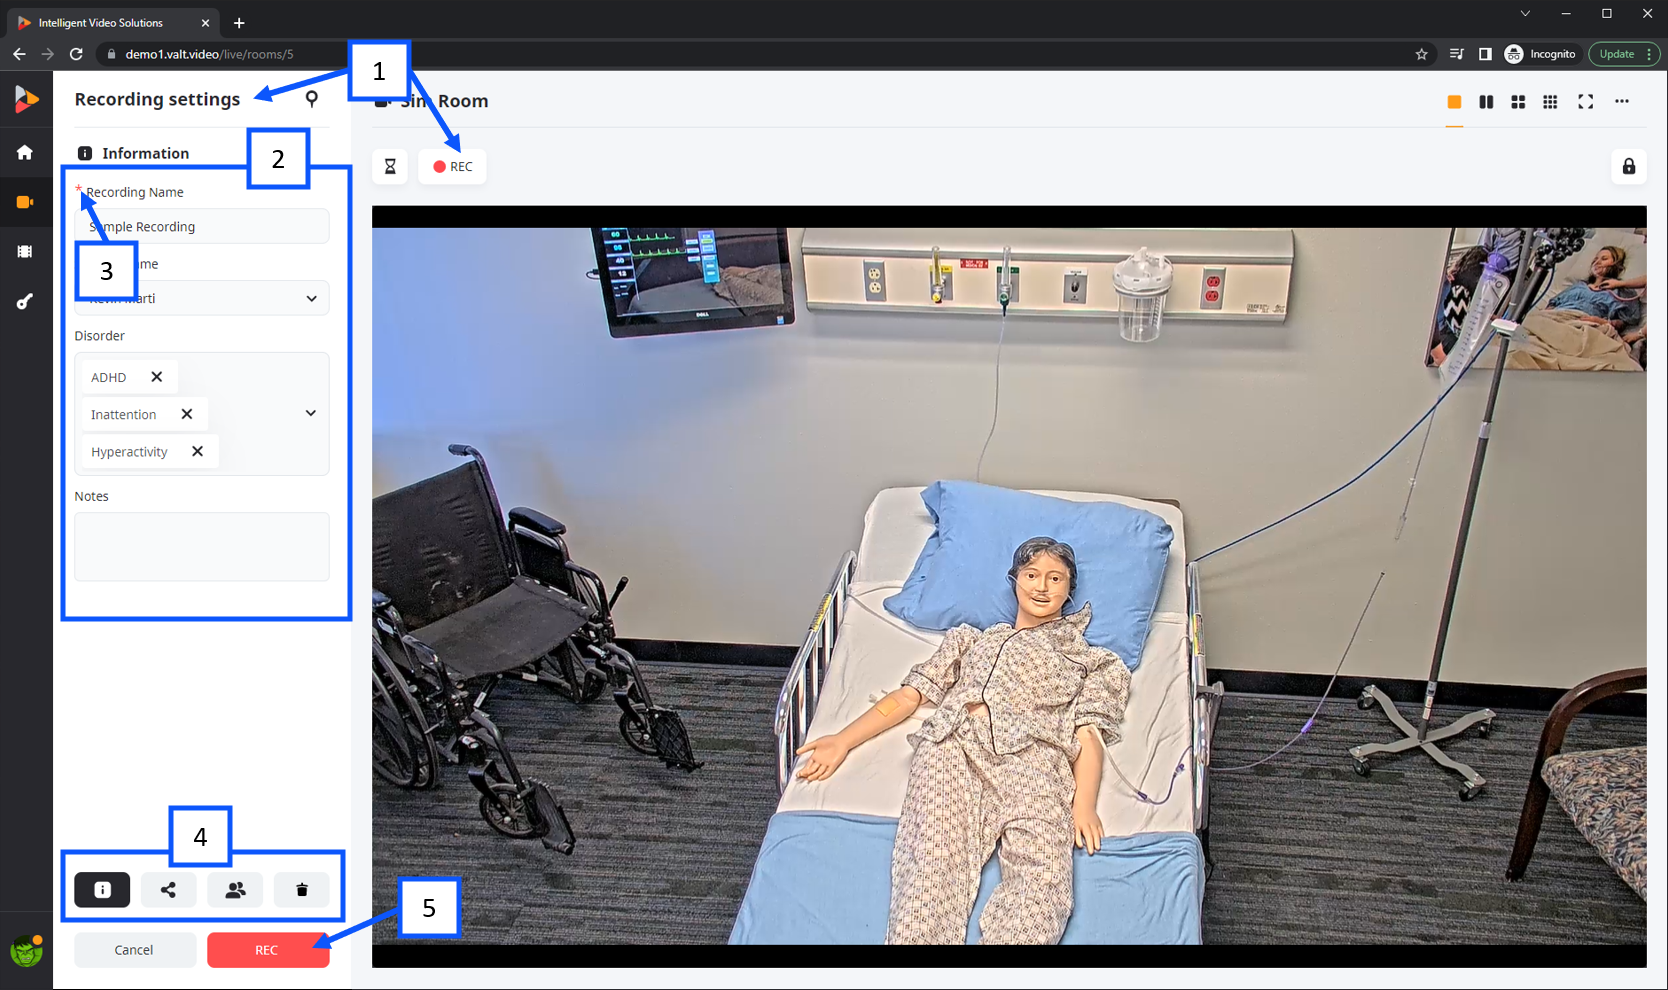
- Pressing the REC (Record) button will bring up the default information template associated with the users group.
- The information template fields are used to associate searchable information with a recording. The information fields can be filled out prior to the start of the recording of after a recording is complete under the review section.
- Any required fields will be denoted with a red *
- The recording navigation menu can be used to switch to different sections that allow a user to share the recording with other VALT users, change the author, or modify how long the video is stored for before automatically deleted prior to starting a recording.
- Once the information is filled out clicking the red REC (Record) button will start the recording.
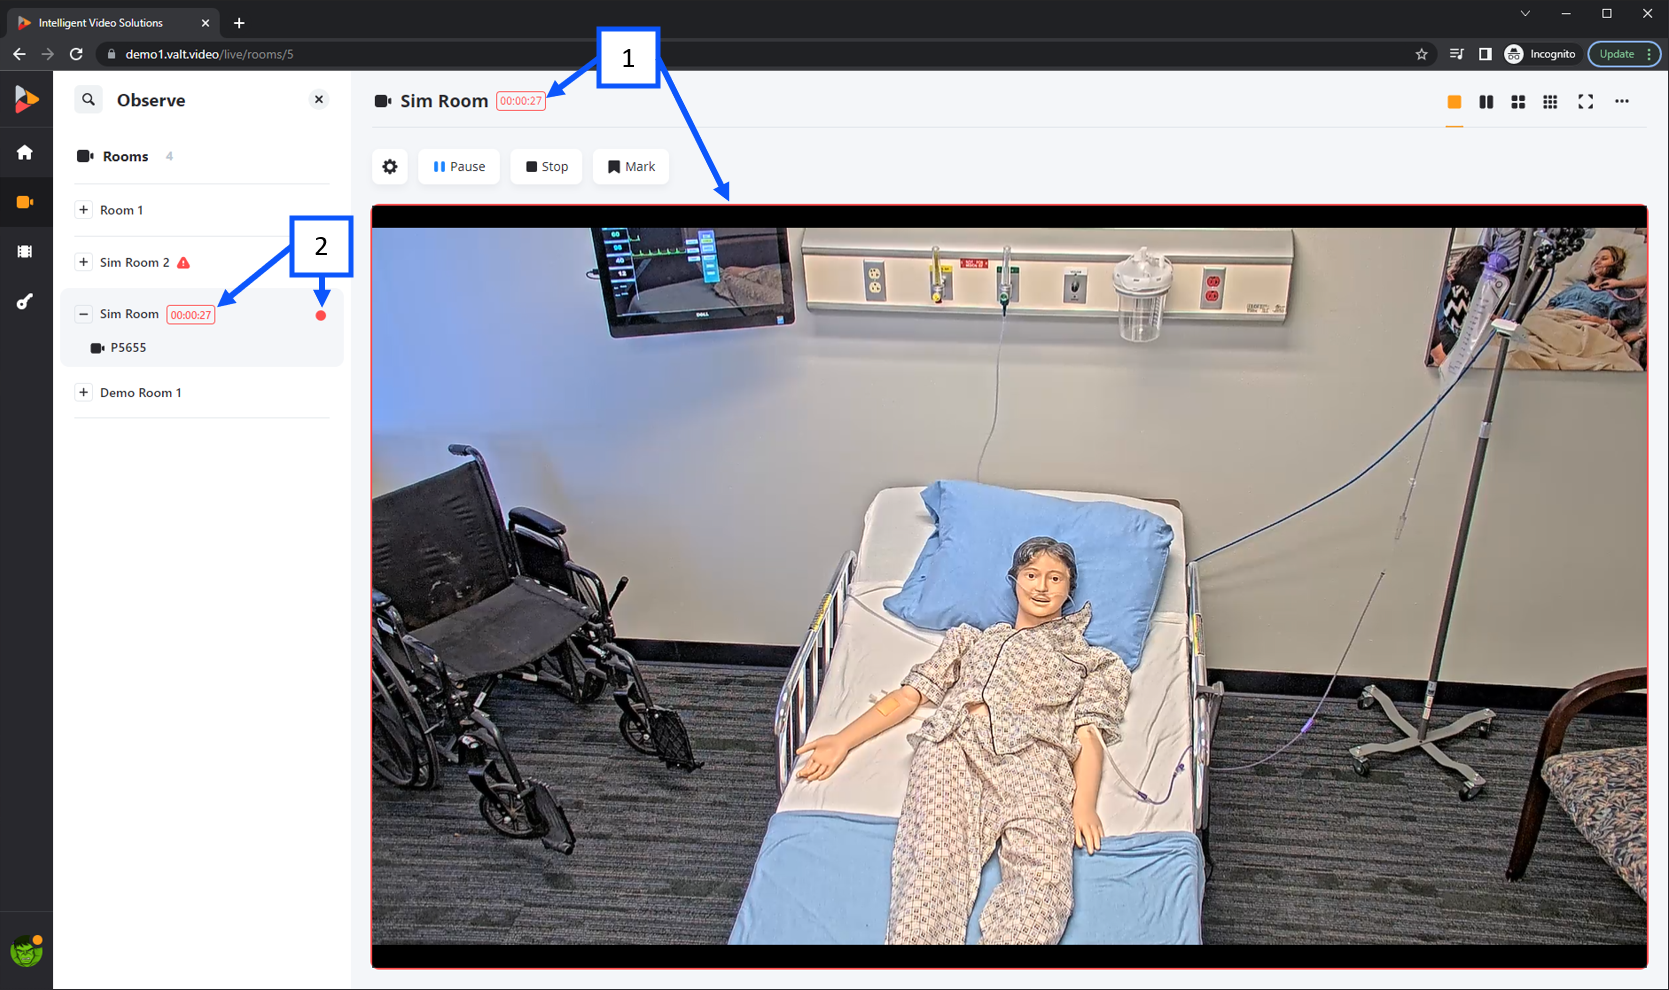
- Once a recording has been started if the “Room” is being observed a recording indicator will appear next to the room displaying how long the recording has been active and a red border will appear around the “Room”.
- A recording indicator will also display in the menu as shown above.
⤺ Back to the Main Manual Page
Sharing
The sharing section allows recordings to be shared with VALT users that normally would not have access to them from both a live observation and review perspective.
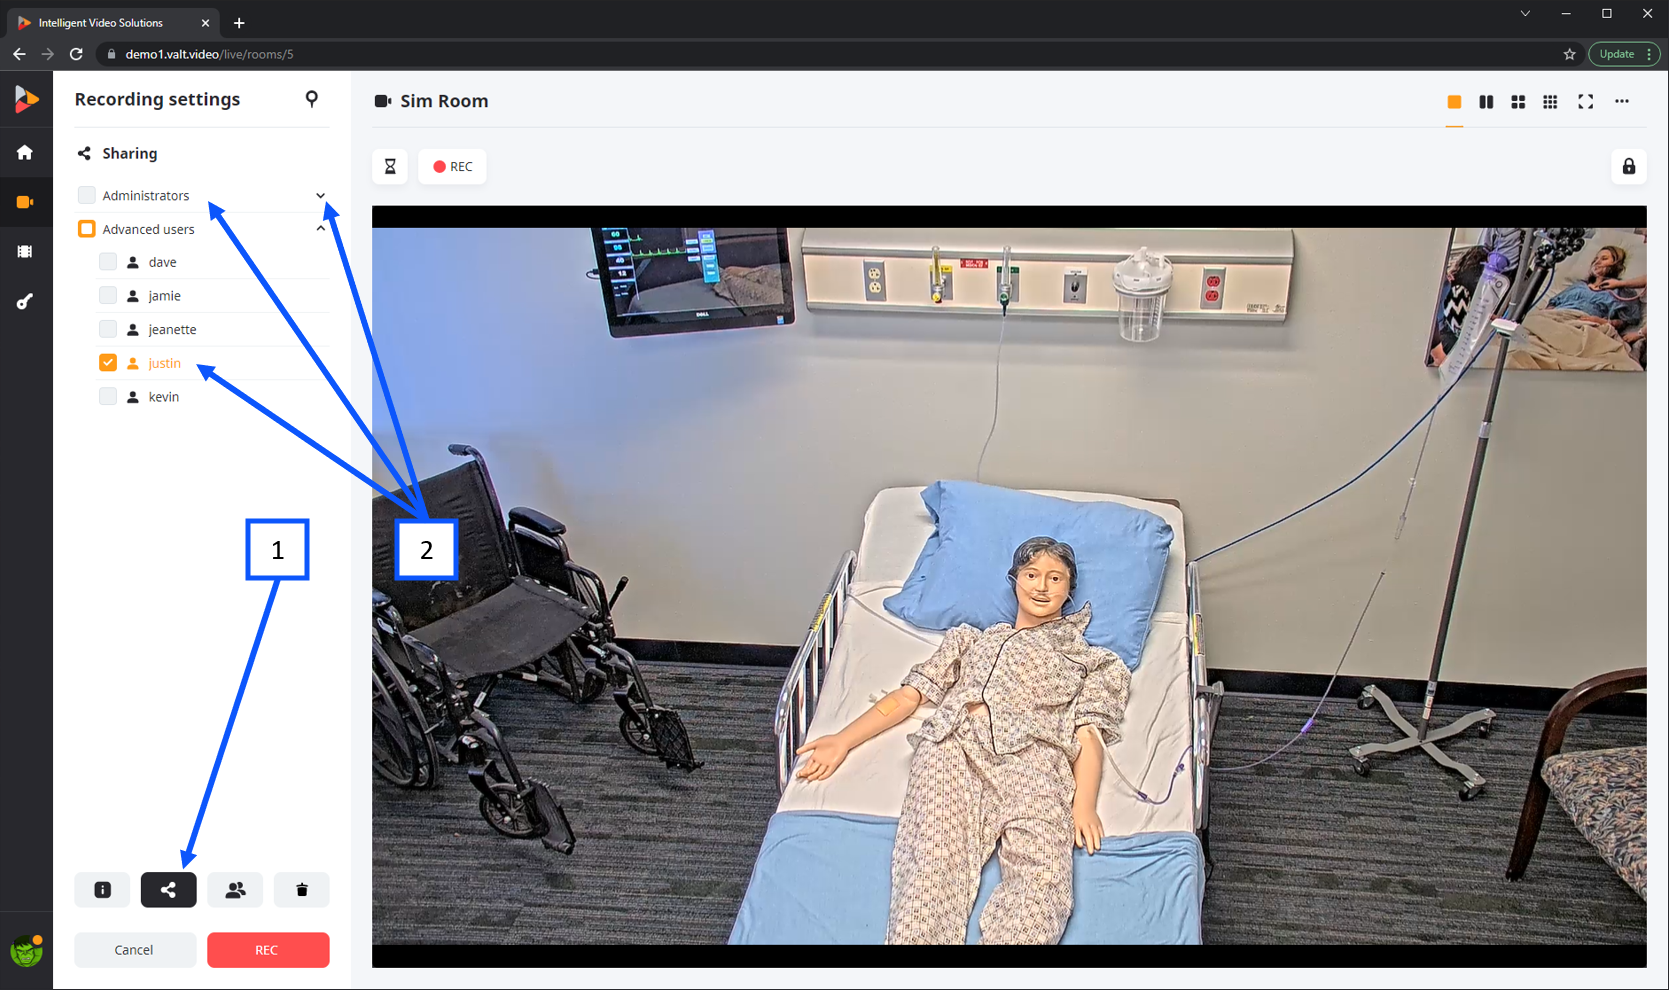
- Clicking on the sharing button will pull up the sharing section in the recording modal.
- The arrows can be used to expand user groups, a user can check the box next to a user or an entire group of users to share the video.
⤺ Back to the Main Manual Page
Change Author
The change author section can be used to re-author a recording. This can be important as access rules are based on who authored the video

- Clicking on the change author button will pull up the change author section in the recording modal.
- The arrows can be used to expand user groups, a user can only select a single author for a recording.
⤺ Back to the Main Manual Page
Retention
The retention settings control how long a recording is stored on the system before it is automatically deleted. Retention settings are set based on the recording authors user group but can be modified either before a recording starts or after a recording is finished within the review section.
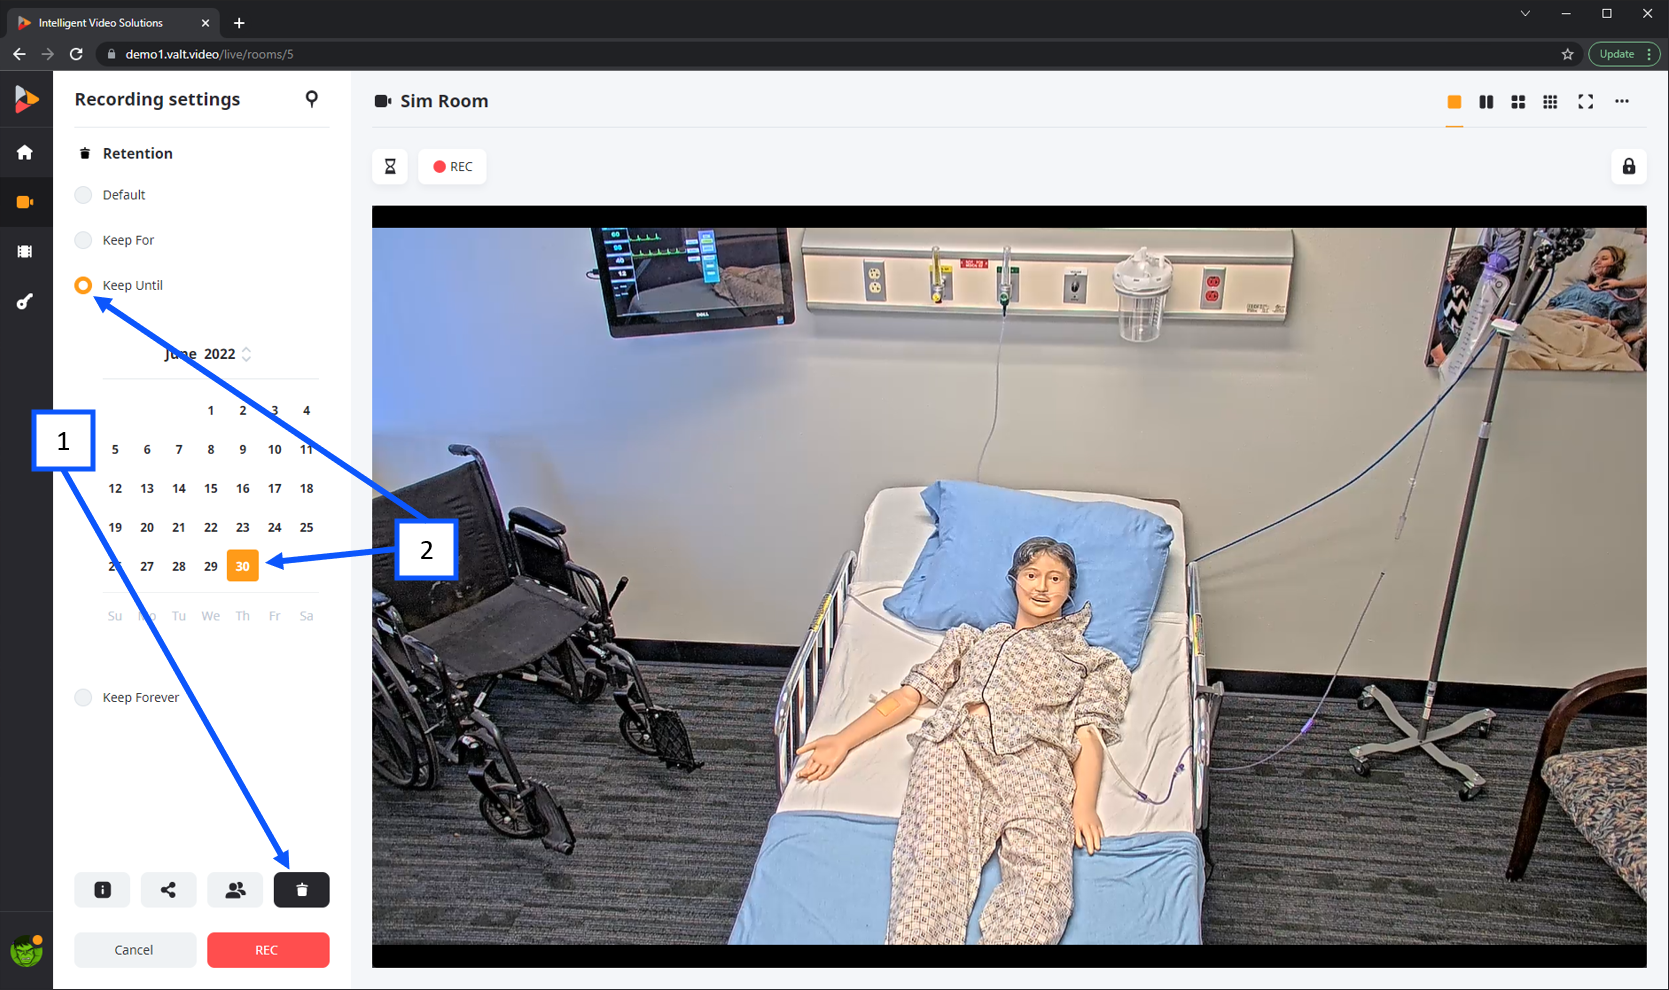
- Clicking on the retention button will pull up the retention section of the recording modal.
- Select the retention duration type:
- Default: whatever the authors user group retention settings are set to will be automatically used.
- Keep For: allows a user to define a number of days, hours or minutes to keep a recording for.
- Keep Until: allows users to select a future date that the recording will be deleted on.
- Keep Forever
⤺ Back to the Main Manual Page
Prepare
The prepare feature allows a user to enter information about a recording ahead of time so the recording can be started quickly with the single click of a button.
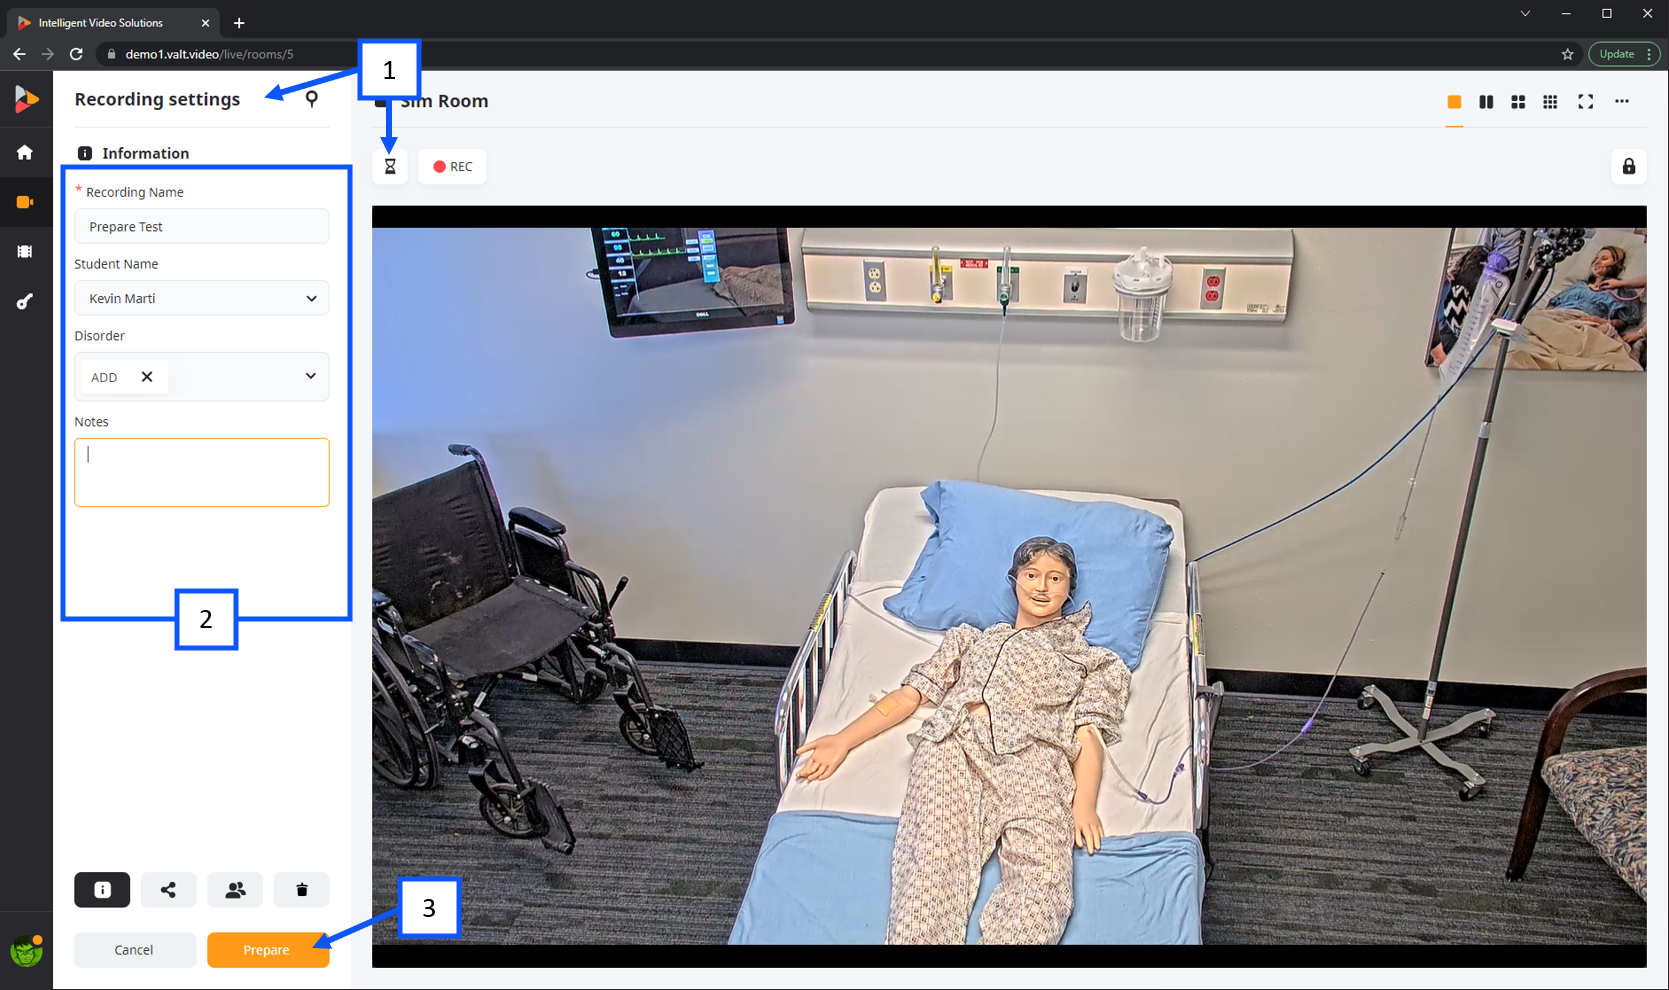
- Pressing the prepare button will bring up the default information template associated with the users group.
- The information template fields are used to associate searchable information with a recording. The information fields can be filled out prior to the start of the recording of after a recording is complete under the review section.
- Clicking the prepare button will finish preparing the room and close the modal.
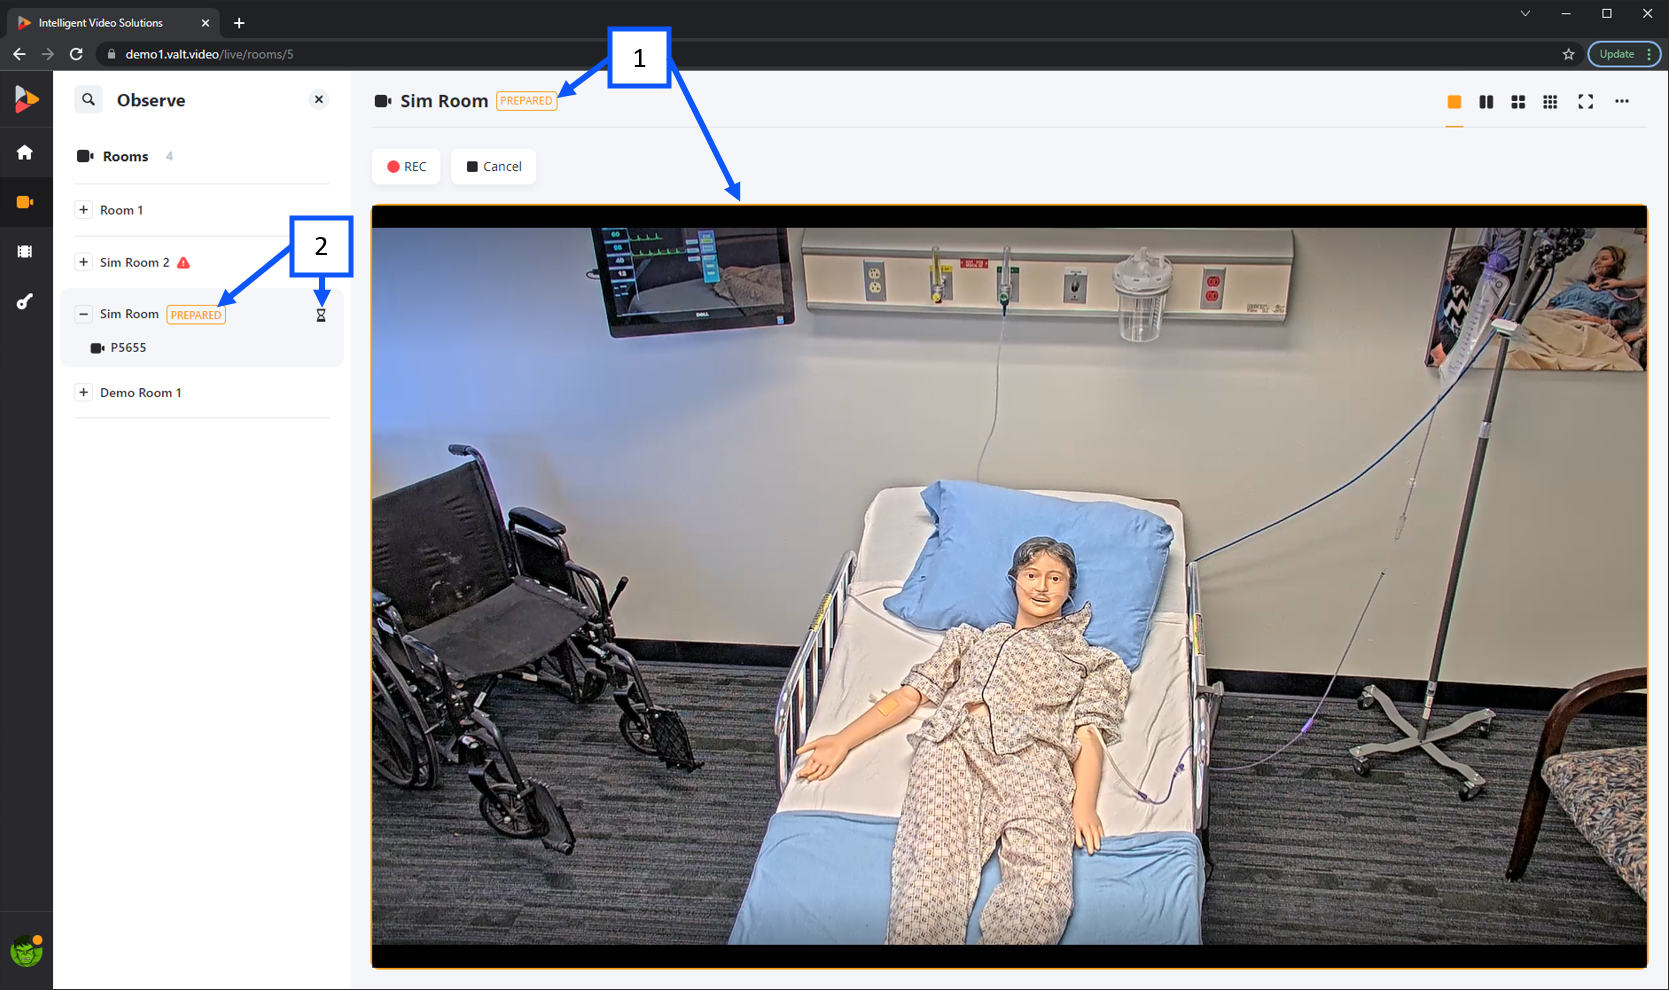
- Once a recording has been prepared if the “Room” is being observed a prepare indicator will appear next to the room and an orange border will appear around the “Room”.
- A prepared indicator will also display in the menu as shown above.