VALT 6 Review
Contents
Review
The review section is used to find and manage recordings. Only recordings the active user has access to will show under that user’s review section.
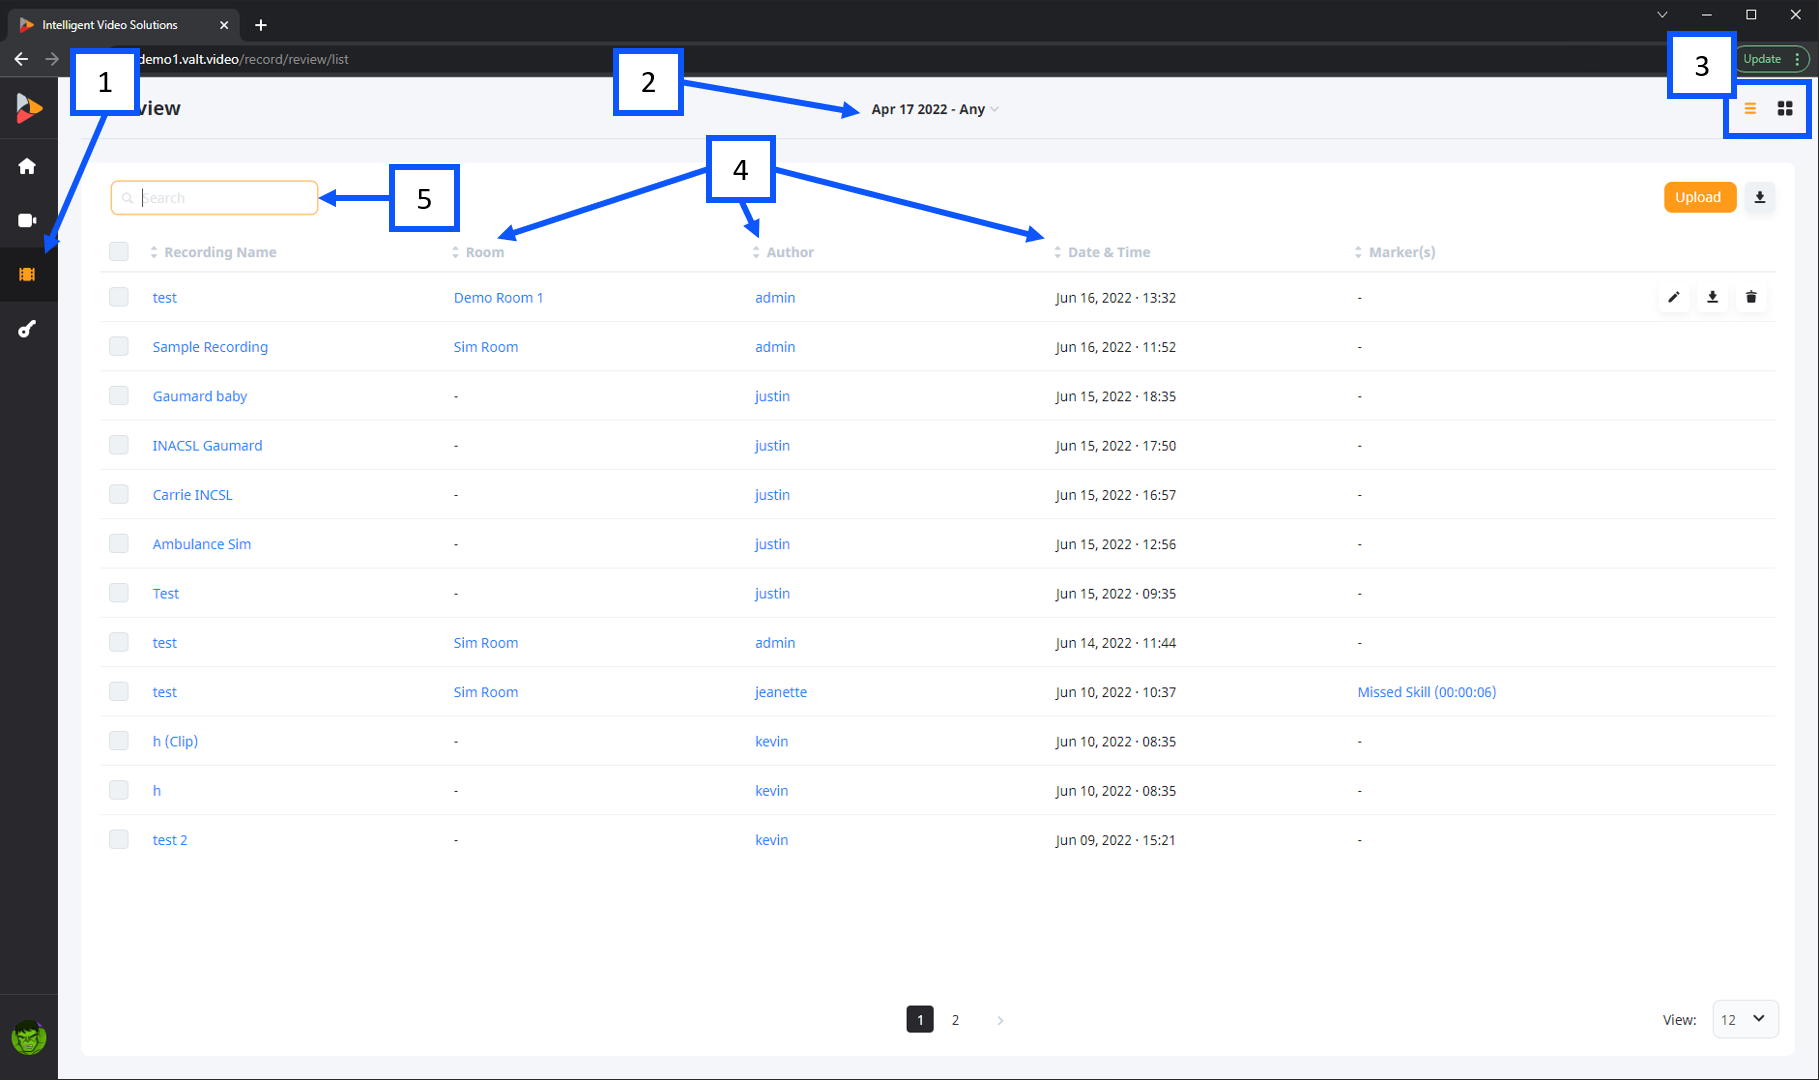
- Clicking the review button on the main navigation menu will take a user to that section.
- Date range: This is used to filter the display results based on a date range. The default range is defined by the active users group settings.
- The view mode button can be used to toggle between a list view and a thumbnail view of the results.
- Sortable column headers can be used to sort results on any column type.
- The search dialog box can be used to filter results based on any search query. The field searches across all information attached to a recording such as author, room, information template, markers etc.
- The download button can be used to download a pdf or csv summary of the information associated the displayed results.
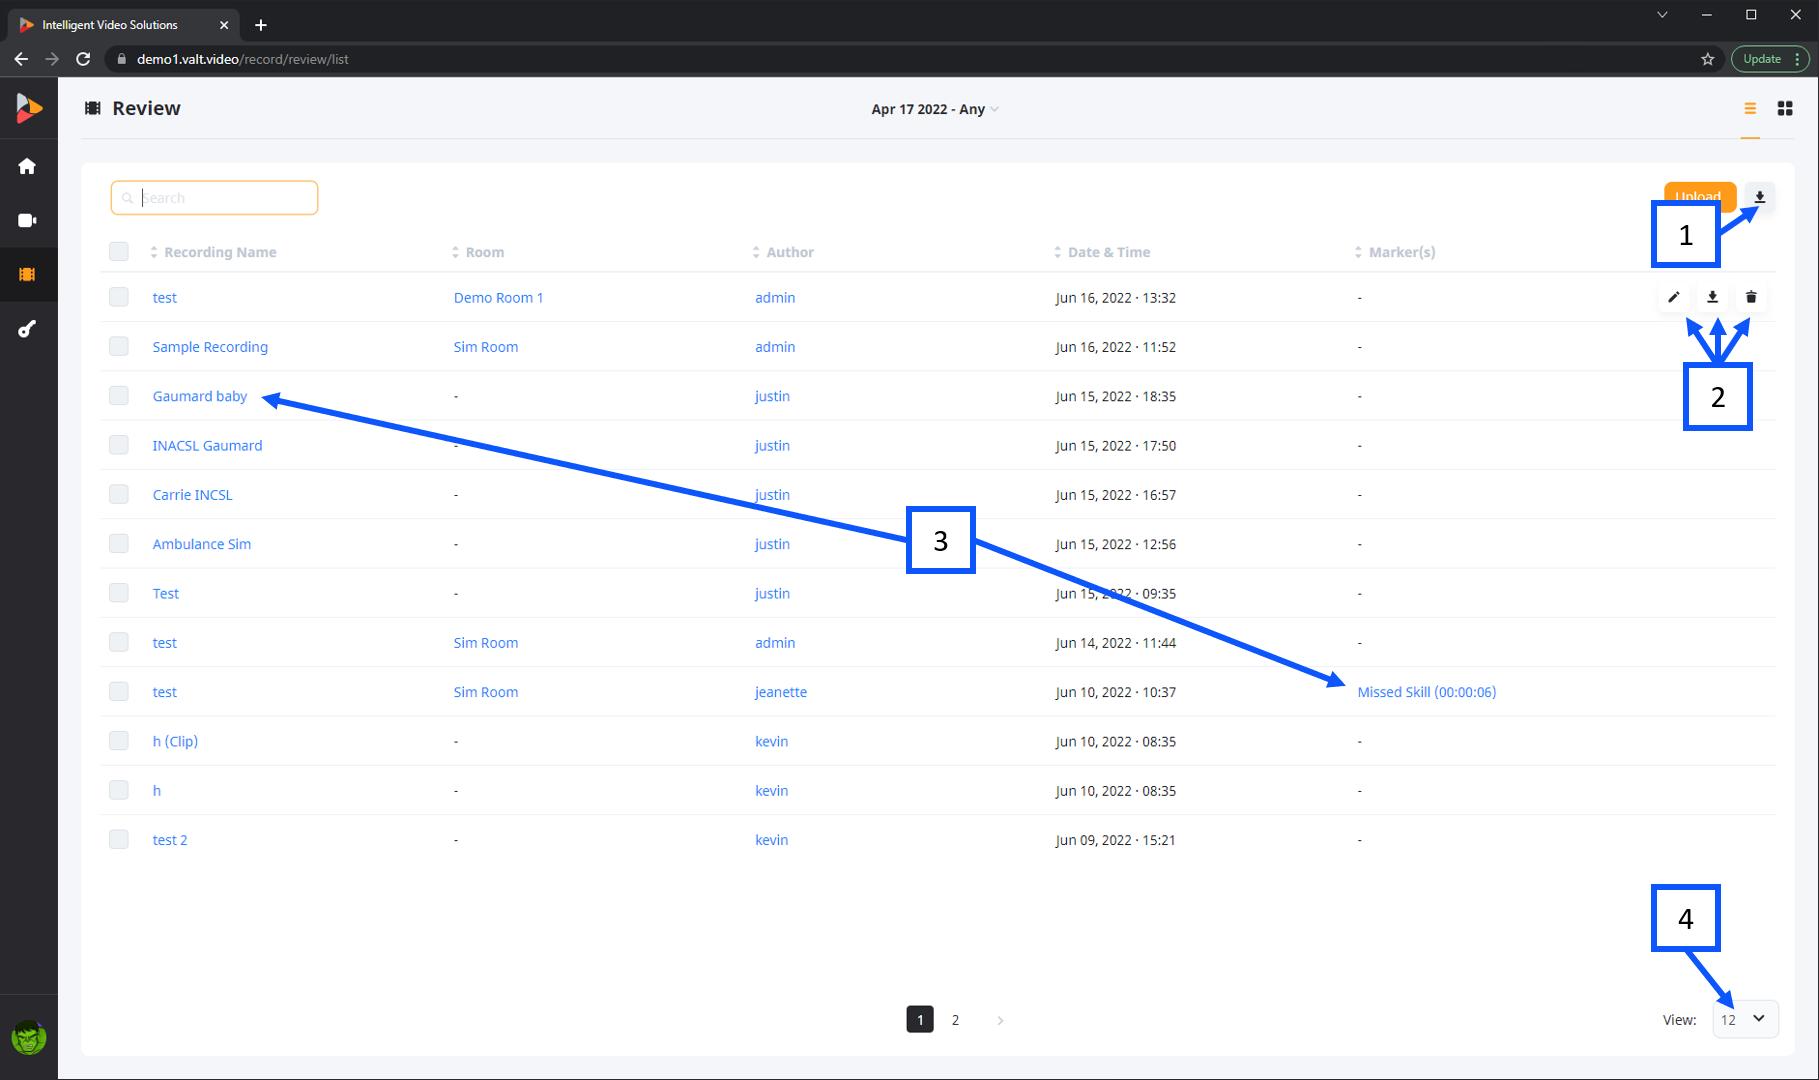
- Hovering over a result will display control buttons based on the users rights for the selected recording. The buttons shown above are edit, download and delete.
- Clicking on a the recording title or marker title will open up the corresponding video. If a marker is clicked on it will take the user to that specific point in the recording.
- The drop down in the lower right can be used to adjust how many results are shown per page.
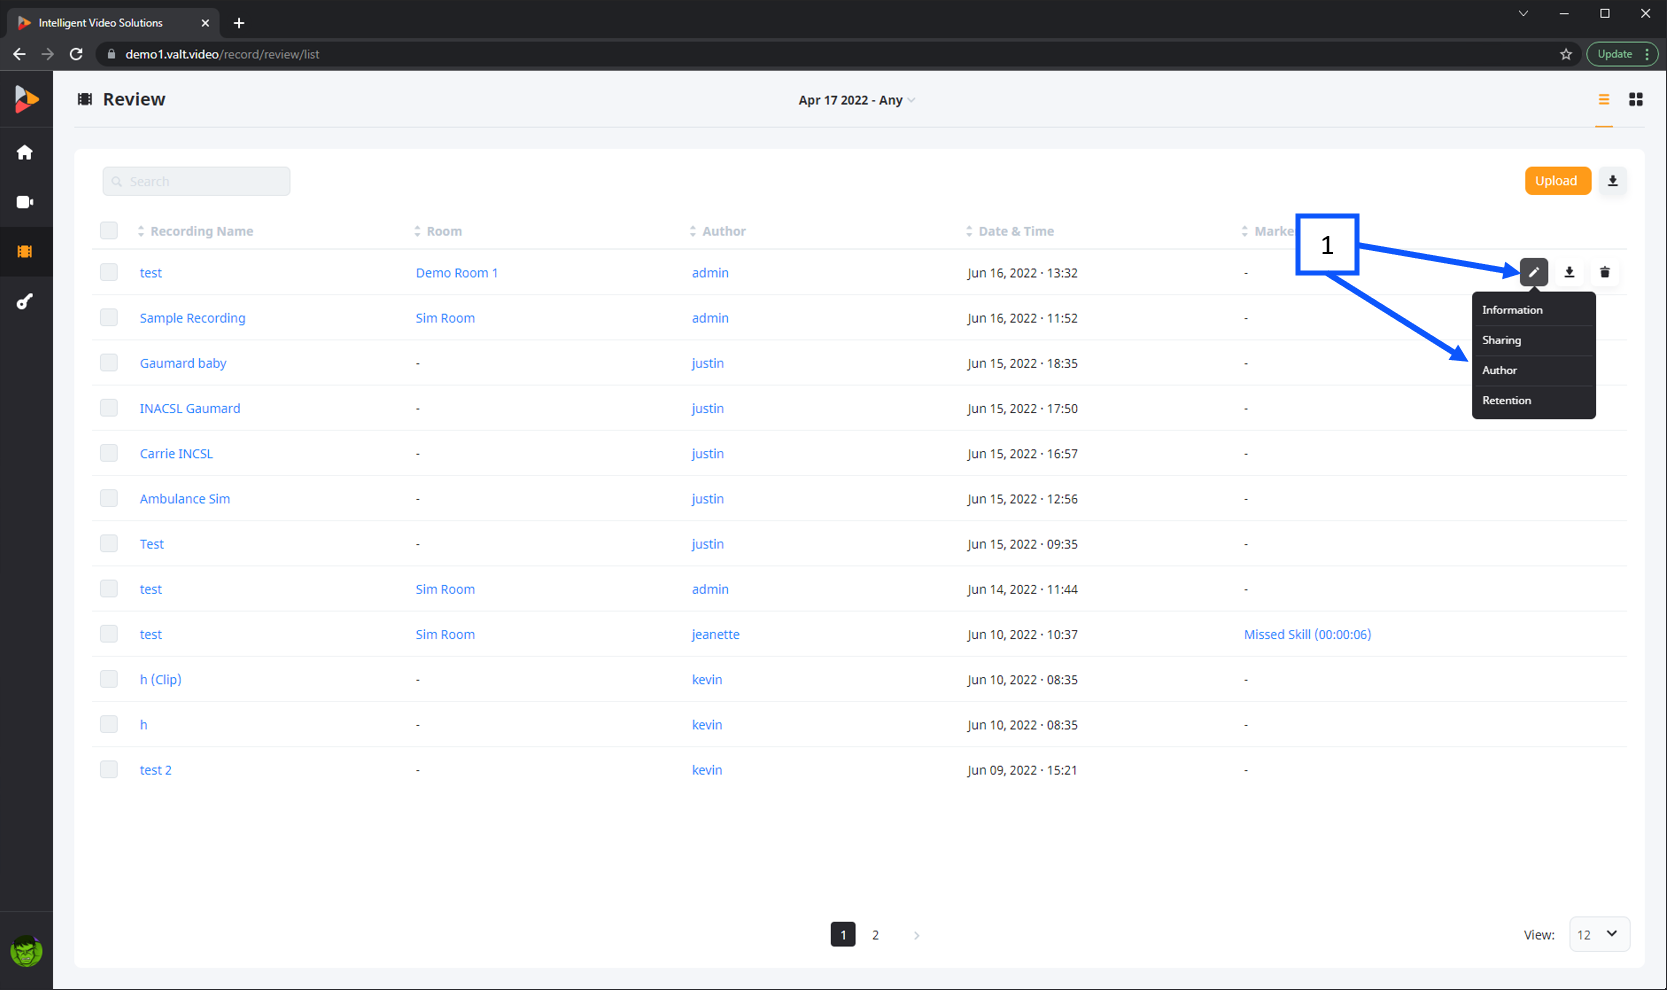
- Clicking on the edit button opens a sub menu. Clicking on any of the sub menu items will bring up the corresponding recordings modal on the left.
- Information: allows a user to add or edit previously entered recording information.
- Sharing: allows a user to share a recording with users or groups that do not have access to it.
- Author: allows a user to change the author of a recording.
- Retention allows a user to edit how long a recording will remain on the system before it is automatically deleted.
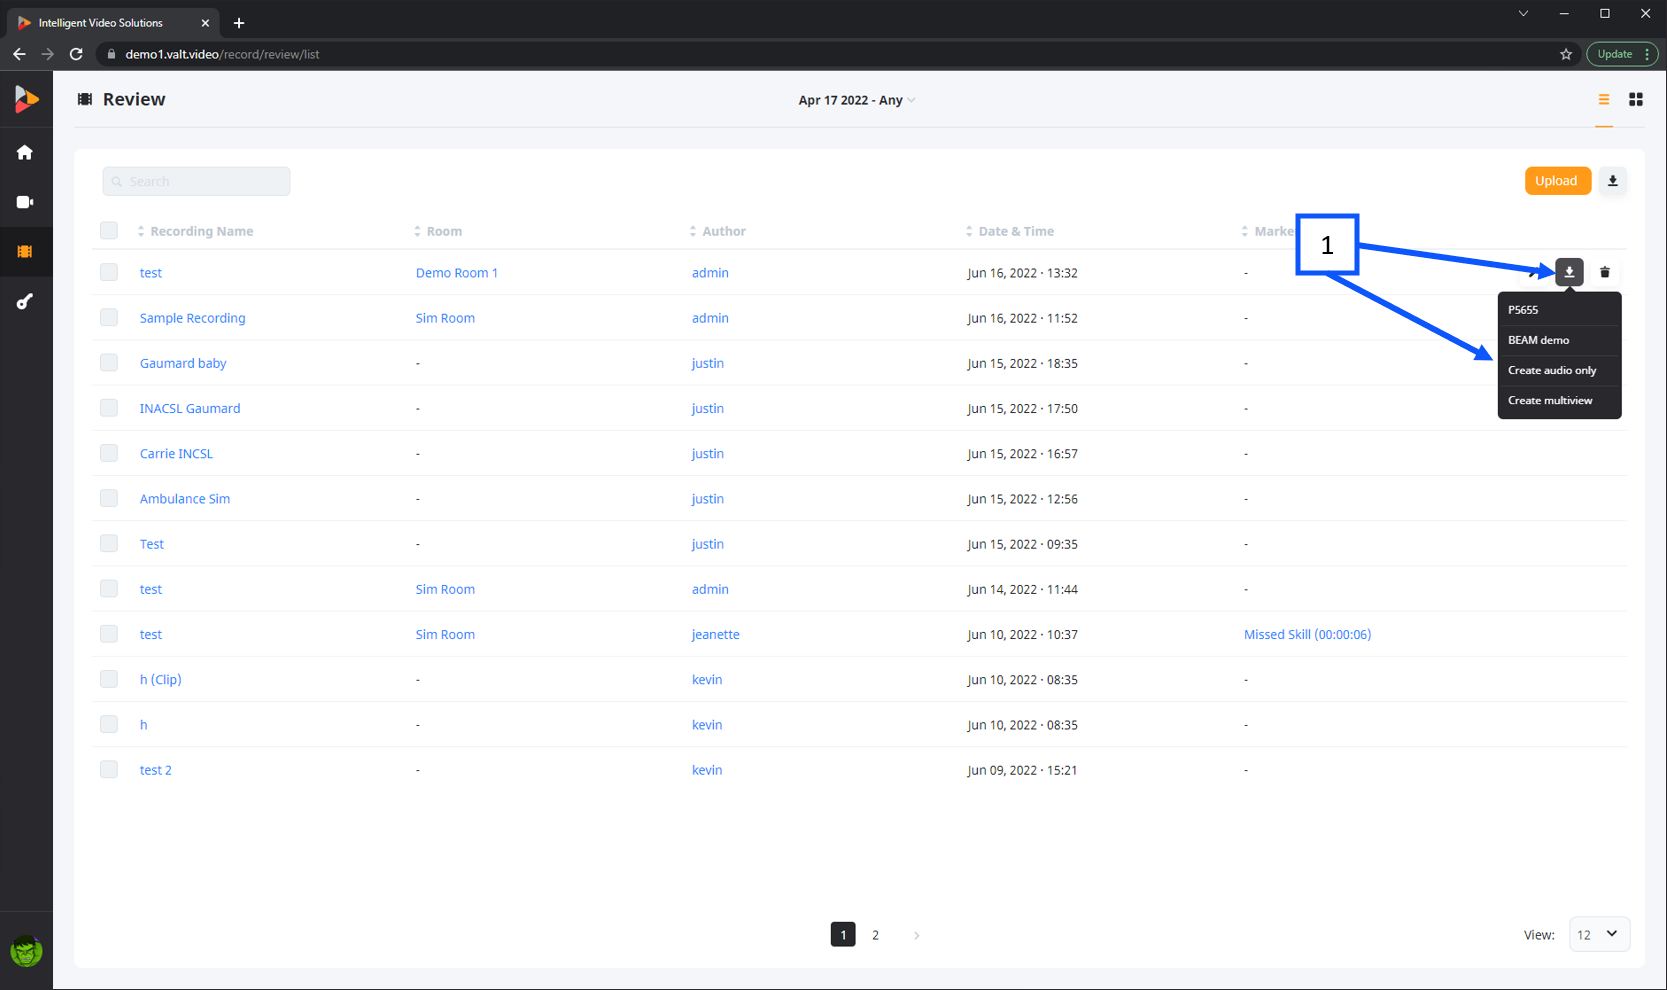
- The download button can be used to download a single video file associated with a recording or create an audio only (.mp3) file for download. The download button can also be used to generate a multi-view which can stich up to 4 video files together into a single .mp4 file which can then be downloaded using the same button upon completion.
⤺ Back to the Main Manual Page
Upload
The upload feature can be used to upload recordings made outside of VALT into the VALT application for management.
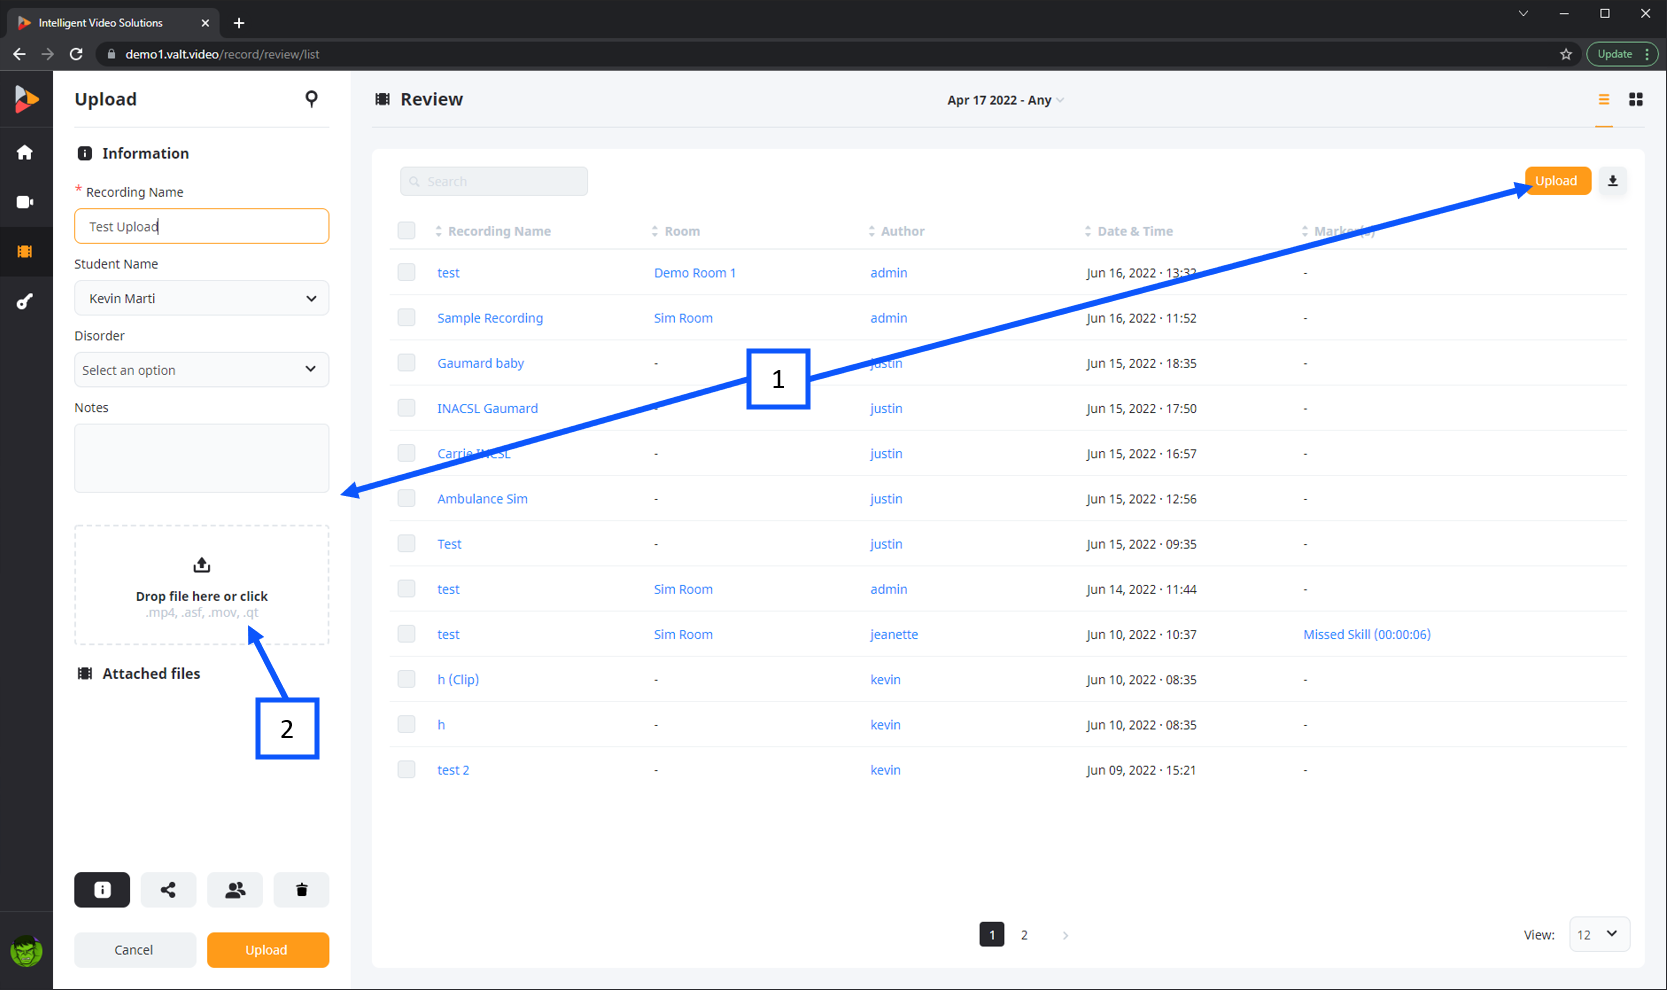
- Clicking the upload button will open the upload information modal on the left.
- Clicking on the upload section will open up a file explorer window allowing a user to select a video file (.mp4 .asf .mov .qt).
Once a video is uploaded it will appear in the same fashion as any other recording done in VALT. The system will use the user that uploaded the recording as the default author. </ol>
⤺ Back to the Main Manual Page
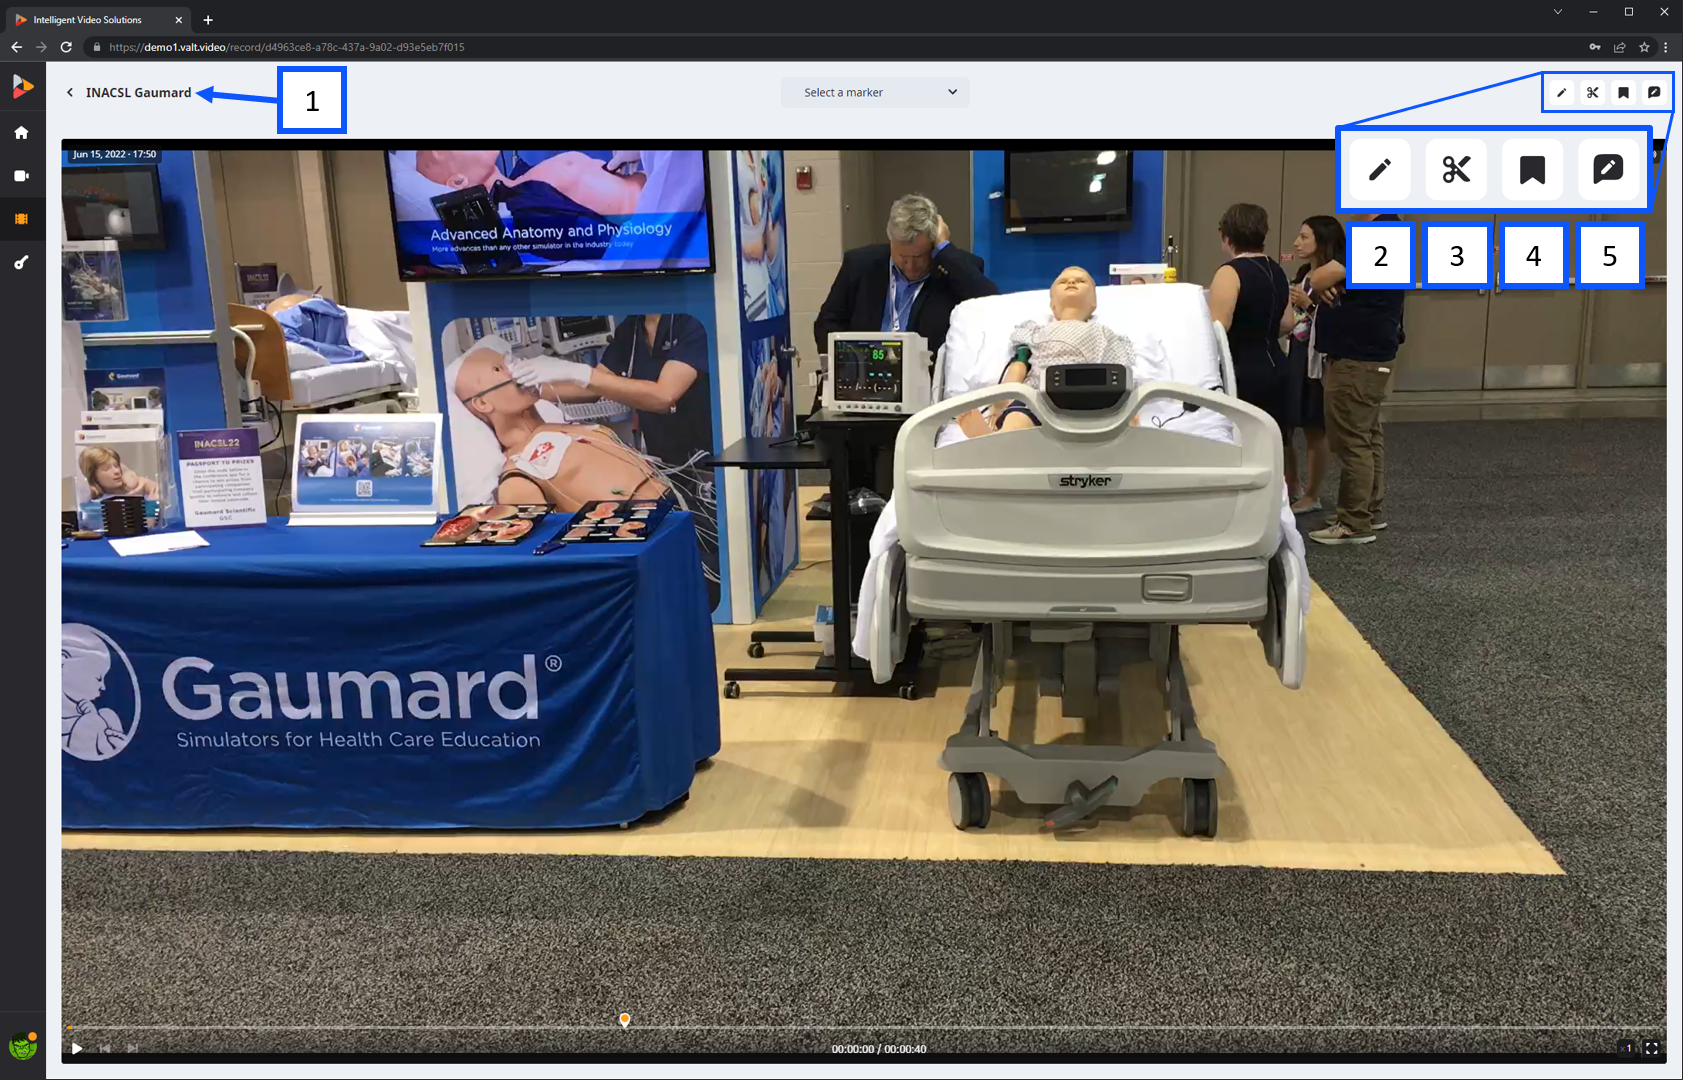
Video Player
The video player launches whenever a recording name is clicked within the review section.
- Clicking the recording name title will take the user back to the review section.
- The edit button opens the information modal allowing a user to view and edit the information, sharing. author, and retention settings associated with the recording.
- The clip button will open the clip modal which allows a user to create a clip or cut out a section of the recording.
- The marker button opens the marker modal which allows a user associate searchable information to specific points within a recording.
- The transcription button allows a user to transcribe a video or download a previously completed transcription.
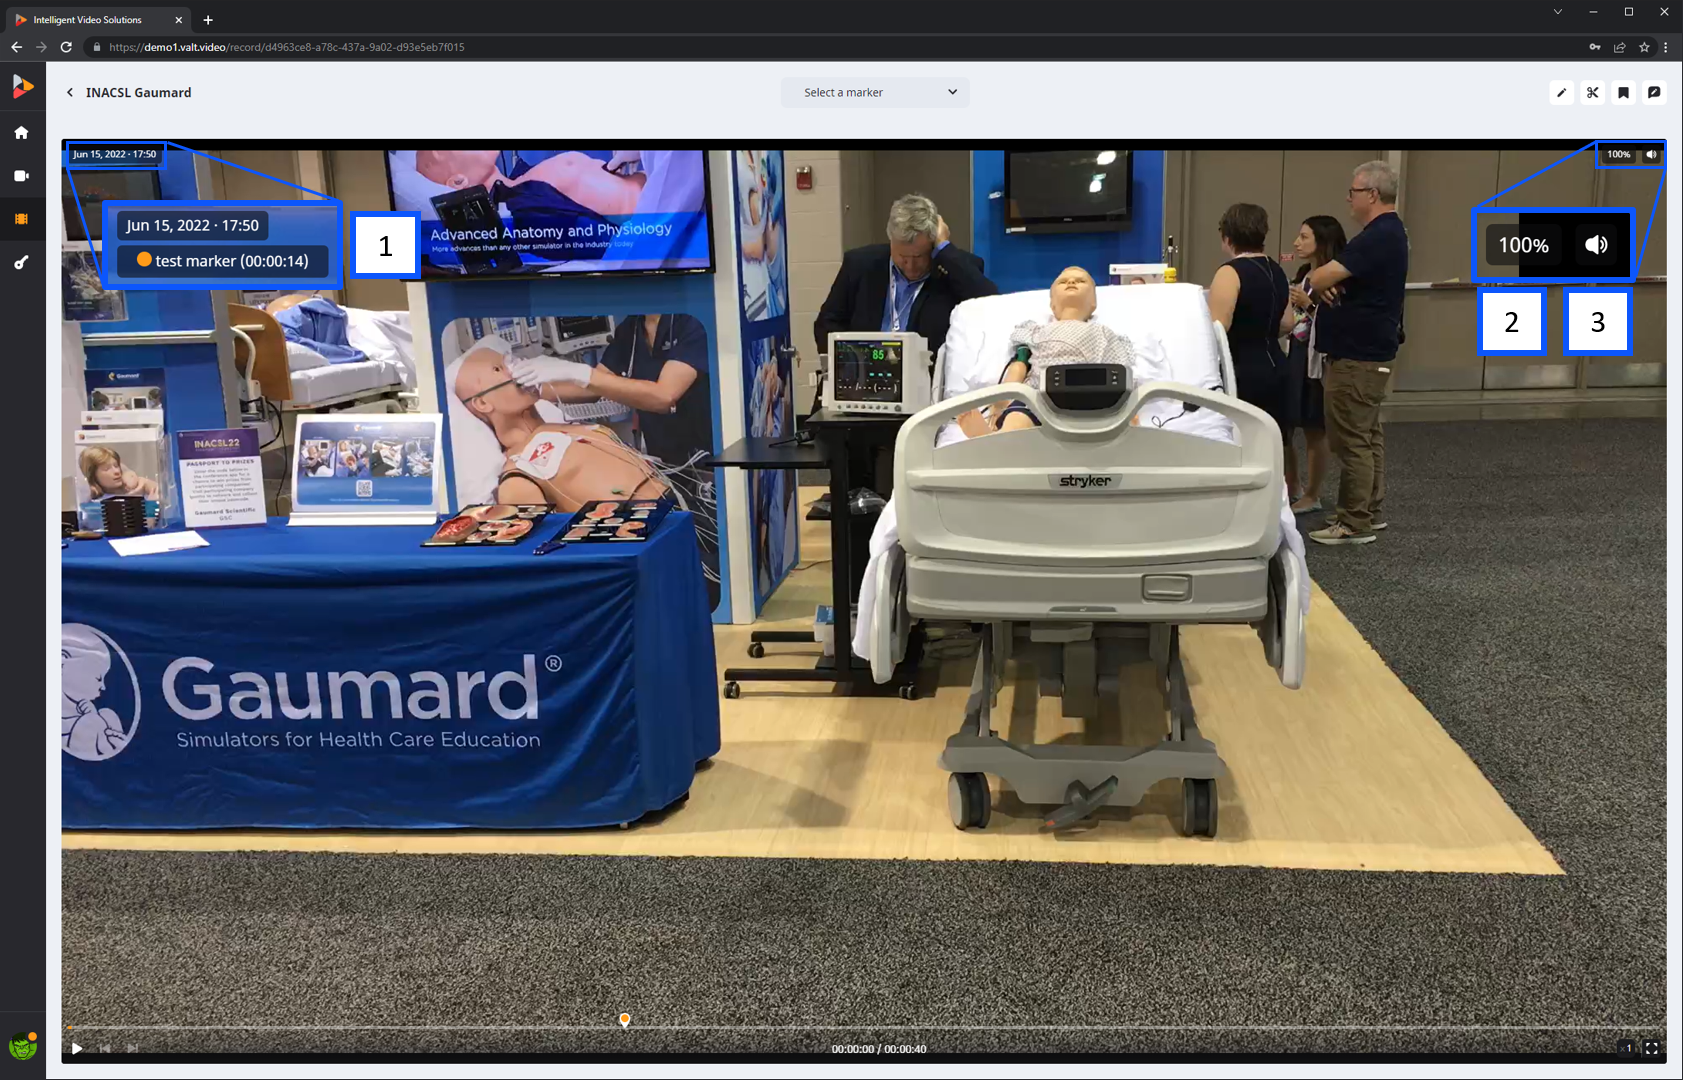
- This shows the created date and time for the displayed recording.
- This is the digital zoom status, clicking on this button will reveal a slider that can be used to digitally zoom in or out of the displayed recording.
- Clicking the audio button will reveal a volume slider as well as a source selector which allows you to select an audio source if more than one camera is associated with a recording.
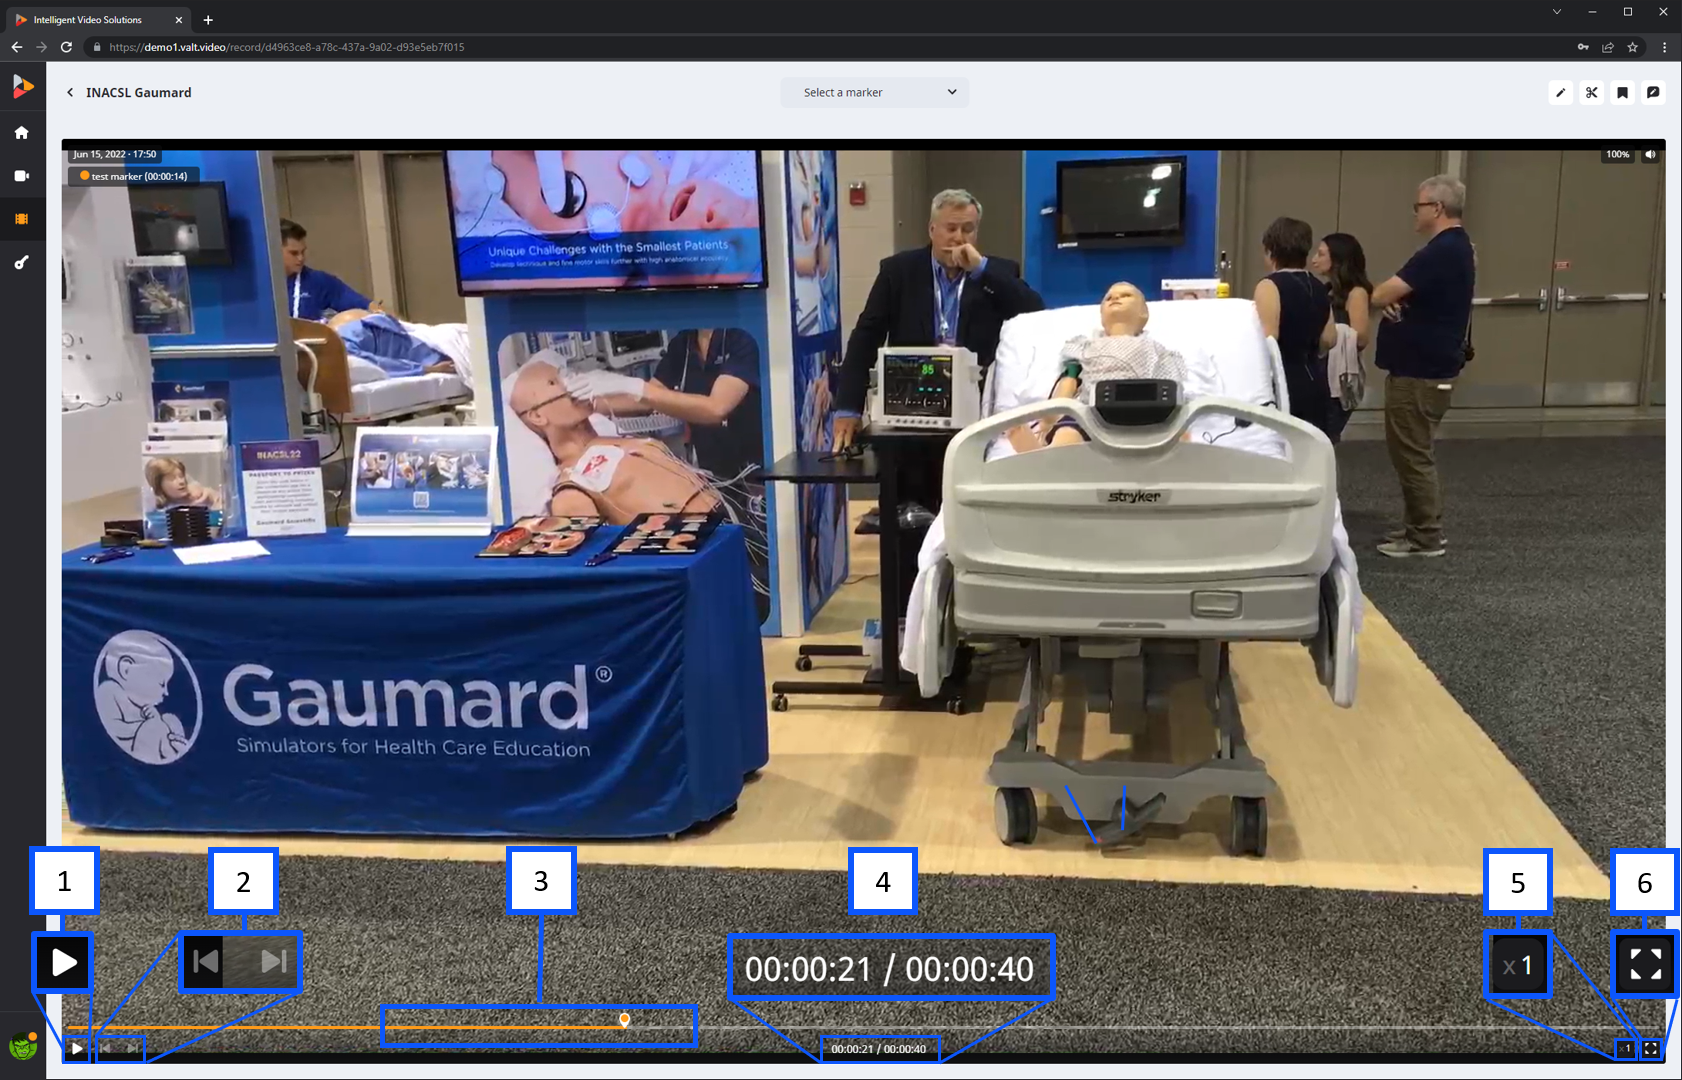
- This button toggles from play to pause depending on the state of the player.
- The jump forward / back buttons can be used to advance or rewind the video player by a step of 5 seconds per click.
- The video progress bar shows the current progress of playback.
- The playback status shows the current time and total time of the recording.
- Clicking the playback speed button will reveal different options that can be used to speed up or slow down the playback speed.
- Clicking the full screen button will hider the VALT user interface and maximize the video player.
⤺ Back to the Main Manual Page
Clip Tool
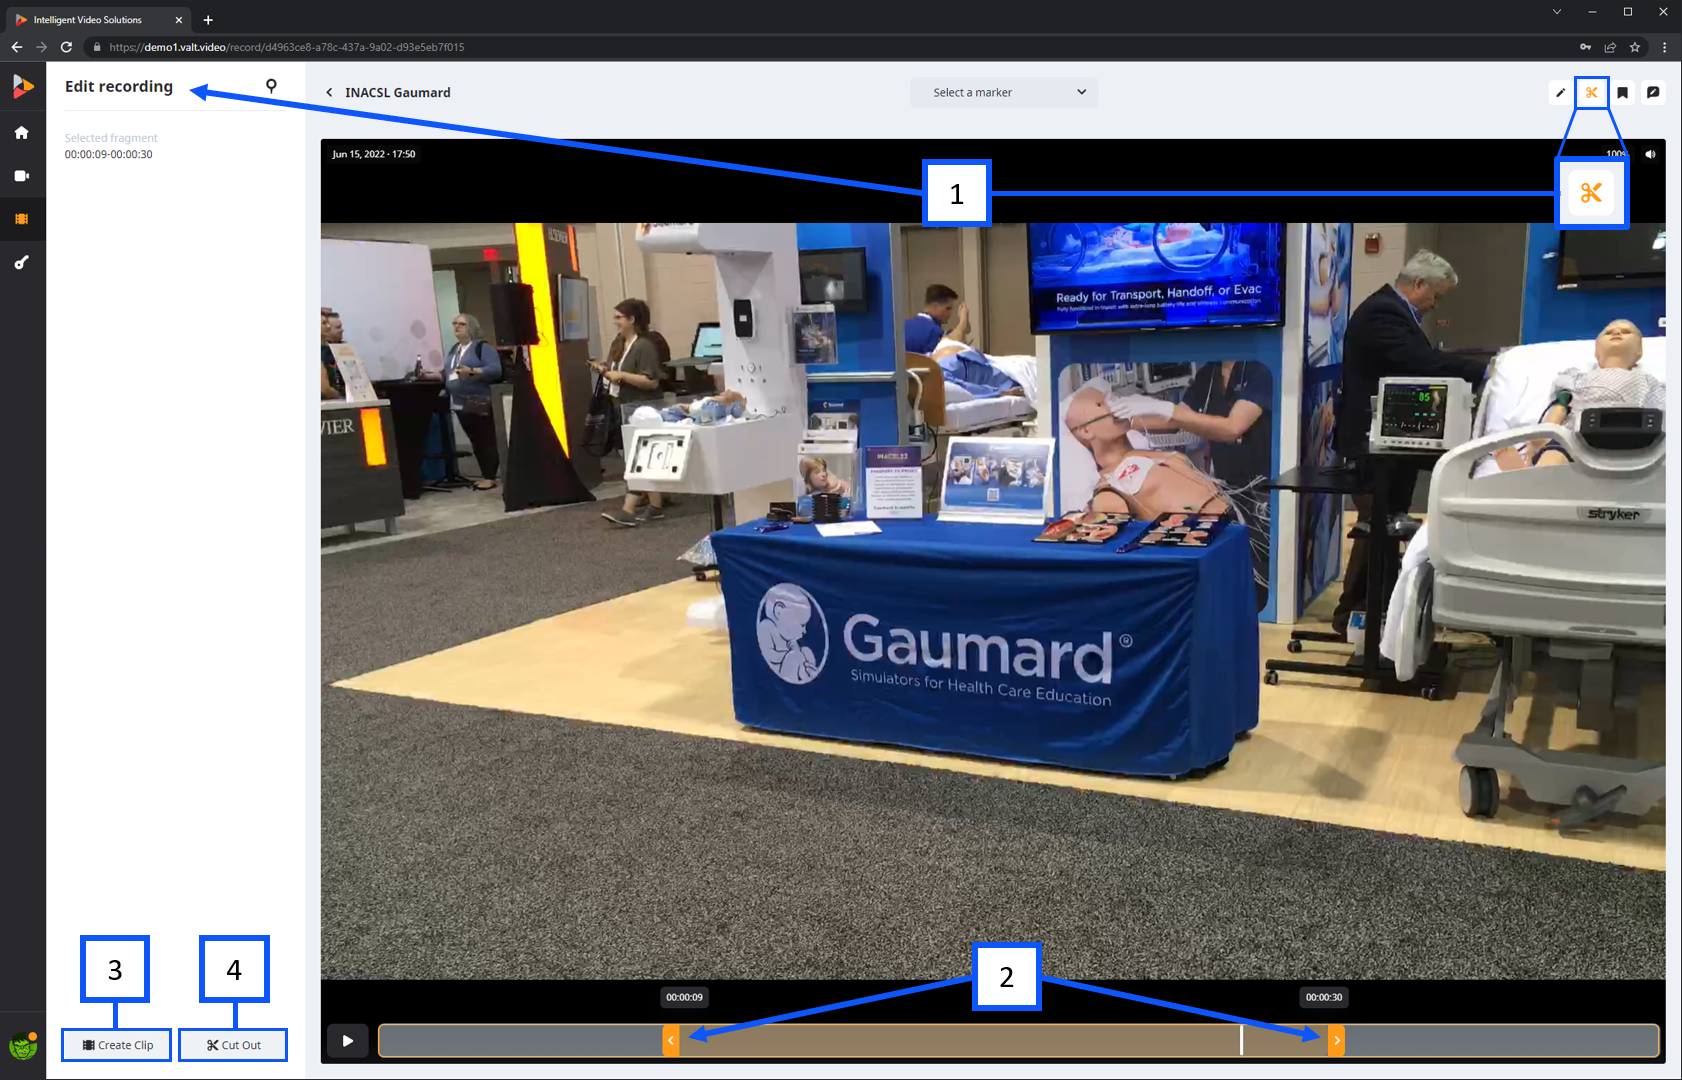
- Clicking the tools button will open the Edit Recording tab.
- A user can change the selected segment by clicking and dragging the arrows.
- Create Clip: cut out the selected section creating a second video file titled “Original Name(Clip)” while maintaining the original file.
- Cut Out: remove the selected section creating a second video file titled “Original Name(Redact)” while maintaining the original file.
⤺ Back to the Main Manual Page
Markers
Adding markers to your video can be a great to document when important events happen that you want to easily navigate to later.
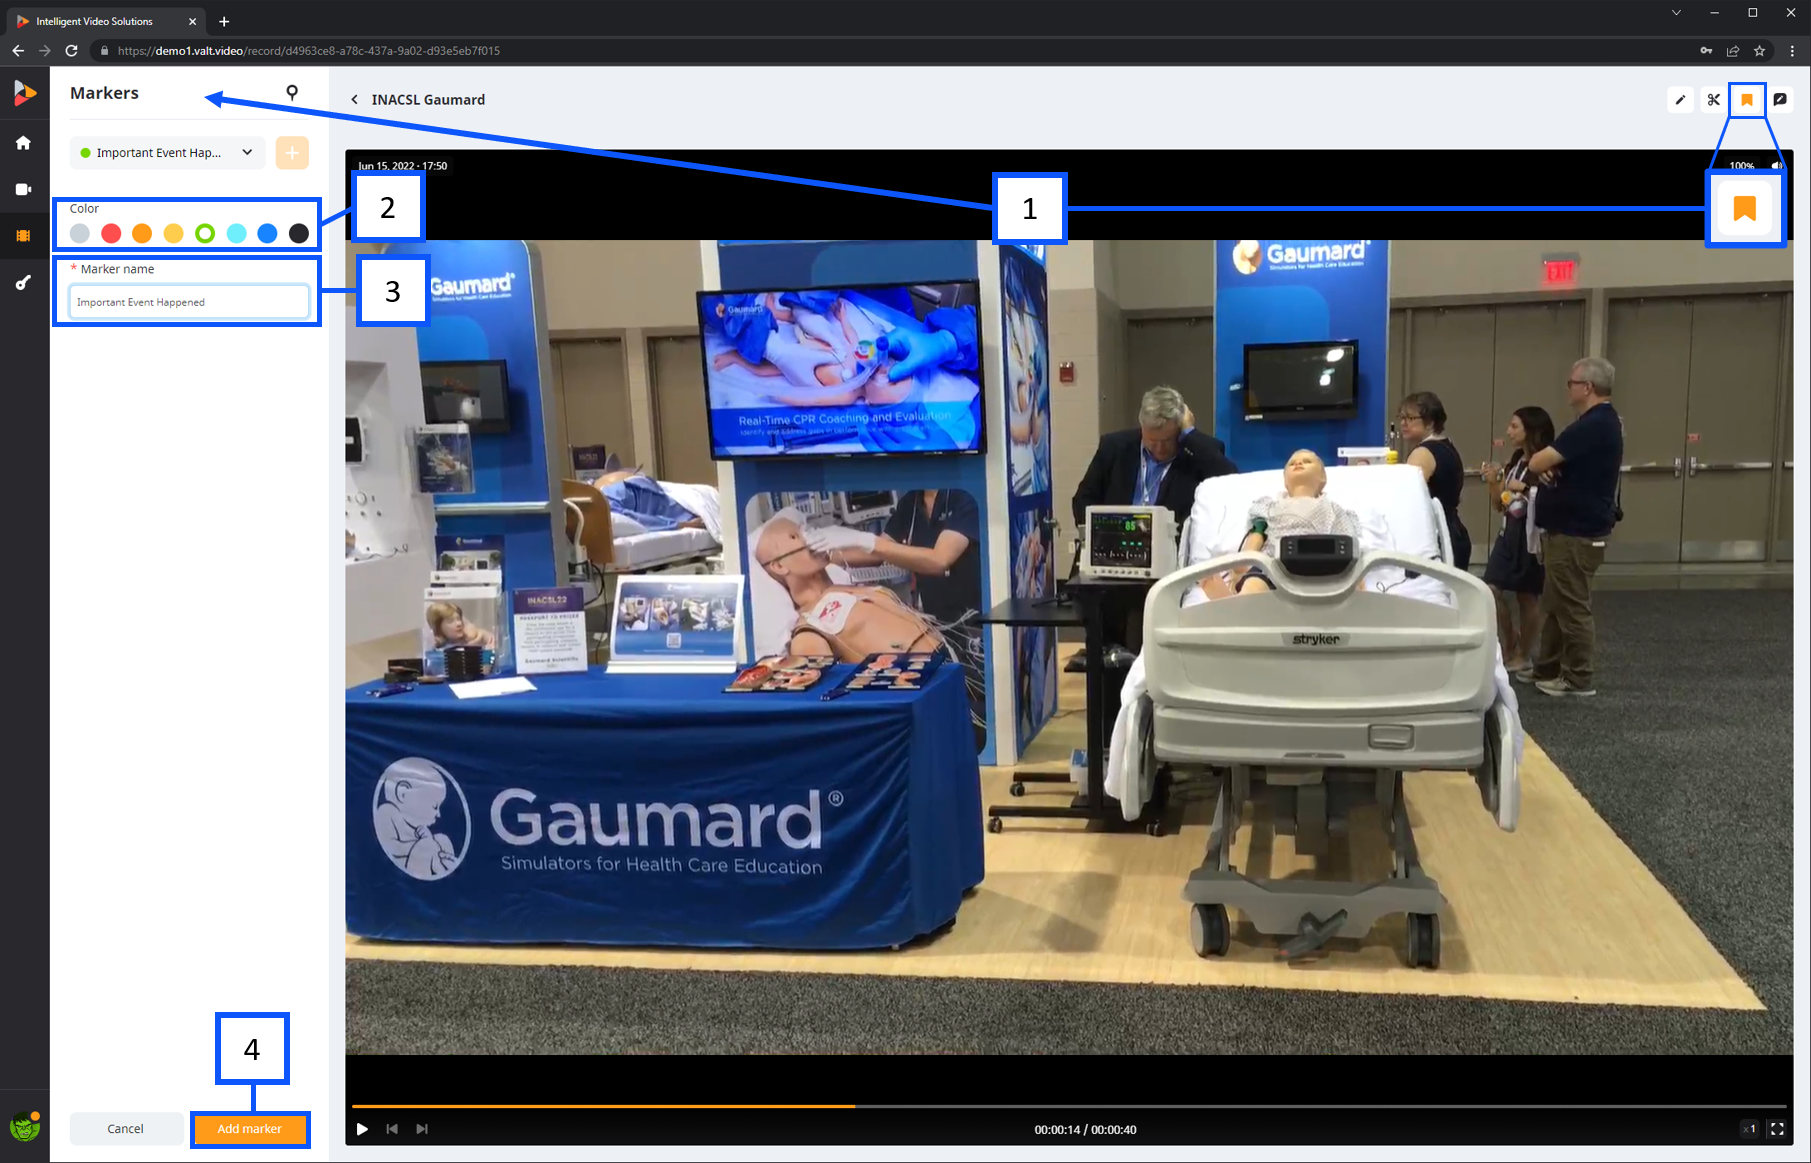
- Clicking the Mark button will open the marker modal as shown above.
- The color selection section allows a user to select what color will be used for the marker.
- Marker fields will display based on the template used. Above shows a single plain text field that can be used to enter information about the marker.
- Add Marker: insert a marker into the video.
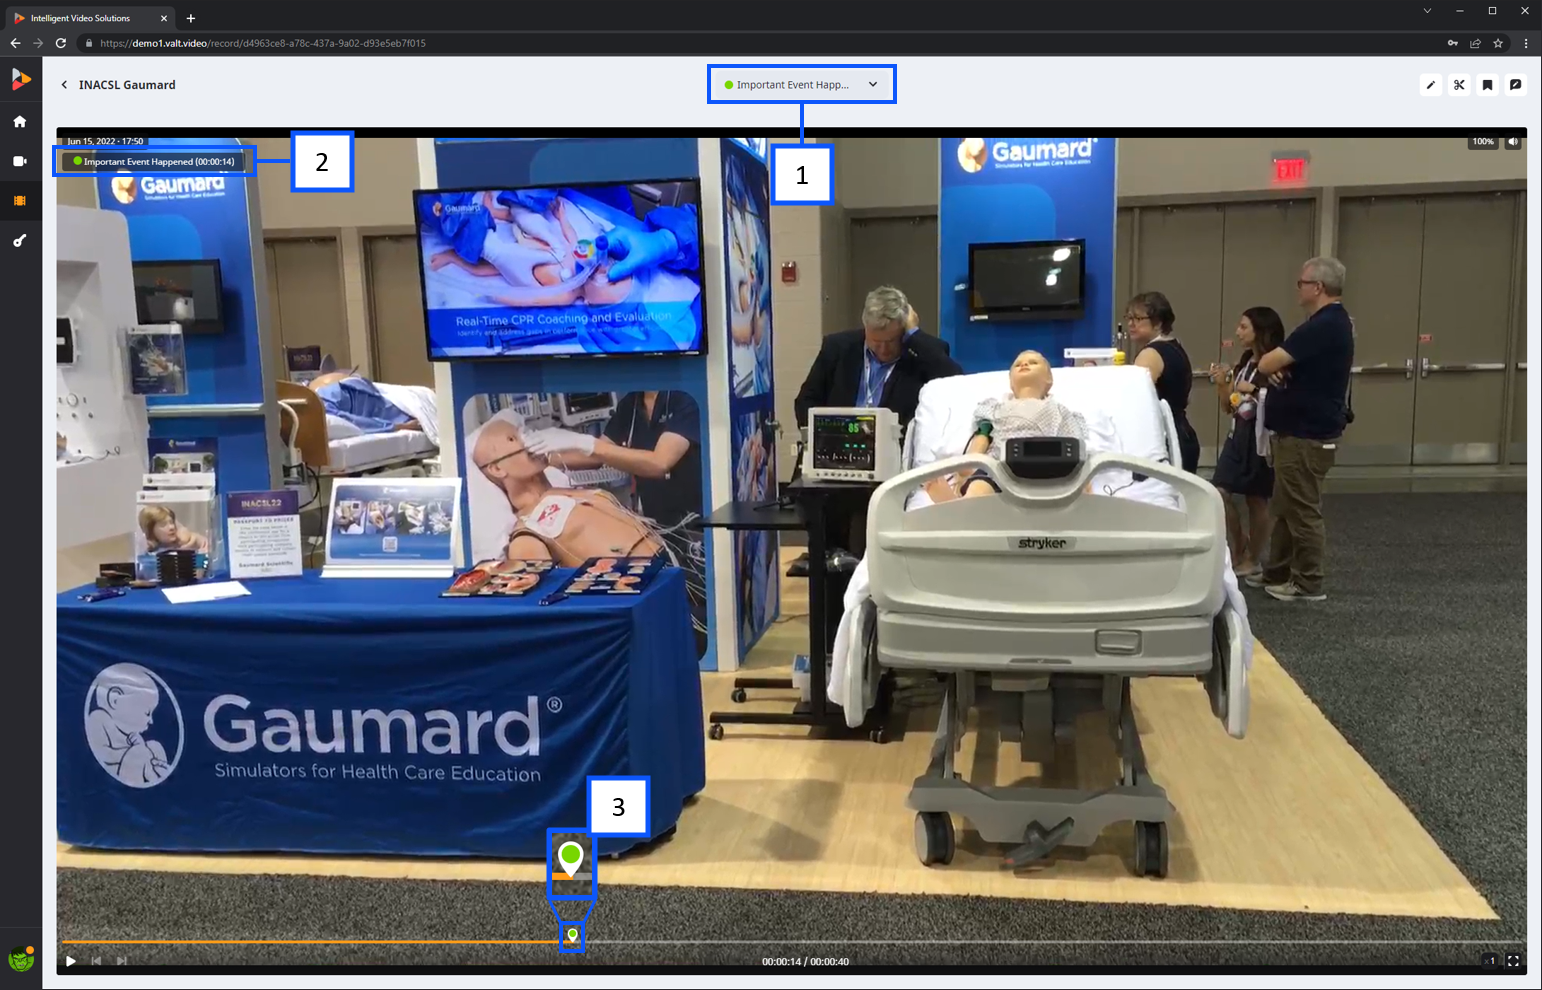
- If any markers are present within a recording a marker drop down selector will be shown. Clicking this drop down will allow a user to jump to any markers within the recording.
- A marker overlay will display on top of the video showing the textual data associated with the marker that is being played back at a given time.
- Markers will appear on the video progress bar as a pin with the associated marker color. Hovering over a marker will show the marker name.