VALT Manual Recording
There are several ways to initiate a recording using the VALT software. Recordings can started while observing a room through the software, using a physical Start/Stop button, RFID card readers, a built in scheduler, or our API.
Contents
Recording while Observing
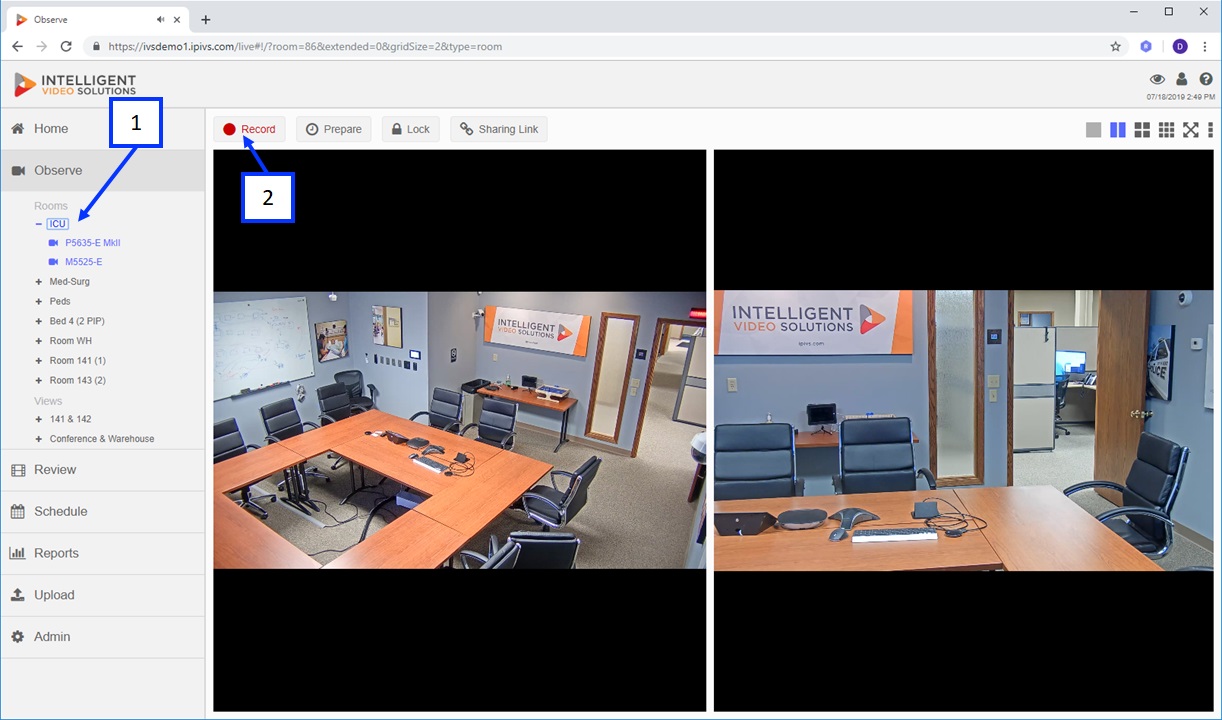
- Selecting a room or this will bring up the buttons associated with the active user's rights.
- Pressing the Record button will start a recording as shown above. After the Record button is pressed it will bring up the information template as shown below.
Information
Information templates within VALT are used to tie searchable & reportable information to videos. A template(s) is assigned to a user group, where when that user starts or schedules a recording their set of templates will automatically get assigned to the associated recording(s).
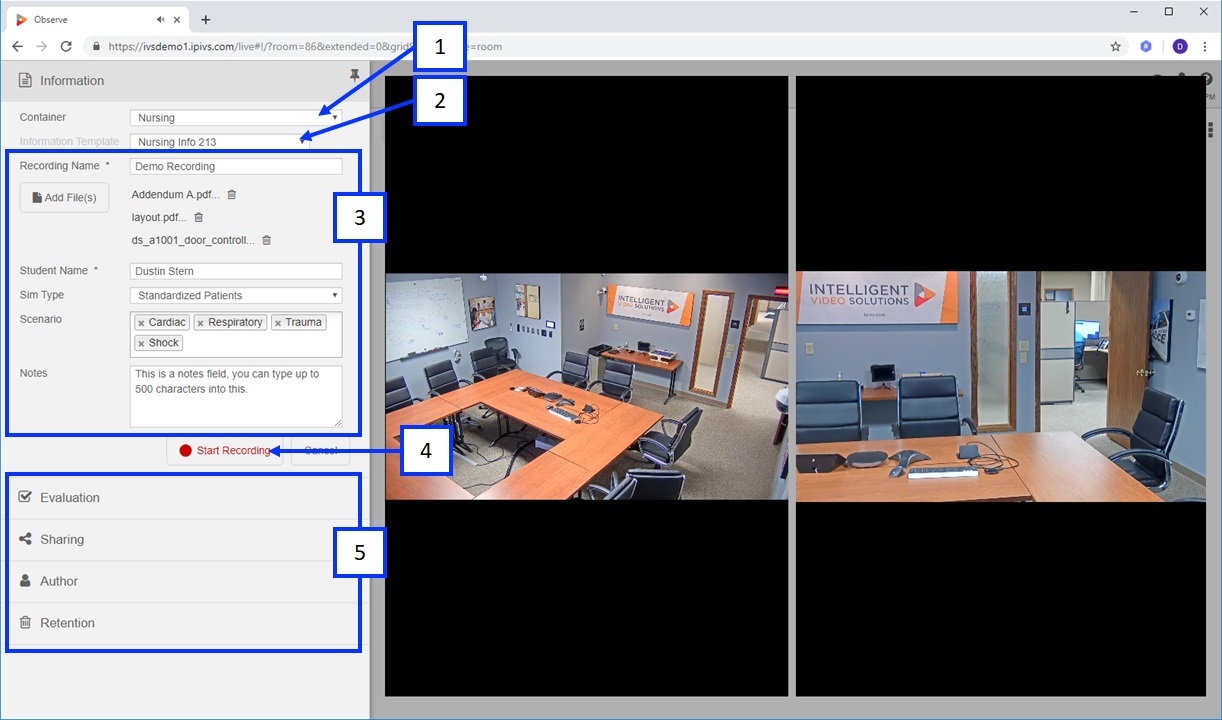
- Container Drop Down: This item will only show up if a user has access to more than a single container. It allows a user to select which container the recording will be assigned to.
- Information Template: This item will only show up if a user has more than one template assigned to it. This drop down menu allows a user to switch the template used for the recording.
- Information Fields: These are input fields used to assign searchable information to the recording. They can be text fields, files, drop down menu, picklist, notes field, audio field, or quick record.
- Start Recording: clicking this button will kick off the recording once all required information fields are filled out.
- Navigation Menu: clicking on sharing, author or retention will take the user to that section of the menu and collapse the information portion.
Evaluation
An evaluation templates is typically used during a recording, or after a recording is completed (rarely accessed or completed at the beginning of a recording). An evaluation form acts much like an information form in that it is used to tie a single set of information into the recording. The big difference between an evaluation and information form is that numeric values can be assigned to the fields within an evaluation form. This allows scoring to be done on each item and the overall form. Evaluation also allow unique reports to be run against them that are based on score %.
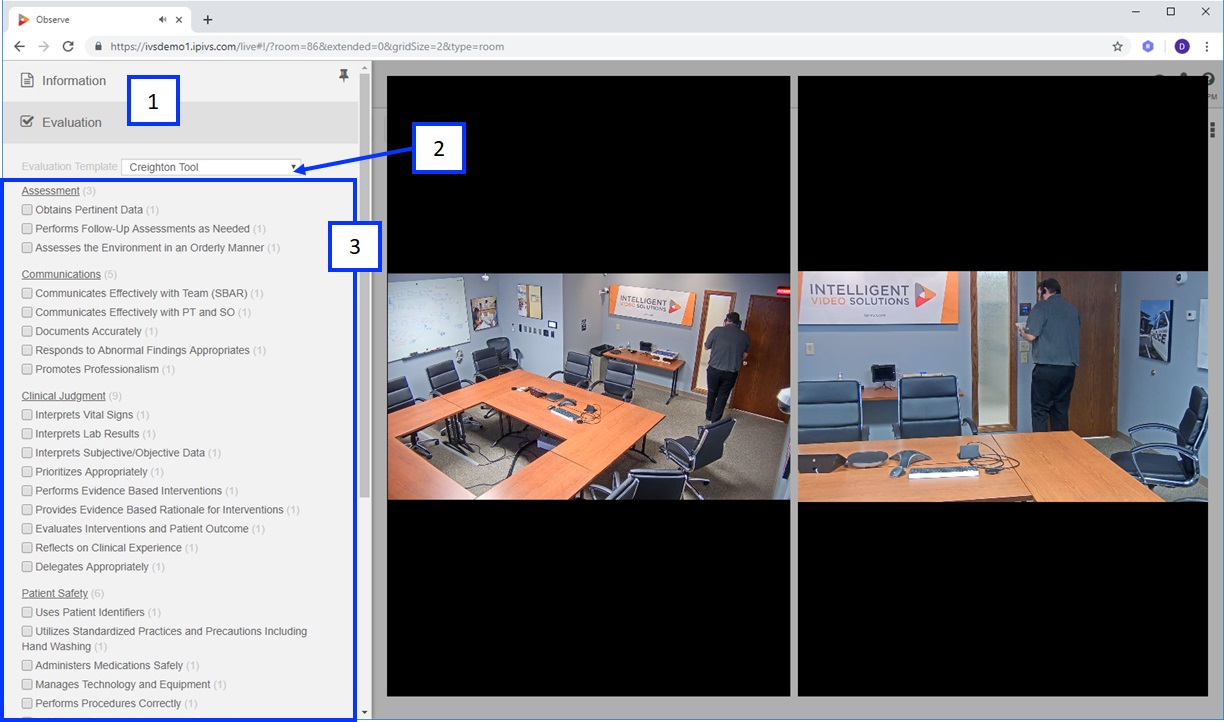
- Select the Evaluation button
- If more than one evaluation template is assigned to the active user the evaluation template dropdown will be present.
- Evaluation fields: These fields can be multi check, single select, or notes. Each field value will have a score associated with it.
Sharing
Sharing allows you to share videos with users or user groups that would normally not have access to the video.
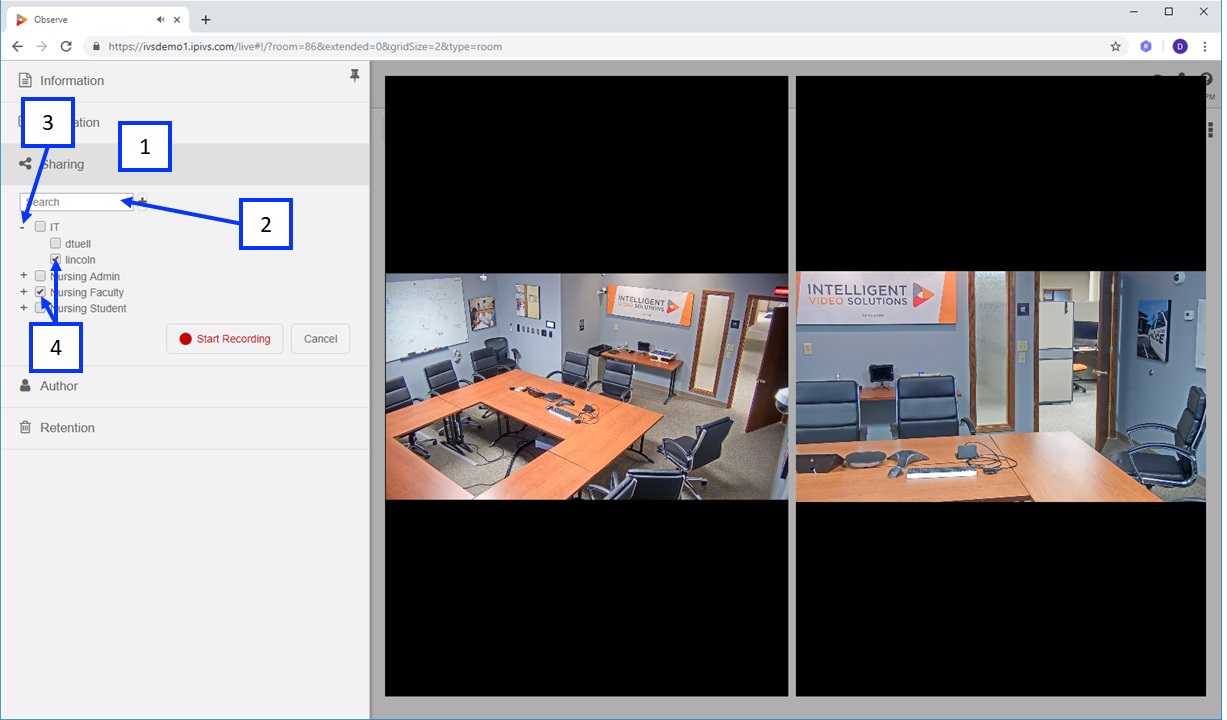
- Select the Sharing button.
- Search: this dialog box is used to search for the user / user group you want to share the video with; it is used to narrow the list of possible users.
- Each usergroup can be expanded to reveal the users within.
- Checking a user checkbox will share the video with that specific user (the video will appear in their review section), checking a usergroup checkbox will share a video with all users within that usergroup.
Change Author
The author section can be used to change the author of the recording. The VALT system assigns access to the recording based on the author so changing the author will change who can see the live and recorded video.
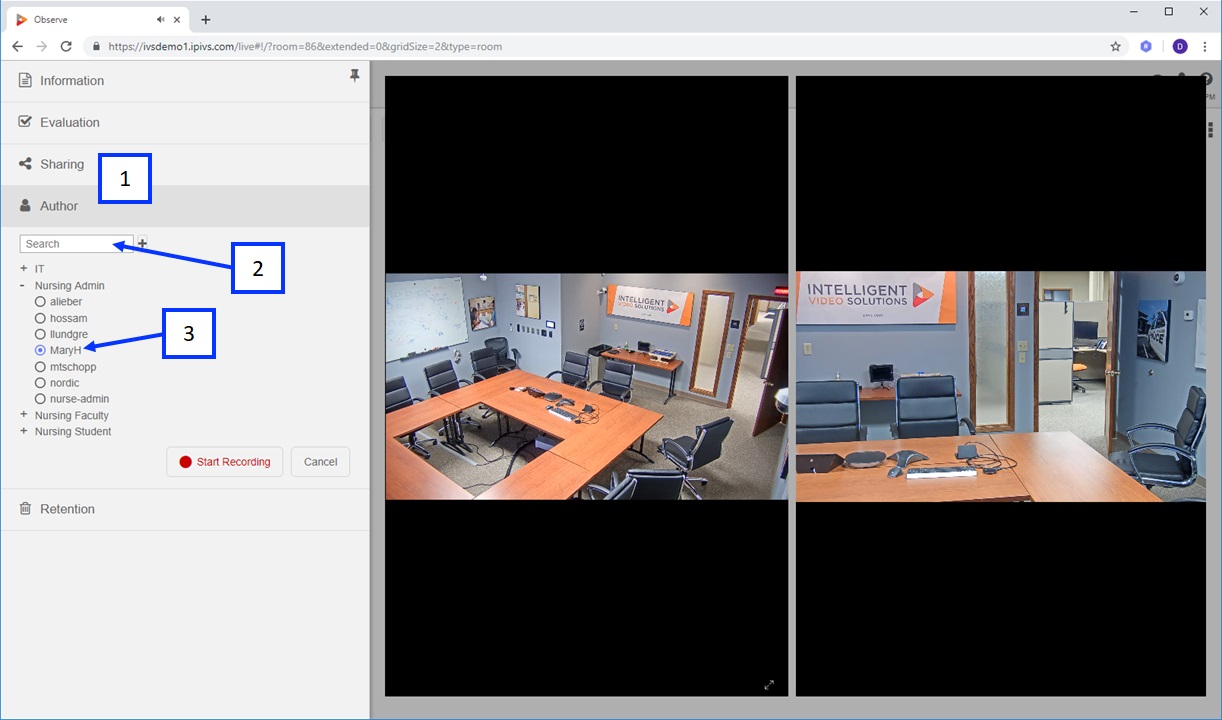
- Select the Author button.
- Search: this dialog box is used to search for the user you want to use as the author of the video; it is used to narrow the list of possible users.
- The author can be changed by clicking the radio button next to the new author's name.
Retention
By default, every recording has a retention rule assigned to it based on the author that recorded the video. The retention rule determines how long the video will be saved for before it is automatically deleted from the system.
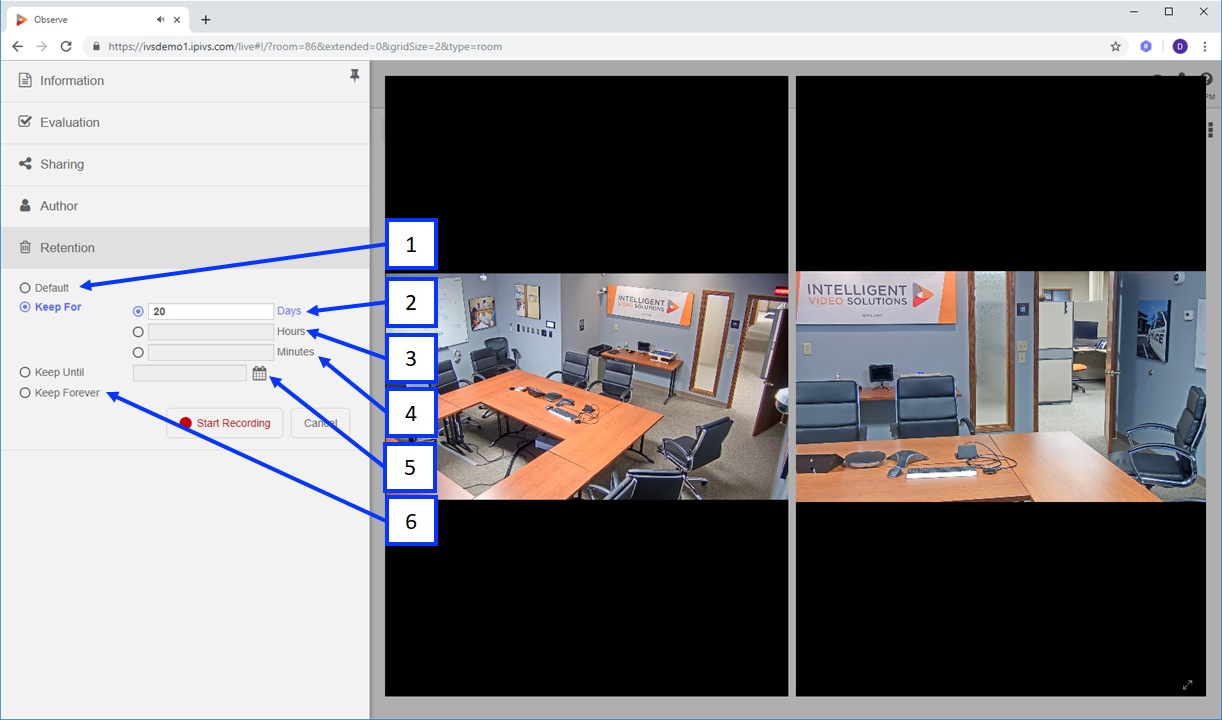
- Default: this option is always selected by default; if this is selected, the retention rule will follow what is set for the authors user group.
- Keep for Days: Assign a number of days for this video to be kept for 1-99999
- Keep for Hours: assign a number of hours for this video to be kept 1-99999
- Keep for Minutes: assign a number of minutes for this video to be kept for 1-99999
- Keep Until: Select a date that the video is automatically deleted on.
- Keep Forever: never delete this video unless retention is changed in the future or it is manually deleted.
Started Recording
Once a user presses the “Start Recording” button the recording menu will collapse and the application will look like below picture.
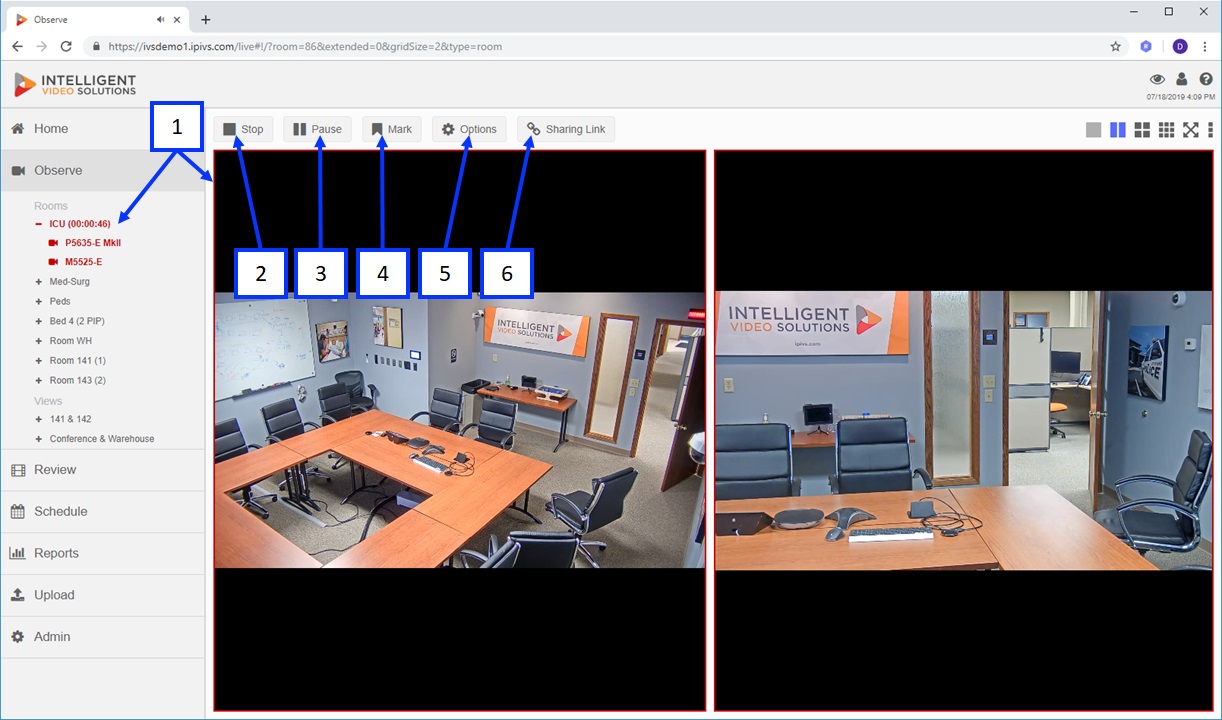
- The red highlight indicates the room is recording; you will also notice a duration to the right of the room indicating how long it has been recording for.
- Stop: clicking on this button will stop the active recording.
- Pause: clicking on this button will pause the active recording.
- Mark: clicking on this button will pull up the marker template associated with the active user.
- Options: Clicking this button will pull up the recording menu including the information, evaluation, sharing, author & retention options. These can all be modified while a recording is in progress.
- Sharing Link: Clicking this button will generate a link that can be emailed, users without a VALT user account can click the unique link to view the active recording session live.
Pause
The pause function pauses an in progress recording until resume is pressed.
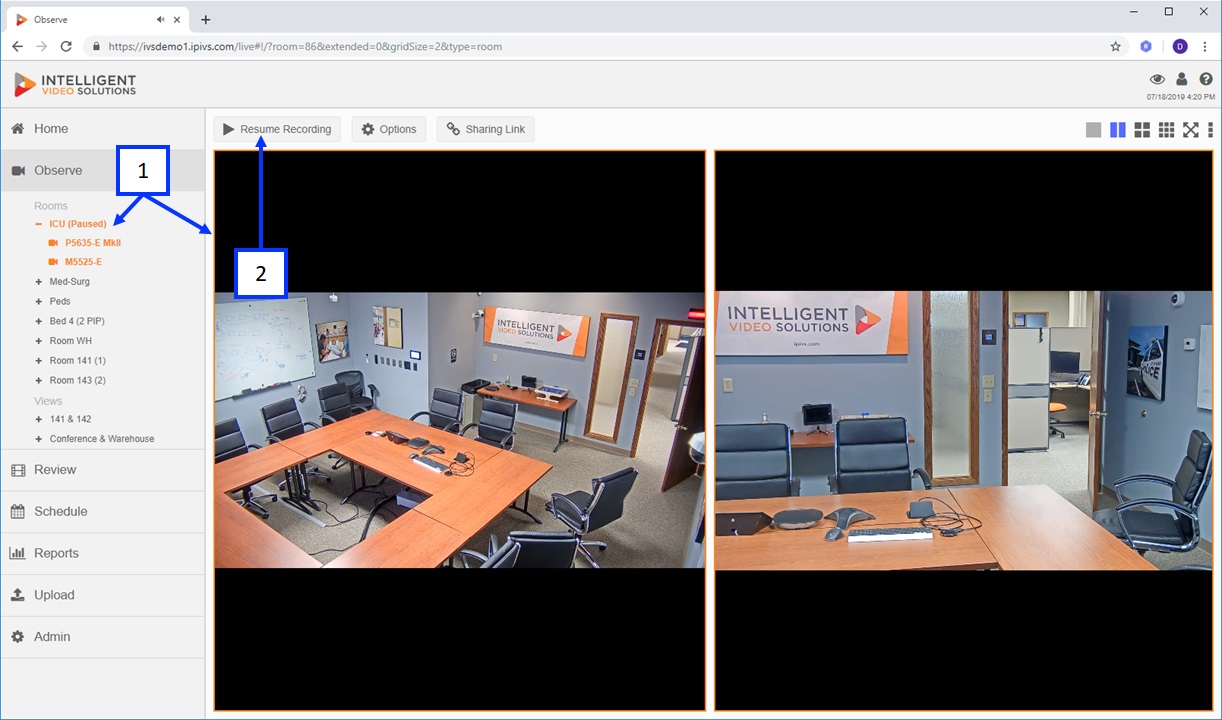
- If a recording in a room is paused, the room text and camera border will turn orange with the words (Paused) to the right of it as shown above.
- Resume Recording: clicking this will resume the recording.

- When a recording is resumed from a paused state, the room will turn red and the duration counter will resume where it last left off.
Markers
Markers like recording information have an associated template. Markers allow users to insert searchable information into a specific point within the recording. Markers also act as index points within the recording allowing users to easily navigate to that point during review. Markers can be added during live observation or review. There are 3 different types of marker templates.
Basic Marker
This marker template is very similar to a information template. Any number of fields can be defined such as text, drop down, and multi-select.
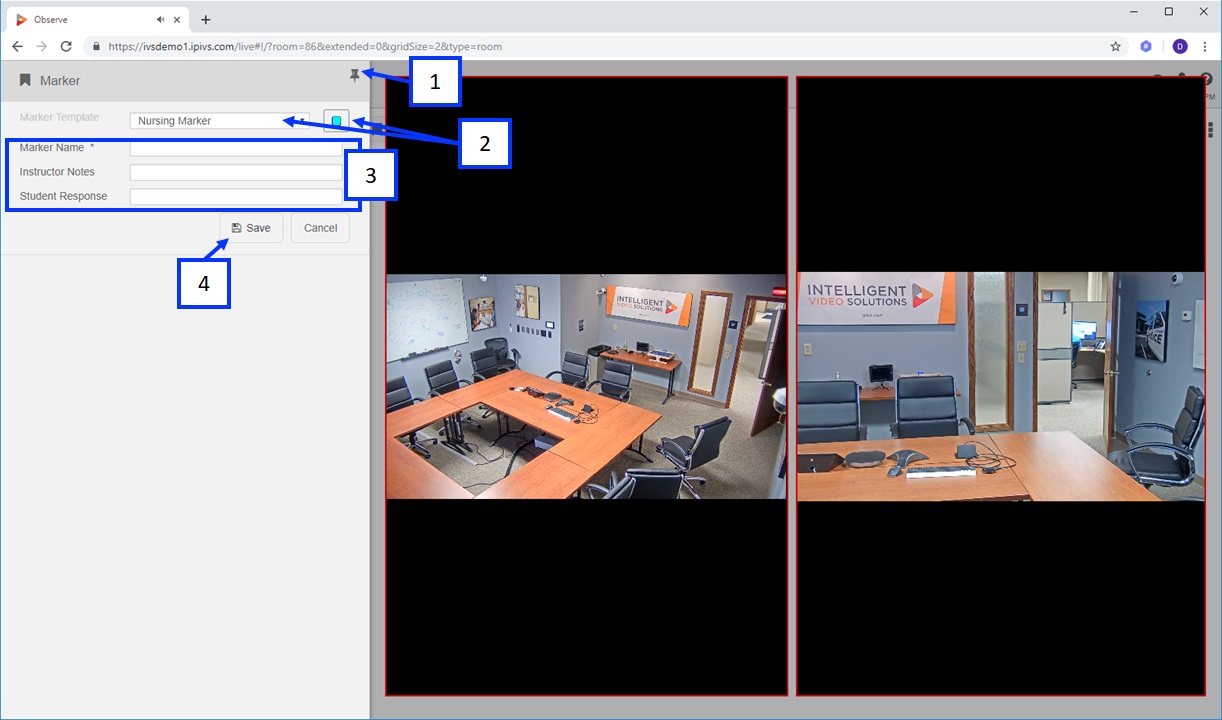
- Pin: this button is used to pin the menu so it does not auto-collapse after a marker is added (after the user clicks save). This is useful if a user intends to insert multiple markers while doing live observation.
- When a user clicks on the Mark button it will bring up the marker template associated with the active user, if more than one template is assigned a drop down will appear that will allow the user to switch between templates. The marker color can also be changed.
- Marker Fields: these are input fields that allow users to associate searchable information with specific points within the video.
- Save: pressing this button will save the marker. Please note the marker is actually inserted when the original mark button is pressed not when save is pressed.
Quick Marker
This marker type is used for single click markers, any number or quick mark buttons can be defined, unique colors can be associated with each one.
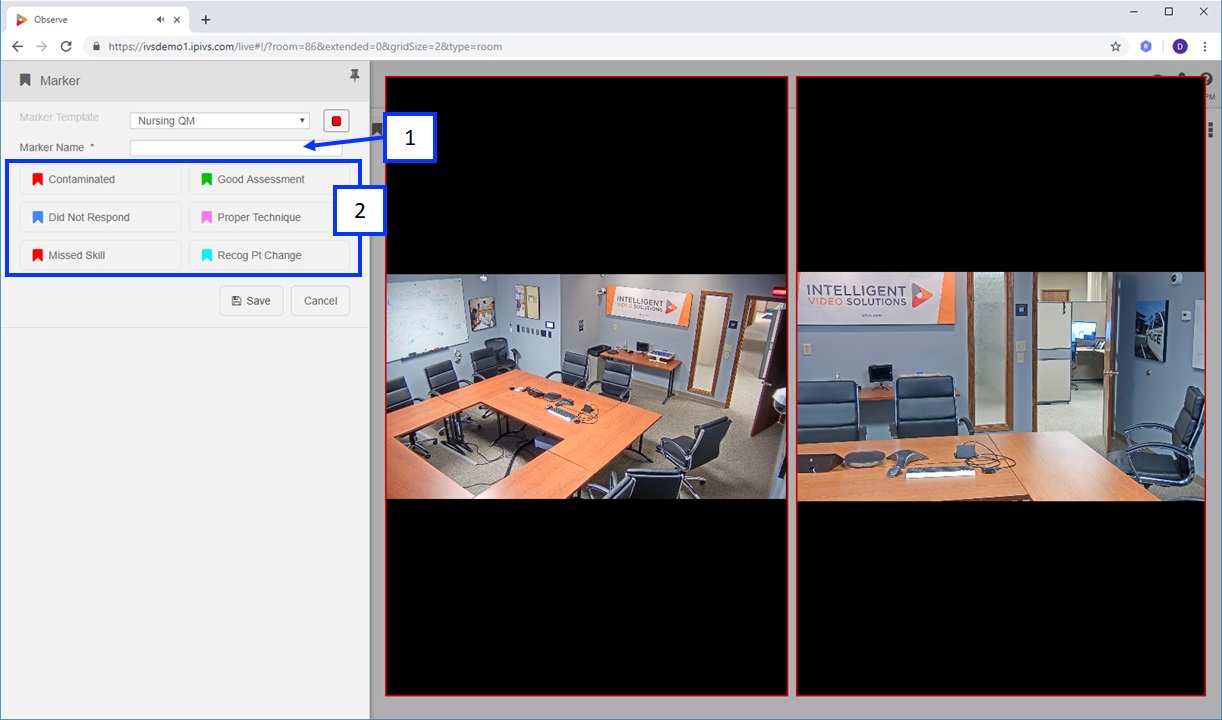
- A free form text box is present so a user may input a note or marker not defined in the quick marks.
- Clicking a quick mark will automatically insert the associated descriptive text and color into the video.
Continuous Marker
Continuous markers are typically used when many unique markers are added frequently. This marker type allows users to quickly enter data (by typing into a free form text box) and simply pressing enter to inject the marker and clear the displayed text so the field is ready for the next annotation (marker).
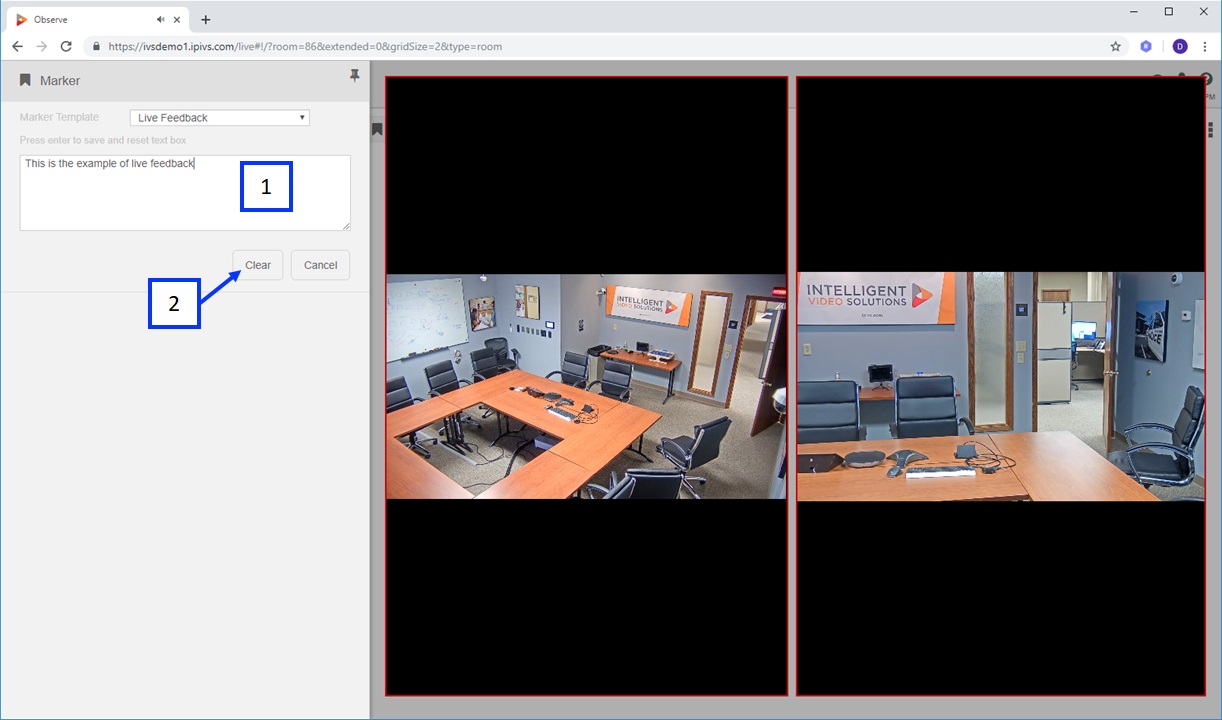
- A user can enter text into the free form text box. Note a marker will be inserted when the user starts typing the text not when enter is pressed.
- Clear: this clears existing text if the user changes their mind after they type some text.
Button
One option to start and or stop a recording is to use a simple momentary contact button. Integrated or independent of the button, an LED can also be lit to indicate when a recording is active. Buttons are tied to rooms within the software. From an author perspective, each button is also assigned an author (when the button is pressed it will use this user to author the recording). IVS sells buttons that have been validated to work with our software with a built in LED (shown below). IVS offers two LED options for recording indication: Red (shown below) and Blue .
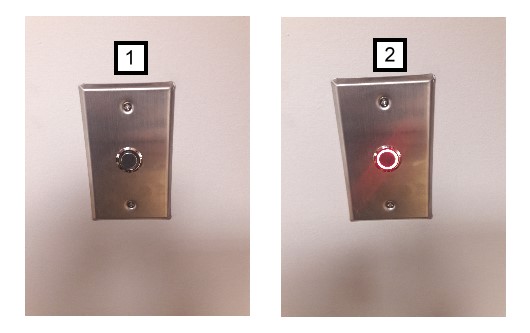
- Shows the button when a recording is not active for the associated room.
- Shows the button when a recording is active for the associated room.
Access Control
Access control readers can be configured to start and/or stop a recording with the Valt software. Readers are tied to rooms, and card numbers are tied to specific users. The advantage of using an access card and reader is the software can understand who started the recording, and apply the correct author to the recording automatically.

- Example of card reader used to start and stop a recording. The LED will appear Red when a recording is active and green when no recording is active.
- Axis A1001 required to interface access reader with VALT software.