VALT Motion Sensor
Contents
Wiring
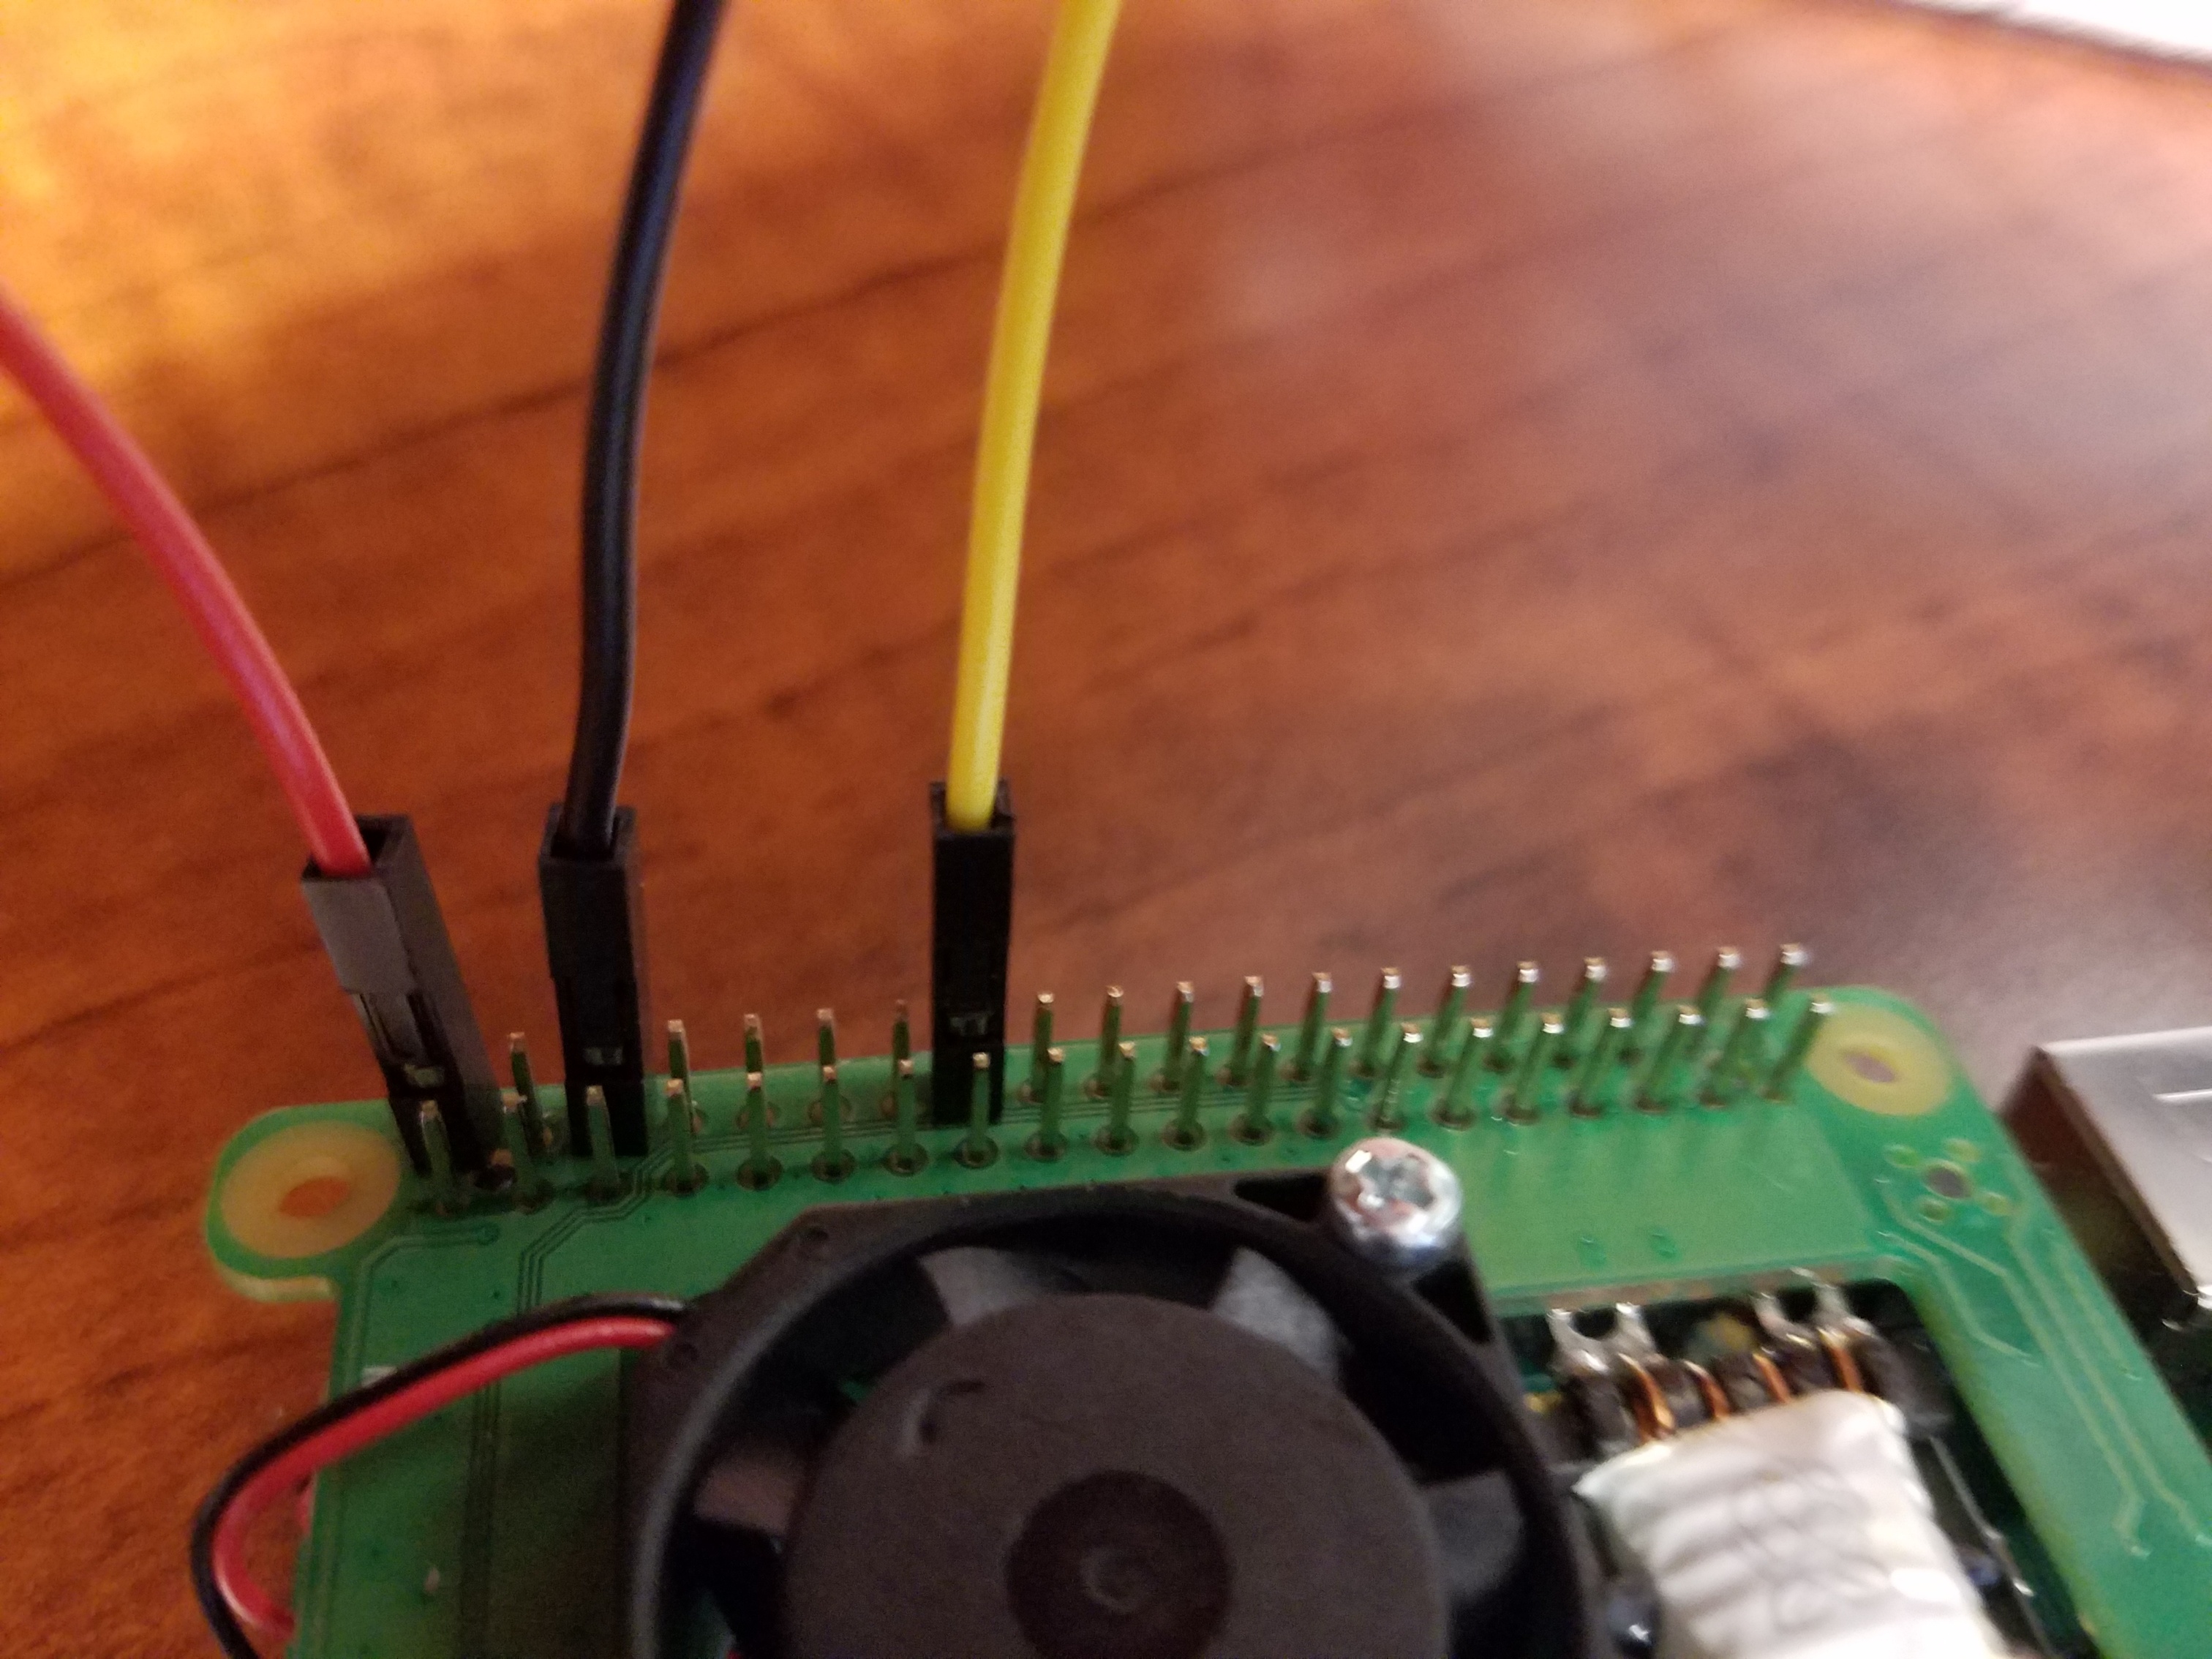
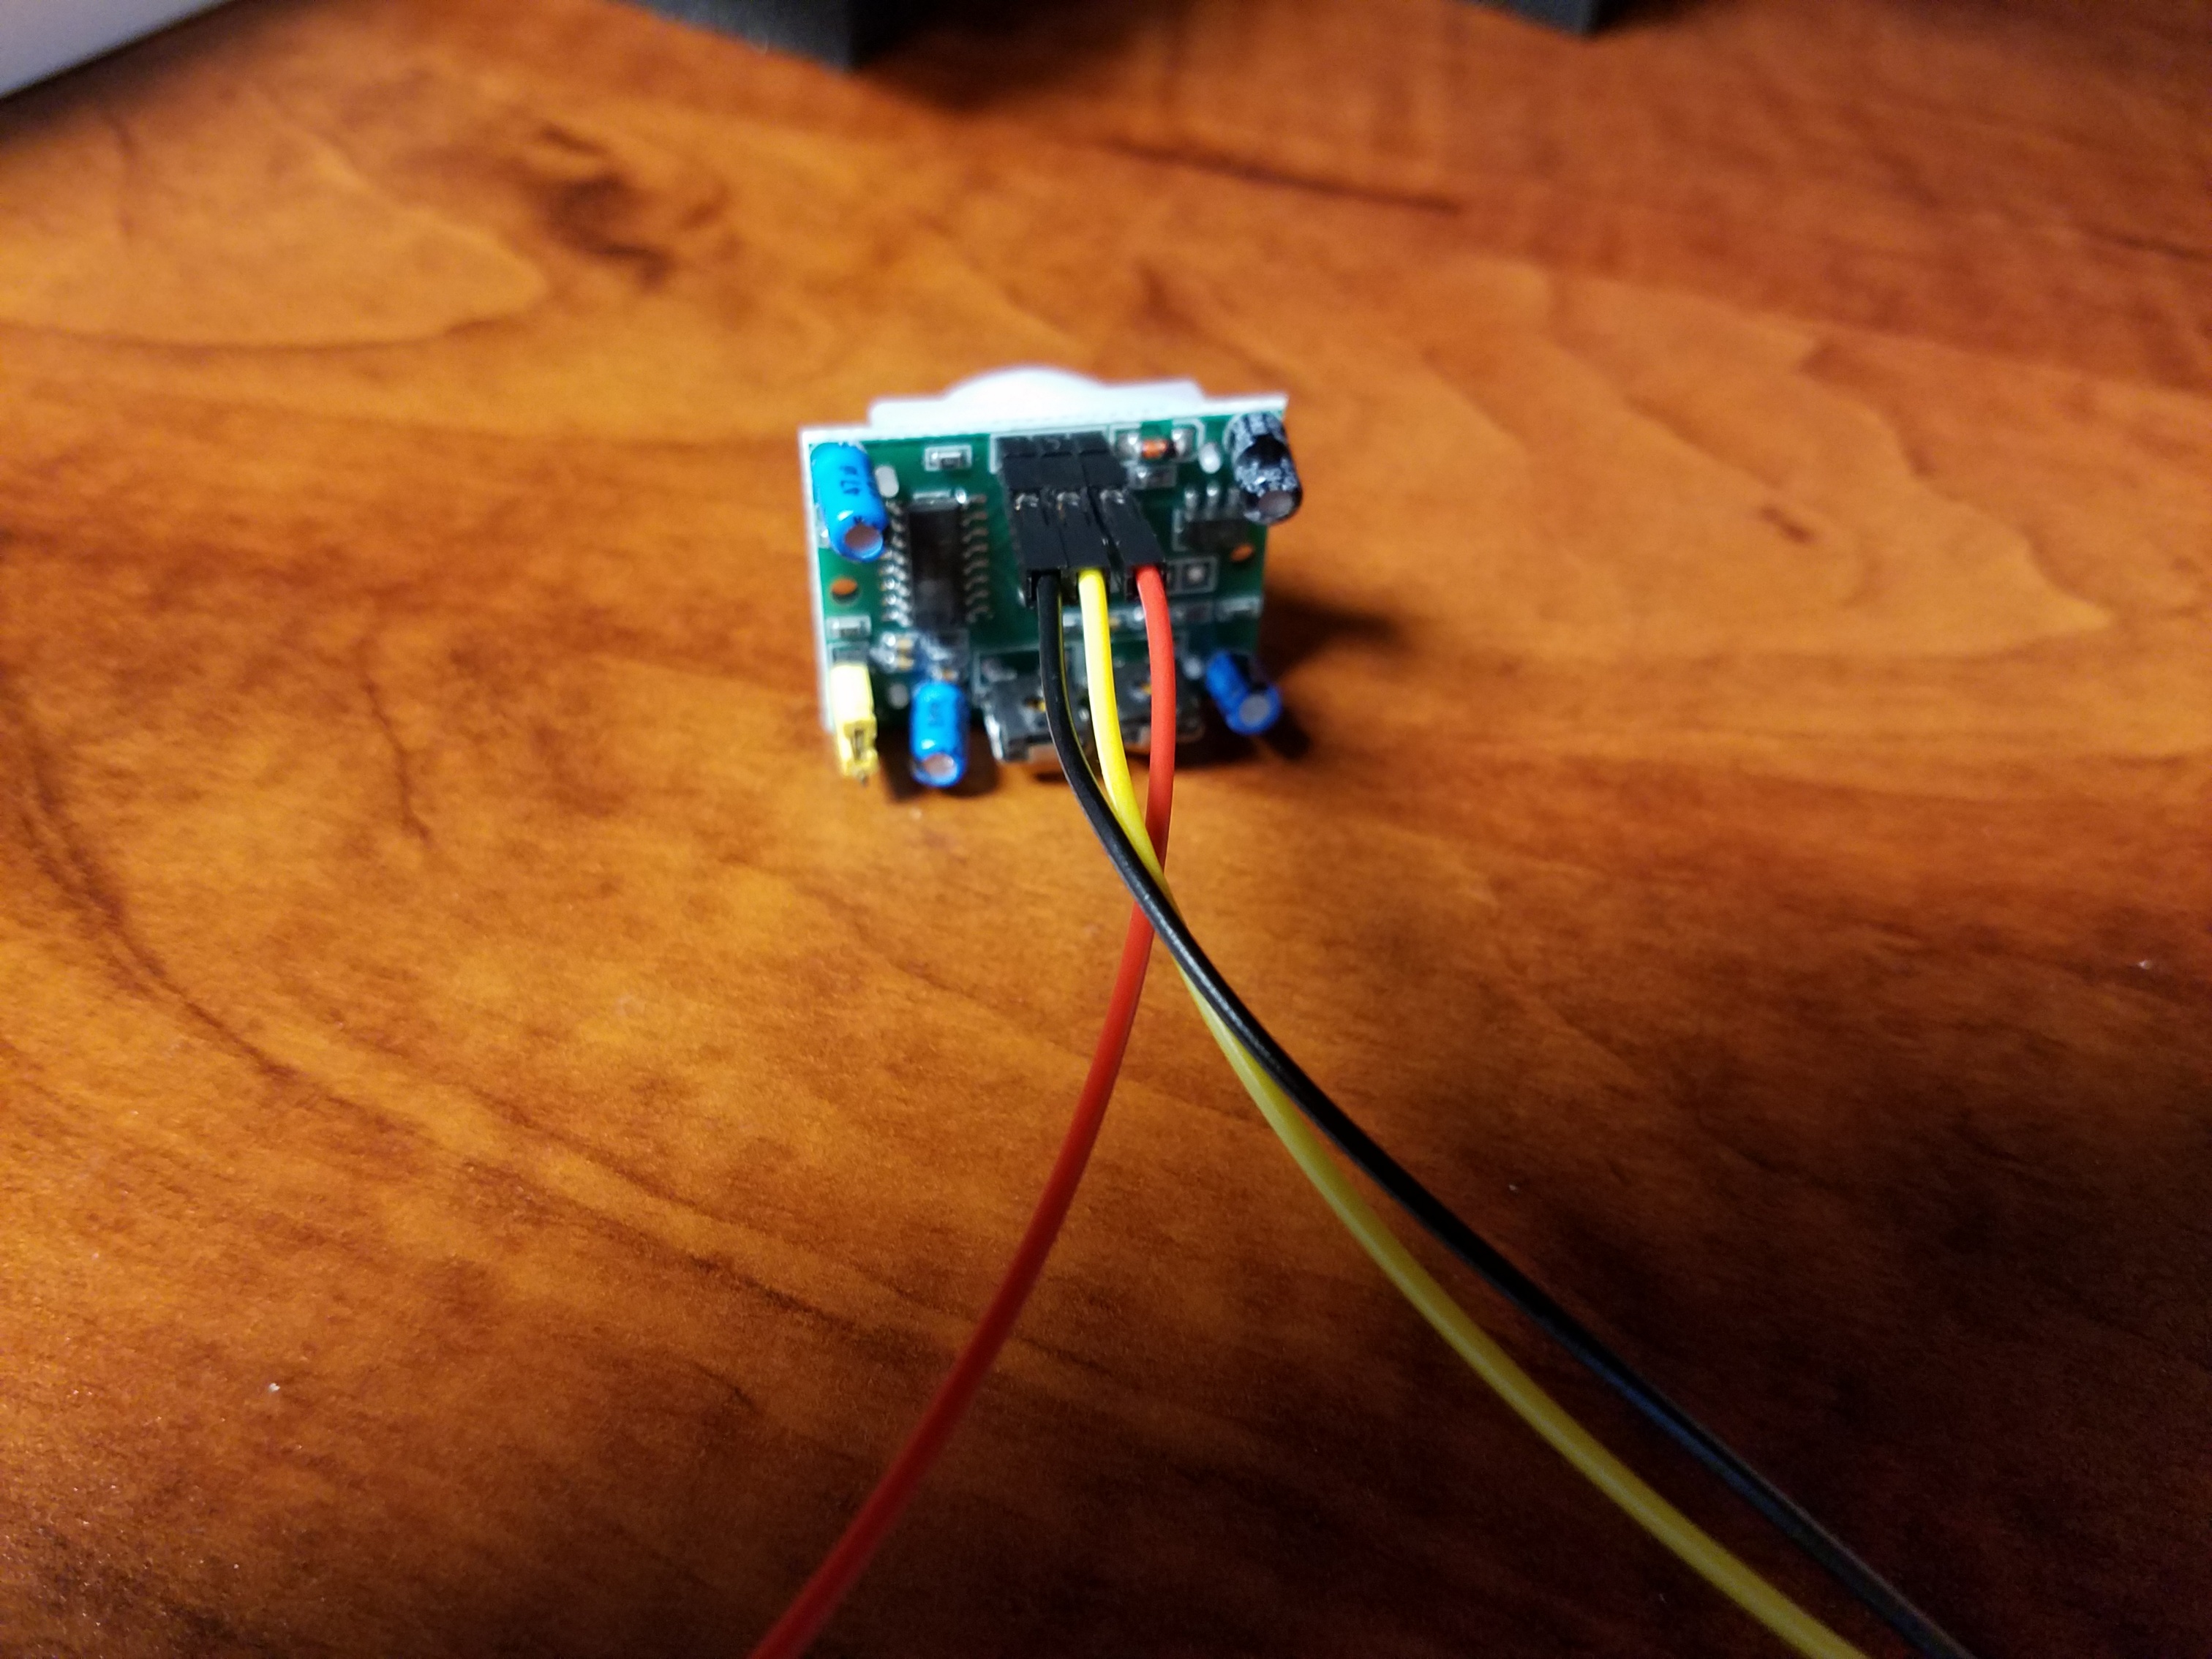
The motion sensor should come prewired with three leads between the case and the sensor. These leads will most likely need to be cut and extended using three conductor wire. The leads on your motion sensor may not be the same colors as those pictured here. The leads should already be connected at both ends, so simply cut the leads, strip the ends, and splice in an extension connecting same colors. The table below is for reference only and matches the colors in the pictures.
| Red | 5 Volt |
| Black | Ground |
| Yellow | Sensor |
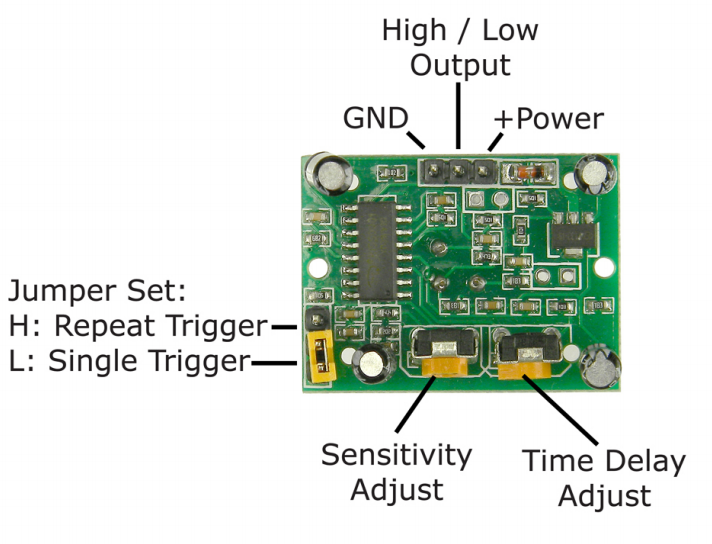
- The sensitivity dial may need to be adjusted to suit your environment. The default setting is approximately 50%.
- The delay dial should always be turned as far counterclockwise as possible.
- The jumper should be set to H.
Connecting to the Motion Sensor
- Connect the Valt Motion Sensor to the network.
- The sensor is POE powered and requires an 802.3af POE compliant switch.
- The VALT Motion Sensor should obtain an IP address automatically.
- The IP address should be listed in your DHCP leases on the DHCP server. The name of the device is MotionSensor. If you do not have DHCP, the device will default to an IP address of 192.168.0.91.
Manually Setting an IP Address
In order to set the IP address manually, you must be connected to the SmartButton using the ivsadmin user. The ivsuser account can not change any settings. If you are connecting from the console, type the following to change accounts. You will then be prompted for the ivsadmin password:
su ivsadmin
- Type the following, and press Enter:
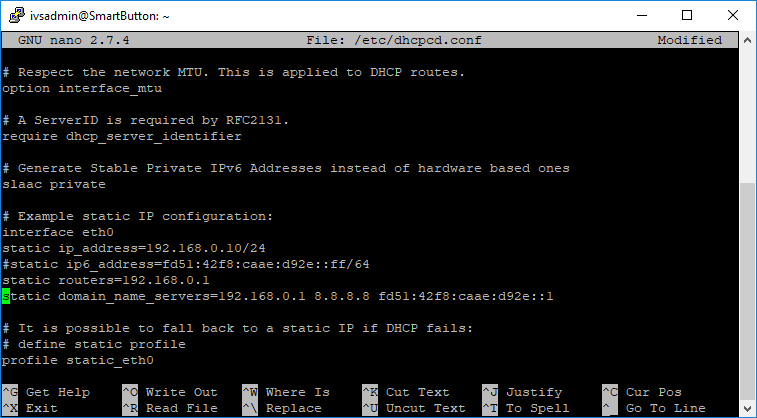
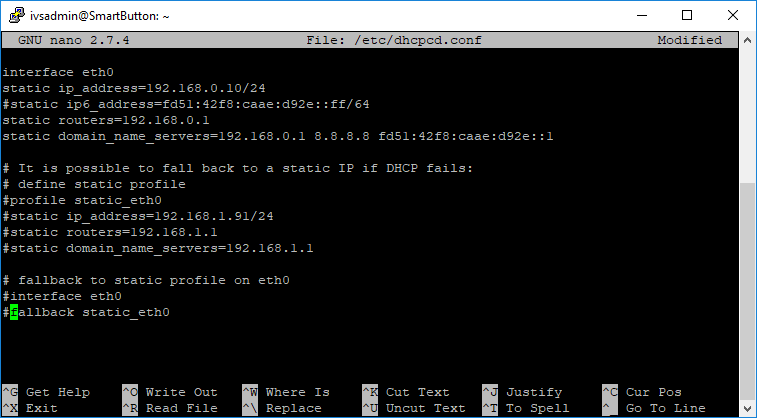
sudo nano /etc/dhcpcd.conf
- Scroll down until you find the section for interface eth0.
- Remove the # at the start of the lines for static ip_address, static routers, and static domain_name_servers.
- Update the IP configuration to reflect the correct settings for your environment.
- Comment out the remaining lines in the file by adding a # to the start of the line.
Configuration
- Connect the to VALT Motion sensor via SSH.
- You will need a certificate from IVS to complete the connection. Please contact IVS Support to obtain this certificate.
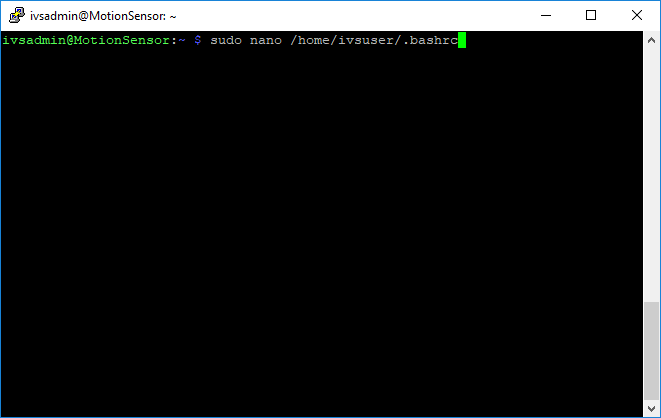
- Type the following, and press Enter:
sudo nano /home/ivsuser/.bashrc
-
- Enter the password when prompted.
- Scroll down to the bottom of the file.
-
- Modify the last command in the file to match your environment. The settings are listed below.
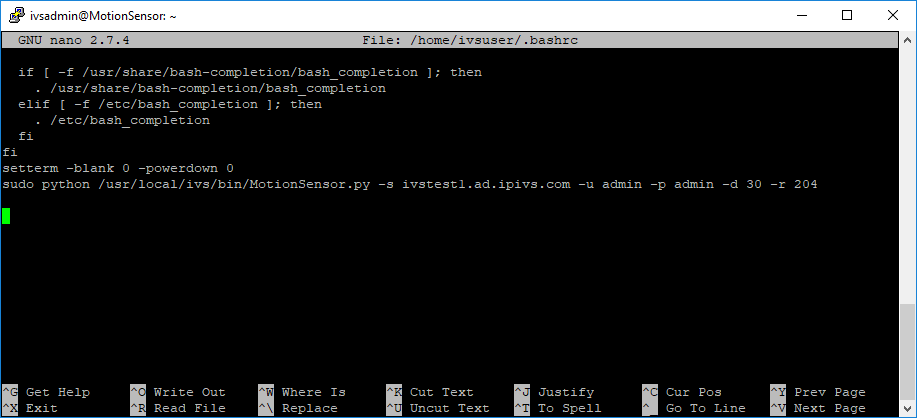
| -s | Server IP Address or DNS entry |
| -u | VALT Username |
| -p | VALT Password |
| -r | VALT Room Number |
| -d | Delay in Seconds |
| --ssl | True if using https, otherwise omit. |
Save the file by pressing CTRL + X and then entering Y to save. You will be prompted for the file name, do not change it and press Enter.
Reboot the Motion Sensor (sudo reboot), and it should begin functioning normally.
Notes
- The motion sensor will start a recording as soon as motion is detected. Recording will continue until no motion has been detected for the number of seconds specified in the delay setting. Once that time period has elapsed a stop command will be sent to the VALT server.
- Delays will need to be tailored to your environment. A 300 second delay (5 minutes) was used to great success during testing for an interview room.
- The motion sensor will not stop a recording started through the web interface.
- It is recommended to create a local service account in VALT for use with the VALT Motion Sensor.
- IVS recommends placing the main VALT Motion Sensor unit a minimum of five feet from actual sensor, as PIR sensors are susceptible to RF interference which can cause false positions.