Difference between revisions of "VALT Manual Upload"
IVSWikiBlue (talk | contribs) (→Upload) |
IVSWikiBlue (talk | contribs) |
||
| Line 1: | Line 1: | ||
=Upload= | =Upload= | ||
| − | The upload option allows users to upload '''.mp4 (H264/AAC)''', '''.mov''' or '''.asf (H264/MLAW)''' video files into the VALT system. | + | <div class="floating_card">The upload option allows users to upload '''.mp4 (H264/AAC)''', '''.mov''' or '''.asf (H264/MLAW)''' video files into the VALT system.</div> |
| − | + | {{img with key | file = Upload-1.jpg | list = | |
| + | <li>To open the upload menu click the '''Upload''' button.</li> | ||
| + | }} | ||
| − | + | {{img with key | file = Upload-2.jpg | list = | |
| + | <li>Container: if the active user has access to more than one container they can select the container using this drop down menu. If they only have access to a single container this option will not be present.</li> | ||
| + | <li>Information Template: if the active user has access to more than one information template, they will be able to select which one to use. If they only have access to a single information template, this option will not be present.</li> | ||
| + | <li>Information: this is the searchable information that will be assigned to the uploaded video.</li> | ||
| + | <li>Save: pressing '''Save''' will start the upload process. Note you will not be able to press '''Save''' until a file has been selected.</li> | ||
| + | }} | ||
| − | + | {{img with key | file = Upload-3.jpg | list = | |
| + | <li>Clicking on '''File''', followed by '''Choose File''', will pop open the browse dialog box. Browse to the file, and then click '''Open'''.</li> | ||
| + | <li>Save: clicking '''Save''' will start the upload process.</li> | ||
| + | }} | ||
| − | + | {{img with key | file = Upload-4.jpg | list = | |
| − | + | <li>Working Indicator: this indicates the application is working on something.</li> | |
| − | + | <li>Progress Bar: this displays the upload / conversion progress.</li> | |
| − | + | <li>When an upload completes it will be visible under the '''Review''' section.</li> | |
| − | + | }} | |
| − | |||
| − | |||
| − | |||
| − | |||
| − | |||
| − | |||
| − | |||
| − | |||
| − | |||
| − | |||
Latest revision as of 11:56, 15 August 2022
Upload
The upload option allows users to upload .mp4 (H264/AAC), .mov or .asf (H264/MLAW) video files into the VALT system.
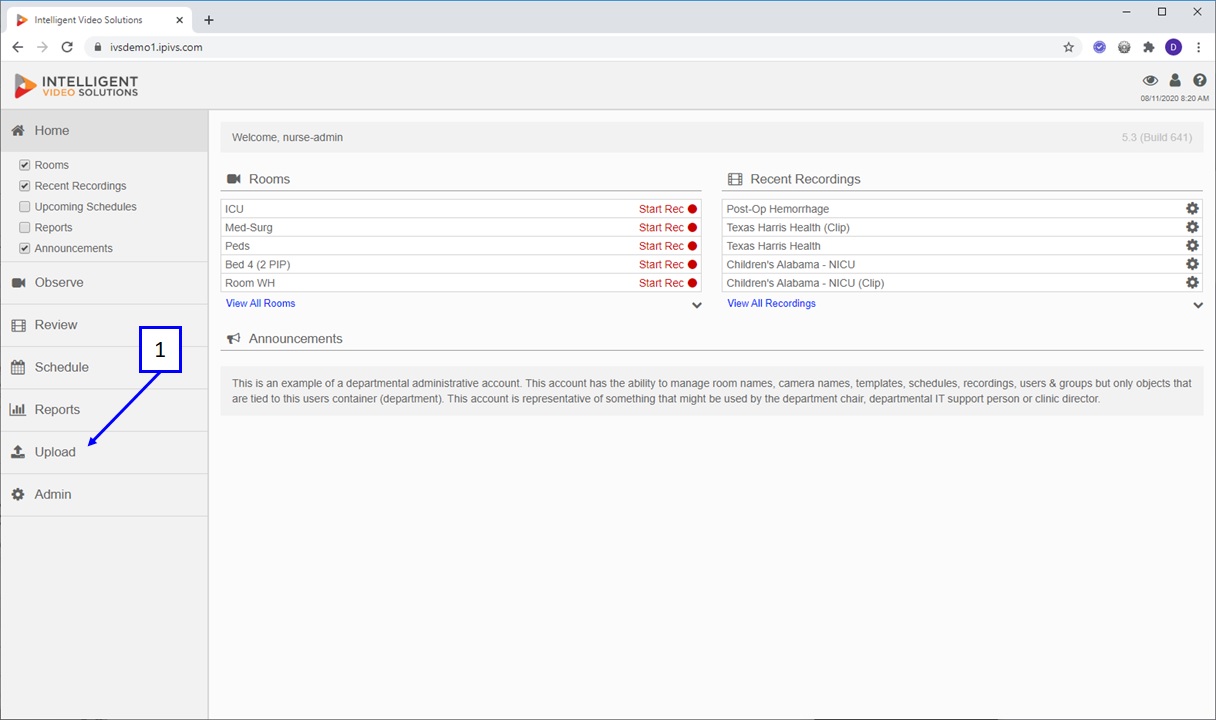
- To open the upload menu click the Upload button.

- Container: if the active user has access to more than one container they can select the container using this drop down menu. If they only have access to a single container this option will not be present.
- Information Template: if the active user has access to more than one information template, they will be able to select which one to use. If they only have access to a single information template, this option will not be present.
- Information: this is the searchable information that will be assigned to the uploaded video.
- Save: pressing Save will start the upload process. Note you will not be able to press Save until a file has been selected.
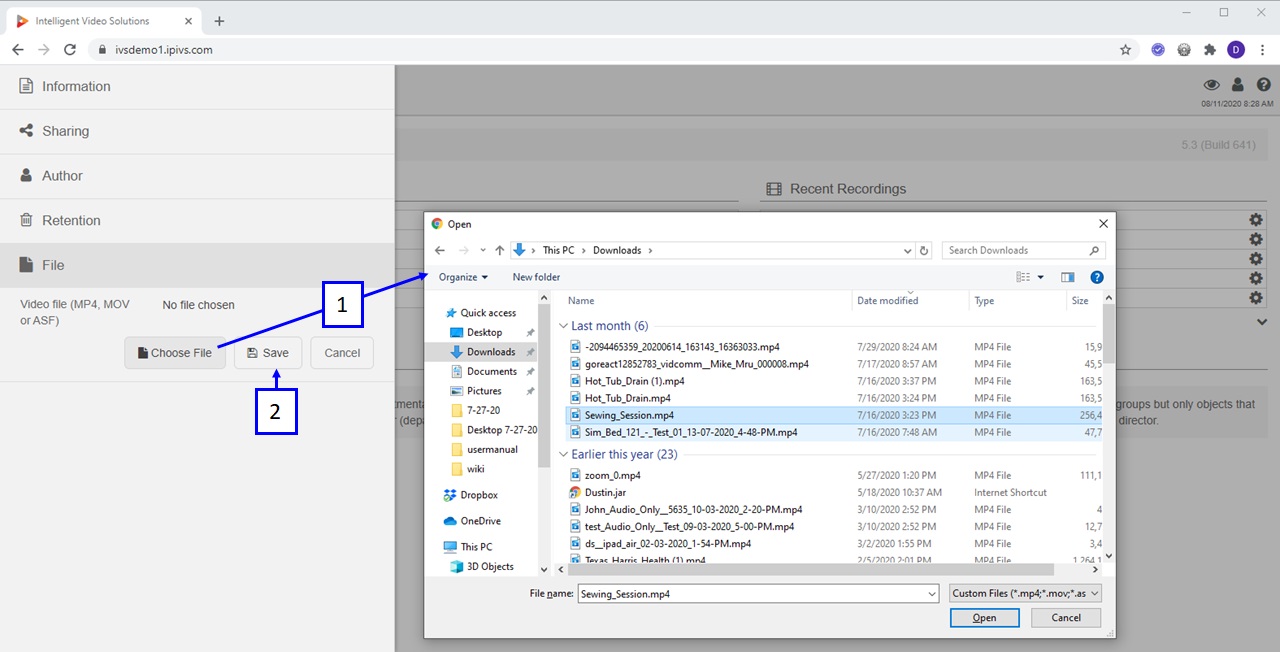
- Clicking on File, followed by Choose File, will pop open the browse dialog box. Browse to the file, and then click Open.
- Save: clicking Save will start the upload process.
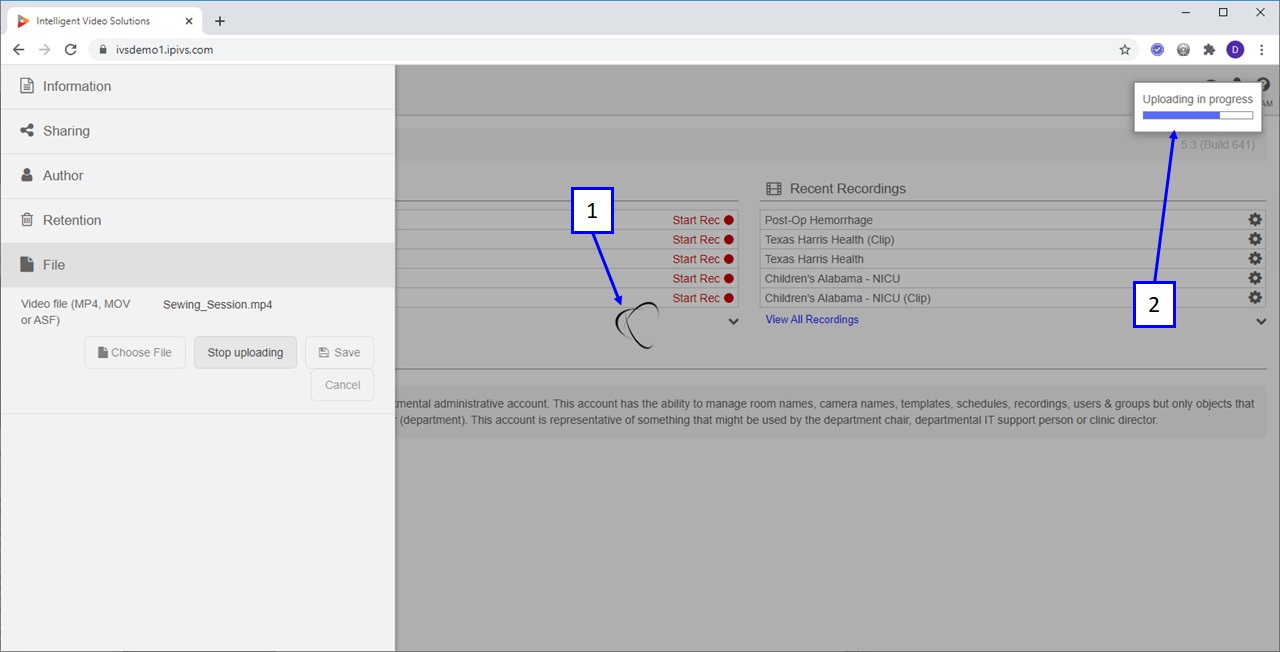
- Working Indicator: this indicates the application is working on something.
- Progress Bar: this displays the upload / conversion progress.
- When an upload completes it will be visible under the Review section.