Difference between revisions of "VALT Manual General"
IVSWikiBlue (talk | contribs) (Created page with "=Supported Desktop Browsers= VALT uses HTML5 for all video controls. Virtually any modern browser should be compatible with VALT however we only test compatibility with the b...") |
IVSWikiBlue (talk | contribs) (→Login) |
||
| (10 intermediate revisions by the same user not shown) | |||
| Line 1: | Line 1: | ||
=Supported Desktop Browsers= | =Supported Desktop Browsers= | ||
| − | + | {{:Supported Browsers}} | |
| − | { | ||
| − | |||
| − | |||
| − | |||
| − | |||
| − | |||
| − | |||
| − | |||
| − | |||
| − | |||
| − | |||
| − | |||
| − | |||
| − | |||
| − | |||
| − | |||
| − | |||
| − | |||
| − | |||
| − | |||
| − | |||
| − | |||
| − | |||
| − | |||
| − | |||
| − | |||
| − | |||
| − | |||
| − | |||
| − | |||
| − | |||
| − | |||
=Login= | =Login= | ||
| − | To access VALT simply open a web browser and point to the URL of the VALT server. This will take the user to a login screen as shown below. | + | <div class="floating_card">To access VALT simply open a web browser and point to the URL of the VALT server. This will take the user to a login screen as shown below.</div> |
| − | |||
| − | + | [[File:general_accessing.png|1000px|link=]] | |
| − | |||
| − | + | {{Aside | content = If the Enterprise version of VALT was purchased the login page can be customized as shown below.}} | |
| − | + | ||
| + | {{img with key | file = general_login_custom.jpg | list = | ||
| + | <li>This the login area where the user credentials are entered.</li> | ||
| + | <li>This is the custom image section, any number of images can be added the images will automatically scale to the browser width. These images can also be set to link to other web pages.</li> | ||
| + | }} | ||
=Main Navigation= | =Main Navigation= | ||
| − | Once logged into the software the user will have access to a variety of application features and sections based on their user permissions. | + | <div class="floating_card">Once logged into the software the user will have access to a variety of application features and sections based on their user permissions.</div> |
| − | + | ||
| − | + | {{img with key | file = general_mainnav.jpg | list = | |
| − | + | <li>Any unacknowledged alerts will appear at the top of the page. Alerts are items that often require attention and include: offline cameras, encoders, controllers and low disk space (500GB, 200GB, 100GB, 50GB, 10GB).</li> | |
| − | + | <li>The main navigation menu will appear on the left hand side. The active section will be expanded and shown in grey.</li> | |
| + | <li>The buttons in the upper right hand corner are present in every section and will these are...</li><dl> | ||
| + | <dt>[[File:general_night_mode.png]] <b>Night Mode</b></dt> | ||
| + | <dt>[[File:user_menu.png]] <b>User Menu</b></dt> | ||
| + | <dt>[[File:help.png]] <b>Help</b></dt> | ||
| + | </dl> | ||
| + | <i>These are covered in detail below.</i> | ||
| + | }} | ||
==Night Mode== | ==Night Mode== | ||
| − | Night mode can be toggled on or off by clicking the Night Mode button. This is a user specific setting and the application remembers each users preference. When enabled it changes the interface to use darker colors for all sections as shown below. | + | <div class="floating_card">Night mode can be toggled on or off by clicking the Night Mode button. This is a user specific setting and the application remembers each users preference. When enabled it changes the interface to use darker colors for all sections as shown below.</div> |
| + | |||
| + | |||
| + | [[File:general_night_mode_ui.jpg|1000px]] | ||
| − | |||
==User Menu== | ==User Menu== | ||
| − | The user menu allows users to view and change some account specific settings without admin access. Clicking the user menu icon will display some portion of the options shown below (based on permissions). | + | <div class="floating_card">The user menu allows users to view and change some account specific settings without admin access. Clicking the user menu icon will display some portion of the options shown below (based on permissions).</div> |
| + | |||
| − | + | {{img with key | file = general_user_menu_ui.png | list= | |
| − | + | <li><b>Display Name:</b> This is the name that will be shown in other parts of the software (author, sharing sections etc).</li> | |
| − | + | <li><b>Email Address:</b> If the user wishes to receive any email alerts this field will have to properly entered.</li> | |
| − | + | <li><b>Password Reset:</b> If the account is a local user (not LDAP // SSO) and the user has permission they can reset their password using these fields.</li> | |
| + | }} | ||
==Help== | ==Help== | ||
| − | This is a configurable help section. All users will have access to view this section, the displayed information can be modified through the admin section. | + | <div class="floating_card">This is a configurable help section. All users will have access to view this section, the displayed information can be modified through the admin section.</div> |
| − | [[File:general_help_ui.jpg|600px]] | + | [[File:general_help_ui.jpg|600px|link=]] |
Latest revision as of 07:23, 19 May 2023
Contents
Supported Desktop Browsers
Login
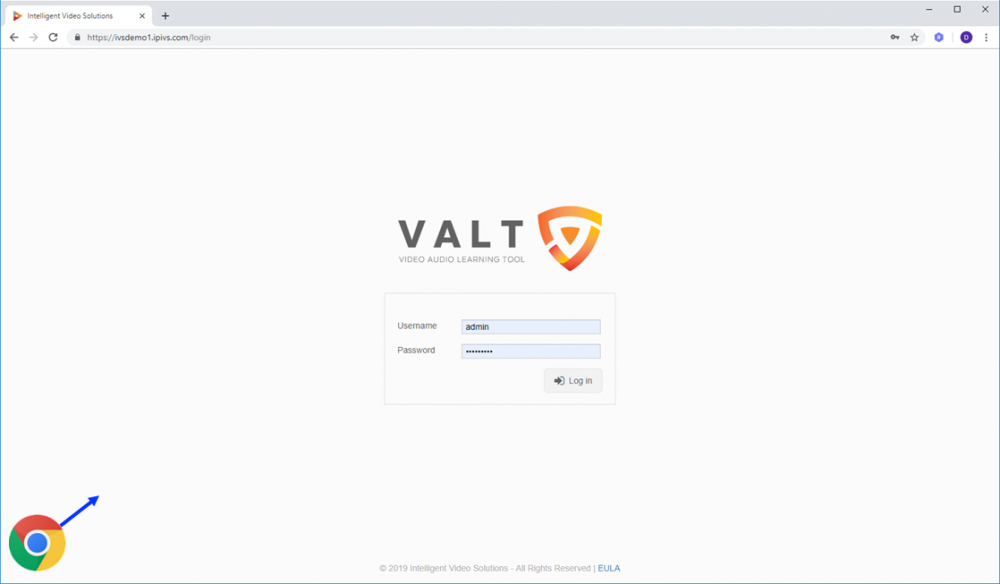
To access VALT simply open a web browser and point to the URL of the VALT server. This will take the user to a login screen as shown below.
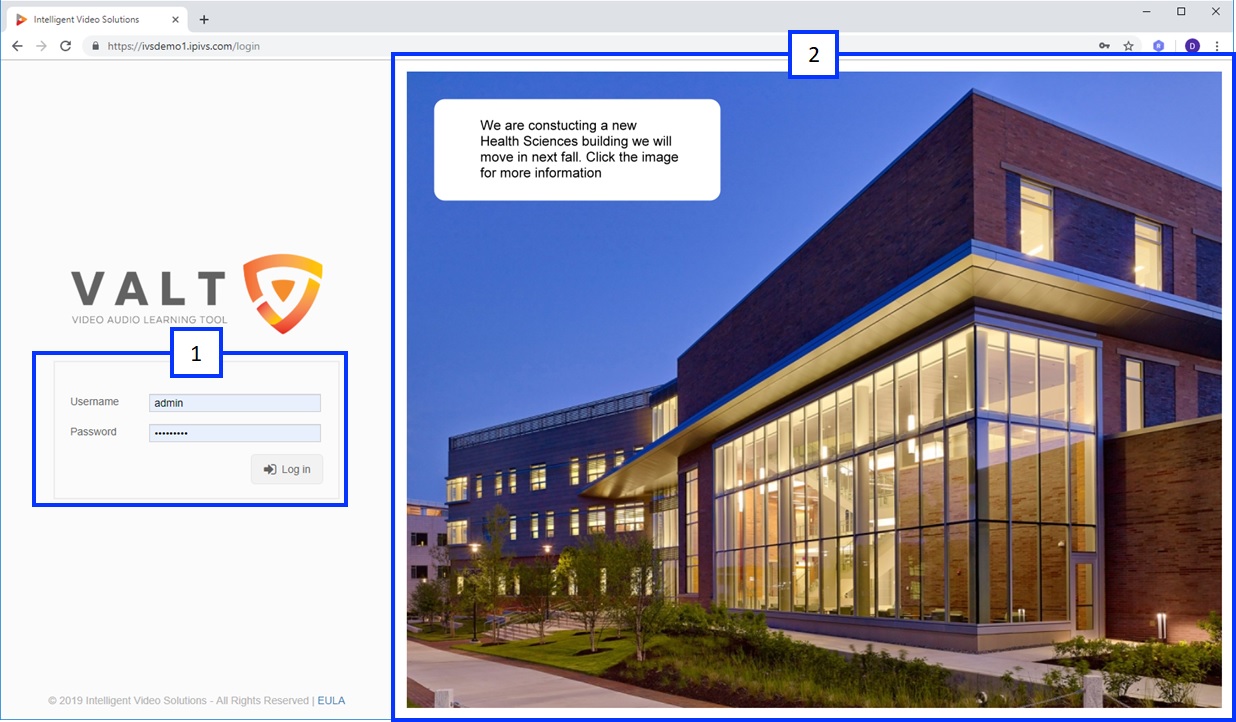
✎If the Enterprise version of VALT was purchased the login page can be customized as shown below.
- This the login area where the user credentials are entered.
- This is the custom image section, any number of images can be added the images will automatically scale to the browser width. These images can also be set to link to other web pages.
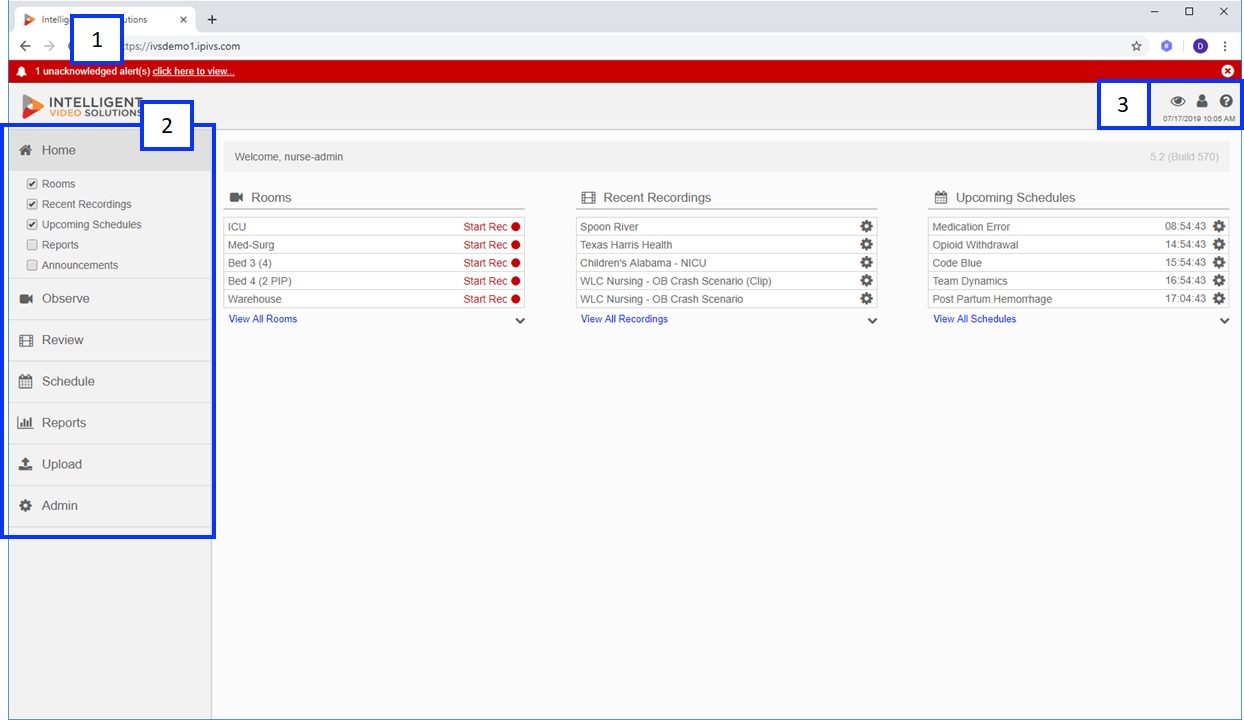
Once logged into the software the user will have access to a variety of application features and sections based on their user permissions.
- Any unacknowledged alerts will appear at the top of the page. Alerts are items that often require attention and include: offline cameras, encoders, controllers and low disk space (500GB, 200GB, 100GB, 50GB, 10GB).
- The main navigation menu will appear on the left hand side. The active section will be expanded and shown in grey.
- The buttons in the upper right hand corner are present in every section and will these are...
These are covered in detail below.
Night Mode
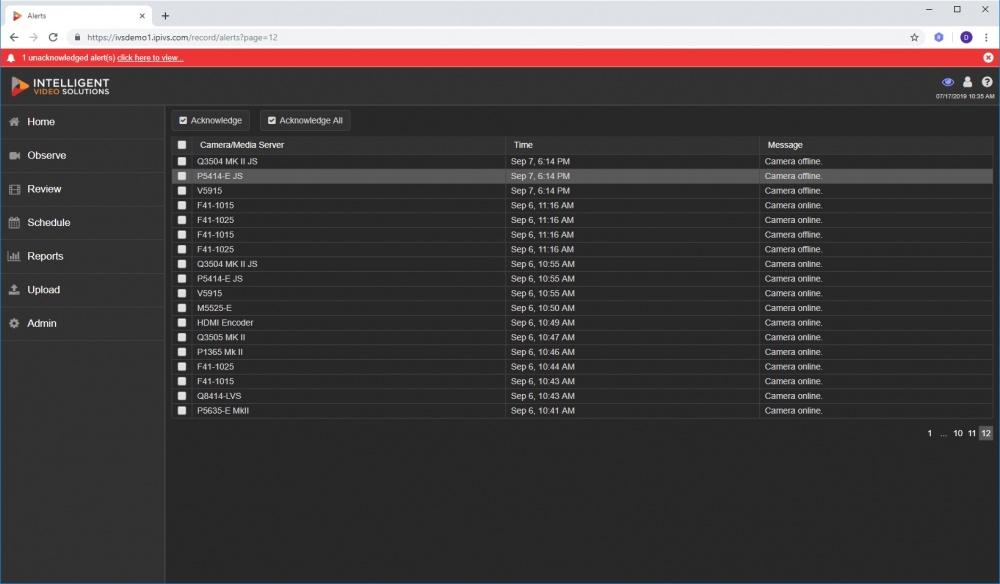
Night mode can be toggled on or off by clicking the Night Mode button. This is a user specific setting and the application remembers each users preference. When enabled it changes the interface to use darker colors for all sections as shown below.
User Menu
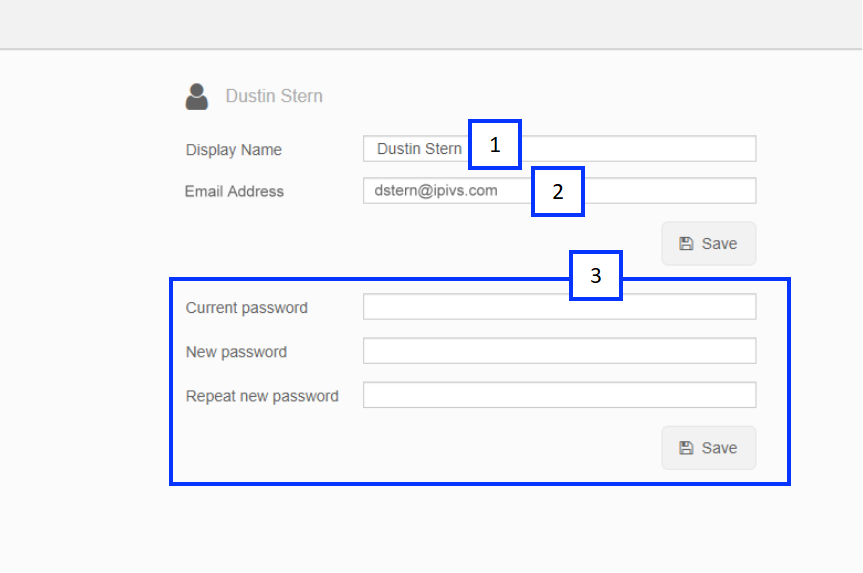
The user menu allows users to view and change some account specific settings without admin access. Clicking the user menu icon will display some portion of the options shown below (based on permissions).
- Display Name: This is the name that will be shown in other parts of the software (author, sharing sections etc).
- Email Address: If the user wishes to receive any email alerts this field will have to properly entered.
- Password Reset: If the account is a local user (not LDAP // SSO) and the user has permission they can reset their password using these fields.
Help
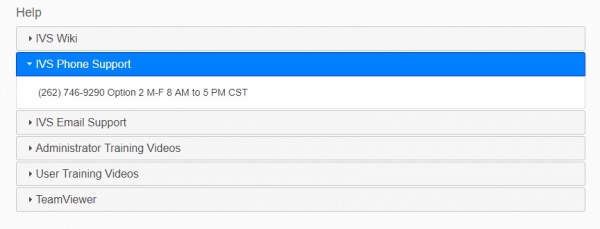
This is a configurable help section. All users will have access to view this section, the displayed information can be modified through the admin section.
