Difference between revisions of "VALT Manual Settings"
IVSWikiBlue (talk | contribs) |
IVSWikiBlue (talk | contribs) |
||
| (4 intermediate revisions by the same user not shown) | |||
| Line 209: | Line 209: | ||
#Click the {{img - icon | file = Edit.png}} <strong>Edit</strong> icon. | #Click the {{img - icon | file = Edit.png}} <strong>Edit</strong> icon. | ||
| + | Here you will be able to edit the following fields: | ||
| − | + | {{Manual lvl 4 | title = General | content = Basic user settings for Username, Email, Default Group, Additional Groups, and Access Expiration.}} | |
| + | {{Manual lvl 5 | title = Account Name | content = Set the Account's Username. This is the value used to sign in.}} | ||
| + | {{Manual lvl 5 | title = Email | content = Set the Account's email address. This value is only used if email alerts are configured.}} | ||
| + | {{Manual lvl 5 | title = Group | content = Set which group the Account belongs to.}} | ||
| + | {{Manual lvl 5 | title = Additional Groups | content = Add the Account to additional groups using the drop down.}} | ||
| + | {{Manual lvl 5 | title = Access Expiration | content = Set the Account's access to expire after a certain point. }} | ||
| + | {{Manual lvl 4 | title = Security | content = Location where an Administrator can change a user's password.}} | ||
| − | + | {{Manual lvl 4 | title = Other | content = Various other user configurations.}} | |
| − | + | {{Manual lvl 5 | title = Single Sign-On Config | content = Select a single sign-on configuration to associate the account with from the drop-down list. If a user was created as an SSO user, this field will be set automatically.}} | |
| − | + | {{Manual lvl 5 | title = Mobile PIN | content = Set this field to securely login to BEAM or VALT Cue.}} | |
| + | {{Manual lvl 5 | title = Control Type | content = Toggle between the Joystick and Compass PTZ Control types. }} | ||
| + | {{Manual lvl 5 | title = Card Number | content = Set this field if using a VALT Card Reader to start recordings.}} | ||
| + | {{Manual lvl 5 | title = Rooms | content = Use this area to add additional room access to this user only, in addition to the access already provided at the Group level.}} | ||
| + | {{Manual lvl 5 | title = Display Name | content = Use this are to set a Display Name for the user. The Display Name will be shown within all VALT pages, although the user will still user their Account Name for logging in.}} | ||
| − | + | {{Manual lvl 4 | title = Video Access | content = This section defines whose past and ongoing recordings a user will have access to based on who authored the recordings, in addition to the access already provided at the Group level. To give the user access to another author's recordings, simply check the box next to that author's name.}} | |
| − | |||
| − | + | {{Manual lvl 4 | title = Platform Access | content = Use this section to set specific days and times for users to access VALT.}} | |
| − | + | {{Manual lvl 4 | title = Save | content = Click the Save button to save any changes made to the user.}} | |
| − | |||
| − | |||
| − | |||
| − | |||
| − | |||
| − | |||
| − | |||
}} | }} | ||
| Line 238: | Line 241: | ||
{{Manual lvl 3 | title = LDAP Import | content = Use this section to search your Active Directory for an individual user and import them into VALT. }} | {{Manual lvl 3 | title = LDAP Import | content = Use this section to search your Active Directory for an individual user and import them into VALT. }} | ||
{{Manual lvl 3 | title = Sync Schedules | content = Use this section to automatically import groups from your active directory into your VALT groups.}} | {{Manual lvl 3 | title = Sync Schedules | content = Use this section to automatically import groups from your active directory into your VALT groups.}} | ||
| − | {{Aside - Helpful | content = Learn more about using Active Directory to manage your users}} | + | {{Aside - Helpful | content = Learn more about using [[VALT 6 - LDAP Configuration | Active Directory]] to manage your users}} |
{{Manual lvl 3 | title = Import from File | content = Upload a list of local users to a certain group in a TXT, XLS, XLSX, or CSV file. }} | {{Manual lvl 3 | title = Import from File | content = Upload a list of local users to a certain group in a TXT, XLS, XLSX, or CSV file. }} | ||
| Line 252: | Line 255: | ||
| − | {{Aside - | + | {{Aside - Helpful | hue = 50 | content = Interested in using SSO on your system? [https://ivs.help Contact the IVS Support Team]}} |
}} | }} | ||
| Line 259: | Line 262: | ||
{{hr}} | {{hr}} | ||
| − | {{Manual lvl 2 | title = Add User | + | {{Manual lvl 2 | title = Add a User or Group | content = To add a <b>User</b> or <b>Group</b>: |
#Click the {{Add Button}} <strong>Add</strong> button. | #Click the {{Add Button}} <strong>Add</strong> button. | ||
#Select <b>Add group</b> or <b>Add user</b>. | #Select <b>Add group</b> or <b>Add user</b>. | ||
| Line 356: | Line 359: | ||
{{Aside | content = Each device that should be assigned to the room needs to be assigned to the same media server.}}}} | {{Aside | content = Each device that should be assigned to the room needs to be assigned to the same media server.}}}} | ||
{{Manual lvl 5 | title = Save | content = Click the Save button to save your changes.}} | {{Manual lvl 5 | title = Save | content = Click the Save button to save your changes.}} | ||
| + | |||
{{Manual lvl 4 | title = Adding a Camera | content = When adding a Camera, you will need to configure the following fields:}} | {{Manual lvl 4 | title = Adding a Camera | content = When adding a Camera, you will need to configure the following fields:}} | ||
{{Manual lvl 5 | title = Brand | content = Use the drop down to select either Axis or Epiphan as the device brand, matching the brand of the device you are configuring.}} | {{Manual lvl 5 | title = Brand | content = Use the drop down to select either Axis or Epiphan as the device brand, matching the brand of the device you are configuring.}} | ||
| Line 367: | Line 371: | ||
{{Manual lvl 5 | title = Rooms | content = Assign the camera to any rooms that it will be part of.}} | {{Manual lvl 5 | title = Rooms | content = Assign the camera to any rooms that it will be part of.}} | ||
{{Manual lvl 5 | title = Save | content = Click the Save button to save your changes.}} | {{Manual lvl 5 | title = Save | content = Click the Save button to save your changes.}} | ||
| + | |||
| + | {{Manual lvl 4 | title = Adding an EDGE camera | content = When adding an EDGE camera, you will need to configure the following fields:}} | ||
| + | {{Manual lvl 5 | title = Name | content = The Name field is what will be displayed as the camera name in the other sections of VALT.}} | ||
| + | {{Manual lvl 5 | title = Serial number | content = Input the camera Serial number here.}} | ||
| + | {{Manual lvl 5 | title = Media server | content = Assign the camera to the appropriate Media server.}} | ||
| + | {{Manual lvl 5 | title = Rooms | content = Assign the camera to any rooms that it will be part of.}} | ||
| + | {{Manual lvl 5 | title = Save | content = Click the Save button to save your changes.}} | ||
| + | |||
| + | {{Manual lvl 4 | title = Adding a BEAM device | content = When adding a BEAM device, you will need to configure the following fields:}} | ||
| + | {{Manual lvl 5 | title = Name | content = The Name field is what will be displayed as the device name in the other sections of VALT.}} | ||
| + | {{Manual lvl 5 | title = Media server | content = Assign the BEAM device to the appropriate Media server. All video uploads will be stored on that Media server.}} | ||
| + | {{Manual lvl 5 | title = Rooms | content = Assign the BEAM device to any rooms that it will be part of. {{Aside | content = You may choose not to add the BEAM device to any rooms, in which case it will appear under Streams while a stream is in progress. This is the recommended setup.}}}} | ||
| + | {{Manual lvl 5 | title = Save | content = Click the Save button to save your changes.}} | ||
| + | |||
| + | {{Manual lvl 4 | title = Adding Other devices | content = When adding an encoder, you will need to configure the following fields:}} | ||
| + | {{Manual lvl 5 | title = Name | content = The Name field is what will be displayed as the device name in the other sections of VALT.}} | ||
| + | {{Manual lvl 5 | title = RTSP url | content = Input the RTSP url of the device. The default format for IVS's encoders is {{Code Block - Mini | text = rtsp://<device ip>/live/1_0}}}} | ||
| + | {{Manual lvl 5 | title = Media server | content = Assign the device to the appropriate Media server. All video uploads will be stored on that Media server.}} | ||
| + | {{Manual lvl 5 | title = Rooms | content = Assign the BEAM device to any rooms that it will be part of. }} | ||
| + | {{Manual lvl 5 | title = Save | content = Click the Save button to save your changes.}} | ||
| + | |||
{{Manual lvl 3 | title = Edit a Room | content = Hover over a Room and click {{img - icon | file = Edit.png}} <strong>Edit</strong> to Edit the Room setup.}} | {{Manual lvl 3 | title = Edit a Room | content = Hover over a Room and click {{img - icon | file = Edit.png}} <strong>Edit</strong> to Edit the Room setup.}} | ||
| − | {{Manual lvl 3 | title = Delete a Room | content = Hover over an existing Room and select {{img - icon | file = Delete.png}} <strong>Delete</strong> to permanently delete the Room.}} | + | {{Manual lvl 3 | title = Delete a Room | content = Hover over an existing Room and select {{img - icon | file = Delete.png}} <strong>Delete</strong> to permanently delete the Room. {{Aside - Warning | content = You will be prompted whether you want to keep the cameras in the system. In most cases, you should keep the cameras, which will be placed in Cameras without room.}}}} |
{{Manual lvl 3 | title = Edit a Device | content = Select {{img - icon | file = More.png | width = 16px}} <strong>More</strong>, then <b>Edit Device</b> to make changes to the device’s setup.}} | {{Manual lvl 3 | title = Edit a Device | content = Select {{img - icon | file = More.png | width = 16px}} <strong>More</strong>, then <b>Edit Device</b> to make changes to the device’s setup.}} | ||
{{Manual lvl 3 | title = Remove a Device | content = Select {{img - icon | file = More.png | width = 16px}} <strong>More</strong>, then <b>Remove Device</b> to make changes to the device’s configuration.}} | {{Manual lvl 3 | title = Remove a Device | content = Select {{img - icon | file = More.png | width = 16px}} <strong>More</strong>, then <b>Remove Device</b> to make changes to the device’s configuration.}} | ||
| Line 385: | Line 410: | ||
{{Manual lvl 2 | title = Display Various Servers/Services | content = The top buttons can be used to display media servers, transcription server, LDAP server, and Single Sign-On configuration for editing or deleting as necessary.}} | {{Manual lvl 2 | title = Display Various Servers/Services | content = The top buttons can be used to display media servers, transcription server, LDAP server, and Single Sign-On configuration for editing or deleting as necessary.}} | ||
| − | {{Aside | content = | + | {{Aside | content = These are typically configured by IVS Technicians.}} |
{{Top of Page}} | {{Top of Page}} | ||
Latest revision as of 12:57, 20 March 2025
Contents
- 1 Overview
- 2 General
- 3 Users & Groups
- 3.1 Groups
- 3.2 Users
- 3.3 Import
- 3.4 Single Sign-On
- 3.5 Add a User or Group
- 4 Templates
- 5 Rooms & Cameras
- 6 Servers & Services
- 7 Logs
- 8 Alerts
- 9 Help
Overview
The Settings section is where you can customize your VALT system to fit your organization's workflow.
General
The General page is the landing spot when you first enter the Settings section. This page provides an overview of your system's information.
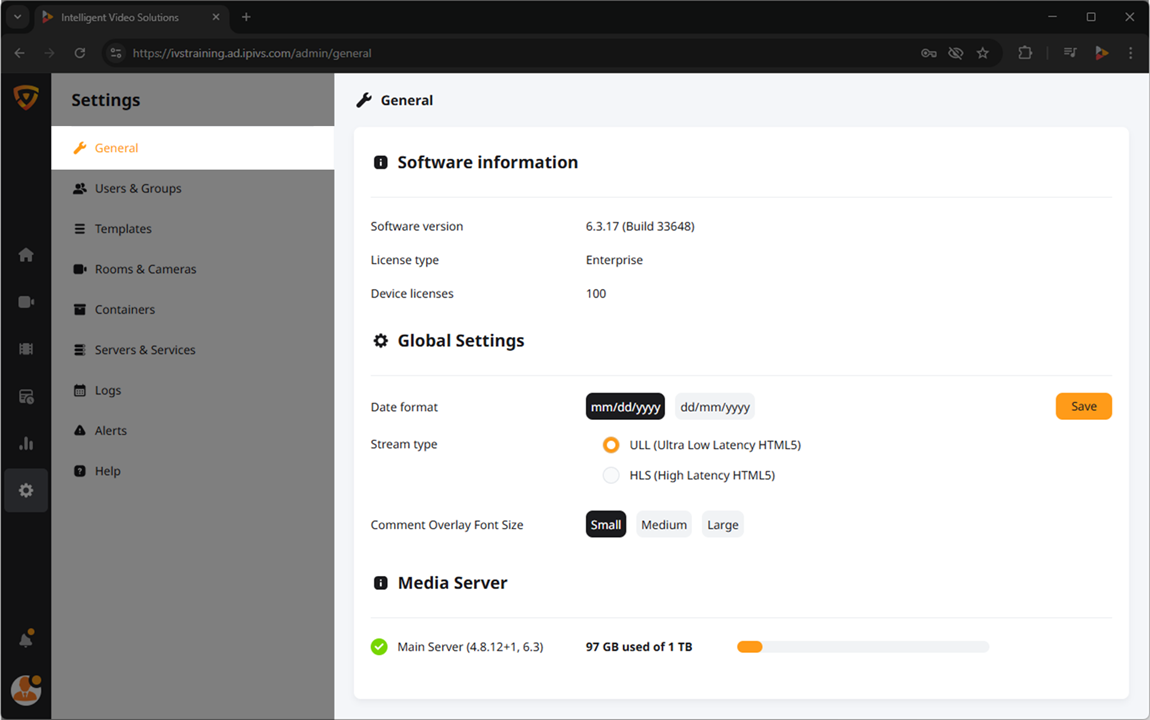
Software Information
Here, you can view the following items:
Software version
The software version shows which iteration of VALT you are currently using.
License type
The license type is a legacy field.
Device licenses
Device licenses are required to add cameras, encoders, BEAM devices, or VALT Cue devices.
Global Settings
The Global Settings are systemwide settings that can be edited.
Date format
This setting allows you to swap all dates in the system between the Month/Day/Year and the Day/Month/Year format.
Stream Type
This setting allows you to toggle between using ULL or HLS.
By default, this will be set to ULL, which provides the best performance of the video streams.
Comment Overlay Font Size
This setting changes the size of the comment overlay in the Review section for all users.
Media Server
This displays all the media servers associated with the software instance, and the amount of storage used from the total amount on each.

Email notifications
Email notifications allow an organization to send emails for comments directed at a user or videos shared with a user, and email alerts for when a stream goes online/offline.
Email settings
The Email settings section is used to configure the mail server for sending Email notifications.
Users & Groups
The Users & Groups page is where User logins, Video Access, and User permissions are managed.
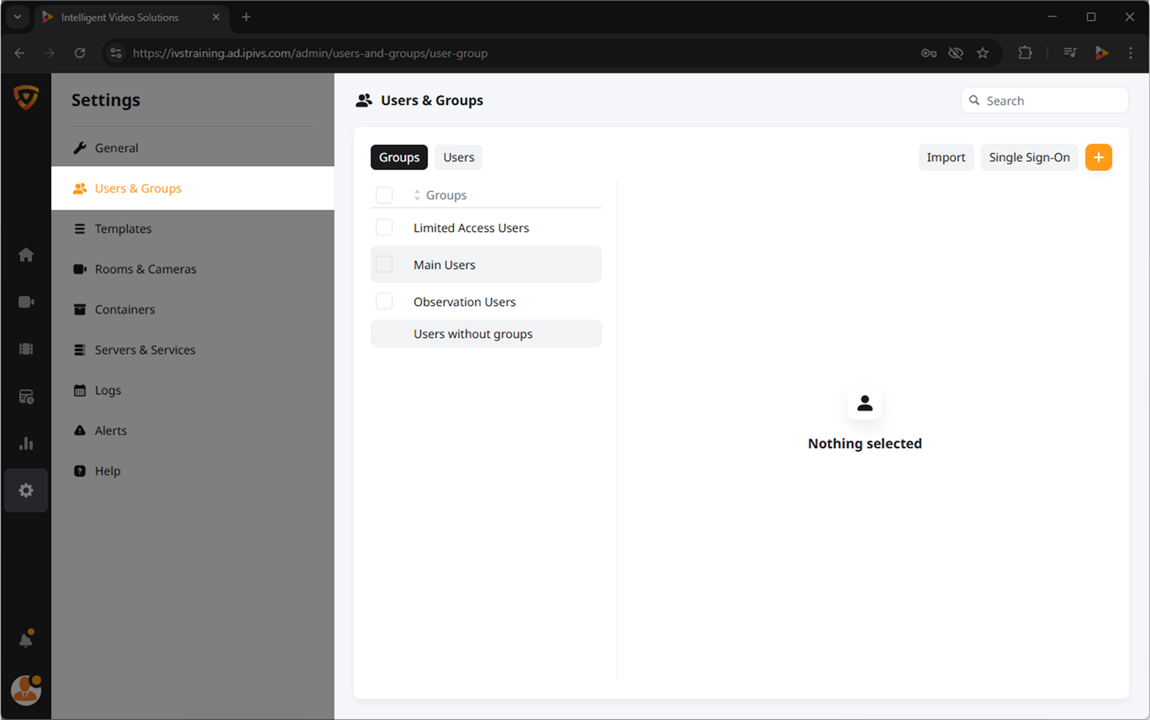
Groups
All Groups will be displayed on the left side.
View Users within Group
To view which users are part of a group, simply click on that group.
The Users list will appear on the right side.
Edit Group - Main settings
To edit the settings of a group:
- Hover over the Group
- Click the
 Edit icon.
This takes you into the Group editing page, where the settings for that particular group will be configured.
Name
Enter the name of the group in this field.
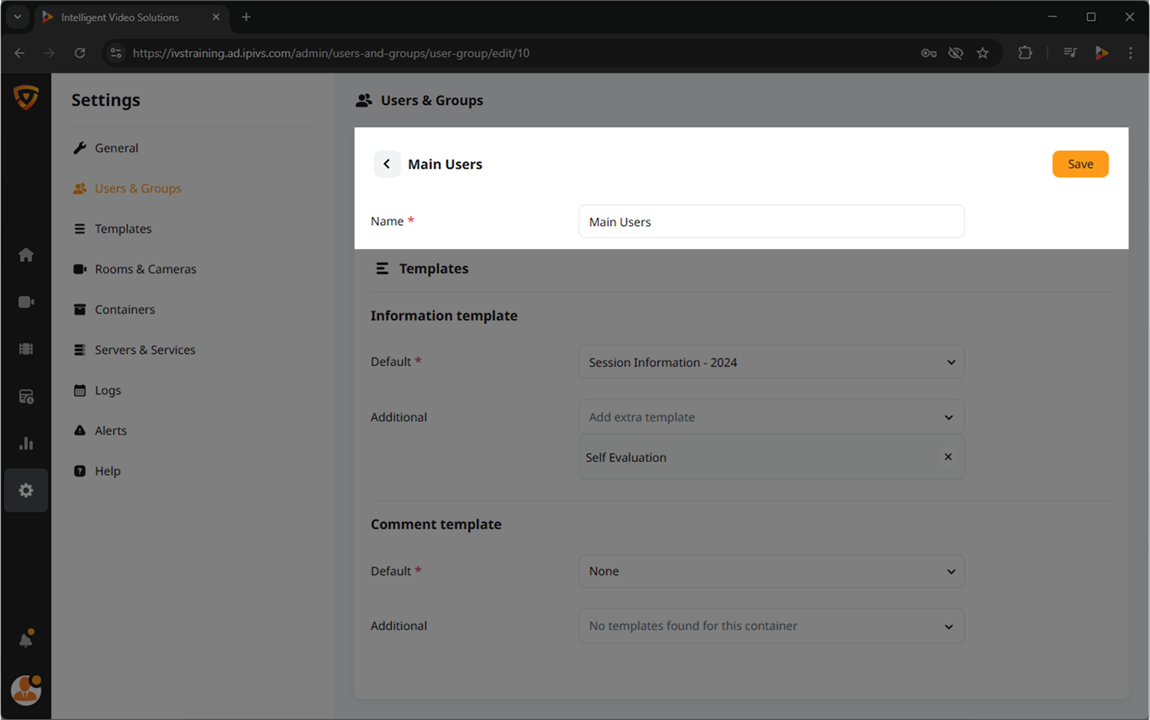
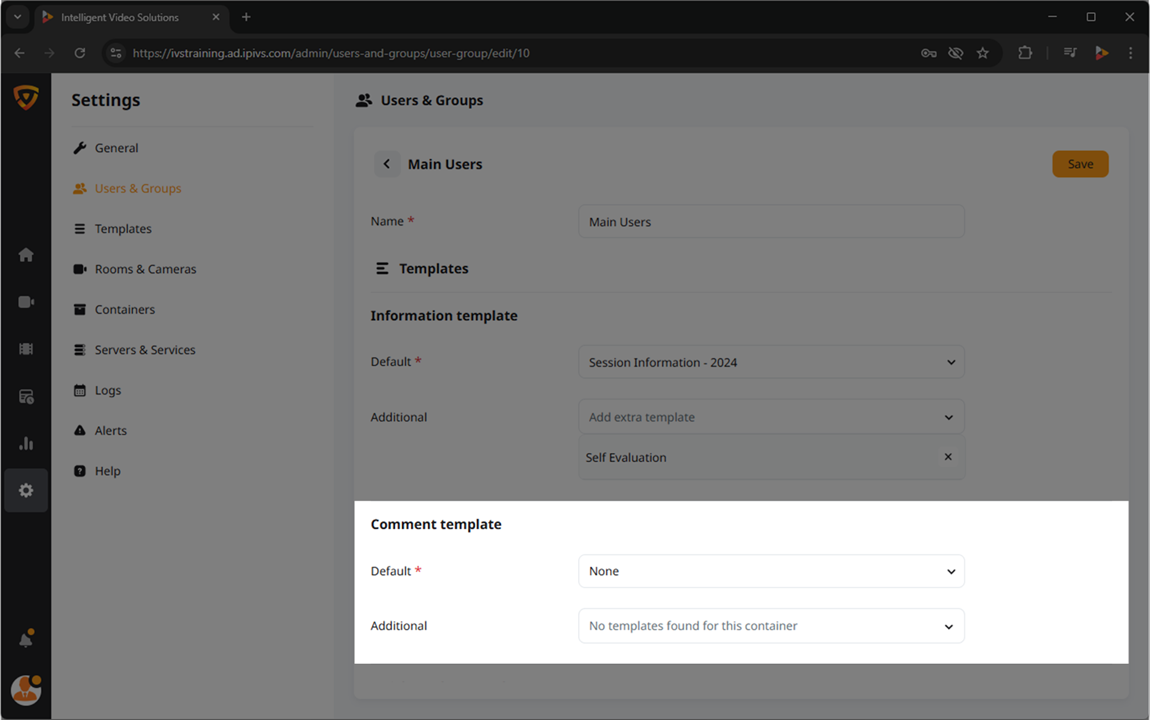
Group Templates
In this section, select the Templates that the group will have available for video information, comments, quick markers, and evaluations. For each type of template, input a default that this group will use, as well as any additional templates that they may need to switch between.
Information Template
This template is used when starting a recording. Learn more about Information Templates.
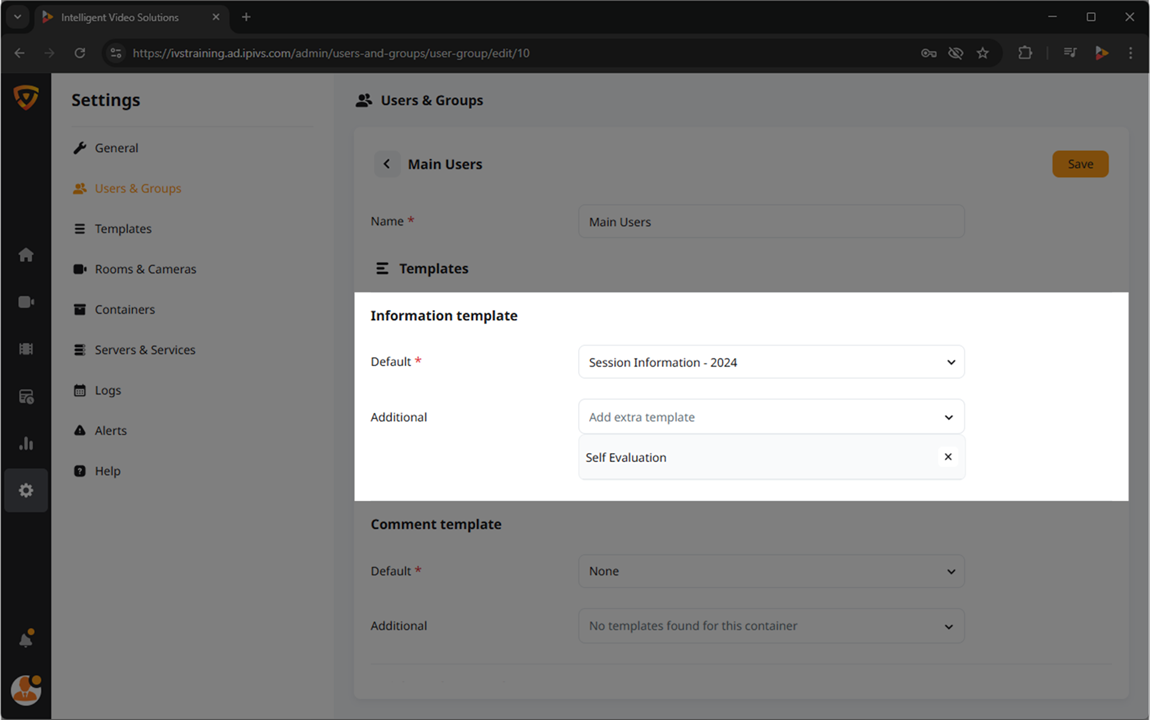
Comment Template
This template can be used when commenting on a recording. Learn more about Comment Templates.
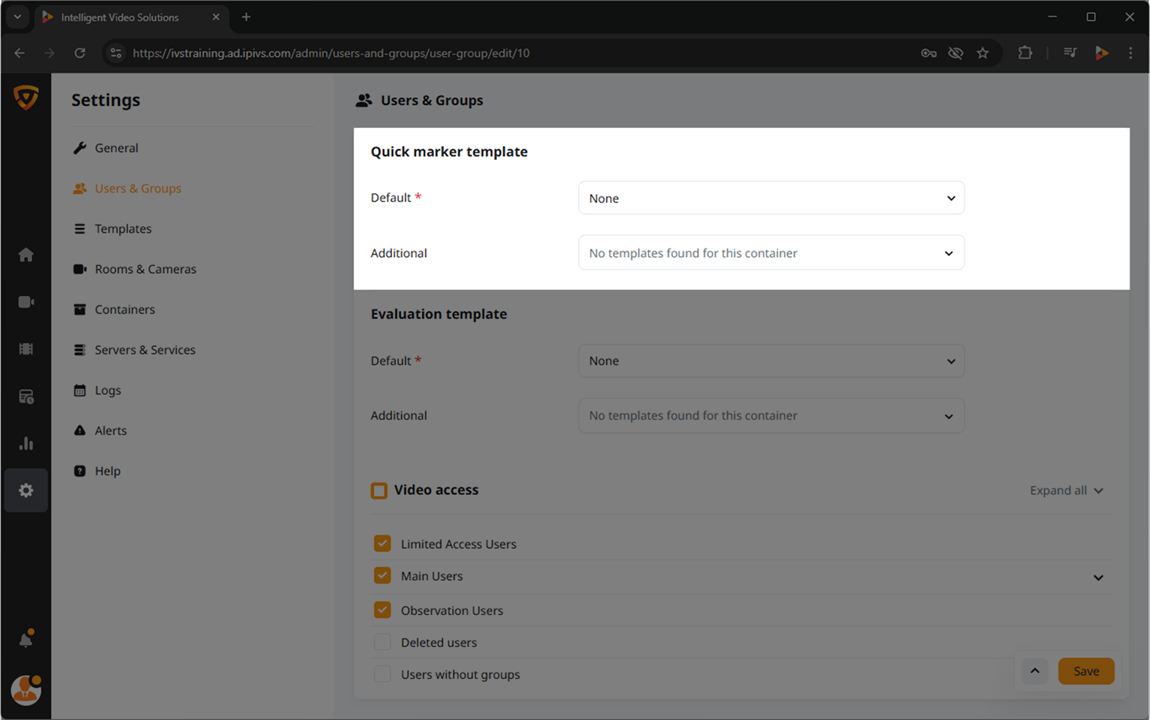
Quick marker Template
This template is used when applying quick markers to a recording. Learn more about Quick Marker Templates.
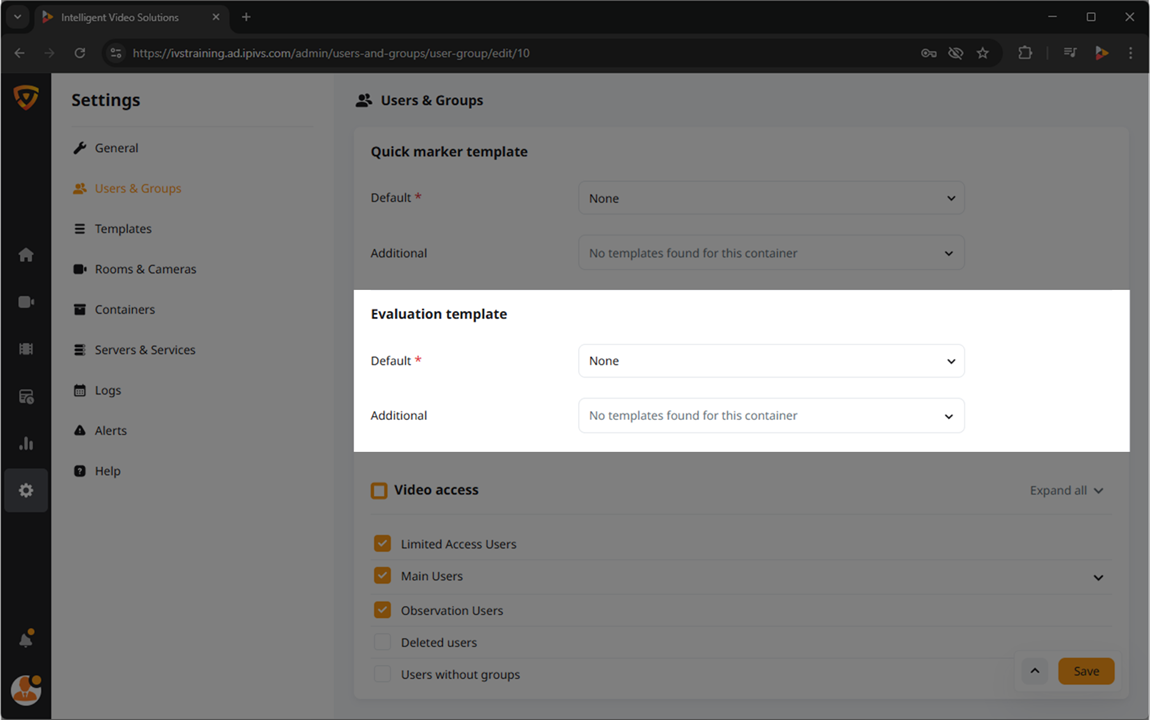
Evaluation Template
This template is used when added evaluations to a recording. Learn more about Evaluation Templates.
Video Access
This section controls which videos the group will be able to access based on who authors the video. To give the group you are editing access to another user's videos, make sure that user is checked.
Rights
This section controls which features the group will be able to use within VALT. To give a right to a group, make sure that right is selected.
Rooms
This section controls which Rooms a group will be able to see in the Observe and Review sections. To give Room access to the group, select the room from the drop down or use the select all option.
Edit Group - Advanced settings
Select the Advanced settings to configure some additional, lesser-used settings.
Default retention rule
Set a Default retention rule for the group here.
Recording Duration
Enable this option to set a maximum time limit for recordings authored by this group.
Other
This is a collection of various settings.
I/O Record Name
Set the Recording Name for any recordings started by this group via a Start/Stop accessory, including a button, keypad, or card reader
Search Results Default
Select how the Review section loads by default: List View or Tile View.
Search Results Display
Select which fields display in the List View of the Review section.
Announcement
Use this section to create a Homepage Announcement for the group.
Review List Default Period (days)
Set the default date filter that appears when this group navigates to the Review section.
Access Expiration
Use this option to cause the users in this group to lose login privileges after a certain point.
Platform Access
Use this area to select which days and times the users in the group will be able to login to VALT.
Delete Group
To delete a group, click on the trash can icon on the right side of the group. You will be prompted whether to Keep users or Delete. Those Users will be shifted over to Users without groups.
Multi-Select Groups
Check the box on the left side of the Group to select the Group. Check additional boxes to Multi-select. The option to delete those groups will appear at the bottom of the screen.
Users
The top two buttons toggle between showing all Groups and all Users.
Edit User
To ![]() Edit the User:
Edit the User:
- Hover over a User
- Click the Edit icon.
Here you will be able to edit the following fields:
General
Basic user settings for Username, Email, Default Group, Additional Groups, and Access Expiration.
Account Name
Set the Account's Username. This is the value used to sign in.
Set the Account's email address. This value is only used if email alerts are configured.
Group
Set which group the Account belongs to.
Additional Groups
Add the Account to additional groups using the drop down.
Access Expiration
Set the Account's access to expire after a certain point.
Security
Location where an Administrator can change a user's password.
Other
Various other user configurations.
Single Sign-On Config
Select a single sign-on configuration to associate the account with from the drop-down list. If a user was created as an SSO user, this field will be set automatically.
Mobile PIN
Set this field to securely login to BEAM or VALT Cue.
Control Type
Toggle between the Joystick and Compass PTZ Control types.
Card Number
Set this field if using a VALT Card Reader to start recordings.
Rooms
Use this area to add additional room access to this user only, in addition to the access already provided at the Group level.
Display Name
Use this are to set a Display Name for the user. The Display Name will be shown within all VALT pages, although the user will still user their Account Name for logging in.
Video Access
This section defines whose past and ongoing recordings a user will have access to based on who authored the recordings, in addition to the access already provided at the Group level. To give the user access to another author's recordings, simply check the box next to that author's name.
Platform Access
Use this section to set specific days and times for users to access VALT.
Save
Click the Save button to save any changes made to the user.
Import
Use this section to add users to VALT from an external source.
LDAP Import
Use this section to search your Active Directory for an individual user and import them into VALT.
Sync Schedules
Use this section to automatically import groups from your active directory into your VALT groups.
Import from File
Upload a list of local users to a certain group in a TXT, XLS, XLSX, or CSV file.
Single Sign-On
View your single sign-on configuration.
Add a User or Group
To add a User or Group:
- Click the + Add button.
- Select Add group or Add user.
- Fill out the * required fields.
Templates
Use this section to customize the templates to your workflow.
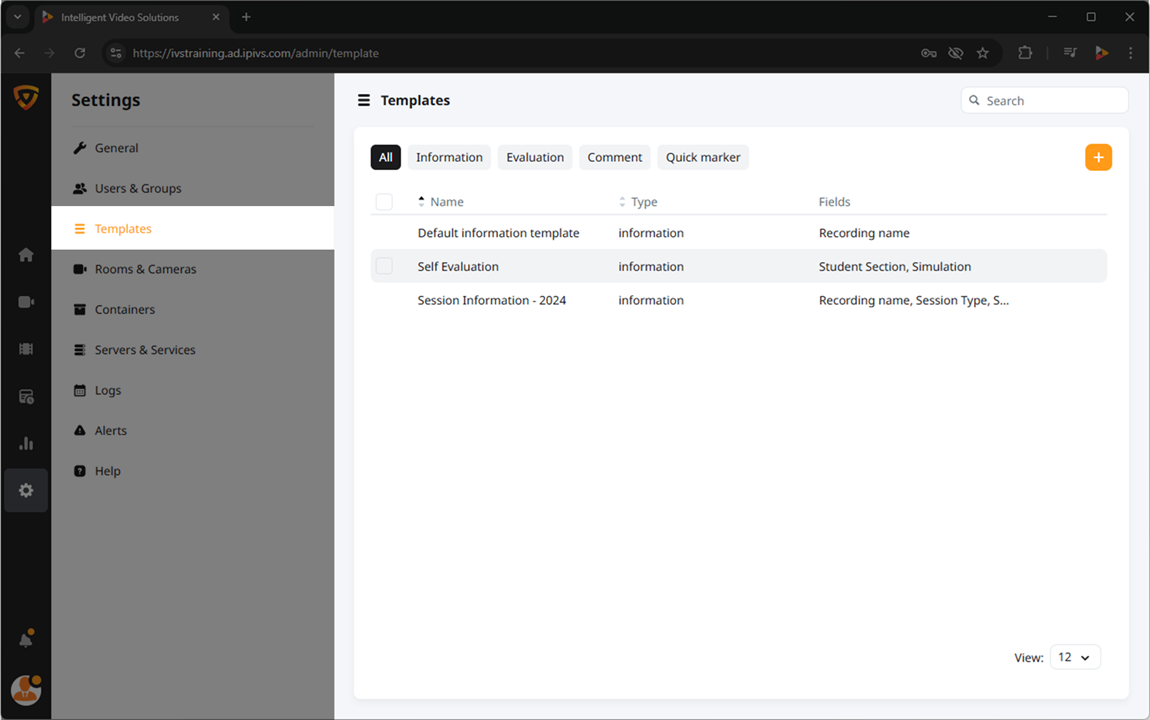
Display by Template Type
Filter buttons can be used to display only certain Template Types (Info, Evaluation, Comment, or Quick marker).
Add New Template
General
- Give the template a name.
- Select the type.
- Information Templates can be given a duration for the recording.
- Add the fields to your template.
- Save the template.
- Assign the template to the groups that will be using the template.
Template Fields
Add fields to be completed by users who utilize the template. Fields can be optional or required.
Copy Template
Hover over a template and select the Copy button to create a second template with similar settings. The second template will be named 'Original Template' (Copy).
Edit Template
To ![]() Edit a template:
Edit a template:
- Hover over a Template
- Click the Edit icon.
Delete Template
To permanently ![]() Delete the Template:
Delete the Template:
- Hover over an existing Template
- Click the
 Delete icon.
Rooms & Cameras
The Rooms & Cameras page is used during initial setup of the VALT system to add your devices and sort them into Rooms. After installation, the information stored here can be helpful to identify the configuration and make edits as needed.
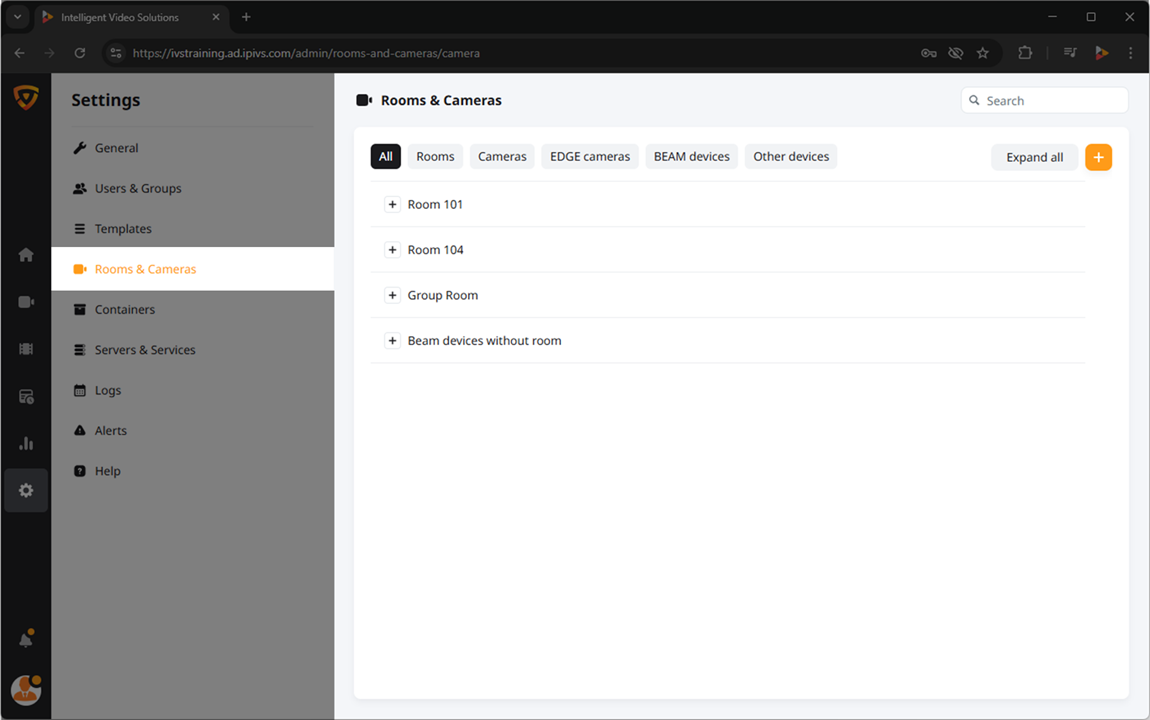
Use the following options to Navigate the Rooms & Cameras page.
Display by category
The buttons along the top can be used to display all Rooms & Devices or individual categories: (Cameras, EDGE Cameras, BEAM devices, or Other devices).
Expand/Collapse View
The Expand all button is used to open up every room and view each room’s devices. Alternatively, you can click the plus button next to any room to expand only that room.
Modifying Rooms and Devices
Use these options during initial setup of the VALT system to add your devices and sort them into Rooms.
Add a New Room or Device
Click the + Add button to configure a new room or device.
Adding a Room
When adding a Room, you will need to configure the following fields:
Name
The Name field is what will be displayed as the Room name in the other sections of VALT.
Container
Use this drop down to add the room to the appropriate container.
Select view grid
This option allows you to select how the devices will be displayed in both the Observe and Review sections. This will resize to match the number of devices automatically.
Media server
This drop down allows you to assign the Room to a particular media server. All recordings done in that room will be stored on that media server.
Save
Click the Save button to save your changes.
Adding a Camera
When adding a Camera, you will need to configure the following fields:
Brand
Use the drop down to select either Axis or Epiphan as the device brand, matching the brand of the device you are configuring.
Name
The Name field is what will be displayed as the camera name in the other sections of VALT.
IP address
Input the IP Address of the camera in this field.
HTTP port
RTSP port
Username
Input the camera username here.
Password
Input the camera password here.
Media server
Rooms
Assign the camera to any rooms that it will be part of.
Save
Click the Save button to save your changes.
Adding an EDGE camera
When adding an EDGE camera, you will need to configure the following fields:
Name
The Name field is what will be displayed as the camera name in the other sections of VALT.
Serial number
Input the camera Serial number here.
Media server
Assign the camera to the appropriate Media server.
Rooms
Assign the camera to any rooms that it will be part of.
Save
Click the Save button to save your changes.
Adding a BEAM device
When adding a BEAM device, you will need to configure the following fields:
Name
The Name field is what will be displayed as the device name in the other sections of VALT.
Media server
Assign the BEAM device to the appropriate Media server. All video uploads will be stored on that Media server.
Rooms
Save
Click the Save button to save your changes.
Adding Other devices
When adding an encoder, you will need to configure the following fields:
Name
The Name field is what will be displayed as the device name in the other sections of VALT.
RTSP url
Input the RTSP url of the device. The default format for IVS's encoders is rtsp://<device ip>/live/1_0
Media server
Assign the device to the appropriate Media server. All video uploads will be stored on that Media server.
Rooms
Assign the BEAM device to any rooms that it will be part of.
Save
Click the Save button to save your changes.
Edit a Room
Hover over a Room and click ![]() Edit to Edit the Room setup.
Edit to Edit the Room setup.
Delete a Room
Edit a Device
Select ![]() More, then Edit Device to make changes to the device’s setup.
More, then Edit Device to make changes to the device’s setup.
Remove a Device
Select ![]() More, then Remove Device to make changes to the device’s configuration.
More, then Remove Device to make changes to the device’s configuration.
Servers & Services
This section is used to configure the media server, add additional media servers, and set up integrations with Transcription service, Active Directory, and SSO.
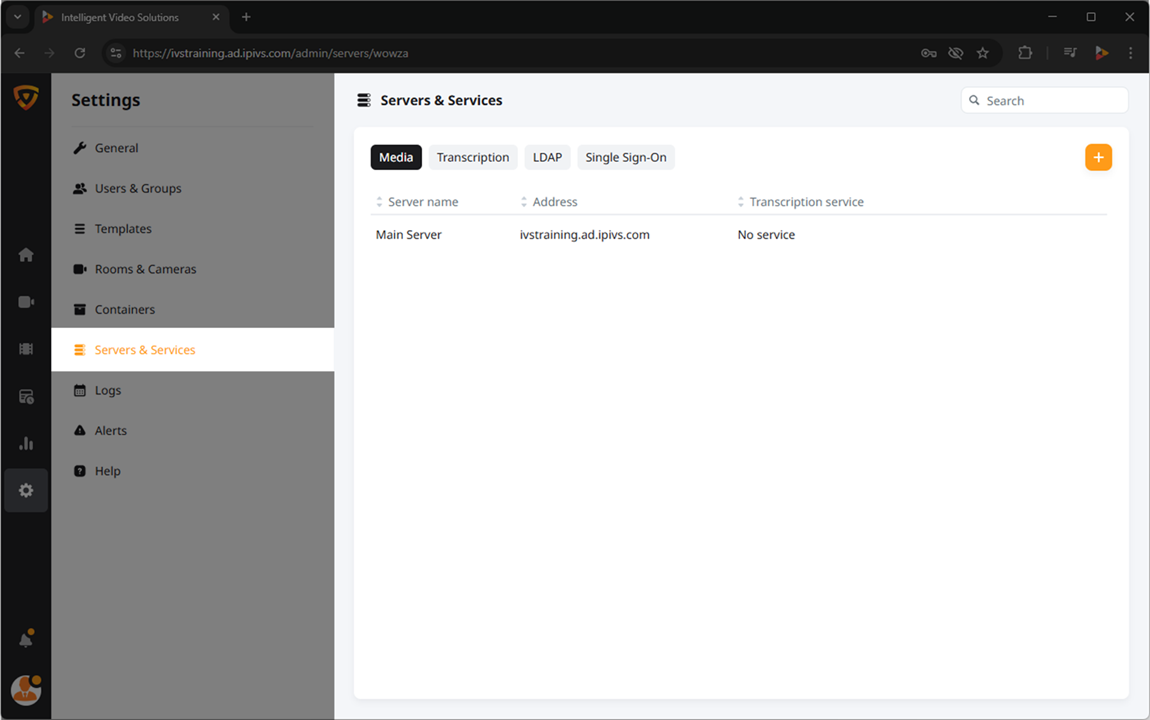
Display Various Servers/Services
The top buttons can be used to display media servers, transcription server, LDAP server, and Single Sign-On configuration for editing or deleting as necessary.
Add New Server/Service
Click the + button to configure a new server or service.
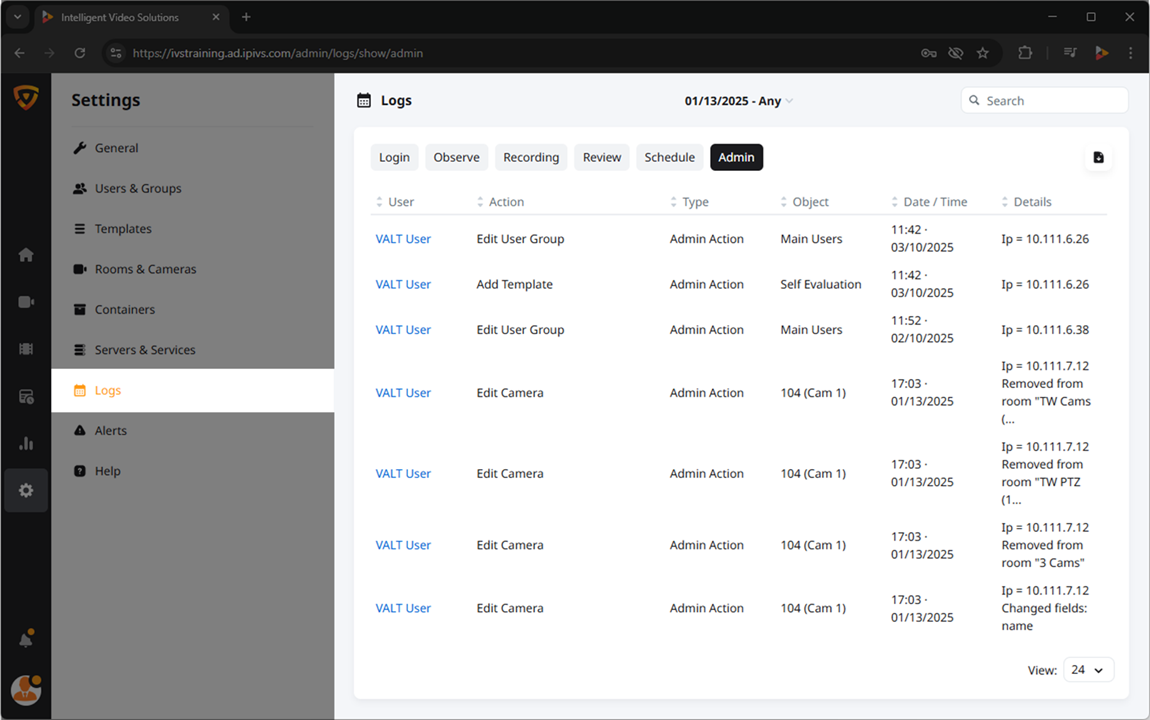
Logs
The Logs section contains a record of all actions taken on the VALT system, sorted by the sections of VALT.
The following options appear to Navigate through the Logs section.
Date Range
The date range at the top will filter out results. Default date range is set to Any.
Search
Typing information into this box will display matching results.
Display by Log type
The top buttons can be used to display various types of recorded logs.
Export Logs
The ![]() Export button can be used to download a PDF or CSV summary of the information associated with the results displayed.
Export button can be used to download a PDF or CSV summary of the information associated with the results displayed.
Content
Here is an overview of the logs that are located under each heading.
Login
The Login logs record the time and user details of all successful logins, failed logins, and successful logouts. Additionally, the IP address of the computer being used to access VALT is recorded.
Observe
The Observe logs record all actions taken in the Observe section of VALT, with the exception of Recording actions, which are logged in the Recording logs. Each entry will include the user, action, room, and time of the action.
Recording
The Recording logs record all actions taken to start, stop, pause, resume, or prepare a recording. This includes any recordings that are started via a physical accessory, such as a Start/Stop button or a card reader. Additionally, all schedules will be logged here as they start and stop, or if they are prevented from started by an in-progress recording.
Review
The Review logs record all actions taken in the Review section of VALT. These logs will note the user, action taken, name of recording that the action is performed on, and the time of the action.
Schedule
The Schedule logs record all actions taken in the Schedule section of VALT. These logs will note anytime a schedule is created, deleted, or edited, as well as any Exceptions.
Admin
The Admin logs record all actions taken in the Settings section of VALT. These logs will include any edits made in any of the Settings sections, including the user who made the change and the time that the change occurred.
Alerts
The Alerts section displays cameras/streaming devices that have gone offline/online.
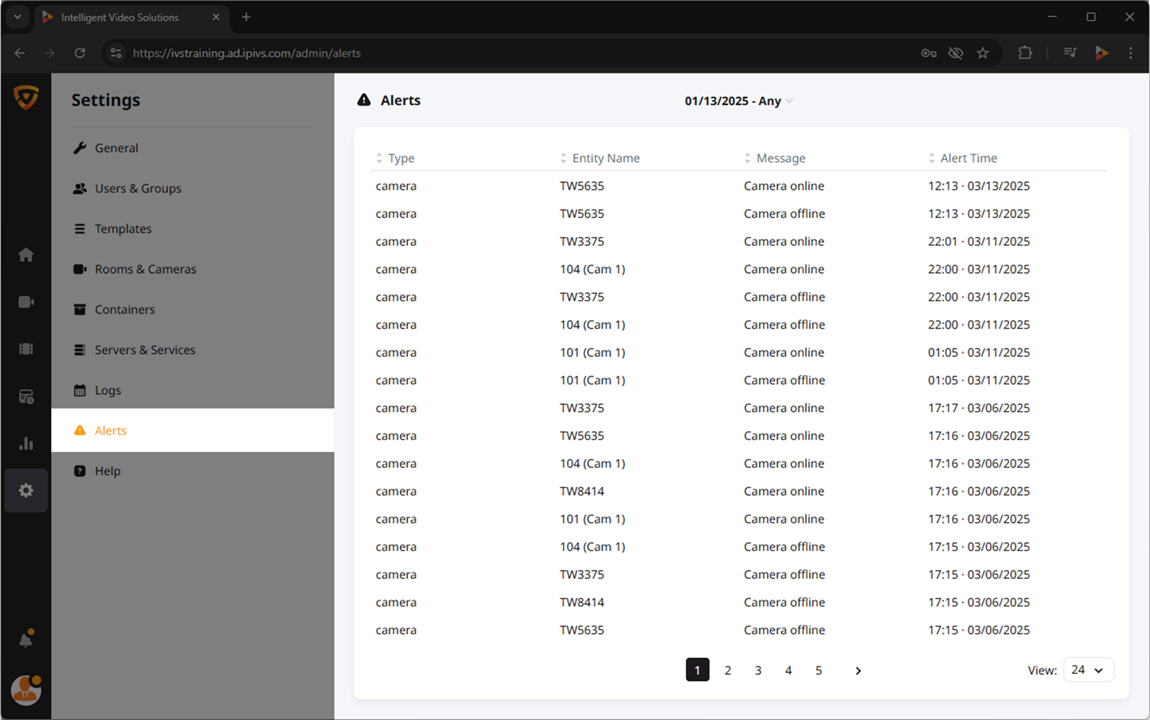
These are the tools for reviewing your system alerts.
Date Range
The date range at the top will filter out results. Default date range is set to Any.
Sortable Column Headers
Clicking on any of these will sort results alphabetically on the selected column.
Paginator
If multiple pages of results are present (12, 24, or 48 based on view), You can use this to navigate between pages.
Help
The Help section allows you to create custom resources for your organization to access via the Help section. To access the Help resources, users should click on their user profile icon in the bottom left corner and select the Help option.

View Help Content
To preview existing help content, you may click the Expand all button. This will display the text of each help entry. To hide the text, click the Hide all button.
Modifying Help Content
Use the following options to modify your custom help content.
Add Help Content
Click the Expand all button or the arrow next to any Help topic to display the content.
Edit Help Content
Click the + Add button to begin creating a new Help topic.
Delete Help Content
Hover over a Help topic and select the ![]() Delete icon to permanently delete the topic.
Delete icon to permanently delete the topic.