Difference between revisions of "IVS Wiki talk:BEAM Manual"
IVSWikiBlue (talk | contribs) |
IVSWikiBlue (talk | contribs) |
||
| Line 1: | Line 1: | ||
{{Article - Manual | content = | {{Article - Manual | content = | ||
| + | <h1>Getting Started</h1> | ||
| + | {{Manual lvl 2 | title = Logging In | content = | ||
| + | Before using the BEAM application, users must first sign in. | ||
| + | |||
| + | <ol> | ||
| + | <li>Enter your <b>username</b></li> | ||
| + | <ul> | ||
| + | <li><em>BEAM usernames are the same as the username used to log into VALT.</em></li> | ||
| + | </ul> | ||
| + | {{hr - 2}} | ||
| + | <li>Enter your <b>pincode</b>.</li> | ||
| + | <ul> | ||
| + | <li><em>Not all user accounts have a pincode. If you are unsure of your pincode, please reach out to your local VALT administrator.</em></li> | ||
| + | </ul> | ||
| + | </ol> | ||
| + | |||
| + | |||
| + | {{img - resize | file = BEAM Manual 2.0 Login 00.png}} | ||
| + | }} | ||
| + | |||
| + | |||
| + | {{Top of Page}} | ||
| + | {{hr}} | ||
| + | |||
| + | {{Manual lvl 2 | title = Main Screen | content = | ||
Once logged into BEAM, you will be greated to a camera view with a variety of buttons to perform actions. | Once logged into BEAM, you will be greated to a camera view with a variety of buttons to perform actions. | ||
| + | |||
| + | |||
{{img - resize | file = BEAM Manual 2.0 Navigation 00.png}} | {{img - resize | file = BEAM Manual 2.0 Navigation 00.png}} | ||
| + | }} | ||
| + | |||
| + | |||
| + | {{Top of Page}} | ||
| + | {{hr}} | ||
| + | |||
| + | {{Flexbox - Basis | left_size = 5 | right_size = 3 | left = | ||
<h1>Navigation</h1> | <h1>Navigation</h1> | ||
| + | |||
{{Manual lvl 2 | title = Connection Status | content = | {{Manual lvl 2 | title = Connection Status | content = | ||
| − | The {{img - tooltip | file = BEAM Manual 2.0 Navigation 01.png | text = Connection Status | width = | + | The {{img - tooltip | file = BEAM Manual 2.0 Navigation 01.png | text = Connection Status | width = 800px}} displays the current status of communication with the VALT server.}} |
| + | | right = | ||
| + | {{Aside - Helpful | hue = 260 | content = <center>Interactive <b>BEAM Navigation</b>. | ||
| + | {{Try it out | link = https://app.storylane.io/share/icfqzqy9tchh}}</center>}} | ||
}} | }} | ||
| − | + | <table class="wikitable" style="margin:auto"> | |
| + | <tr> | ||
| + | <th style="width:230px;text-align:right">BEAM can connect to VALT</th> | ||
| + | <td style="width:50px;text-align:center">{{img - no click | file = Beam online status-00.png | width = 100px}}</td> | ||
| + | </tr> | ||
| + | <tr> | ||
| + | <th style="text-align:right">BEAM cannot connect to VALT</th> | ||
| + | <td style="text-align:center">{{img - no click | file = Beam online status-01.png | width = 100px}}</td> | ||
| + | </tr> | ||
| + | </table> | ||
{{Top of Page}} | {{Top of Page}} | ||
{{hr}} | {{hr}} | ||
| − | {{Manual lvl 2 | title = | + | {{Manual lvl 2 | title = Logout | content = |
| − | The {{img - icon | file = Beam icob(sign-out-option).png | width = 16px}} {{img - tooltip | file = BEAM Manual 2.0 Navigation 02.png | text = Logout button}} will allow you to logout or disconnect BEAM from your VALT server | + | The {{img - icon | file = Beam icob(sign-out-option).png | width = 16px}} {{img - tooltip | file = BEAM Manual 2.0 Navigation 02.png | text = Logout button | width = 800px}} will allow you to logout or disconnect BEAM from your VALT server. |
| − | {{Aside - Warning | + | {{Aside - Warning | content = Switching servers will <b>delete</b> all videos that are not yet uploaded to VALT.}} |
| − | |||
}} | }} | ||
| Line 24: | Line 70: | ||
{{Manual lvl 2 | title = Prepare Recording | content = | {{Manual lvl 2 | title = Prepare Recording | content = | ||
| − | The {{img - icon | file = Beam icon(hour glass).png | width = 16px}} {{img - tooltip | file = BEAM Manual 2.0 Navigation 03.png | text = Prepare button}} is used to arm a room for an active recording. This option allows you to fill in all the information fields ahead of the recording. | + | The {{img - icon | file = Beam icon(hour glass).png | width = 16px}} {{img - tooltip | file = BEAM Manual 2.0 Navigation 03.png | text = Prepare button | width = 800px}} is used to arm a room for an active recording. This option allows you to fill in all the information fields ahead of the recording. |
| − | |||
}} | }} | ||
| Line 33: | Line 78: | ||
{{Manual lvl 2 | title = Flip Camera | content = | {{Manual lvl 2 | title = Flip Camera | content = | ||
| − | The {{img - icon | file = Beam icon(flip cam).png | width = 16px}} {{img - tooltip | file = BEAM Manual 2.0 Navigation 04.png | text = Flip Camera button}} allows users to toggle between the front and rear cameras of your device. | + | The {{img - icon | file = Beam icon(flip cam).png | width = 16px}} {{img - tooltip | file = BEAM Manual 2.0 Navigation 04.png | text = Flip Camera button | width = 800px}} allows users to toggle between the front and rear cameras of your device. |
| − | |||
}} | }} | ||
| Line 42: | Line 86: | ||
{{Manual lvl 2 | title = Record | content = | {{Manual lvl 2 | title = Record | content = | ||
| − | The {{img - icon color | file = Record.png}} {{img - tooltip | file = BEAM Manual 2.0 Navigation 05.png | text = Recording button}} will prompt the user to fill out an Information Template before beginning the reocrding. | + | The {{img - icon color | file = Record.png}} {{img - tooltip | file = BEAM Manual 2.0 Navigation 05.png | text = Recording button | width = 800px}} will prompt the user to fill out an Information Template before beginning the reocrding. |
| − | + | ||
| + | {{img - resize | file = BEAM Manual 2.0 Template 01.png}} | ||
}} | }} | ||
| Line 51: | Line 96: | ||
{{Manual lvl 2 | title = Stream | content = | {{Manual lvl 2 | title = Stream | content = | ||
| − | The {{img - icon | file = Beam icon(wifi-signal).png | width = 18px}} {{img - tooltip | file = BEAM Manual 2.0 Navigation 06.png | text = Stream button}} will allow the user to Stream or Stream and Record. Both options will allow the BEAM video stream to be viewable in VALT. The video will show up as a [[VALT_Manual_Observe#Filter|Stream]] in the VALT application. | + | The {{img - icon | file = Beam icon(wifi-signal).png | width = 18px}} {{img - tooltip | file = BEAM Manual 2.0 Navigation 06.png | text = Stream button | width = 800px}} will allow the user to Stream or Stream and Record. Both options will allow the BEAM video stream to be viewable in VALT. The video will show up as a [[VALT_Manual_Observe#Filter|Stream]] in the VALT application. |
| − | |||
}} | }} | ||
| Line 60: | Line 104: | ||
{{Manual lvl 2 | title = Files | content = | {{Manual lvl 2 | title = Files | content = | ||
| − | The {{img - icon | file = Beam icon(folder).png | width = 16px}} {{img - tooltip | file = BEAM Manual 2.0 Navigation 07.png | text = Folder button}} will show you recordings stored on this device and allow users to change their individual [[ | + | The {{img - icon | file = Beam icon(folder).png | width = 16px}} {{img - tooltip | file = BEAM Manual 2.0 Navigation 07.png | text = Folder button | width = 800px}} will show you recordings stored on this device and allow users to change their individual sync settings. |
| + | |||
| + | |||
| + | Users will have access to two methods of syncing their files to VALT. | ||
| + | #[[#Manual Upload|Manual Upload]] <em>(Default)</em> | ||
| + | #[[#Auto Sync|Auto Sync]] | ||
}} | }} | ||
| + | |||
{{Manual lvl 3 | title = Manual Upload | content = | {{Manual lvl 3 | title = Manual Upload | content = | ||
| − | + | If Auto Sync is disabled, users will need to <b>manually sync</b> their recorded videos. | |
| + | {{Aside - Warning | hue = 50 | content = The iPad must be able to communicate with VALT to be able to upload the video to VALT. [[Network_Requirements#BEAM_.28Mobile_Application.29 | Click here]] to learn about the BEAM network requirements.}} | ||
| − | |||
| + | {{Flexbox | left = | ||
In the Files folder, you will see a list of your videos. | In the Files folder, you will see a list of your videos. | ||
| − | + | *The <b>up arrow</b> indicates the video has not been synced to the VALT server. | |
| − | + | *You can click the up arrow to initiate uploading the video. | |
| − | + | *A <b>progress circle</b> will appear after the arrow is pressed. | |
| − | + | *A <b>checkmark</b> will appear when the recording is done uploading to the server. | |
| − | + | | right = | |
| − | |||
<table class="wikitable" style="margin:auto"> | <table class="wikitable" style="margin:auto"> | ||
<tr> | <tr> | ||
| Line 93: | Line 143: | ||
</tr> | </tr> | ||
</table> | </table> | ||
| + | }} | ||
| + | |||
| + | {{img - resize | file = BEAM Manual 2.0 Files 01.png}} | ||
}} | }} | ||
| Line 106: | Line 159: | ||
{{hr}} | {{hr}} | ||
| − | {{ | + | {{Flexbox | left = |
| − | {{img | + | Auto Sync is disbaled by deafult. Users can be enable by toggling <b>Auto Sync Files</b>. |
| − | < | + | | right = |
| + | <table class="wikitable" style="margin:auto"> | ||
| + | <tr> | ||
| + | <th style="width:150px;text-align:right">Auto Sync Disabled</th> | ||
| + | <td style="width:50px;text-align:center">{{img - no click | file = Beam auto sync icon-01.png | width = 30px}}</td> | ||
| + | </tr> | ||
| + | <tr> | ||
| + | <th style="text-align:right">Auto Sync Enabled</th> | ||
| + | <td style="text-align:center">{{img - no click | file = Beam auto sync icon-00.png | width = 30px}}</td> | ||
| + | </tr> | ||
| + | </table> | ||
}} | }} | ||
| + | |||
| + | {{img - resize | file = BEAM Manual 2.0 Files 02.png}} | ||
}} | }} | ||
Latest revision as of 11:07, 29 April 2025
Getting Started
Logging In
Before using the BEAM application, users must first sign in.
- Enter your username
- BEAM usernames are the same as the username used to log into VALT.
- Enter your pincode.
- Not all user accounts have a pincode. If you are unsure of your pincode, please reach out to your local VALT administrator.

Main Screen
Once logged into BEAM, you will be greated to a camera view with a variety of buttons to perform actions.

Connection Status
The Connection Status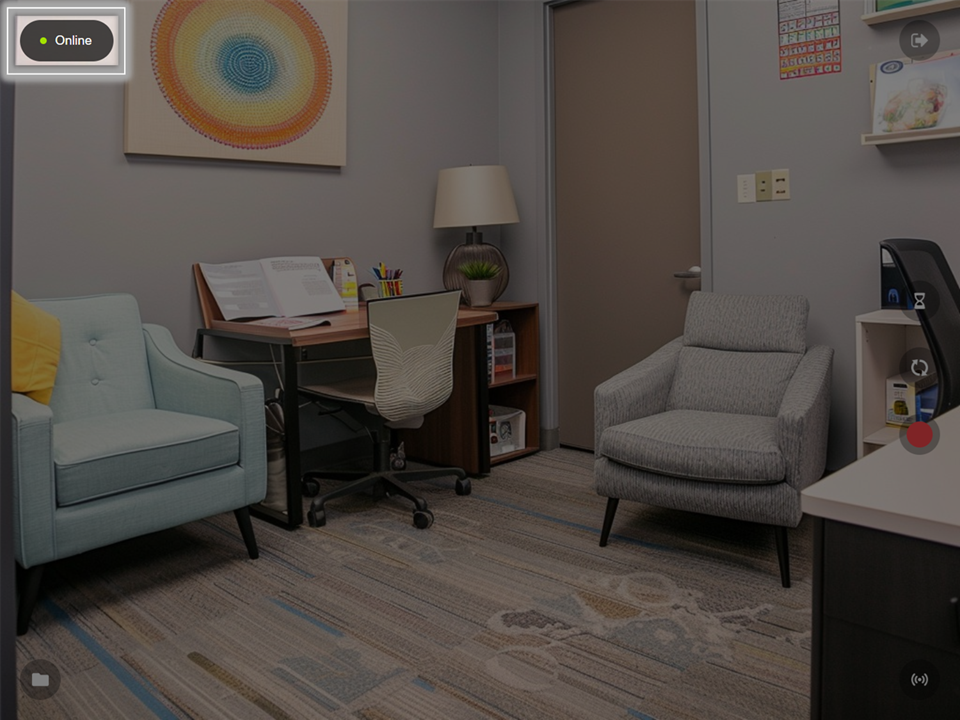 🖼️ displays the current status of communication with the VALT server.

Try it out!
| BEAM can connect to VALT | |
|---|---|
| BEAM cannot connect to VALT |
Logout
The ![]() Logout button
Logout button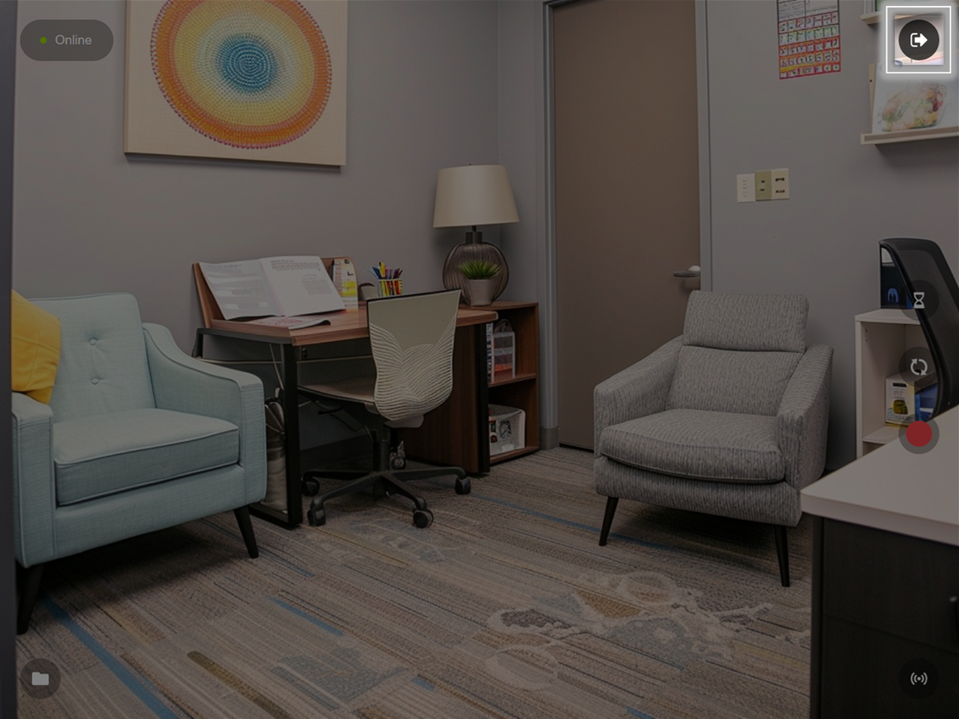 🖼️ will allow you to logout or disconnect BEAM from your VALT server.
Prepare Recording
The ![]() Prepare button
Prepare button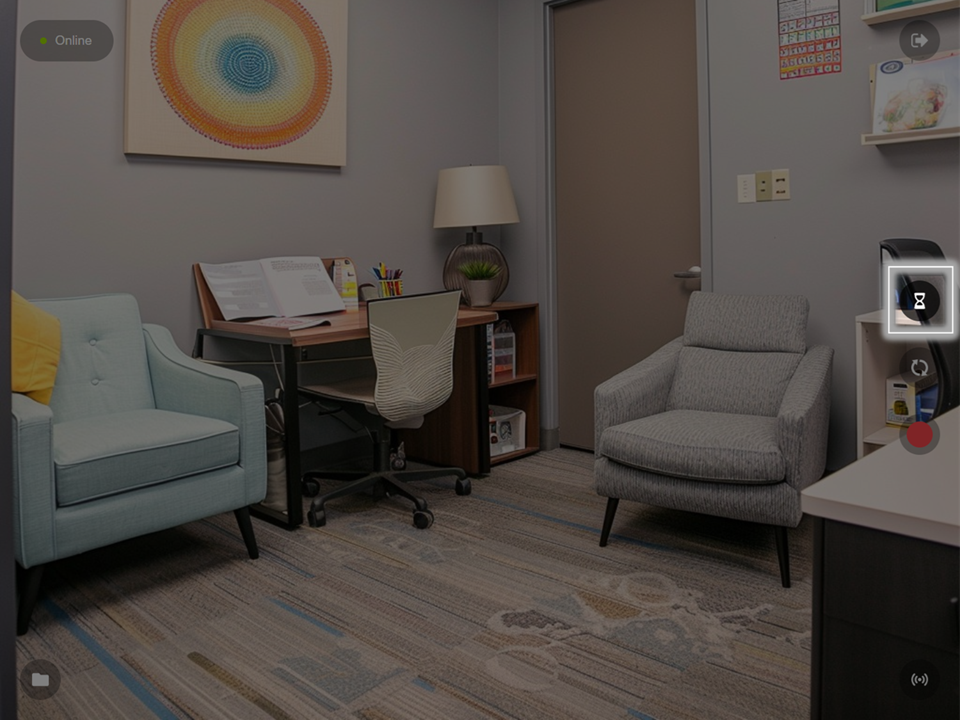 🖼️ is used to arm a room for an active recording. This option allows you to fill in all the information fields ahead of the recording.
Flip Camera
The ![]() Flip Camera button
Flip Camera button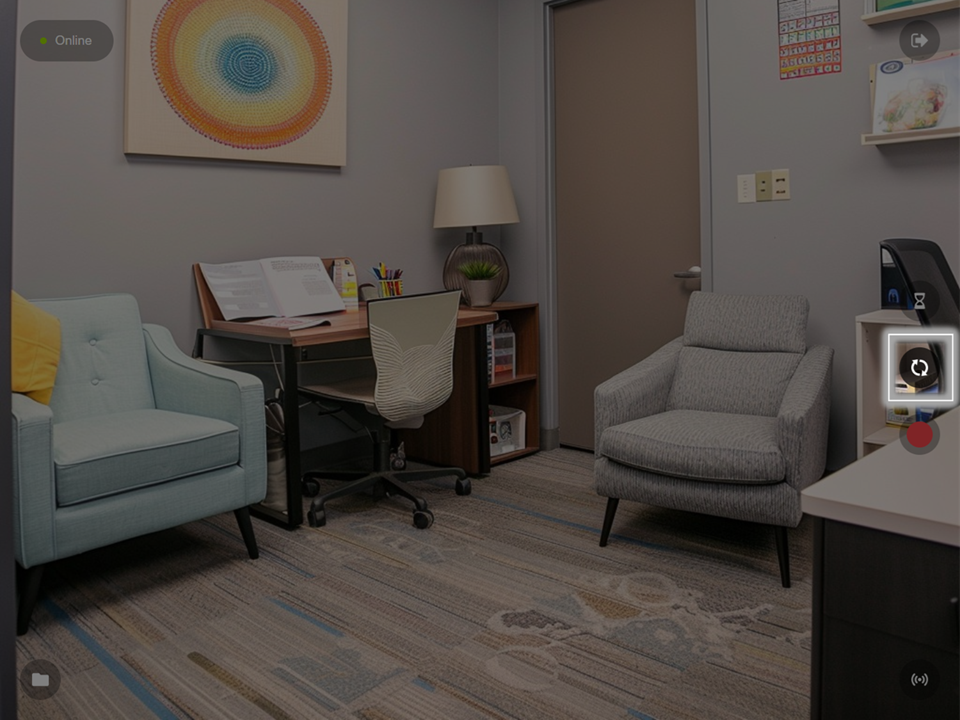 🖼️ allows users to toggle between the front and rear cameras of your device.
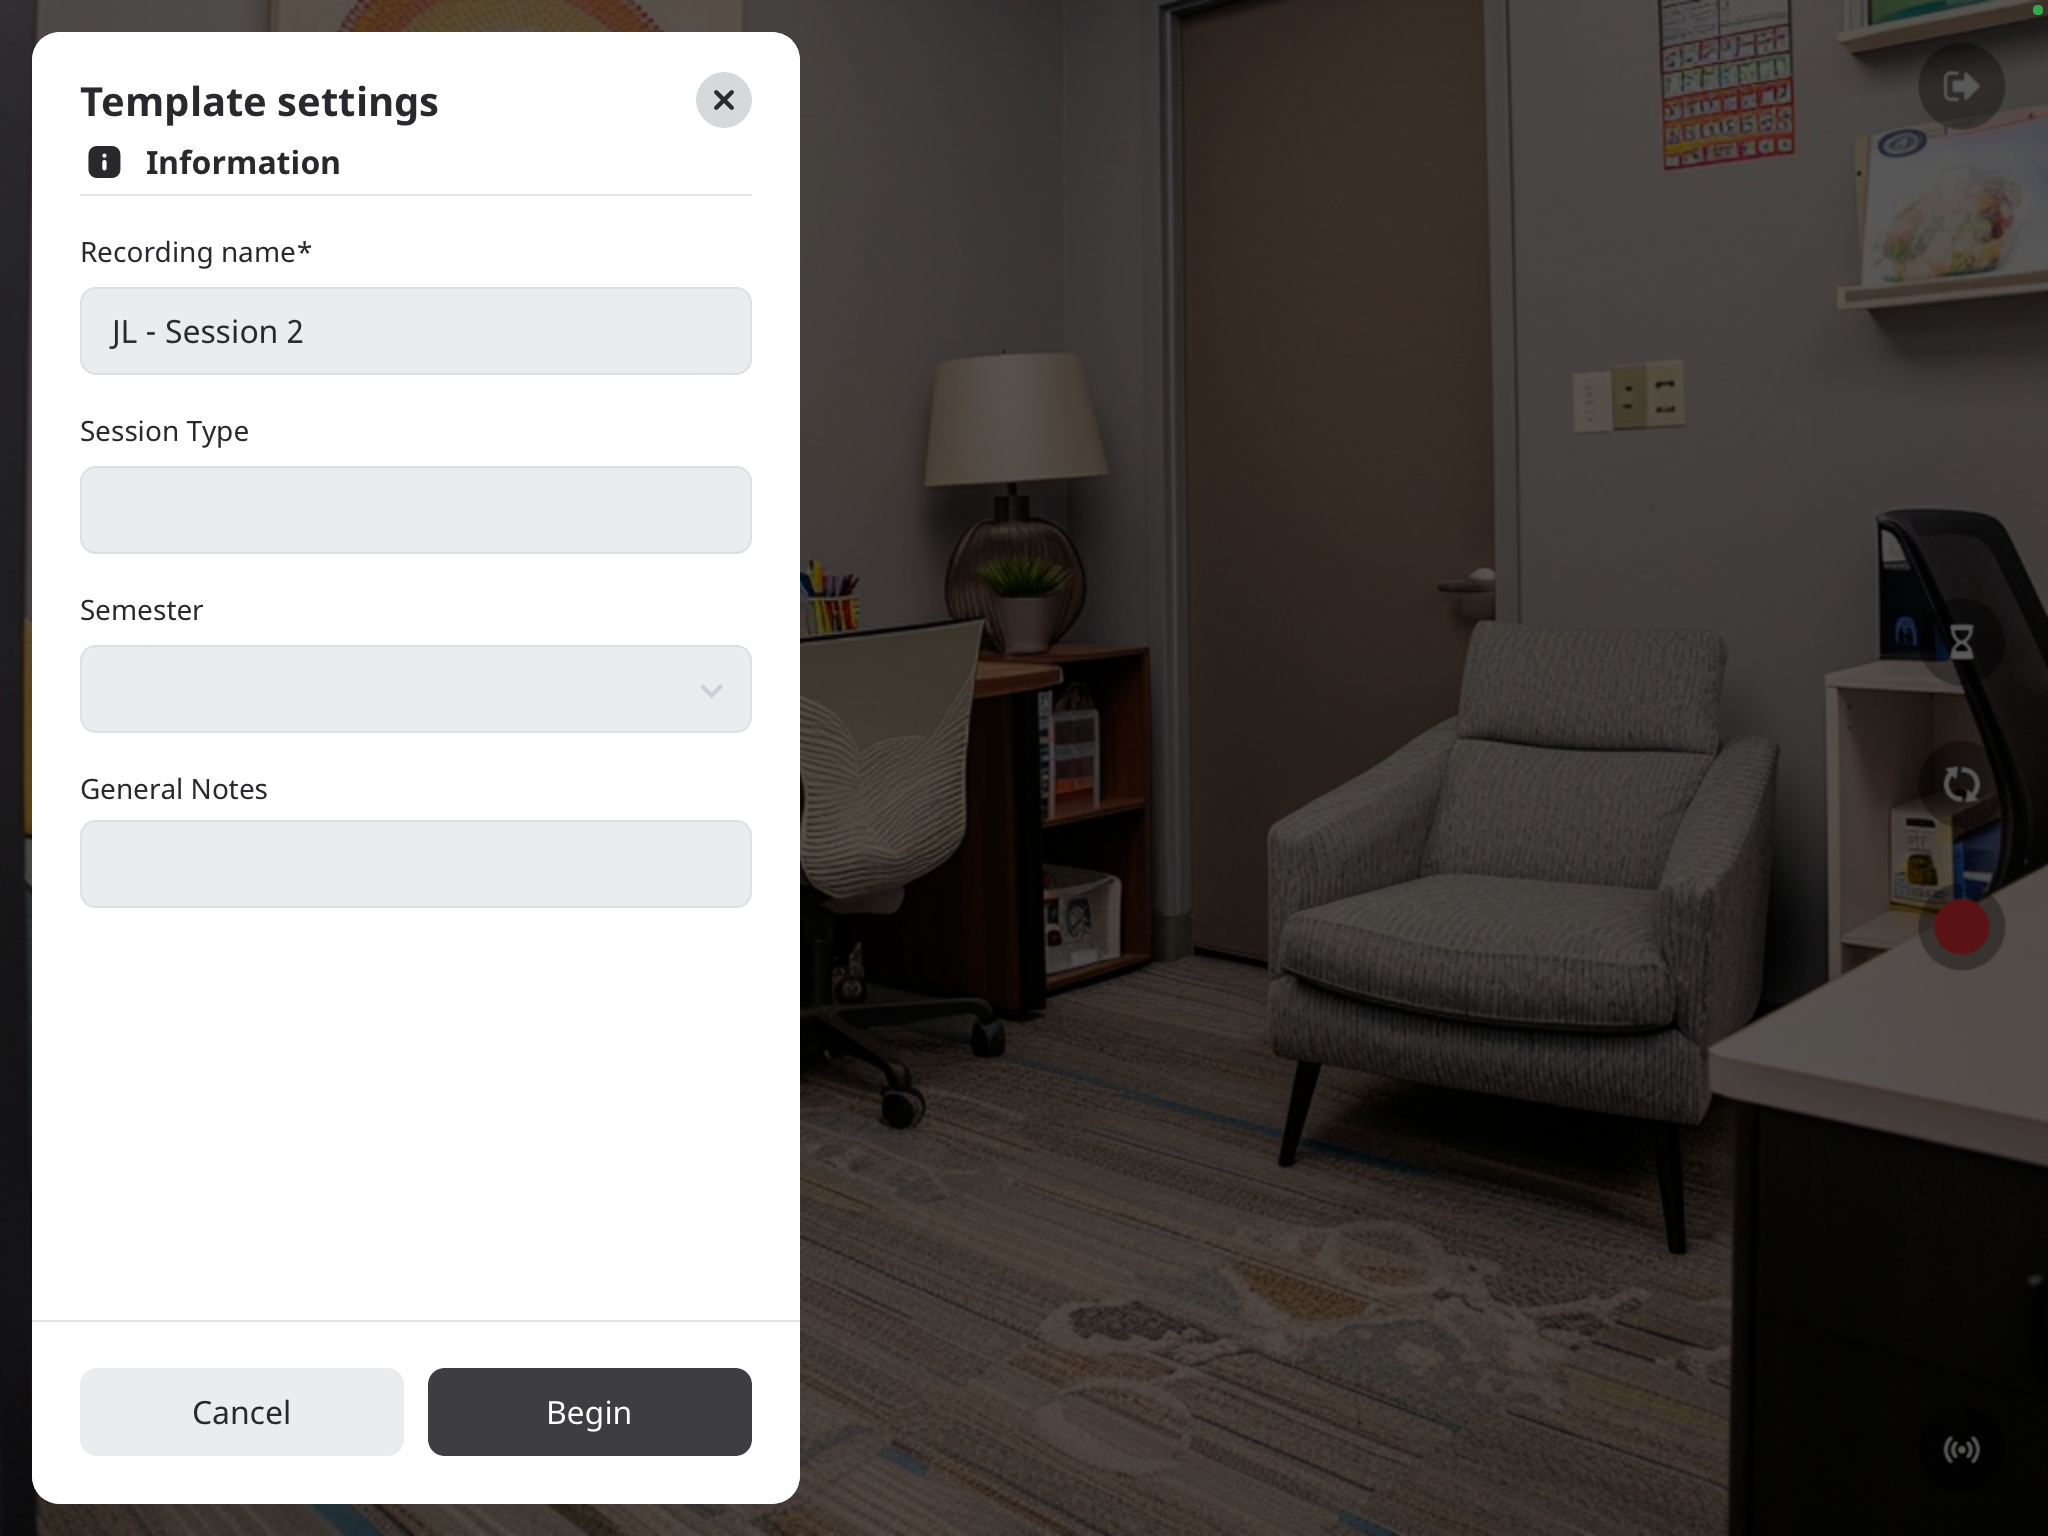
Record
The ![]() Recording button
Recording button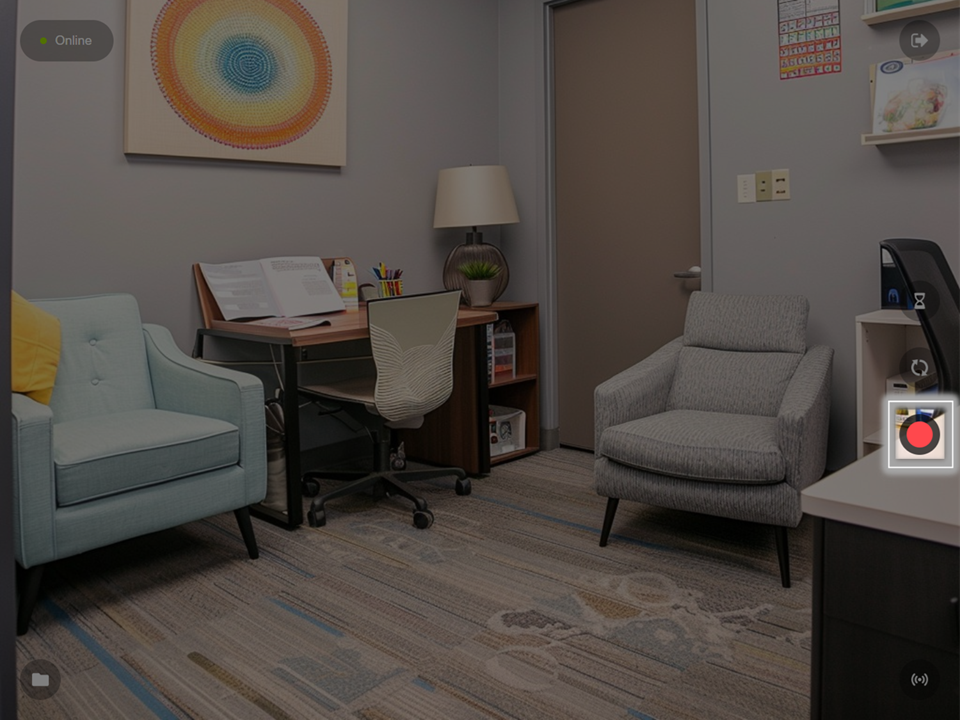 🖼️ will prompt the user to fill out an Information Template before beginning the reocrding.
Stream
The ![]() Stream button
Stream button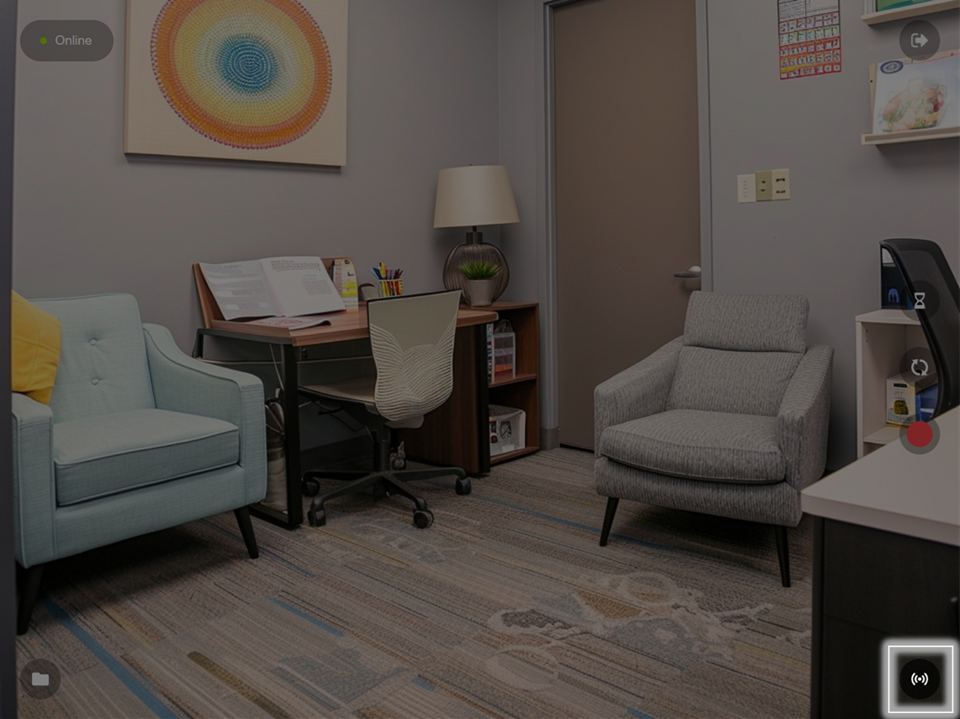 🖼️ will allow the user to Stream or Stream and Record. Both options will allow the BEAM video stream to be viewable in VALT. The video will show up as a Stream in the VALT application.
Files
The ![]() Folder button
Folder button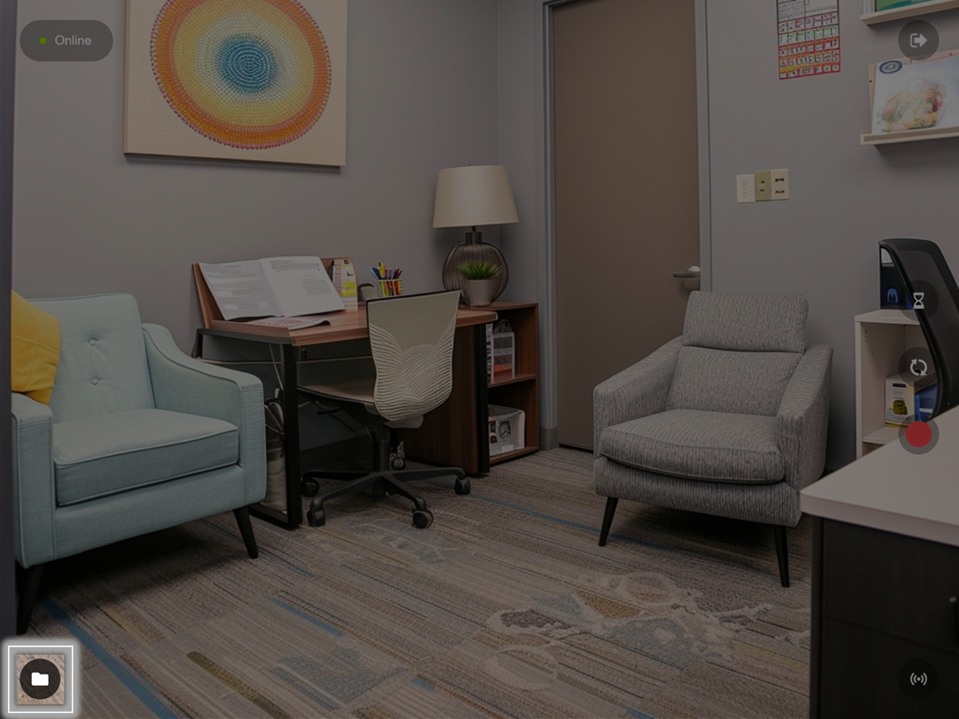 🖼️ will show you recordings stored on this device and allow users to change their individual sync settings.
Users will have access to two methods of syncing their files to VALT.
- Manual Upload (Default)
- Auto Sync
Manual Upload
If Auto Sync is disabled, users will need to manually sync their recorded videos.
In the Files folder, you will see a list of your videos.
- The up arrow indicates the video has not been synced to the VALT server.
- You can click the up arrow to initiate uploading the video.
- A progress circle will appear after the arrow is pressed.
- A checkmark will appear when the recording is done uploading to the server.
| Ready to upload | |
|---|---|
| Preparing to upload | |
| Upload in progress | |
| Upload complete |
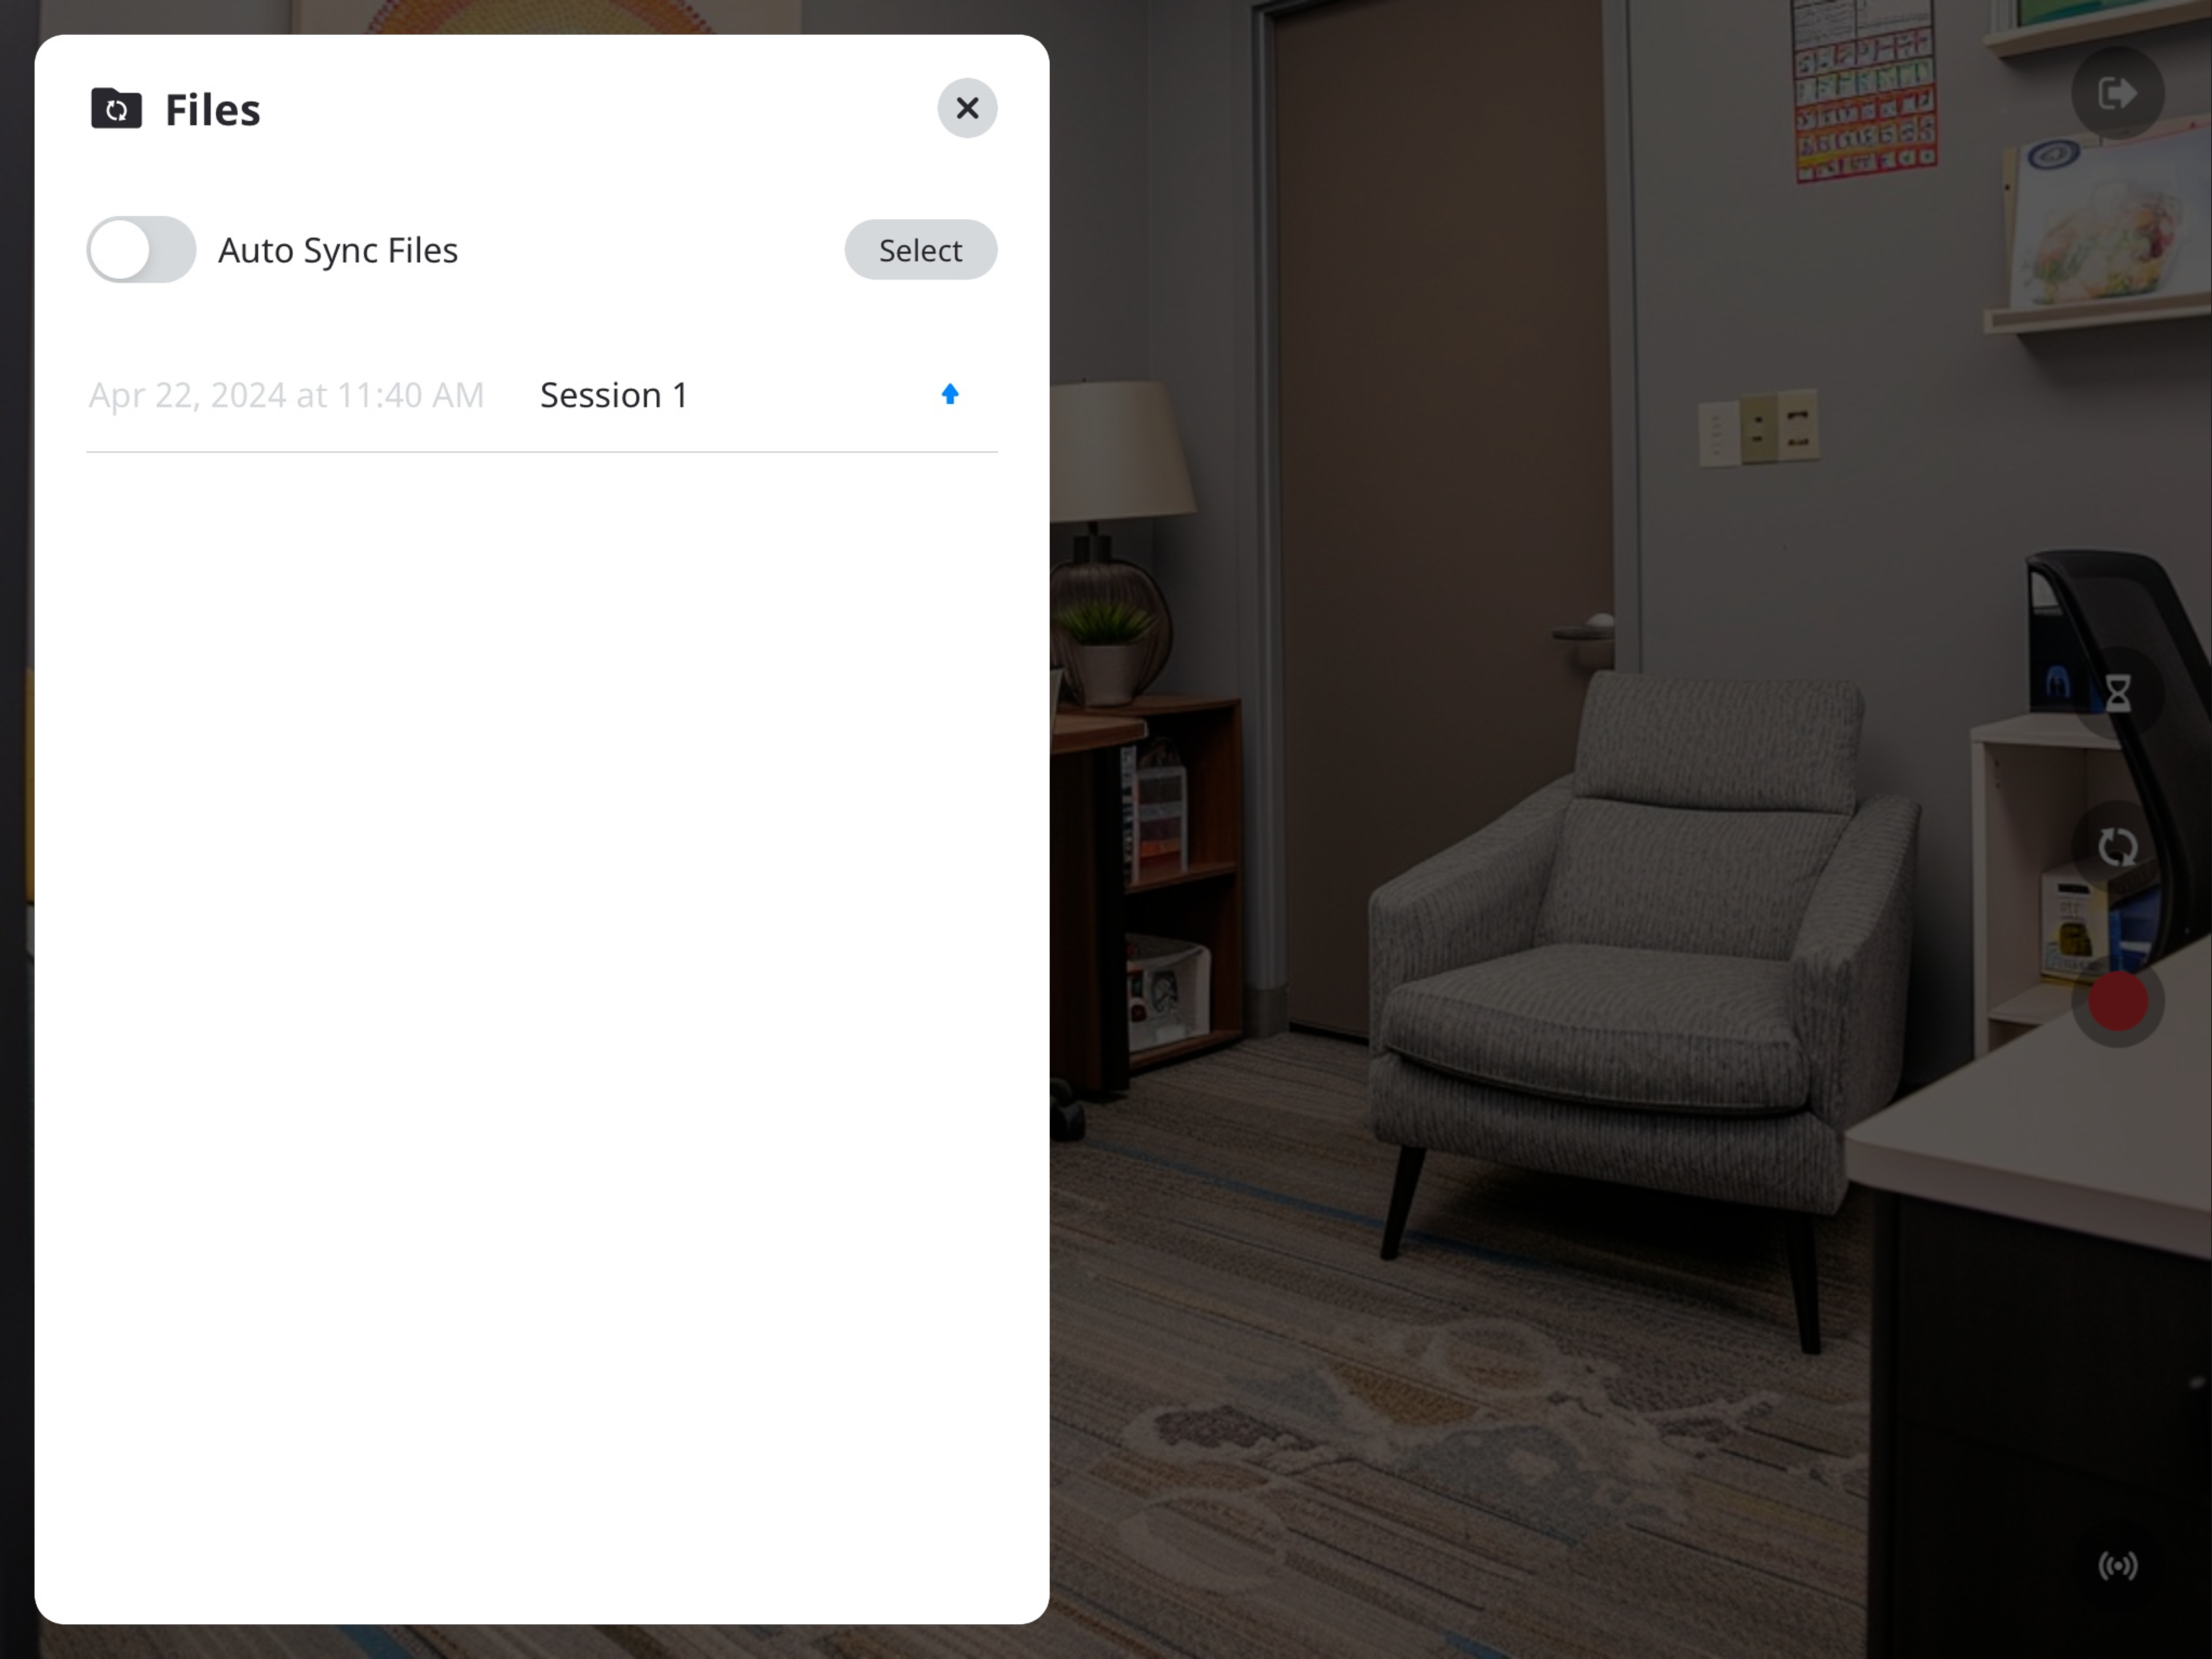
Auto Sync
Auto Sync is a feature in BEAM that allows a user to automatically upload a video from the BEAM application to the VALT server. This screen will list any recordings that have been made, but not uploaded to the server.
Auto Sync is disbaled by deafult. Users can be enable by toggling Auto Sync Files.
| Auto Sync Disabled | |
|---|---|
| Auto Sync Enabled |
