Difference between revisions of "IVS Wiki:VALT 6 Manual - Review"
IVSWikiBlue (talk | contribs) |
IVSWikiBlue (talk | contribs) |
||
| Line 174: | Line 174: | ||
<h1>Table View</h1> | <h1>Table View</h1> | ||
| − | {{Manual lvl 2 | title = Sortable Column Headers | content = }} | + | |
| + | {{Manual lvl 2 | title = Sortable Column Headers | content = Clicking on any of the tabs will sort the results in ascending or decending order, based on the content in that tab.}} | ||
| + | |||
| + | {{img - resize | file = VALT 6.3 Manual-Review 07.png}} | ||
Revision as of 15:35, 12 March 2025
Search Screen
Date Range
The Date Range is used to filter the display results based on a date range.
✎The default range is defined by the active users group settings.
- Click the Date Range Filter.
- Select a start date.
- Select an end date.
View Mode
The view mode button can be used to toggle between a list view and a thumbnail view of the results.
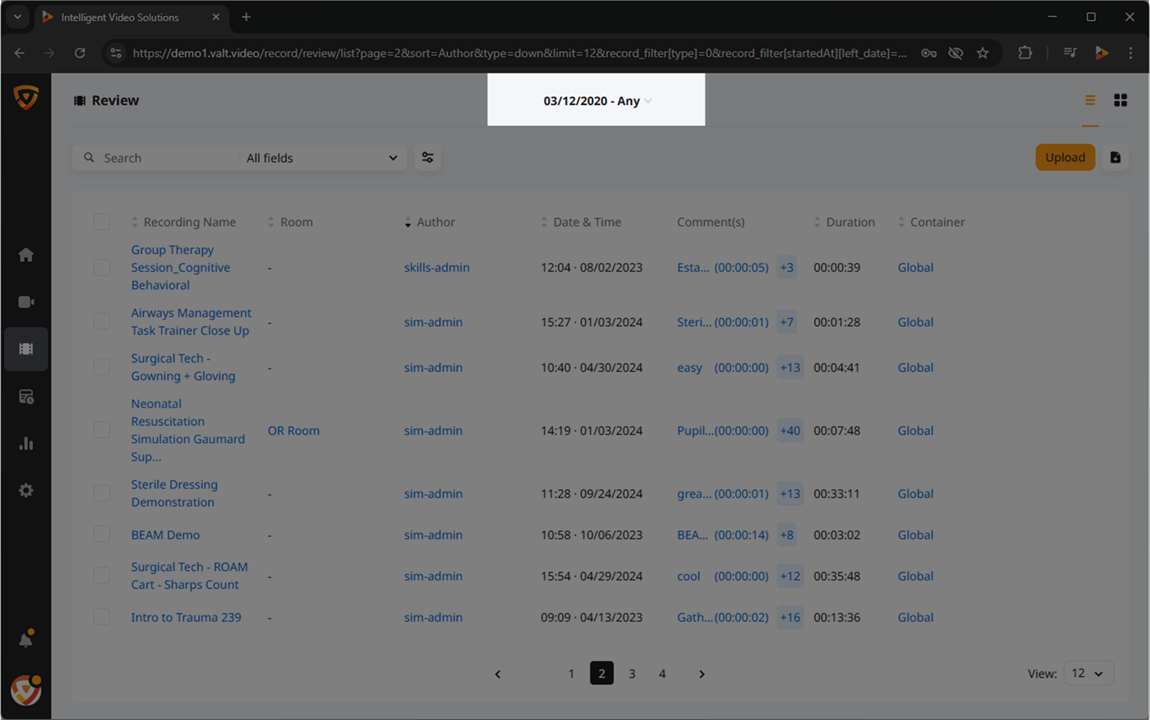
List View
The ![]() list view is the most common view for recordings. This view allows users to see the most information assigned to the video. This view can be customized to display the custom information being captured in the information template.
list view is the most common view for recordings. This view allows users to see the most information assigned to the video. This view can be customized to display the custom information being captured in the information template.

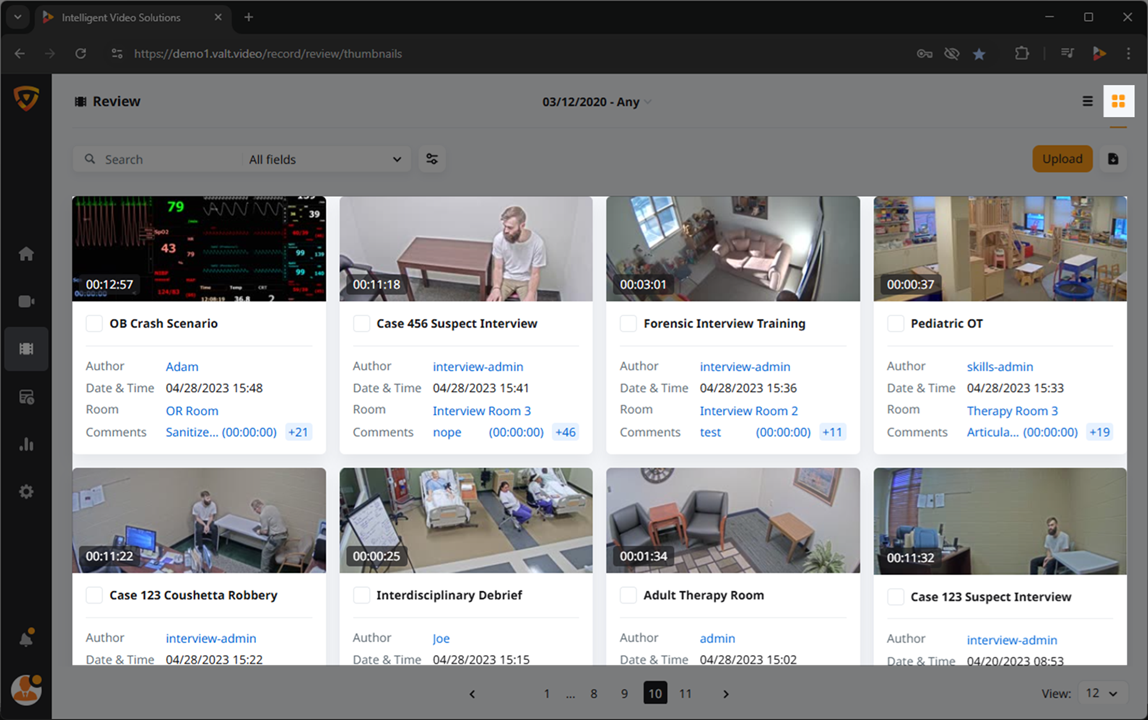
Thumbnail View
The ![]() thumbnail view allows users to see an image preview of the reocrding.
thumbnail view allows users to see an image preview of the reocrding.
✎The image in this preview cannot be changed.
Search
The ![]() Search box can be used to filter results based on any search query.
Search box can be used to filter results based on any search query.
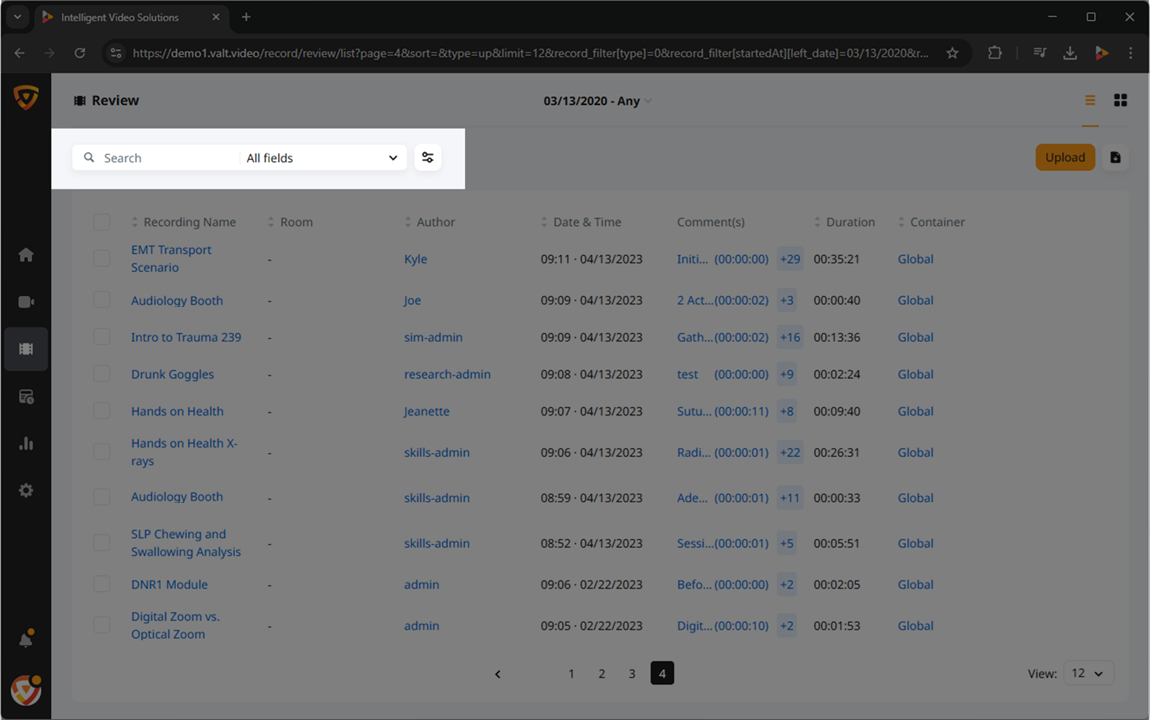
Search a Specific Field
1. Open the All fields drop down box.
2. Select the field you would like to filter by.
You can change the dropdown to limit search results to one of the following fields:
- All feilds (default)
- Recording name
- Information fields
- These are the custom fields that you fill out when starting a recording.
- Room name
- Camera name
- Author
- Comments
Search Filters
Search filters allow users to set up a specific search result for reuse and can use a combination of the following:
- Information
- Creates a filter that uses fields from your information templates.
- Rooms
- Creates a filter that uses a specific room or rooms from your application.
- Users
- Creates a filter that pulls recordings authored by certain users or groups.
- Dates
- Creates a filter that uses only certain rolling quick dates/weeks (e.g. Last 30 days), or a range of specific calendar days (e.g. Feb 2-Feb 9, 2025).
Add Filter
- Click the
 Filter icon.
 - Click + Add filter.
- Name your filter.
- Click + Add search field.
- Select the field type you would like to add.
- Click Save and Apply.
- Optional Steps:
- Add additional fileds by clicking + Add search field.
- Go to the bottom and filter by the following criteria — Rooms, Users & Groups, Date
Apply Filter
- Click the Filter icon.
- Click on the filter you would like to use.
When a filter is applied, a ✔ will appear next to the ![]() Filter icon.
Filter icon.
Edit Filter
- Click the Filter icon.
- Click the
 Edit icon.
 - Edit your filter.
- Click Save and Apply.
Remove Filter
- Click the Filter icon.
- Click the
 Delete icon.
 - Click Delete to confirm your action.
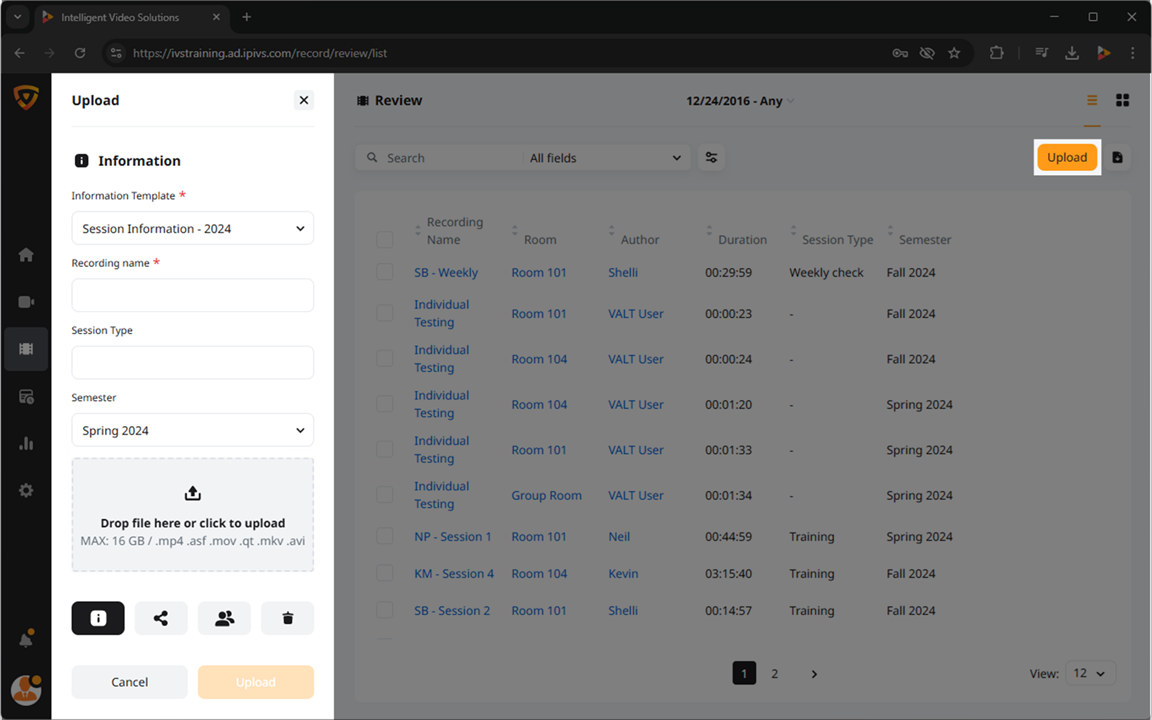
Upload
The upload feature can be used to upload recordings made outside of VALT into the VALT application for management.
- Click Upload in the top right corner.
- Fill out the information relevant to the recording.
- Attach the video file.
- Click Upload
✎The video will need time to process for uploading. The size of the video will impact the uploading time.
Max file size: 16GB
Allowed file types: .mp4, .asf, .mov, .qt, .mkv, .avi
Export
The ![]() Export button can be used to download a PDF or CSV summary of the information associated with the results displayed.
Export button can be used to download a PDF or CSV summary of the information associated with the results displayed.
Export to PDF
- Click the
 Export button.
 - Select Export to PDF.
Export to CSV
- Click the Export button.
- Select Export to CSV.
Paginator
If multiple pages of results are present (12, 24, or 48 based on view). You can use this to navigate between pages.
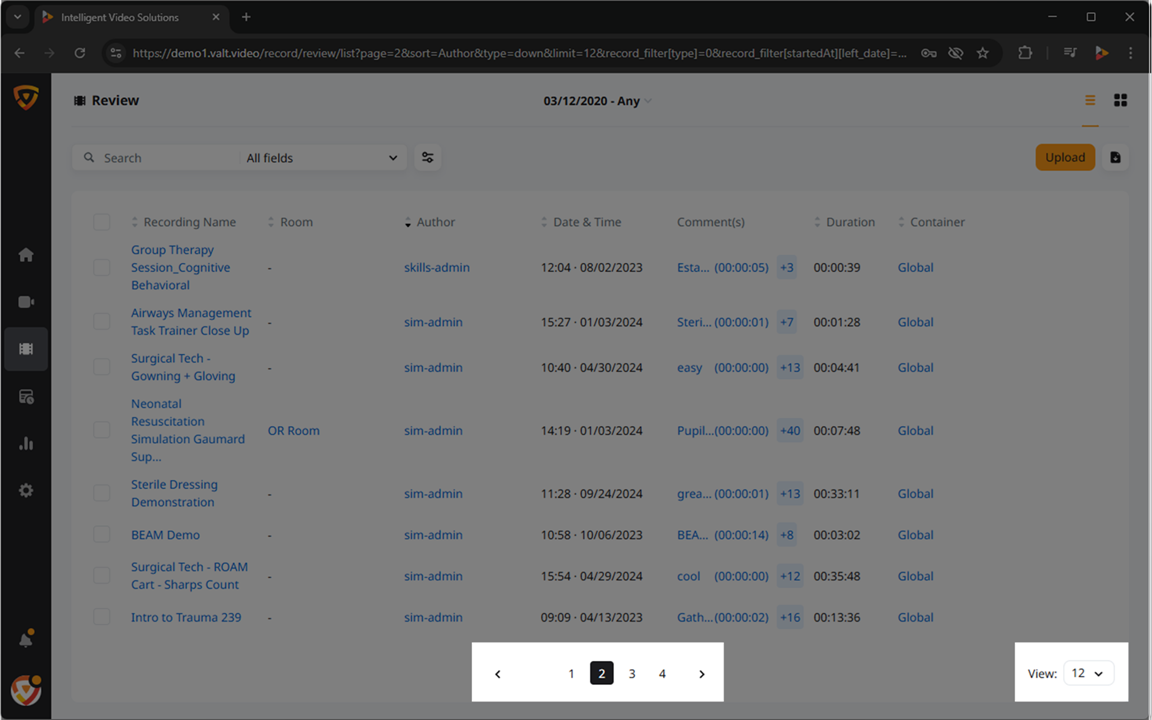
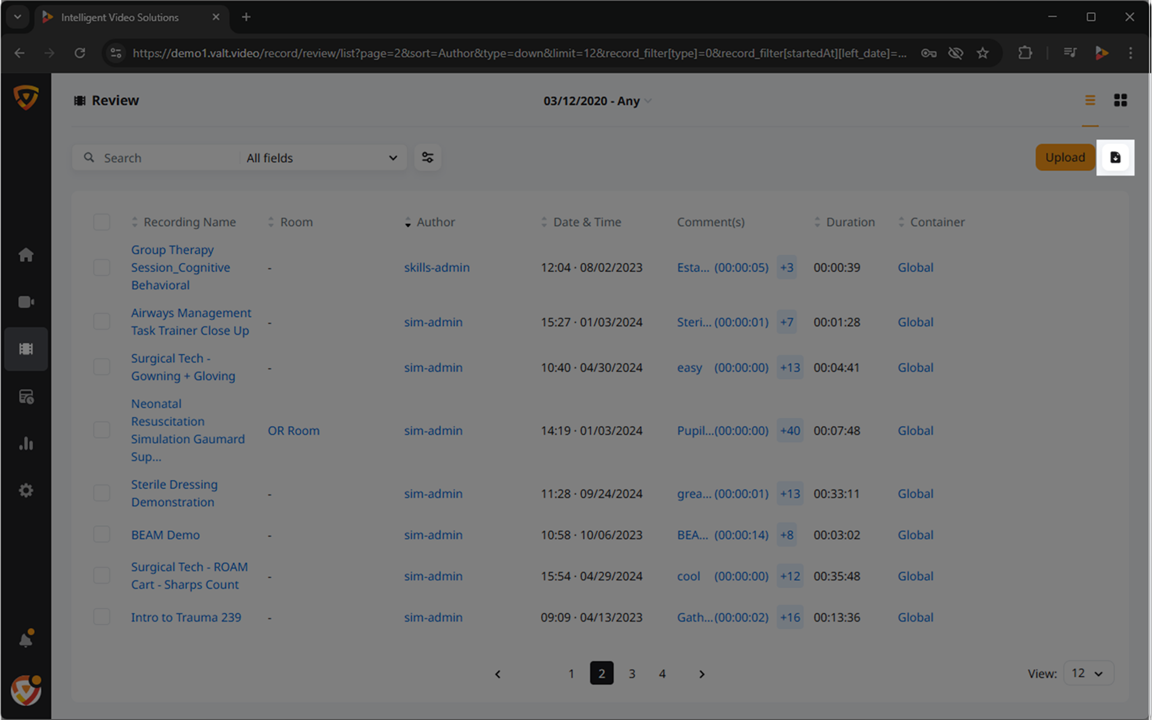
Table View
Sortable Column Headers
Clicking on any of the tabs will sort the results in ascending or decending order, based on the content in that tab.

Multi-Select
Export
Delete
View a Recording
Room
Author
Comments
Show More Comments
Container
Edit a Recording
Download a Recording
Delete a Recording
Tiles View
View a Recording
Edit a Recording
Download a Recording
Delete a Recording
Multi-Select
Export
Delete
Author
Comments
Show More Comments
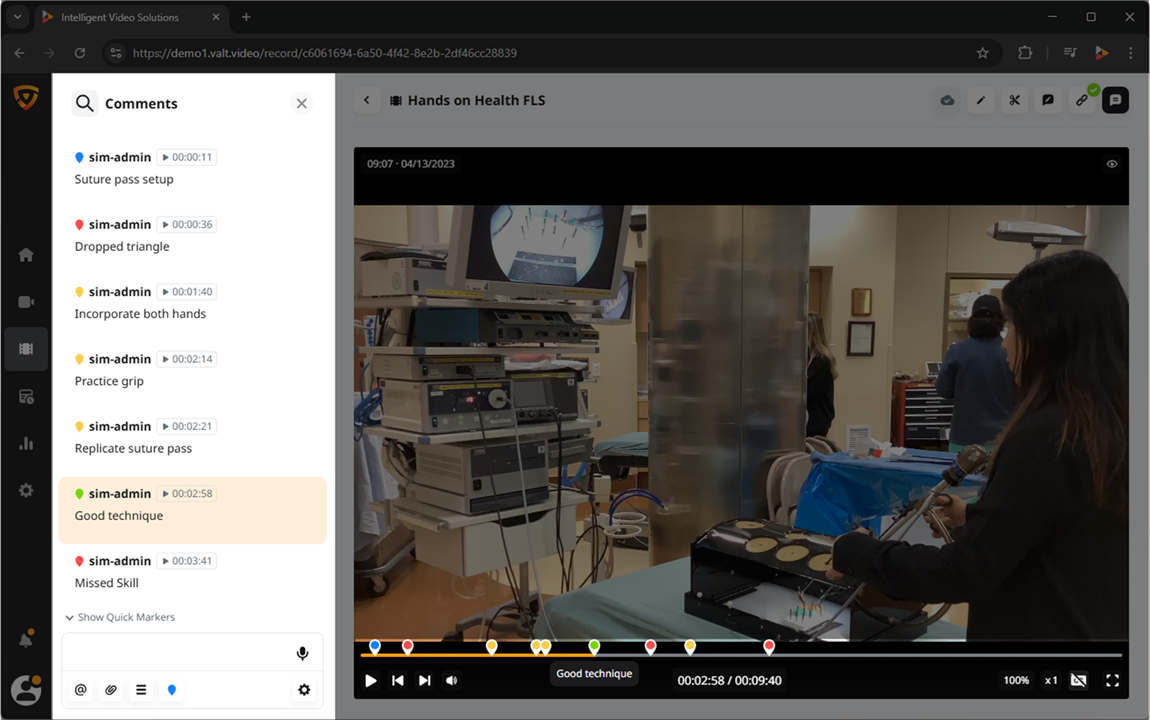
Video Review
Comments
Users are able to leave comments in the video. These comments are attached to the user leaving the comment and are timestamped in the videos timeline.
Add
Comments can be added in many ways. The most simple, is a standard comment.
- Go to a room that is recoding.
- Click on the
 Comments button.
 - Click on the text field in the bottom left of the screen.
- Enter the text for your comment.
- Press Enter or click on the
 Send comment button.
🕮Admins can grant access to comments in the User & Groups settings.
Quick Markers
Selection of pre-defined comments for adding to a recording, set up in the Templates section of the VALT Settings.
Enable Audio Mode
This feature allows a user to record an audio comment instead of free text.
Add Mention
Use the ![]() Mention icon to direct a comment towards another VALT user.
Mention icon to direct a comment towards another VALT user.
✎Only the tagged user or group will see this comment.
Attach a File
The attach file icon allows users to include a file in the comments for others to download.
Open Comment Template
The ![]() hamburger button allows users to fill in pre-set fields, created in the comments template section of the VALT Settings.
hamburger button allows users to fill in pre-set fields, created in the comments template section of the VALT Settings.
Select Color
You can use the ![]() color button to change the color of the marker on the timeline.
color button to change the color of the marker on the timeline.
Reset Timestamp
During live observation of a recording, when typing a comment, the timestamp will correlate to the time the comment was started. Click the ![]() Reset Timestamp button to update the time to the current time.
Reset Timestamp button to update the time to the current time.
Reply
Hover over a comment and click the ![]() Reply icon to direct a response that a specific post.
Reply icon to direct a response that a specific post.
Edit
To make a change to an existing comment, hover over the comment and click the ![]() Edit icon.
Edit icon.
Delete
Hover over a comment and click the ![]() Delete icon to delete the comment.
Delete icon to delete the comment.