Difference between revisions of "LDAP Configuration"
IVSWikiBlue (talk | contribs) (→Connecting to the LDAP Server) |
IVSWikiBlue (talk | contribs) (→Syncing Security Groups) |
||
| Line 76: | Line 76: | ||
</tr> | </tr> | ||
</table> | </table> | ||
| − | #Test | + | #:Test that the user import worked: |
| − | [[File:Testing_Sync_Schedule_Import.png]] | + | <span class="indent">A. Click on the '''Group'''</span> |
| + | <br> | ||
| + | <span class="indent">B. Click '''Import'''</span> | ||
| + | *:If the import was successful, and there are users assigned to Security Groups, you will see this message:<br>:[[File:Testing_Sync_Schedule_Import.png]] | ||
==Importing an Individual User== | ==Importing an Individual User== | ||
Revision as of 13:54, 15 June 2022
Connecting to the LDAP Server
- Navigate to the VALT software either through the IP Address or the FQDN using Chrome, Firefox, or other standard web browser
- Log in using your login credentials
- Note: (Default credentials: Username = admin | Password = admin)
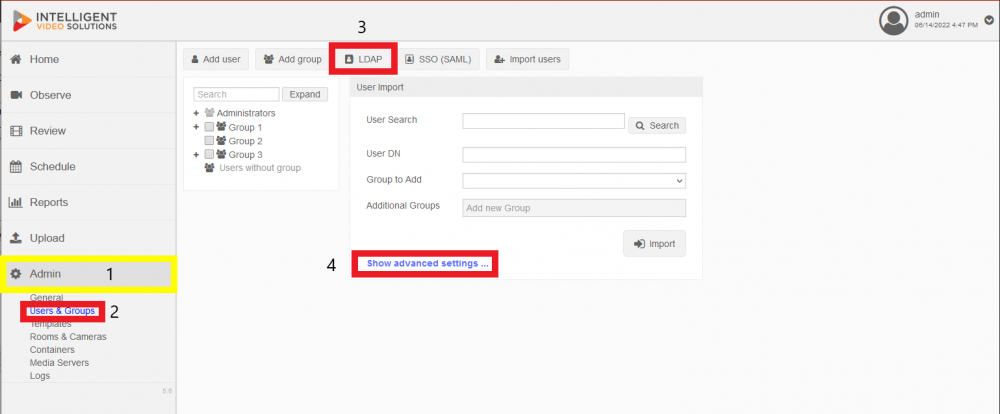
- Click on Admin -> Users & Groups -> LDAP -> Show Advanced Settings
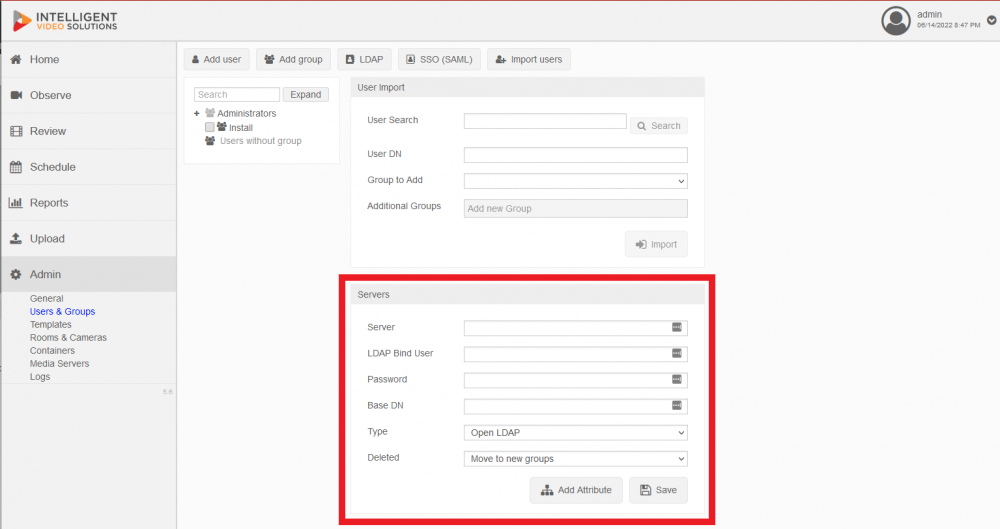
- Scroll down to Servers
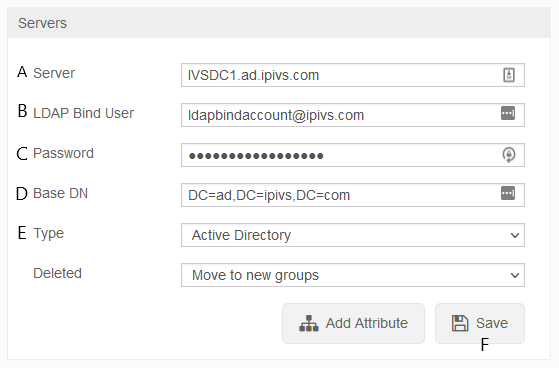
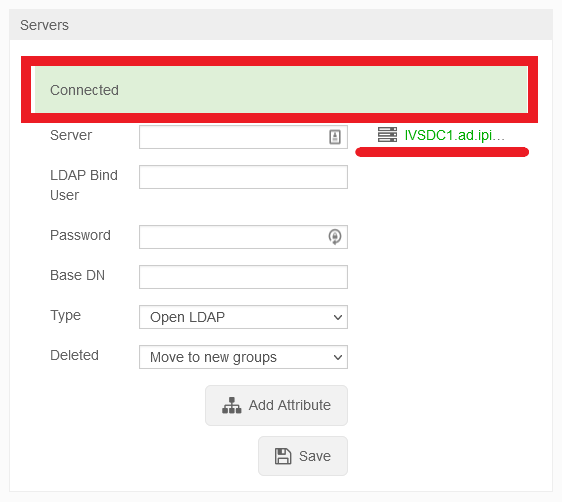
- Enter in your LDAP Server information:
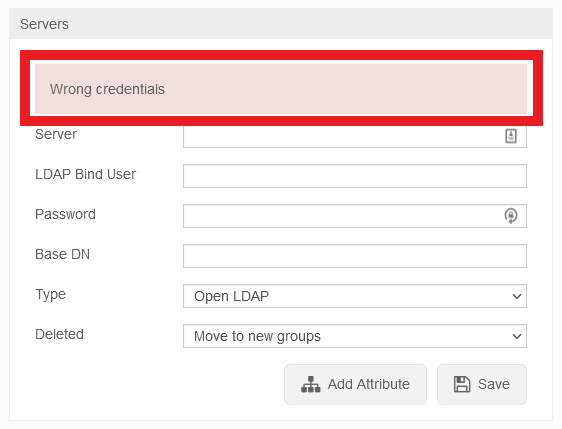
- If the credentials were accepted and a connection was established, you will receive a message stating connected and you will see your LDAP Server in Green:
Syncing Security Groups
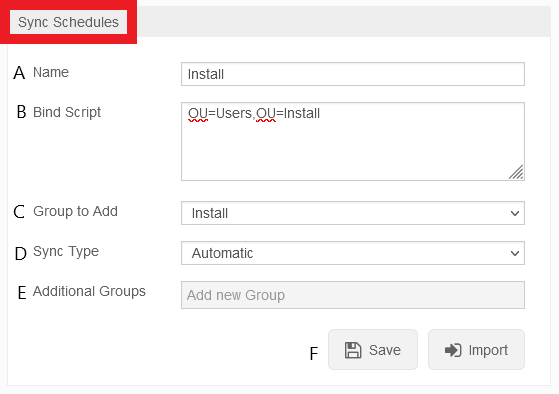
- To sync users accounts, navigate to Sync Schedules
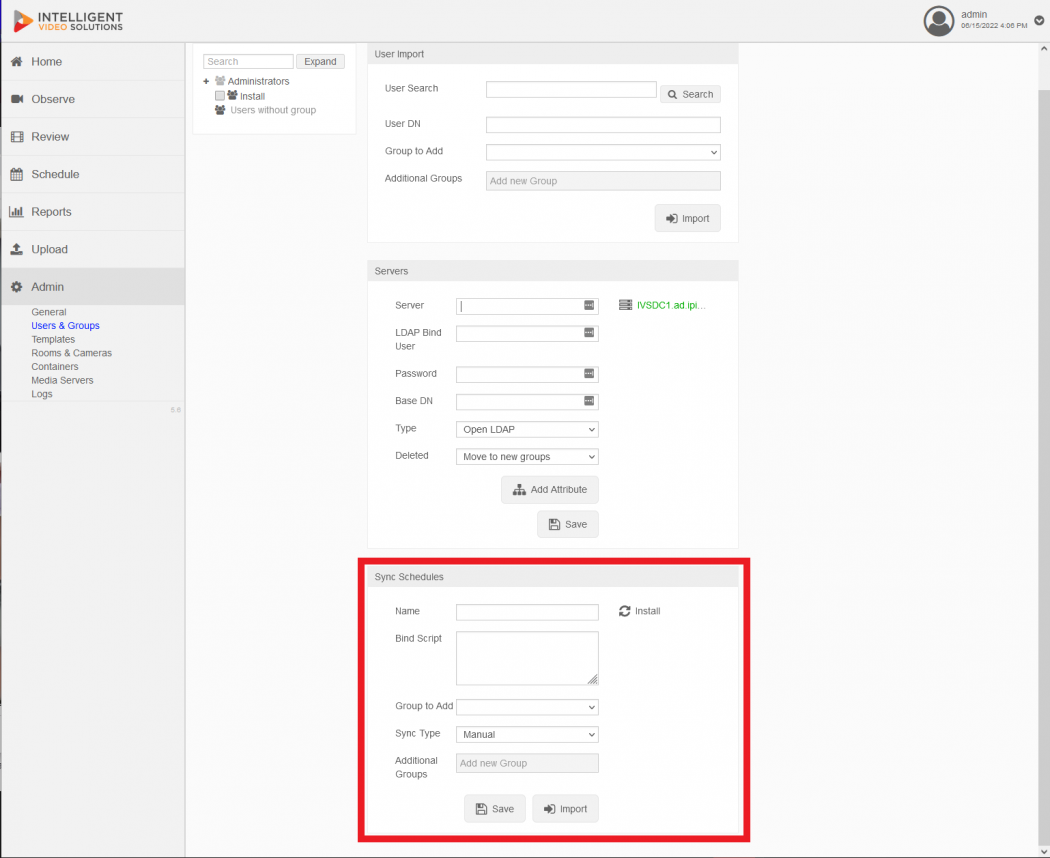
- Once here, start entering in the following information:
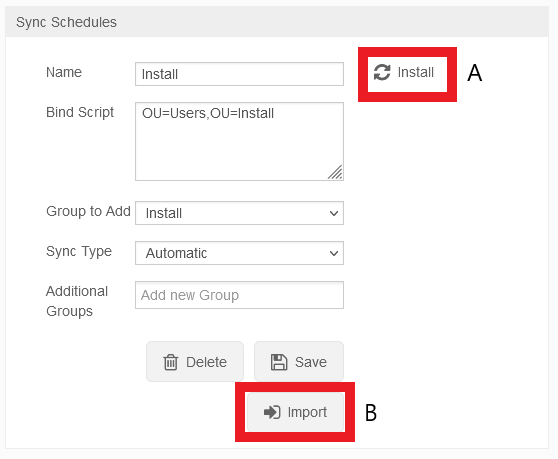
- Test that the user import worked:
A. Click on the Group
B. Click ImportImporting an Individual User
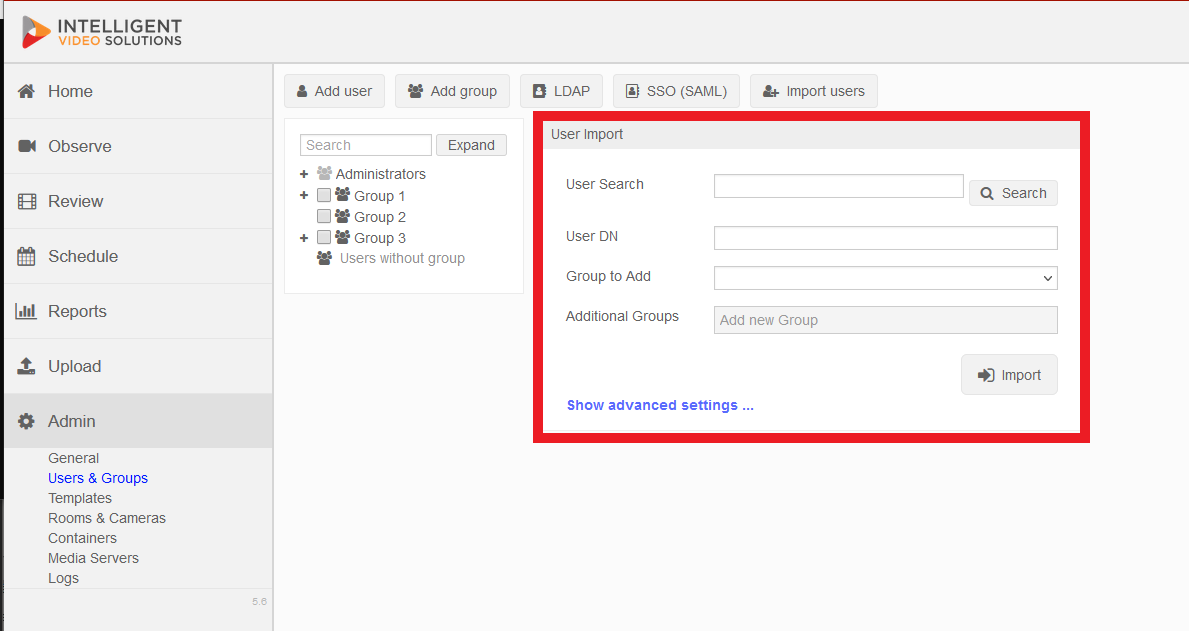
- Type the distinguished name for the user into the LDAP field, omitting the DC components
- Example: CN=testuser,OU=Users
- Select a Group from the Group to Add field.
- Note: If you do not select a group, the user will still be important and must be assigned a group manually.
- If the credentials were accepted and a connection was established, you will receive a message stating connected and you will see your LDAP Server in Green:
