VALT Manual Settings
Contents
- 1 Overview
- 2 General
- 3 Users & Groups
- 4 Templates
- 5 Rooms & Cameras
- 6 Servers & Services
- 7 Logs
- 8 Alerts
- 9 Help
Overview
The Settings section is where you can customize your VALT system to fit your workflow.
General
The General page is the landing spot when you first enter the Settings section. This page provides an overview of your system's information.
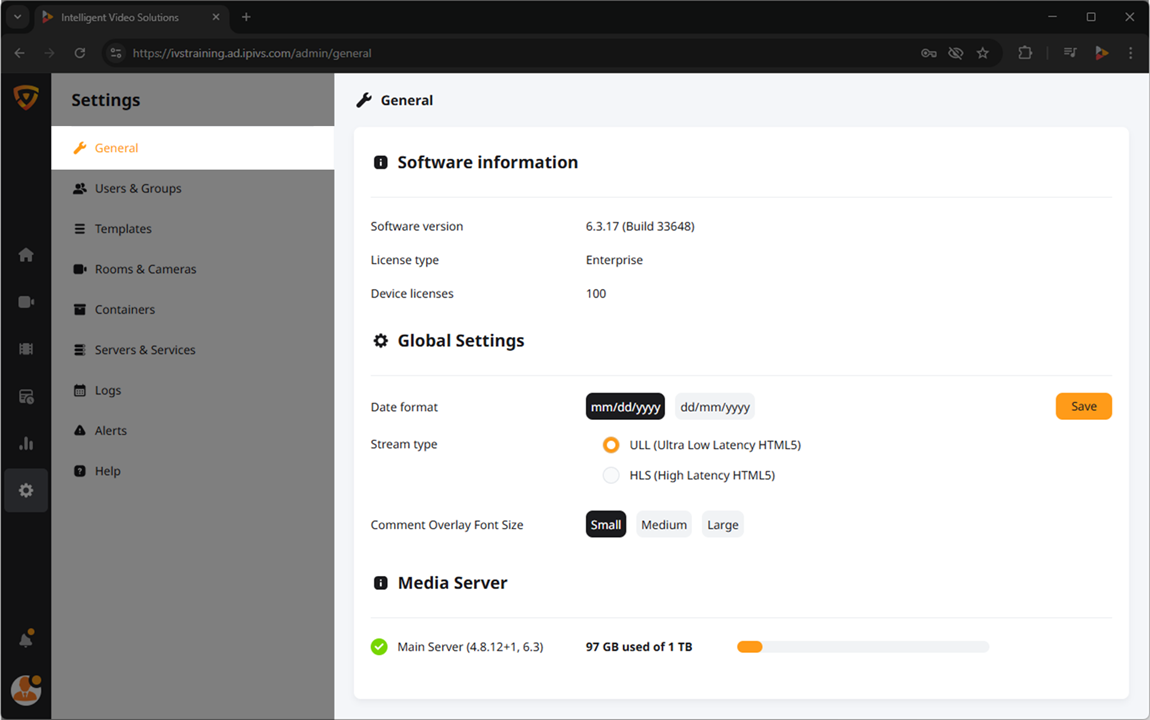
Software Information
Here, you can view the following items:
Software version
The software version shows which iteration of VALT you are currently using.
License type
The license type is a legacy field.
Device licenses
Device licenses are required to add cameras, encoders, BEAM devices, or VALT Cue devices.
Global Settings
The Global Settings are systemwide settings that can be edited.
Date format
This setting allows you to swap all dates in the system between the Month/Day/Year and the Day/Month/Year format.
Stream Type
This setting allows you to toggle between using ULL or HLS.
By default, this will be set to ULL, which provides the best performance of the video streams.
Comment Overlay Font Size
This setting changes the size of the comment overlay in the Review section for all users.
Media Server
This displays all the media servers associated with the software instance, and the amount of storage used/remaining on each.

Email notifications
Email notifications allow an organization to send emails for comments directed at a user or videos shared with a user, and email alerts for when a stream goes online/offline.
Email settings
The Email settings section is used to configure the mail server for sending Email notifications.
Users & Groups
The Users & Groups page is where User logins, Video Access, and User permissions are managed.
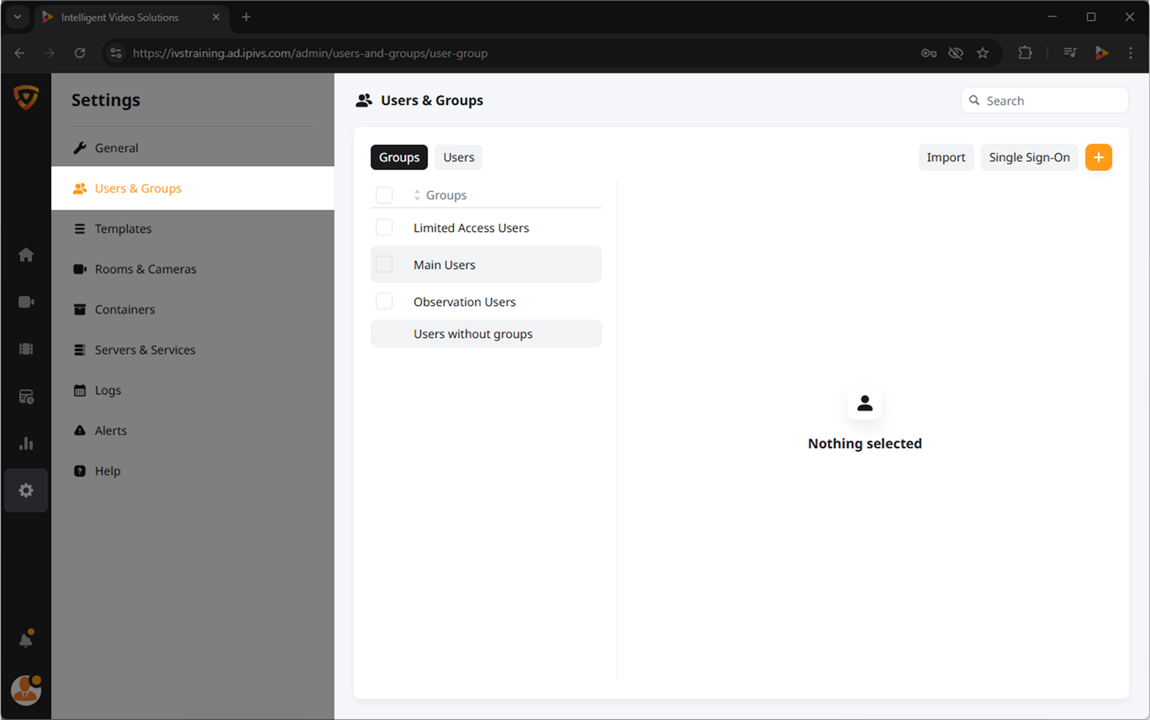
Groups
All Groups will be displayed on the left side.
View Users within Group
To view which users are part of a group, simply click on that group.
The Users list will appear on the right side.
Edit Group - Main settings
To edit the settings of a group:
- Hover over the Group
- Click the
 Edit icon.
This takes you into the Group editing page, where the settings for that particular group will be configured.
Name
Enter the name of the group in this field.
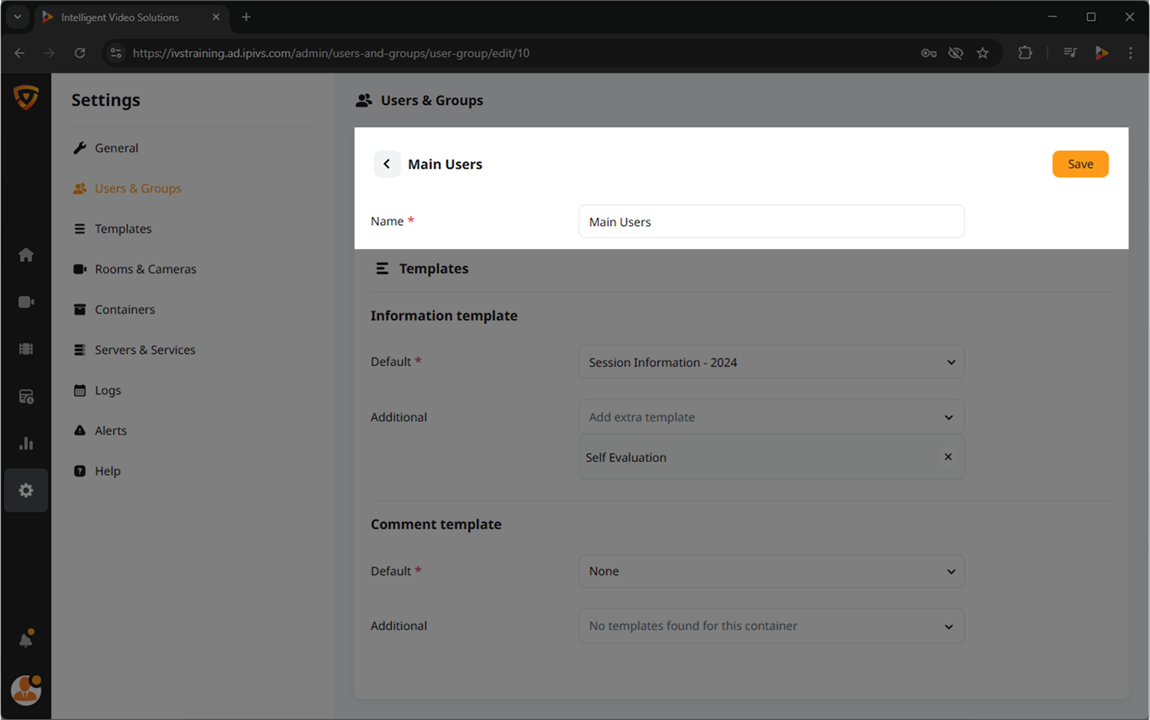
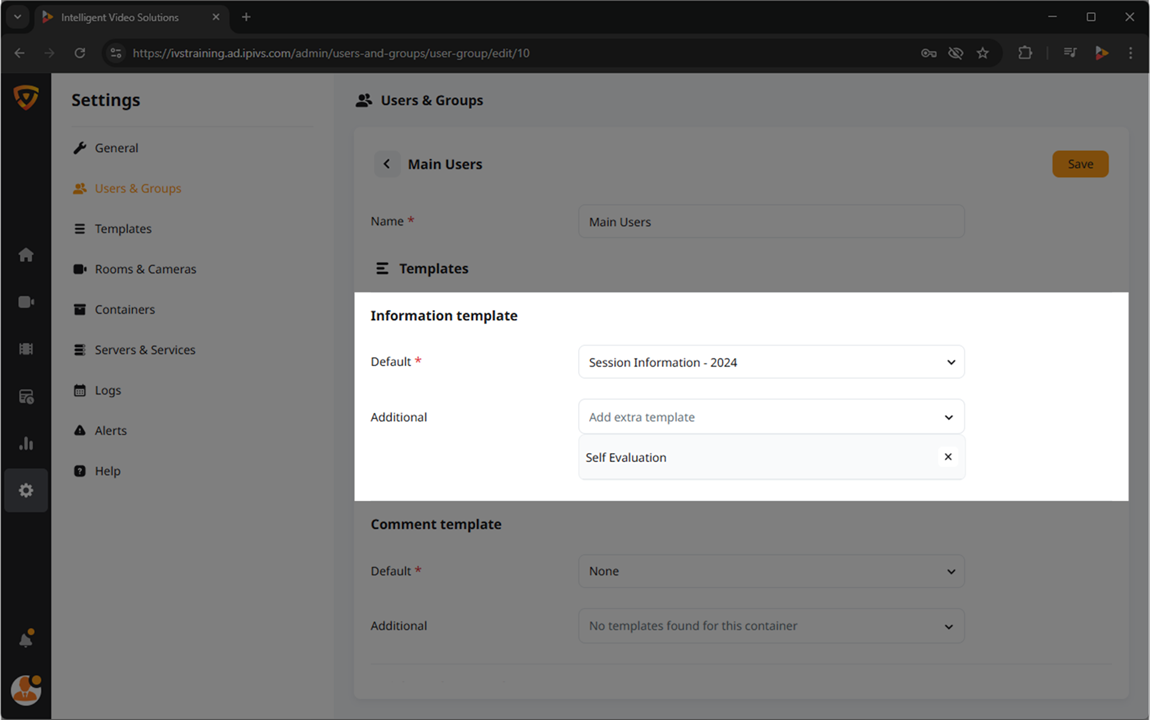
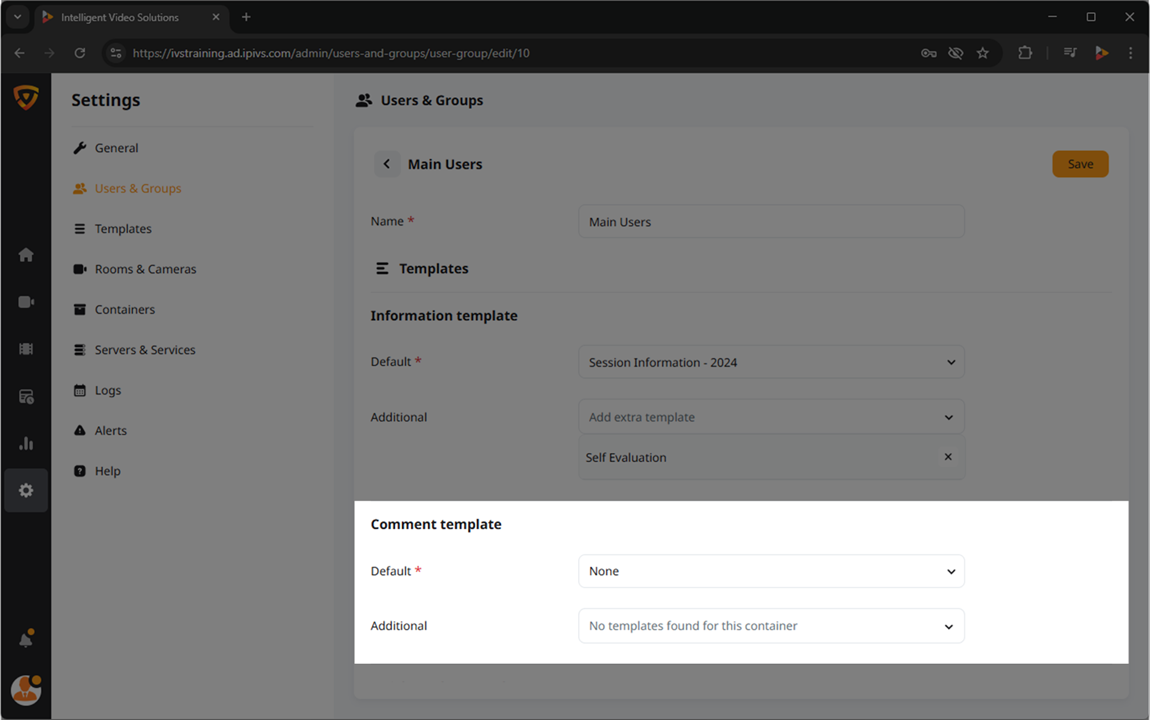
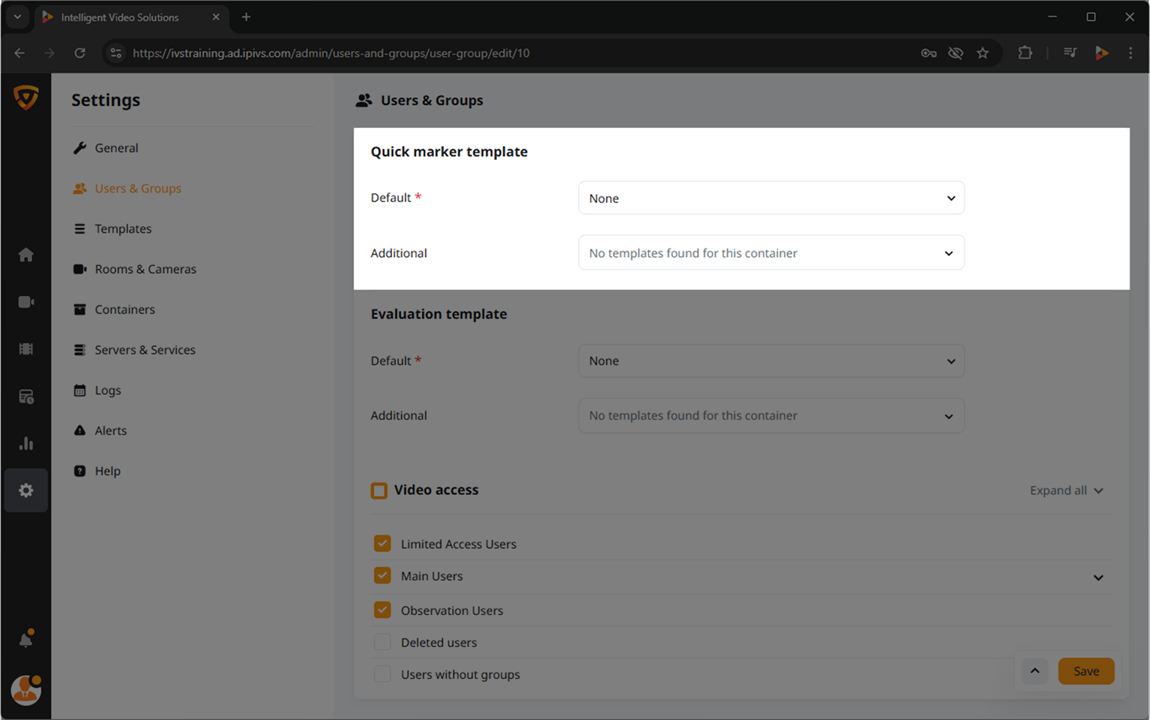
Group Templates
In this section, select the Templates that the group will have available for video information, comments, quick markers, and evaluations. For each type of template, input a default that this group will use, as well as any additional templates that they may need to switch between.
Information Template
This template is used when starting a recording. Learn more about Information Templates.
Comment Template
This template can be used when commenting on a recording. Learn more about Comment Templates.
Quick marker Template
This template is used when applying quick markers to a recording. Learn more about Quick Marker Templates.
Evaluation Template
This template is used when added evaluations to a recording. Learn more about Evaluation Templates.
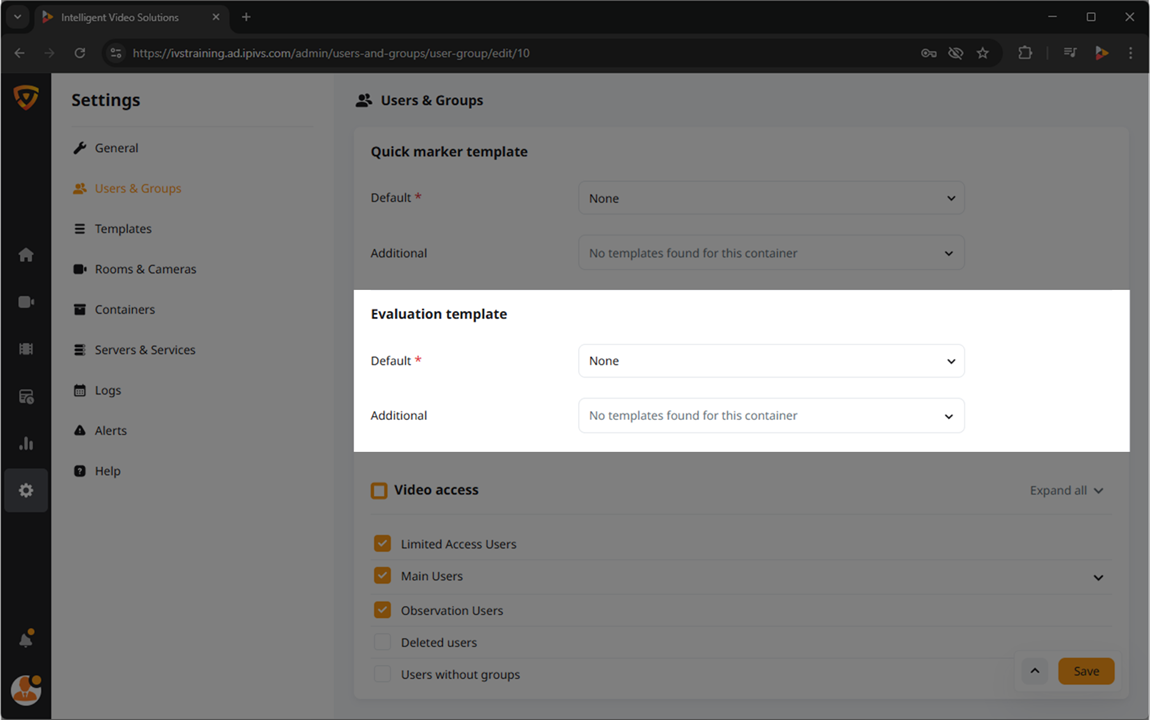
Video Access
This section controls which videos the group will be able to access based on who authors the video. To give the group you are editing access to another user's videos, make sure that user is checked.
Rights
This section controls which features the group will be able to use within VALT. To give a right to a group, make sure that right is selected.
Rooms
This section controls which Rooms a group will be able to see in the Observe and Review sections. To give Room access to the group, select the room from the drop down or use the select all option.
Edit Group - Advanced settings
Select the Advanced settings to configure some additional, lesser-used settings.
Default retention rule
Set a Default retention rule for the group here.
Recording Duration
Enable this option to set a maximum time limit for recordings authored by this group.
Other
This is a collection of various settings.
I/O Record Name
Set the Recording Name for any recordings started by this group via a Start/Stop accessory, including a button, keypad, or card reader
Search Results Default
Select how the Review section loads by default: List View or Tile View.
Search Results Display
Select which fields display in the List View of the Review section.
Announcement
Use this section to create a Homepage Announcement for the group.
Review List Default Period (days)
Set the default date filter that appears when this group navigates to the Review section.
Access Expiration
Use this option to cause the users in this group to expire after a certain point.
Platform Access
Use this area to select which days and times the users in the group will be able to login to VALT.
Delete Group
To delete a group, click on the trash can icon on the right side of the group. You will be prompted whether to Keep users or Delete. Those Users will be shifted over to Users without groups.
Multi-Select Groups
Check the box on the left side of the Group to select the Group. Check additional boxes to Multi-select. The option to delete those groups will appear at the bottom of the screen.
Users
The top two buttons toggle between showing all Groups and all Users.
Edit User
To ![]() Edit the User:
Edit the User:
- Hover over a User
- Click the Edit icon.
Here you will be able to edit the following:
- General
- Basic user settings for Username, Email, Default Group, Additional Groups, and Access Expiration.
- Security
- Location where an Administrator can change a user's password.
- Other
- Various other user configurations such as SSO Identity Provider, mobile pin setup for logging into the BEAM application, control type for PTZ cameras, card number for customers utilizing card readers for start/stop, Rooms for viewing/recording, and Display Name using a different name than your Username.
- Video Access
- This section defines whose videos a user will have access to based on who authored the recordings. This applies to both live observation and review.
- Platform Access
- Ability to set specific days and times for users to access VALT.
Import
Upload a list of users to a certain group in a TXT, XLS, XLSX, or CSV file.
Single Sign-On
View your single sign-on configuration.
Add User/Group
To add a User or Group:
- Click the + Add button.
- Select Add group or Add user.
- Fill out the * required fields.
Templates
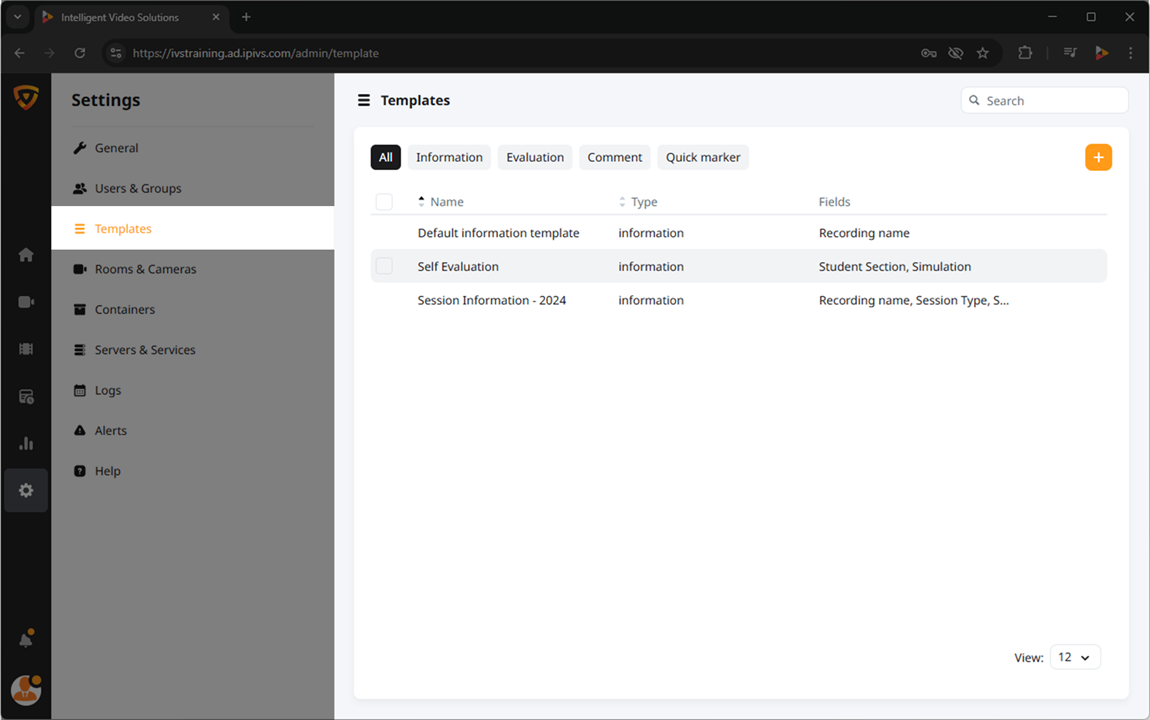
Display by Template Type
Filter buttons can be used to display only certain Template Types (Info, Evaluation, Comment, or Quick marker).
Add New Template
General
- Give the template a name.
- Select the type.
- Information Templates can be given a duration for the recording.
- Add the fields to your template.
- Save the template.
- Assign the template to the groups that will be using the template.
Template Fields
Add fields to be completed by users who utilize the template. Fields can be optional or required.
Copy Template
Hover over a template and select the Copy button to create a second template with similar settings. The second template will be named 'Original Template'(Copy).
Edit Template
To ![]() Edit a template:
Edit a template:
- Hover over a Template
- Click the Edit icon.
Delete Template
To permanently ![]() Delete the Template:
Delete the Template:
- Hover over an existing Template
- Click the
 Delete icon.
Rooms & Cameras
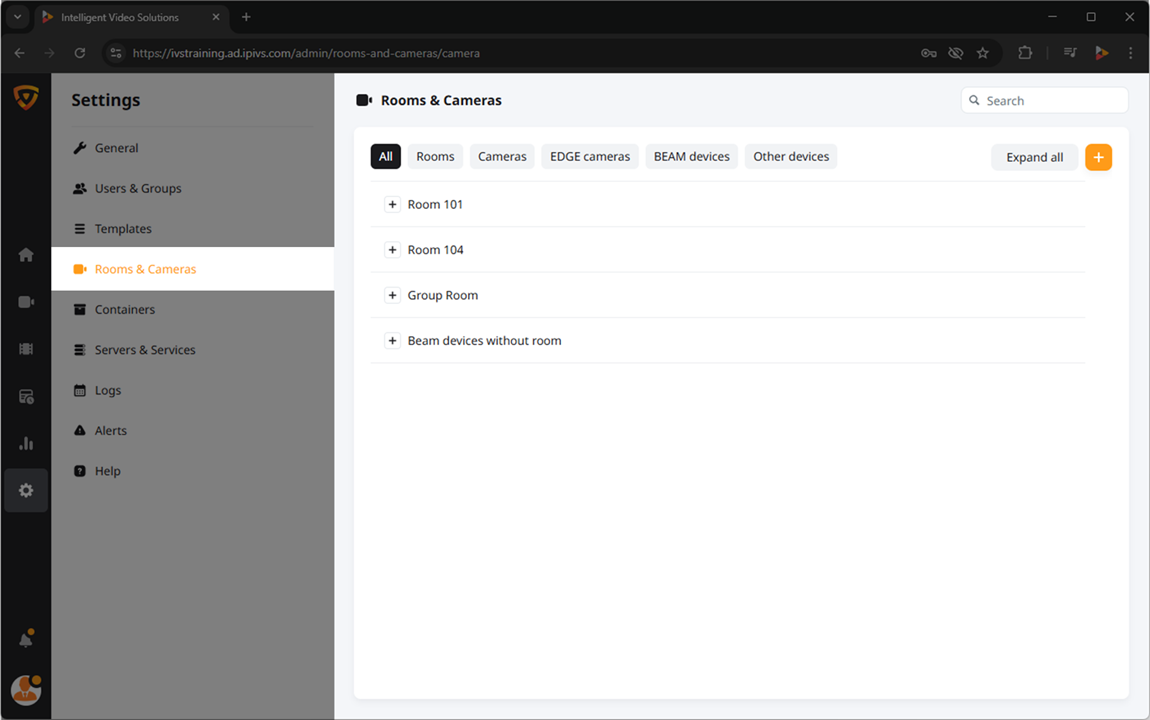
Display Rooms or Streaming Type
Filter buttons can be used to display Rooms or certain streaming types (Cameras, EDGE Cameras, BEAM devices, or Other devices).
Expand/Collapse View
The Expand all button is used to Expand all button to open up every room and view each room’s streams, or click the plus button next to any room to expand only that room.
Add a New Room or Stream
Click the + Add button to configure a new room or streaming device.
Edit a Room
Hover over a Room and click ![]() Edit to Edit the Room setup.
Edit to Edit the Room setup.
Delete a Room
Hover over an existing Room and select ![]() Delete to permanently delete the Room.
Delete to permanently delete the Room.
Edit a Device
Select ![]() More, then Edit Device to make changes to the device’s setup.
More, then Edit Device to make changes to the device’s setup.
Remove a Device
Select ![]() More, then Remove Device to make changes to the device’s setup.
More, then Remove Device to make changes to the device’s setup.
Servers & Services
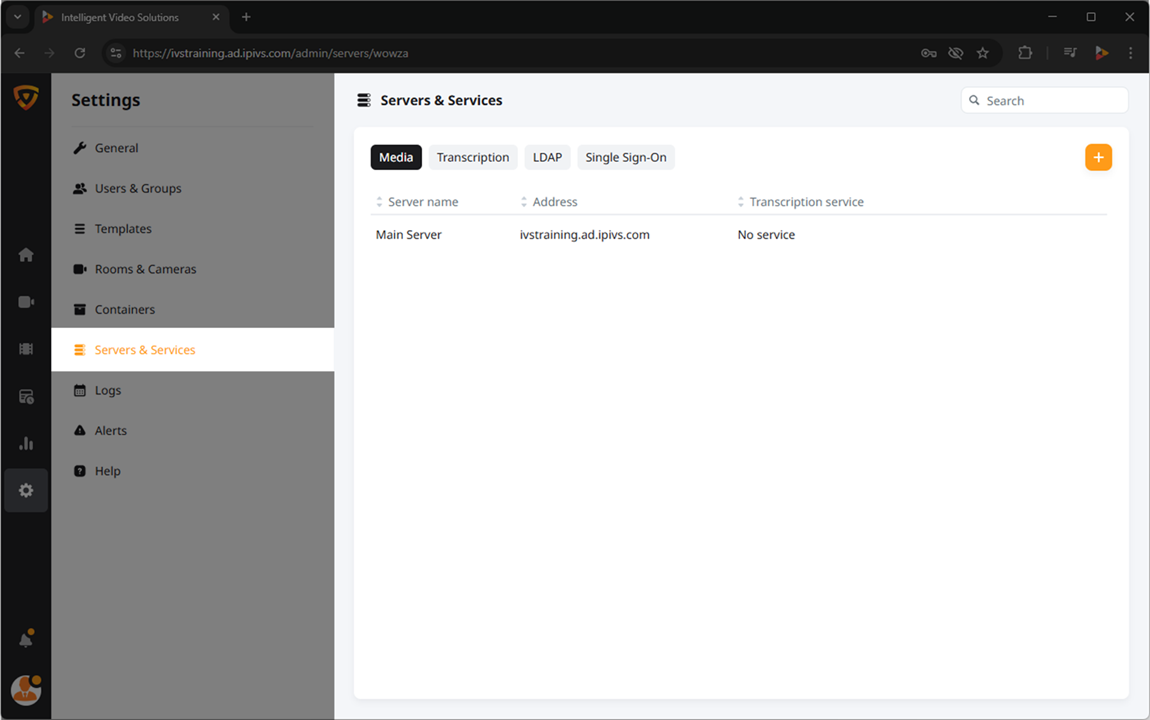
Display Various Servers/Services
The top buttons can be used to display media servers, transcription server, LDAP server, and Single Sign-On configuration for editing or deleting as necessary.
Add New Server/Service
Click the + button to configure a new server or service.
Logs
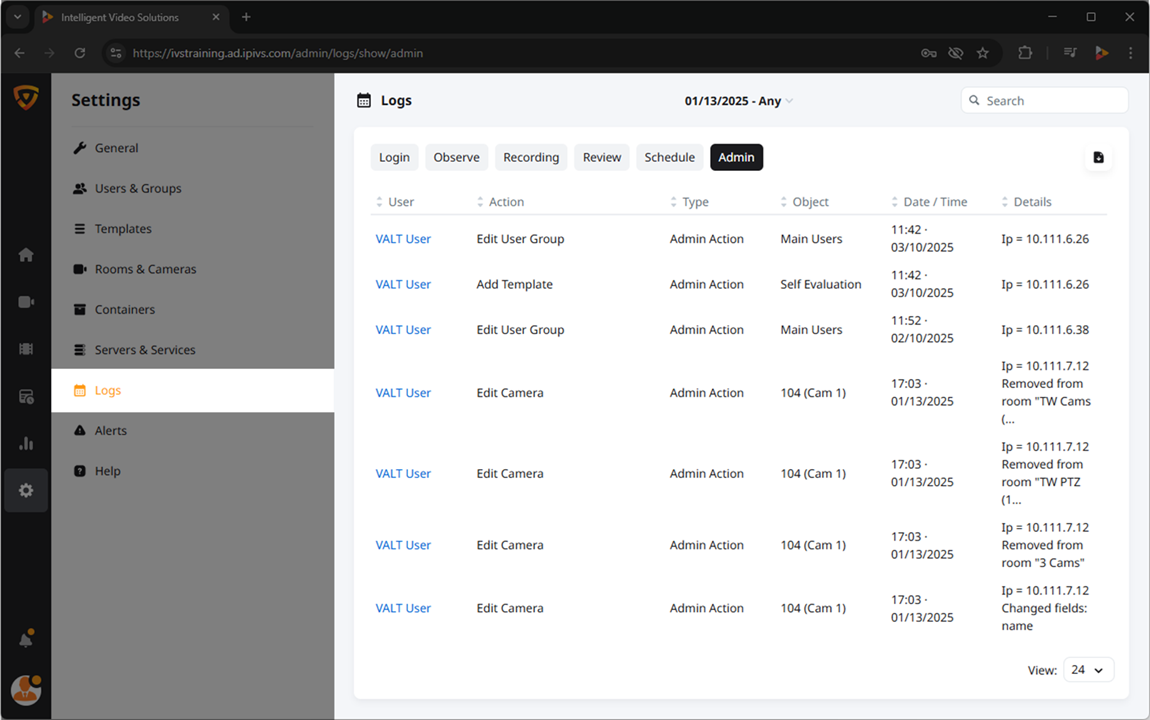
Date Range
The date range at the top will filter out results. Default date range is set to Any.
Search
Typing information into this box will display matching results.
Display by Log type
The top buttons can be used to display various types of recorded logs.
Export Logs
The ![]() Export button can be used to download a PDF or CSV summary of the information associated with the results displayed.
Export button can be used to download a PDF or CSV summary of the information associated with the results displayed.
Alerts
Alerts displays cameras/streaming devices that have gone offline/online.
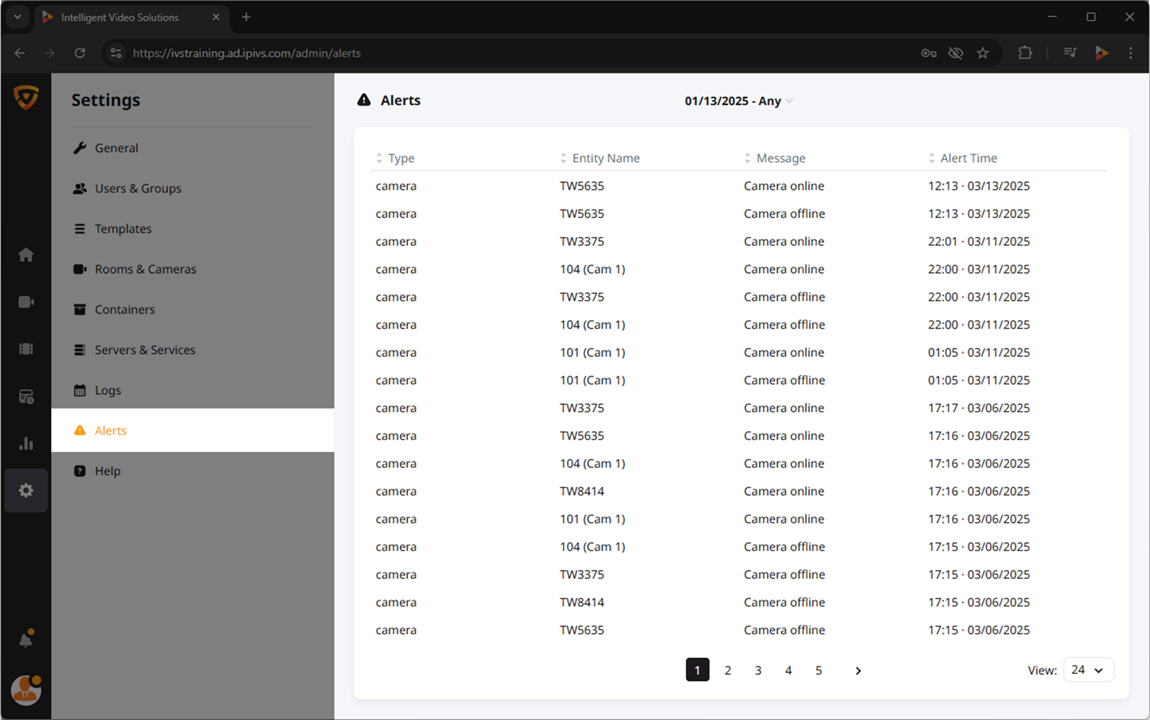
Date Range
The date range at the top will filter out results. Default date range is set to Any.
Sortable Column Headers
Clicking on any of these will sort results alphabetically on the selected column.
Help

Expand/Hide Help Content
This section is used to create Help topics accessible through a user’s profile.
Add Help Content
Click the Expand all button or the arrow next to any Help topic to display the content.
Edit Help Content
Click the + Add button to begin creating a new Help topic.
Delete Help Content
Hover over a Help topic and select the ![]() Delete icon to permanently delete the topic.
Delete icon to permanently delete the topic.