LDAP Configuration
Connecting to the LDAP Server
- Navigate to the VALT software either through the IP Address or the FQDN using Chrome, Firefox, or other standard web browser
- Log in using your login credentials
- Note: (Default credentials: Username = admin | Password = admin)
- Click on Admin -> Users & Groups -> LDAP -> Show Advanced Settings
- Scroll down to Servers
- Enter in your LDAP Server information
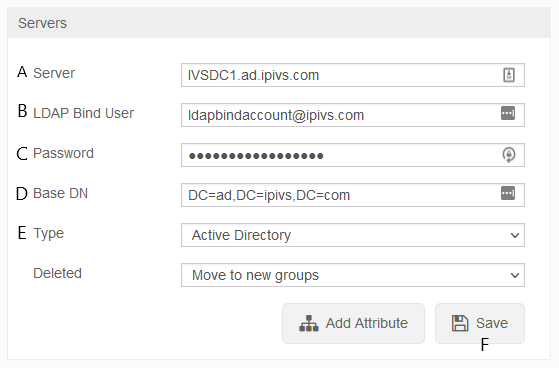
A: Enter the IP Address or FQDN of your Active Directory or other LDAP compatible server in the Server field
Note: If you are using LDAPS, enter the IP or FQDN as ldaps://myldapsserver.comB: Enter a Service Account user with read access in the LDAP Bind User field
Note: The user must be entered as user@domain.comC: Enter the Service Account password D: Enter in the Base DN of the Service Account
Note: Base DN must be entered in the form of DC=ad,DC=ipivs,DC=comE: Select either Active Directory or Open LDAP F: Click Save
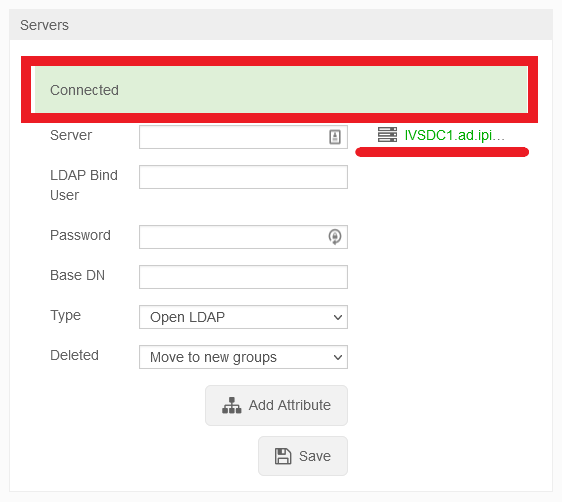
- If the credentials were accepted and a connection was established, you will receive a message stating connected and you will see your LDAP Server in Green.
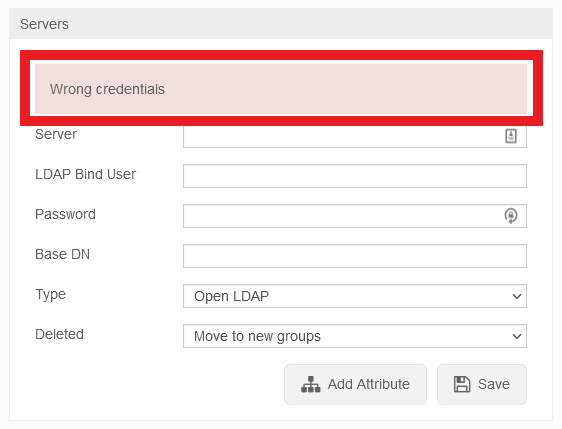
- If the connection fails, you will receive an error message stating Wrong Credentials.
Syncing Security Groups
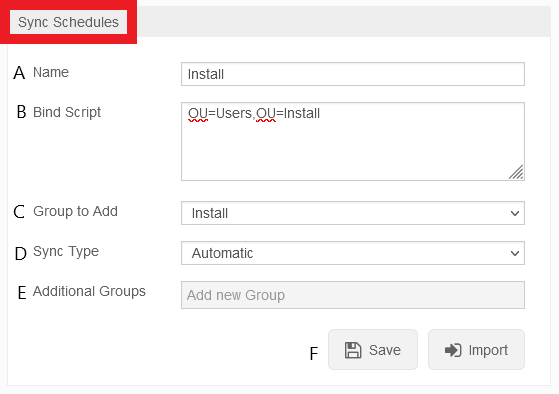
1. Enter in a name for the Security Group
Note: Try to keep these similar to the VALT groups you have created2. Enter in the DN for the Security Group, omitting the DC components
Example: CN=Service Accounts,OU=Users,OU=Install3. Select the VALT Group to have the users added to
Note: The VALT groups need to be created before you can link the Security Groups to them4. Choose either Manual or Automatic Sync Type
Note: Automatic syncs users every day at 7AM server time whereas Manual requires an Admin account to manually sync the users5. Select any Additional Groups you would like the users added to 6. Click Save
- Type a name into the LDAP Sync Schedules name field.
- In the Bind Script field, enter the DN for the security group without the DC components.
For Example: CN=VALT Users, CN=Users - Select a group the users should be added to. A group must be specified.
- Select a sync interval if you would like to automatically import new users added to the group.
- Click Save to save the sync schedule or Import to perform an import and save the schedule.
Importing an Individual User
- Type the distinguished name for the user into the LDAP field, omitting the DC components
- Example: CN=testuser,OU=Users
- Select a Group from the Group to Add field.
- Note: If you do not select a group, the user will still be important and must be assigned a group manually.
- If the credentials were accepted and a connection was established, you will receive a message stating connected and you will see your LDAP Server in Green.


